Blood Sacrament
Chieftain Build
Updated for Patch 3.19
The Best Crafty Guides by Odealo
| Guide notes |
November 5, 2022
-Build created |
| Build Overview |
| Tags: [CASTER] [ELEMENTAL] [LIFE] [LOW LIFE] |
|
Budget:
Defenses:
|


|
Boss DPS:
AoE:
|
|
Blood Sacrament is an ability granted by the unique Relic of the Pact Wand. As you start Channelling, it Reserves some of your Maximum Life per stage. You can stop at any time to release a Discharge-like Area Damage, but what most players do is wait for it to reserve more Life that the character has - it then stops Channelling the Skill automatically and deals damage. The damage is based on how much Life has been Reserved, so naturally, you want to accumulate a lot of Maximum Life. In order to cast it faster, Reserve more Life per Cast by reducing Reservation Efficiency. The goal is to Reserve a lot of Maximum life not only to get more damage but to have a higher cast rate, but not so much that you'd be left with almost no Life at all, which might kill you. We've decided on having a single cast taking slightly over half of the Maximum Life, this way we can reap the bonuses of being Low Life, namely Petrified Blood and Pain Attunement, while also being tanky. Note that the Spell does not "deal" damage to you, it would make it too easy to include in CwDT setups, but the instant Reservation works in a similar manner.
We've used one Essence Worm Ring to have on one Aura, the build can't fit many more Spells that reserve Mana (except Pterfiied Blood, which Reserves 96%) so you might as well check the Sublime Vision Jewels, the bonuses on them can be extremely good. We've used Determination, it would grant more Armour and an extra Maximum Endurance Charge. It would suit the ascendancy we've picked, that is Chieftain. It's very easy to convert all the Physical Damage to Fire and then magnify it via Ngamahu, Hinekora, and Ramako Keystones. The durability is sourced mostly from Determination's Armour, Endurance Charges, Petrified Blood, a large Life Pool, high Block Chance, Spell Suppression Chance, and in some cases - Energy Shield. You might often see Relic of the Pact being used by characters with over 20k of Maximum Life, it can be achieved by sacrificing a lot of utility aspects of a regular build, and these are suited only for boss-killing. Due to the built-in Skill in your one-haded Weapon, you can easily implement The Squire Shield for three extra Support Gems.
You can also check our other Path of Exile builds right over here Odealo's Crafty Guides - Full List
1. Gameplay
Blood Sacrament is the name of the Spell granted by the Relic of the Pact, it is the only damaging ability. To apply Exposure, Curse, and Combustion, we recommend an Arcanist Brand which can cast many Spells by itself. For a Guard Spell use Immortal Cry, it scales up with the number of Endurance Charges spent on it. To taunt enemies, and to regenerate Life use Enduring Cry and Stone Golem with Meat Shield Support. As your mobility skill use Flame Dash.
|
 
Odealo is a secure trading platform for MMO gamers. Here you can buy, sell, and trade PoE Currency for real cash.
|
2. Build's PROS & CONS
| PROS |
- deals moderately high damage due to Pain Attunement, Critical Strike modifiers, and Chieftain's Keystones
- has high maximum life, and even though half of it is reserved, it's still very tanky
- kills most of the regular enemies with a single hit with a medium-sized area of effect
- the majority of items are rare, allowing for various different modifiers
|
| CONS |
- setting it up requires some tinkering with Reservation Efficiency
|
3. Leveling tips
Starting with Molten Strike, you will quickly convert all your damage to Fire and deal substantial damage fight from the start. Support this Attack with Ancestral Call and Added Fire Damage, it will ensure smooth leveling. At level 38 you can combine Essence Worm with Relic of the Pact and start building toward the main setup. Switch to it whenever you feel like the damage is good enough. Fire Damage and Maximum Life will be the most valuable resources throughout the entire playthrough. Remember to keep your Elemental Resistances high at all times.
Suggested leveling Gem setups:
| Molten Strike setup |
 |
Molten Strike - An Attack that deals Physical Damage, converted to Fire after allocating Avatar of Fire. |
 |
Ancestral Call Support - Strike Attacks target additional enemies increasing your clear speed and damage. |
 |
Added Fire Damage Support - Adds extra Physical Damage as Fire Damage. |
 |
Elemental Focus Support - Grants more Elemental Damage, but makes it impossible to Ignite with Molten Strike. |
 |
Fire Penetration Support - Damage penetrates Fire Resistance, resulting in more Damage. |
 |
Concentrated Effect Support - Reduces AoE, but in return grants a lot more Area Damage. |
| Mana Reservation setup |
 |
Anger - Use Anger for additional Fire Damage with Spells and Attacks. |
 |
Purity of Elements - Grants Elemental Resistances and protects against all Elemental Ailments. |
 |
Clarity - Regenerates Mana over time. |
| Utility Gems |
 |
Flammability - Curse that lower the Fire Resistance of the opponent. |
 |
Wave of Conviction - Applies Fire Exposure reducing Fire Resistance, you can link it with Flammability and  Hextouch Support to apply both of these effects with one cast. Hextouch Support to apply both of these effects with one cast. |
 |
Flame Dash - A basic mobility Spell you can use to teleport. |
Bandits:
you should kill all three Bandits for two additional Skill Points, but Helping Alira might be alluring if you need Resistances, Critical Strike Multiplier, and Mana Regeneration.
Leveling Skill Trees:
29 Points Skill Tree
Start with Fire/Physical Damage to boost your Molten Strike.
75 Points Skill Tree
Get more Maximum Life and Fire Damage, Critical Strikes will be much more important later on
Recommended leveling items:
 Le Heup of All - Use it for more Attributes, Damage, and Elemental Resistances. Le Heup of All - Use it for more Attributes, Damage, and Elemental Resistances. |
Adds 1 to 4 Physical Damage to Attacks
+(10-30) to all Attributes
(10-30)% increased Damage
(10-30)% increased Rarity of Items found
+(10-30)% to all Elemental Resistances |
 Goldrim - Offers a lot of Elemental Resistances. Goldrim - Offers a lot of Elemental Resistances. |
+(30-50) to Evasion Rating
10% increased Rarity of Items found
+(30-40)% to all Elemental Resistances
Reflects 4 Physical Damage to Melee Attackers
Level Requirement reduced by 100 (Hidden) |
 Dreadarc - Requires level 16, it goes extremely well with Molten Strike and Fire Damage in general. Dreadarc - Requires level 16, it goes extremely well with Molten Strike and Fire Damage in general. |
Adds (5-15) to (20-25) Physical Damage
Adds (5-15) to (20-25) Fire Damage
(7-10)% increased Attack Speed
+(15-25)% to Fire Resistance
5% increased Movement Speed
Curse Enemies with Flammability on Hit, with 40% increased Effect |
 Tabula Rasa - Use Tabula for the six, white, linked sockets. Tabula Rasa - Use Tabula for the six, white, linked sockets. |
Item has no level requirement and Energy Shield (Hidden)
Item has 6 White Sockets and is fully linked (Hidden) |
4. Final Skill Tree, Ascendancy Points, and Pantheon
Final Skill Tree:
118 Points Final Skill Tree (doesn't include Items, Unique, or Cluster Jewels)
118 Points Path of Building (PoB) link
Ascendancy points:
Preferably in that order:
- Ngamahu
- Hinekora
- Valako
- Ramako
Pantheon:
Major God: Soul of Lunaris: 1% increased Movement Speed for each nearby Enemy, up to 8%; 1% additional Physical Damage Reduction for each nearby Enemy, up to 8%
Minor God: Soul of Shakari: You cannot be Poisoned while there are at least 3 Poisons on you; 50% less Duration of Poisons on You
5. Final Gems links
| [DPS] Blood Sacrament setup |
 |
Blood Sacrament - Blood Sacrament is the main damaging ability. It deals Physical Damage (later converted to Fire) around your character. Its Critical Strike Chance is lucky when on Low Life, and deals more damage the more life has it reserved. |
 |
Lifetap Support - Grants more Damage, and has an extremely high Cost and Reservation Multiplier of 300%, making it useful in most setups. |
 |
Increased Area of Effect Support - Increases AoE of Blood Sacrament, you might swap it for Concentrated Effect when fighting bosses. |
|
Fire Penetration Support - Fire Damage penetrates a big portion of Resistances, resulting in much more Damage. |
| The Squire Support Gems |
 |
Increased Critical Strikes Support - Increases Critical Strike Chance for linked Spell. |
 |
Increased Critical Damage Support - Increases Critical Strike Multiplier, it is extremely useful if your Critical Strike Chance is high. |
 |
Elemental Penetration Support - Your Fire Damage penetrates even more Fire Resistance. |
| [UTILITY] Arcanist Brand setup |
 |
Arcanist Brand - A Brand that attaches to an enemy and activates all linked Spells every second. |
 |
Combustion Support - Enemies Ignited by one of the Spells in this setup apply Combustion debuff, reducing Fire Resistance. |
|
Wave of Conviction - Enemies Hit by it are Exposed to Fire, which reduces their Fire Resistance. |
 |
Assassin's Mark - A Curse that would be the best here, it increases your Critical Strike Chance and Multiplier against the marked opponent. |
 |
Culling Strike Support - Enemies Hit by any of the Spells in this setup that are below 10% of their Maximum Life die. |
|
Lifetap Support - Linked Skills cost Life instead of Mana which you have very little of, if any. |
| [UTILITY] Immortal Call/Enduring Cry setup |
 |
Immortal Call - Makes you take much less Elemental and Physical Damage for a short duration. It lasts longer and prevents more Physical Damage the more Endurace Charges it consumed. |
 |
Enduring Cry - Enduring Cry generates Endurance Charges, Reduces Physical Damage taken, and Recovers your Life. |
 |
Increased Duration Support - Enduring Cry and Immortal Call last longer. |
|
Lifetap Support |
| [UTILITY] Stone Golem setup |
 |
Summon Stone Golem - Summons Stone Golem, it grants you a buff that Recovers your Life much like Vitality. |
 |
Meat Shield Support - Golem is more durable, stays close to your character, and Taunts on Hit. |
 |
Cast when Damage Taken Support - Link it with Golem so that you won't have to re-summon it each time it dies. Can be leveled all the way up. |
|
Lifetap Support |
| [UTILITY] Petrified Blood setup |
 |
Petrified Blood - This Spell protects your lower half of the Life Pool, the big portion of damage dealt to you while you're Low on Life is being taken over time, which grants you time to react and recover it instead of getting one-shotted. It reserves 96% of Mana in our setup. |
 |
Enlighten Support - Linked Spell has increased Mana Reservation Efficiency. |
| [MOBILITY] Flame Dash |
|
Flame Dash - A basic mobility ability, it can be used in almost every build. |
[UTILITY] Determination
to be socketed in Essence Worm |
 |
Determination - The only Aura used in this build, it simply improves your Armour Rating, this maneuver keeps you alive. Put it in your Essence Worm to have it off-charge. You could also use other Auras like Zealotry, but we do not recommend it. |
|
On Odealo dozens of sellers compete for your attention. Buying PoE Currency here guarantees the best prices, prompt delivery, and the best quality of service.
|
6. Gear Setup
The build needs only one Unique Item, which is Relic of the Pact. Its price may vary, depending on many circumstances. The effectiveness of flat added Damage for the Blood Sacrament is too low, so don't bother with it, just focus on Maximum Life, Increased Fire/Physical Damage, Critical Strikes, and Fire Penetration. Maximum Life also serves its second, original purpose, of keeping you alive. Having high Life pool, even when halved, is still the only layer of defense that matters. The other defensive modifiers to keep an eye on are: Block Chance, Spell Suppression Chance, Chaos Resistance, and Life Regeneration. You might want to invest in Energy Shield too if you have a way to recover it, for example by Leeching. Remember to adjust your Reservation of Blood Sacrament to be just slightly above 50%, having it below 50% will cast it more than once, and that would take more time and leave you with almost no Life. For Attributes, seek Dexterity and Strength - for its inherent bonuses to Maximum Life, and for Damage via Iron Will.
Our recommended items will:
- Cap your resistances at 75%
- Provide you with enough DPS and Life to start mapping
|
Stat priorities on items:
- Elemental Resistances until capped
- Maximum Life
- Critical Strike Chance
- Critical Strike Multiplier
- increased or reduced Mana Reservation Efficiency
- increased Fire/Physical Damage with Spells
- Dexterity
- Strength
- Chaos Resistance
- Armour
|
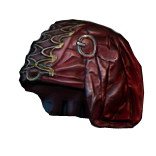
 (Helmet) Rare Helmet - A regular Helmet with a lot of Maximum Life and Resistances is good enough. We recommend a modifier that reduces the Fire Resistance of nearby enemies. (Helmet) Rare Helmet - A regular Helmet with a lot of Maximum Life and Resistances is good enough. We recommend a modifier that reduces the Fire Resistance of nearby enemies. |
Min. requirements:
+80% to Elemental Resistances
+90 to maximum Life
Optional affixes:
increased Mana Reservation Efficiency of Skills
Nearby Enemies have -9% to Fire Resistance
Attributes |
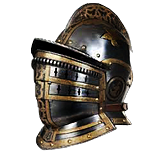
 (Helmet) Glimpse of Chaos - It is a Helmet you can consider equipping if you want more Maximum Life, but all its other mods are extremely hindering. (Helmet) Glimpse of Chaos - It is a Helmet you can consider equipping if you want more Maximum Life, but all its other mods are extremely hindering. |
<Can roll a special implicit when corrupted>
Can be modified while Corrupted
(30-40)% increased maximum Life and reduced Fire Resistance
(30-40)% increased maximum Mana and reduced Cold Resistance
(30-40)% increased Global maximum Energy Shield and reduced Lightning Resistance
Chaos Resistance is Zero
Corrupted |
Helmet enchantments:
Determination/Petrified Blood has increased Mana Reservation Efficiency
increased Assassin's Mark Curse Effect
Immortal Call/Enduring Cry enchantments |
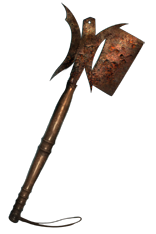
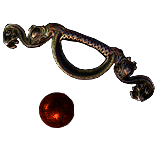
 (Weapon) Relic of the Pact - This Weapon grants you the Skill this build is centered around. (Weapon) Relic of the Pact - This Weapon grants you the Skill this build is centered around. |
(15-19)% increased Spell Damage
Grants Level 1 Blood Sacrament Skill
Your Critical Strike Chance is Lucky while on Low Life |
 (Off-hand) The Squire - It is a Shield we've used, with three extra Support Gems you're able to do much more Damage, and have lower Reservation Efficiency, but it is not required. (Off-hand) The Squire - It is a Shield we've used, with three extra Support Gems you're able to do much more Damage, and have lower Reservation Efficiency, but it is not required. |
120% increased Block Recovery
Has 3 Sockets
All Sockets are White
+(5-8)% to Quality of Socketed Support Gems
Socketed Support Gems can also Support Skills from your Main Hand
(100-150)% increased Armour and Evasion
+(3-5)% Chance to Block |
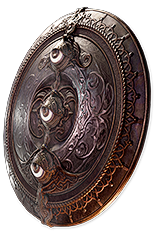
 (Off-hand) Rathpith Globe - Another Shield that's widely used in this build, it grants you a lot of Maximum Life, Spell Damage, and Critical Strike Chance. (Off-hand) Rathpith Globe - Another Shield that's widely used in this build, it grants you a lot of Maximum Life, Spell Damage, and Critical Strike Chance. |
(10-15)% Chance to Block Spell Damage
(120-160)% increased Energy Shield
10% increased maximum Life
Sacrifice 10% of your Life when you Use or Trigger a Spell Skill
5% increased Critical Strike Chance for Spells per 100 Player Maximum Life
5% increased Spell Damage per 100 Player Maximum Life |
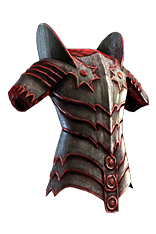 (Body Armour) Rare Body Armour - Aim for as much Maximum Life as you can, seek the highest tier modifiers not only for Life, but for Strength, and increased maximum life as Hunter's Prefix. another great modifier is the extra Spell Critical Strike Chance. (Body Armour) Rare Body Armour - Aim for as much Maximum Life as you can, seek the highest tier modifiers not only for Life, but for Strength, and increased maximum life as Hunter's Prefix. another great modifier is the extra Spell Critical Strike Chance. |
Min. requirements:
+110 to maximum Life
+70% to Elemental Resistances
Optional affixes:
Attributes
Energy Shield
Chance to Suppress Spell Damage
increased Maximum Life
+#% to Spell Critical Strike Chance |
 (Boots) Rare Boots - Besides the regular mods you would usually look for on boots, you can also aim for Onslaught, Tailwind, and Elusive modifiers. The Maximum Life will be, however, the most important. (Boots) Rare Boots - Besides the regular mods you would usually look for on boots, you can also aim for Onslaught, Tailwind, and Elusive modifiers. The Maximum Life will be, however, the most important. |
Min. requirements:
+50% to Elemental Resistances
+70 to Maximum Life
25% increased Movement Speed
Optional affixes:
chance to gain Onslaught for 4 seconds on Kill
You have Tailwind if you have dealt a Critical Strike Recently
chance to gain Elusive on Critical Strike
Attributes |
 (Gloves) Rare Gloves - Again, Maximum Life is the top priority. You can also convert the remaining half of your Physical Damage to Fire via Eldritch Implicits or regular modifiers. It can save you a skill point as you wouldn't need Avatar of Fire anymore. (Gloves) Rare Gloves - Again, Maximum Life is the top priority. You can also convert the remaining half of your Physical Damage to Fire via Eldritch Implicits or regular modifiers. It can save you a skill point as you wouldn't need Avatar of Fire anymore. |
Min. requirements:
+70 to Maximum Life
+50% to Elemental Resistances
Optional affixes:
Attributes
Chaos Resistances
Chance to Suppress Spell Damage
50% of Physical Damage Converted to Fire Damage |
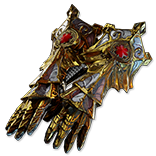 (Gloves) Hands of the High Templar - Hands of the High Templar with the right mods can be better than Rare Gloves - aim for a 12% roll on increased Maximum Life, another 6% from the Corrupted Implicit, and extra Spell Critical Strike Chance. (Gloves) Hands of the High Templar - Hands of the High Templar with the right mods can be better than Rare Gloves - aim for a 12% roll on increased Maximum Life, another 6% from the Corrupted Implicit, and extra Spell Critical Strike Chance. |
Can be modified while Corrupted
Can have up to 5 Implicit Modifiers while Item has this Modifier
(150-200)% increased Armour and Energy Shield
(7-12)% increased maximum Life
+(20-30)% to Fire and Lightning Resistances |
 (Belt) Rare Belt - Get around 100 Maximum Life. There is yet another Hunter's Prefix for increased Maximum Life you should get. Strength is also very common. (Belt) Rare Belt - Get around 100 Maximum Life. There is yet another Hunter's Prefix for increased Maximum Life you should get. Strength is also very common. |
Min. requirements:
+100 to Maximum Life
+80% to Elemental Resistances
Strength
Optional affixes:
Flask modifiers
increased Maximum Life
Attributes |
 (Amulet) Rare Amulet - Maximum Life and Critical Strike modifiers are the most valuable assets to be found on the Amulet. Extra Physical Damage as Fire Damage is a Warlord's Prefix. (Amulet) Rare Amulet - Maximum Life and Critical Strike modifiers are the most valuable assets to be found on the Amulet. Extra Physical Damage as Fire Damage is a Warlord's Prefix. |
Min. requirements:
+60 to Maximum Life
+50% to Elemental Resistances
increased Global Critical Strike Chance
Optional affixes:
+#% to Global Critical Strike Multiplier
Gain #% of Physical Damage as Extra Fire Damage |
 (Amulet) Replica Atziri's Foible - The best Amulet for when you need only Maximum Life, so you might consider it if you're already set up with all the Resistances and Critical Strike Chance. (Amulet) Replica Atziri's Foible - The best Amulet for when you need only Maximum Life, so you might consider it if you're already set up with all the Resistances and Critical Strike Chance. |
Regenerate (1-2)% of Life per second
+100 to maximum Life
(20-25)% increased Life Regeneration rate
Items and Gems have 25% reduced Attribute Requirements |
Recommended Anointments:
Charisma, Champion of the Cause
Disciple of the Unyielding |
 (Ring) Rare Rings - You will have one or none of these Rare Rings, depending on your Reservation Efficiency. Get the default defensive stats, preferably on a Vermillion Ring. (Ring) Rare Rings - You will have one or none of these Rare Rings, depending on your Reservation Efficiency. Get the default defensive stats, preferably on a Vermillion Ring. |
Min. requirements:
+70 to Maximum Life
+50% to Elemental Resistances
Strength
Optional affixes:
Chaos Resistance
Attributes
Maximum Energy Shield |
 (Ring) Essence Worm - Reduced Reservation Efficiency is mandatory, and this Ring is one of the very limited sources of it. You can put your Determination here. (Ring) Essence Worm - Reduced Reservation Efficiency is mandatory, and this Ring is one of the very limited sources of it. You can put your Determination here. |
Has 1 Socket
+2 to Level of Socketed Aura Gems
Socketed Gems have no Reservation
Your Blessing Skills are Disabled
80% reduced Reservation Efficiency of Skills |
 (Jewel) Rare Jewels - On the Jewels seek Maximum life, Attributes, Resistances, and Critical Strike modifiers. (Jewel) Rare Jewels - On the Jewels seek Maximum life, Attributes, Resistances, and Critical Strike modifiers. |
Recommended affixes:
Elemental or Chaos Resistances
Attributes
Maximum Life
Critical Strike modifiers |
 (Jewel) Lethal Pride - Lethal Pride can be a source of Strength and increased Maximum Life if you happen to have one with good rolls. We didn't use it as in our case the skill points were thinly spread across the passive tree. (Jewel) Lethal Pride - Lethal Pride can be a source of Strength and increased Maximum Life if you happen to have one with good rolls. We didn't use it as in our case the skill points were thinly spread across the passive tree. |
Commanded leadership over (10000-18000) warriors under Akoya
Passives in radius are Conquered by the Karui
Historic |
 (Jewel) Grand Spectrum, Maximum Life - For even more Life you can go ahead and use three Grand Spectrum Jewels for a 45% increased Maximum Life. (Jewel) Grand Spectrum, Maximum Life - For even more Life you can go ahead and use three Grand Spectrum Jewels for a 45% increased Maximum Life. |
| 5% increased Maximum Life per Grand Spectrum |
  (Jewel) Forbidden Flesh & Forbidden Flame - Unflinching, Unrelenting, and Unyielding are the best Keystones you can borrow from Juggernaut. These are the ones for Endurance Charges bonuses. (Jewel) Forbidden Flesh & Forbidden Flame - Unflinching, Unrelenting, and Unyielding are the best Keystones you can borrow from Juggernaut. These are the ones for Endurance Charges bonuses. |
Allocates <Random Ascendancy Notable> if you have the matching modifiers on Forbidden Flesh
Allocates <Random Ascendancy Notable> if you have the matching modifiers on Forbidden Flame |
 (Jewel) Watcher's Eye - Determination is your only Aura, you can make it grant you more Armour or Block Cance, but it's not a particularly influential upgrade. (Jewel) Watcher's Eye - Determination is your only Aura, you can make it grant you more Armour or Block Cance, but it's not a particularly influential upgrade. |
(4-6)% increased maximum Energy Shield
(4-6)% increased maximum Life
(4-6)% increased maximum Mana
<Two or Three random aura modifiers> |
 (Jewel) Sublime Vision - Extra Endurance Charge and more Armour is what you can use Sublime Vision for. Get the one with Determination as you won't be able to roll this modifier. (Jewel) Sublime Vision - Extra Endurance Charge and more Armour is what you can use Sublime Vision for. Get the one with Determination as you won't be able to roll this modifier. |
+1 to Maximum Endurance Charges while affected by Determination
Aura Skills other than Determination are Disabled
Auras from your Skills have (20-40)% increased Effect on you |
 (Flask) Bottled Faith - Consecrated Ground from this Flask can increase your Damage, Regenerate Life, and reduce the effect of Curses. (Flask) Bottled Faith - Consecrated Ground from this Flask can increase your Damage, Regenerate Life, and reduce the effect of Curses. |
40% increased Damage
Creates Consecrated Ground on Use
(30-15)% reduced Duration
Consecrated Ground created by this Flask has Tripled Radius
Consecrated Ground created during Effect applies (7-10)% increased Damage taken to Enemies
(100-150)% increased Critical Strike Chance against Enemies on Consecrated Ground during Flask effect |
|
Other suggested Flasks:
- Quicksilver Flask with increased movement speed
- Diamond Flask with increased Critical Strike Chance
- Granite or Basalt Flask with increased Armour Rating
- Seething Life Flask with Bleeding immunity/removal
|
    |
|
Odealo is one of the biggest Path of Exile marketplaces. It allows regular players to buy, sell, and trade PoE Currency with the use of real cash
|
If you have any other build requests please leave that in the comments below. We are always open to suggestions and constructive feedback.
Pictures used in this article are the intellectual property of Grinding Gear Games.