Impale Reap CoC
Champion Build
Updated for Patch 3.20
The Best Crafty Guides by Odealo
| Guide notes |
January 26, 2023
-Build created |
| Build overview |
| Tags: [BOW] [PHYSICAL] [LIFE] [TRIGGER] |
|
Budget:
Defenses:
|

|
Boss DPS:
AoE:
|

|
Impale is a very powerful mechanic dedicated to the Physical Damage type. It stores 10% of each of your Hits to deal it again the next time you Hit the Impaled enemy again, and by default, it can have up to 5 stacks on each foe. For the longest time, it was really available only for Attacks, but with the addition of new Unique Gloves, Entropic Devastation, you can benefit from it on Spells as well. With them, your Spell Critical Strikes will inflict Impales with up to 50% increased Effect.
Since you need to invest a lot into Critical Strike Chance, we decided to pair it up with Cast on Critical Strike setup for the natural synergy. That way, you can focus on your Critical Strike without worrying about Cast Speed, and easily get a much better outcome. There are many ways to make this Setup, but in this case, we decided to use Bows. The biggest advantages of them are access to a 7-link setup, usage of Quiver with precious modifiers, secondary and fully automatic setup with Asenath's Mark, and obviously staying at a safe distance.
There are plenty of Physical Spells in the Game, but most of them come with built-in Elemental Conversion, which disqualifies them for this purpose. The ones that stand out the most are Reap and Exsanguinate. Reap deals very high Physical Damage in a rather small Area of Effect, and deals More Damage per Blood Charge which you get if you don't kill an enemy with your Hit, which works very well against Bosses. It can also be used with Spell Cascade for a powerful overlapping effect.
Exsanguinate, on the other hand, has a much lower Damage ceiling but can cover vastly larger Areas. It's a perfect Skill to use in your Asenat's Mark to improve your Clear without losing single-target Damage.
Both of those Skills by default cost your Life instead of Mana, which is a double-edged Sword. It removes a lot of strain from your Mana Regeneration and allows you to easily Reserve most of it with Auras, but also requires High Life Regeneration. For regular Mapping, one cast is strong enough to kill packs of monsters, so it's not a problem there, but when fighting Bosses you might need to take short breaks to let your Life regenerate back to full.
Bow Skills used to Trigger your Spells are also customizable. The best ones to use are Rain of Arrows and Blast Rain. The first one has much better AoE which works wonders for general Mapping. Blast Rain shots 5 Projectiles that Hit with a slight delay, which easily caps your Triggering Rate. Both of those Skills work well enough on their own, but for the maximum results, it's best to mix them up depending on the situation.
Despite the high Life costs of your Skills, it's a very tanky Build. As a Champion, you have easy access to Fortify and powerful Aura effects. Thanks to Grace and Determination most Attacks won't be a threat, while capped Spell Suppression takes care of any incoming Spell Damage. You will also recover a quarter of your maximum Life when you reach Low Life status.
To get good results with this Build, you will have to acquire some powerful and expensive Items. It could work without them, but it won't feel as smooth as it should.
You can also check our other Path of Exile builds right over here Odealo's Crafty Guides - Full List
1. Gameplay
The Gameplay is very simple and enjoyable. All you need to do is to Attack with your Bow and watch how a powerful cascade of Spells decimates your opponents. To move between packs or dodge incoming Attacks, use Flame Dash. Your Mark and the optional Curse should be fully automated.
|
 
Odealo is a secure trading platform for MMO gamers. Here you can buy, sell, and trade PoE Currency for real cash.
|
2. Build's PROS & CONS
| PROS |
- strong single-target Damage
- good clear speed
- very tanky
- a lot of room for improvements
|
| CONS |
- not a budget-friendly
- needs high Regen just to counter the Life Costs of your Skills
|
3. Leveling tips
Leveling Duelist as a Spell Caster is frankly a terrible experience. You will have a much better time by using any Attack and do a respec once you reach Maps. You can pick up a lot of useful Notables in close proximity to your final Passive Tree. You can check out our Duelist Leveling Guide with Melee Skills for more information, as many of them can be applied here.
Suggested leveling Gem setups:
| Splitting Steel setup |
 |
Splitting Steel - fires a Projectile that splits upon impact. Deals a moderate amount of Physical Damage and has a high chance to Impale. |
 |
Onslaught Support - grants you a chance to gain Onslaught Buff on Kill, which considerably improves your Speed. |
 |
Chance to Bleed Support - gives you flat Physical Damage for your Attacks and gives them a Chance to Bleed for additional Damage. |
 |
Maim Support - Maiming your opponents increases the Physical Damage they take. |
 |
Vicious Projectiles Support - increases your Damage with Projectiles but lowers the Attack Speed. |
 |
Impale Support - increases the Effect of your Impales and allows you to Impale with every Hit. |
| Auras setup |
 |
Herald of Purity - Improves your Physical Damage. You can use your End-game Rings at level 52 for a powerful boost. |
 |
Determination - provides an amazing amount of Armour Rating in early-game. |
| Utility |
 |
Vulnerability - increases the Physical Damage taken by cursed foes. |
 |
Molten Shell - grants a bit of Armour and absorbs part of incoming Damage. |
 |
Leap Slam - jump a short distance to quickly move around or cross terrain gaps. |
Bandits:
Kill all three bandits to get two additional Passive Skill Points
Leveling Skill Trees:
Your Passive Tree is focused on Defense, Aura Modifiers, and Cluster Jewels. We suggest taking nearby Attack Notables to ease Leveling process and refunding them later.
38 Points Passive Tree
Suggested order of allocation: 1) Bravery 2) Golem's Blood 3) Life and Mana Leech (1 point) 4) Thick Skin 5) Entrench
Optional Notables for leveling: 1) Fury Bolts 2) Destroyer 3) Graceful Assault 4) Precise Technique 5) Bladedancer 6) Point Blank
65 Points Passive Tree
Suggested order of allocation: 1) Herbalism 2) Inveterate 3) Charisma 4) Revenge of the Hunter 5) Blood Drinker
Recommended leveling items:
 Le Heup of All - great Ring that grants generic desirable stats such as Damage or Resistances. Le Heup of All - great Ring that grants generic desirable stats such as Damage or Resistances. |
Adds 1 to 4 Physical Damage to Attacks
+(10-30) to all Attributes
(10-30)% increased Damage
(10-30)% increased Rarity of Items found
+(10-30)% to all Elemental Resistances |
 Goldrim - very useful Helmet that grants tons of Resistances. Goldrim - very useful Helmet that grants tons of Resistances. |
+(30-50) to Evasion Rating
10% increased Rarity of Items found
+(30-40)% to all Elemental Resistances
Reflects 4 Physical Damage to Melee Attackers
Level Requirement reduced by 100 (Hidden) |
 The Goddess Bound - a very strong Sword to start your campaign with. It's a one-handed Weapon but takes both hand slots, so you can't dual-wield them. The Goddess Bound - a very strong Sword to start your campaign with. It's a one-handed Weapon but takes both hand slots, so you can't dual-wield them.
|
+1 to Level of Socketed Melee Gems
Uses both hand slots
(250-300)% increased Physical Damage
Adds 3 to 7 Fire Damage
20% increased Attack Speed
30% increased Global Critical Strike Chance
+(20-40) to Evasion Rating
20% reduced Rarity of Items found
30% increased Movement Speed when on Low Life |
 Edge of Madness - a good middle-ground Sword that raises its DPS as your level increases. You can use it at level 22, around act 3. Edge of Madness - a good middle-ground Sword that raises its DPS as your level increases. You can use it at level 22, around act 3. |
+1 to Level of Socketed Active Skill Gems
(40-60)% increased Physical Damage
Adds (60-68) to (90-102) Chaos Damage
1% increased Chaos Damage per Level
Adds 1 to 2 Physical Damage to Attacks per Level |
 Terminus Est - it's one of the best Swords in the game for early progression. You can equip it at level 51 and use it until you are ready to swap for your Bow Setup Terminus Est - it's one of the best Swords in the game for early progression. You can equip it at level 51 and use it until you are ready to swap for your Bow Setup |
(180-220)% increased Physical Damage
20% increased Attack Speed
(50-75)% increased Critical Strike Chance
Gain 10 Mana per Enemy Killed
10% increased Movement Speed
Gain a Frenzy Charge on Critical Strike |
 Tabula Rasa - is your best option when it comes to Damage, however, you need to be wary of the high Mana Costs. Tabula Rasa - is your best option when it comes to Damage, however, you need to be wary of the high Mana Costs. |
Item has no level requirement and Energy Shield (Hidden)
Item has 6 White Sockets and is fully linked (Hidden) |
 Perandus Blazon - grants all Attributes for your Gem Requirements and makes your Quicksilver Flasks easier to sustain. Perandus Blazon - grants all Attributes for your Gem Requirements and makes your Quicksilver Flasks easier to sustain. |
(15-25)% increased Stun and Block Recovery
+(20-30) to all Attributes
(6-8)% increased Quantity of Items found
+20% to Fire Resistance
20% increased Flask Effect Duration
-2 Physical Damage taken from Attack Hits |
 Wanderlust - a quite good pair of Boots that makes you immune to Freeze and grants some Movement Speed Wanderlust - a quite good pair of Boots that makes you immune to Freeze and grants some Movement Speed |
+5 to Dexterity
+(10-20) to maximum Energy Shield
(20-40)% increased Mana Regeneration Rate
20% increased Movement Speed
Cannot be Frozen |
4. Final Skill Tree, Ascendancy Points, and Pantheon
Final Skill Tree:
82 Points Final Passive Tree (doesn't include Cluster or Unique Jewels)
119 Points Path of Building (PoB) link
Ascendancy points:
Preferably in that order:
- First to Strike, Last to Fall
- Unstoppable Hero
- Fortitude
- Inspirational
Pantheon:
Major God: Soul of the Brine King: You cannot be Stunned if you've been Stunned or Blocked a Stunning Hit in the past 2 seconds; Cannot be Frozen
Minor God: Soul of Shakari: You cannot be Poisoned while there are at least 3 Poisons on you; 50% less Duration of Poisons on You
5. Final Gems links
[DPS] Reap Setup
socket in your Bow |
 |
Reap - a bloody scythe deals heavy Physical Damage in targeted Area. On every Hit, gains Blood Charges which improve your Damage. Killing the enemy removes all Charges. Use the Anomalous Quality to significantly improve Critical Strike Chance. |
 |
Blast Rain - fires 5 arrows that continuously fall in the small Area, hitting the same target many times, which can lead to multiple casts of Reap per single Attack. Optionally, swap it with Rain of Arrows for better clear. |
 |
Rain of Arrows - shoots many Arrows in a wide Area, but most of them Hit the same Enemy only once. It has much better Clear Speed but falls off when it comes to a single target. |
 |
Cast on Critical Strike Support - triggers linked Spell when your linked Attack deals Critical Strike. It should be crafted on your Bow as a rare modifier. |
 |
Brutality Support - improves Physical Damage but disables other Types of Damage. |
 |
Increased Critical Damage Support - grants a lot of Critical Strike Multiplier. If you are not capped on Critical strike Chance, use the Increased Critical Strikes Support instead. |
 |
Empower Support - each level above the first one raises your Active Skill Gem Levels by 1, adding a lot of base Damage in the result. |
 |
Spell Cascade Support - creates copies of casted Area Spell around the target. The regular version allows to overlap on the same target with 2 Hits, while the Awakened version can Hit up to 4 times per cast. |
[DPS] Exsanguinate Setup
socket in your Helmet |
 |
Exsanguinate - fires bloody tendrils at nearby enemies, dealing Physical Damage and applying Damage over Time effect. With the Asenath's Mark, you will cast this Spell every time you use a Bow Skill. |
|
Brutality Support - increases Physical Damage dealt by the Exsanguinate. |
|
Increased Critical Damage Support - increases the Damage dealt by your Critical Strikes. |
 |
Increased Critical Strikes Support - significantly improves your Critical Strike Chance. If you are capped without this Gem, use the Cruelty Support instead. |
| [UTILITY] Aura Setup |
 |
Grace - this defensive Aura provides an amazing amount of flat Evasion Rating and a More Multiplier on top of that. |
|
Determination - works the same as Grace, but for Armour Rating. You can use Divirgent Quality to gain an extra bit of Armour from your Evasion Rating. |
 |
Pride - this Aura actually doesn't affect you, but your enemies instead. It increases the Physical Damage they take. |
|
Herald of Purity - dealing Damage summons Sentinels to aid you, but more importantly, it increases your Physical Damage dealt. |
 |
War Banner - very strong Banner improves your Accuracy Rating and increases the Damage you deal to nearby enemies. Doesn't have to be linked with Enlighten Support since your Ascendency makes it free anyway. |
 |
Enlighten Support - significantly reduces the amount of Reserved Mana for each Aura. |
| [UTILITY] Aura Setup |
 |
Vitality - provides a lot of Life Regeneration. High Gem Levels require a lot of Reservation, but you really need that Regen. |
 |
Precision - grants Accuracy Rating and Critical Strike Chance. Try to keep it at a low Gem level, just enough to get 100% Hit Chance. |
 |
Arrogance Support - linked Auras reserve your Life instead of Mana and have a much higher Aura Effect. |
| [UTILITY] Mark and Flame Dash Setup |
 |
Assassin's Mark - improves your Critical Strike chance and Damage against Marked enemies. |
 |
Mark on Hit Support - this Support will trigger your Mark on Rare enemies if you Hit them with any Attack. |
 |
Flame Dash - your main Movement Skill with teleports you in a short distance, allowing you to dodge attacks and cross terrain gaps. |
 |
Lifetap Support - turns your Mana Costs into Life Cost, so you can never run out of Mana unexpectedly. |
| [UTILITY] Guard Setup |
|
Molten Shell - grants bonus Armour and absorbs a high amount of Damage during its Duration. |
|
On Odealo dozens of sellers compete for your attention. Buying PoE Currency here guarantees the best prices, prompt delivery, and the best quality of service.
|
6. Gear Setup
You will use a lot of Rare Items on this Build. Getting a good Bow for Cast on Crit is not an easy task, since there are only a few modifiers that would be beneficial for us. Spine Bow is the optimal base due to its balanced Attack Speed and Critical Strike Chance, but you can also opt for the Forbidden Jewel combination that grants you the Overwhelm, which sets your base Critical Strike Chance with Attacks to 8%, which will allow for more customization on your Bow. Ashes of the Stars are very hard to exclude, as their Mana Reservation Efficiency modifier allows you to use additional Aura, which is a huge Damage Boost. You will need a lot of Intelligence on your Gear to fulfill your Gem Requirements. Defensively, you should focus on Spell Suppression Chance, capping Elemental Resistances, and getting as much Life and Life Regeneration as you can. Your Medium Cluster Jewels are an excellent source of Critical Strike Chance for both your Attacks and Spells, while also providing a lot of raw Damage. Regular Jewels however are not that great, so we recommend getting your Life and Resistances there.
|
Stat priorities on items:
- Cap Elemental Resistances
- Attribute Requirements
- Maximum Life
- Spell Suppression Chance
- Critical Strike Chance
- Critical Strike Multiplier
- Spell or Physical Damage
|
 (Helmet) Asenath's Mark - When you use any Attack, you will automatically cast socketed Spells. It also improves your Spell Damage and Attack Speed. (Helmet) Asenath's Mark - When you use any Attack, you will automatically cast socketed Spells. It also improves your Spell Damage and Attack Speed. |
Trigger a Socketed Spell when you Attack with a Bow, with a 0.3 second Cooldown
(10-15)% increased Attack Speed
+(30-50) to maximum Energy Shield
30% increased Mana Regeneration Rate
(30-60)% increased Spell Damage
Recommended Enchant:
Assassin's Mark Curse Effect
Reap Damage |
 (Helmet) Rare Helmet - you can also use Rare Helmet for a more defensive setup. You can get a lot of Mana Reservation Efficiency here, and back it up with Spell Suppression, Life, or Resistances. (Helmet) Rare Helmet - you can also use Rare Helmet for a more defensive setup. You can get a lot of Mana Reservation Efficiency here, and back it up with Spell Suppression, Life, or Resistances. |
Min. requirements:
20% increased Mana Reservation Efficiency of Skills (Implicit + Essence)
+70 to maximum Life
+50% total Elemental Resistances
Optional affixes:
chance to Suppress Spell Damage
Attributes |
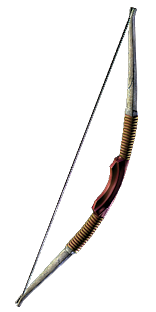 (Weapon) Rare Bow - Shaper Influenced Bows are able to get Cast on Critical Strike Support Gems as a rare modifier, which effectively serves as a 7-link setup. Pair it with Essence Crafted Spell Damage, bonus Gem Levels, or critical Strike modifiers for excellent results. (Weapon) Rare Bow - Shaper Influenced Bows are able to get Cast on Critical Strike Support Gems as a rare modifier, which effectively serves as a 7-link setup. Pair it with Essence Crafted Spell Damage, bonus Gem Levels, or critical Strike modifiers for excellent results. |
Min. requirements:
Socketed Gems are supported by Level 20 Cast On Critical Strike
100% increased Spell Damage
+100% total Elemental Resistances
Optional affixes:
+1 to Level of Socketed Gems
increased Critical Strike Chance |
 (Off-hand) Rare Quiver - your Quiver should be used to improve your Critical Strike Chance with Attacks, Accuracy Rating, or Attack Speed. You can also obtain Frenzy Charge generation here. The remaining modifiers should be focused on Life and Resistances (Off-hand) Rare Quiver - your Quiver should be used to improve your Critical Strike Chance with Attacks, Accuracy Rating, or Attack Speed. You can also obtain Frenzy Charge generation here. The remaining modifiers should be focused on Life and Resistances |
Min. requirements:
5% chance to gain a Frenzy Charge on Critical Strike
+70 to maximum Life
+50% total Elemental Resistances
Optional affixes:
increased Attack Speed
increased Critical Strike Chance with Bows
Accuracy Rating |
 (Body Armour) Rare Armour - you can choose the offensive option and grab Hunter Influenced modifiers such as additional Critical Strike Chance or Additional Curse here, or opt for more defenses with increased Aura Effect and Reservation Efficiency. Regardless of your choice, you should also get some maximum Life, Resistances, or Spell suppression here. (Body Armour) Rare Armour - you can choose the offensive option and grab Hunter Influenced modifiers such as additional Critical Strike Chance or Additional Curse here, or opt for more defenses with increased Aura Effect and Reservation Efficiency. Regardless of your choice, you should also get some maximum Life, Resistances, or Spell suppression here. |
Min. requirements:
+15% chance to Suppress Spell Damage
+90 to maximum Life
Optional affixes:
Spell Critical Strike Chance
% increased maximum Life
You can apply an additional Curse
increased effect of Non-Curse Auras from your Skills
increased Mana Reservation Efficiency of Skills |
 (Gloves) Entropic Devastation - it's a core Item for this Build's concept. You Critical Strikes with Spells will inflict Impale with up to 50% increased Effectiveness. You can get useful corrupted Implicits such as Critical Strike Chance or curse on Hit, but it's not mandatory. (Gloves) Entropic Devastation - it's a core Item for this Build's concept. You Critical Strikes with Spells will inflict Impale with up to 50% increased Effectiveness. You can get useful corrupted Implicits such as Critical Strike Chance or curse on Hit, but it's not mandatory. |
Grants Call of Steel
(100-150)% increased Evasion and Energy Shield
(30-50)% increased Effect of Impales inflicted with Spells
Critical Strikes with Spells inflict Impale |
 (Belt) Rare Belt - Cooldown Recovery Rate is a very valuable modifier to improve your Trigger Rate. Aside from that, try to get as many Life-related and Resistance modifiers here. You can also improve your Flask sustain with various stats. (Belt) Rare Belt - Cooldown Recovery Rate is a very valuable modifier to improve your Trigger Rate. Aside from that, try to get as many Life-related and Resistance modifiers here. You can also improve your Flask sustain with various stats. |
Min. requirements:
+80 maximum Life
+100% total Elemental Resistances
15% increased Cooldown Recovery Rate
Optional affixes:
Life Regeneration
% increased maximum Life
Gain a Flask Charge when you deal a Critical Strike
Flask Effect Duration |
 (Abyss Jewel) Rare Jewel - if you use Stygian Vise as a base for your Belt, you can use Abyss Jewel to get additional stats such as Life or Resistances. (Abyss Jewel) Rare Jewel - if you use Stygian Vise as a base for your Belt, you can use Abyss Jewel to get additional stats such as Life or Resistances. |
Min. requirements:
+30 maximum Life
Optional affixes:
Added Spell Physical Damage while wielding a Two Handed Weapon
Global Critical Strike Multiplier
Elemental Resistances
Attributes |
 (Amulet) Ashes of the Stars - this amazing Amulet lets you fit in another Aura while also improving your Damage. Crafting a Rare Amulet with a similar power level is simply not cost-efficient. (Amulet) Ashes of the Stars - this amazing Amulet lets you fit in another Aura while also improving your Damage. Crafting a Rare Amulet with a similar power level is simply not cost-efficient. |
(5-10)% increased Experience Gain of Gems
(10-20)% increased Reservation Efficiency of Skills
+1 to Level of all Skill Gems
+(20-30)% to Quality of all Skill Gems |
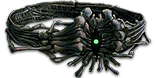
 (Ring) Circle of Guilt - this Unique Ring provides absurd amounts of Damage with proper Herald modifiers. You can also get very useful Synthesised Implicits. However, it's hard to cap your Resistnaces or Attributes while using those. (Ring) Circle of Guilt - this Unique Ring provides absurd amounts of Damage with proper Herald modifiers. You can also get very useful Synthesised Implicits. However, it's hard to cap your Resistnaces or Attributes while using those. |
+(10-20) to all Attributes
Adds (8-10) to (13-15) Physical Damage
+(350-400) to Armour
(40-60)% increased Physical Damage while affected by Herald of Purity
Herald of Purity has (40-60)% increased Buff Effect |
 (Ring) Rare Ring - on your Rare Ring try to get lacking Resistances and Attributes, while also getting maximum Life. You can also craft reduced Mana Costs. If you have sources of Additional Curses, such as on your Body Armour, you can get Vulnerability on Hit here. (Ring) Rare Ring - on your Rare Ring try to get lacking Resistances and Attributes, while also getting maximum Life. You can also craft reduced Mana Costs. If you have sources of Additional Curses, such as on your Body Armour, you can get Vulnerability on Hit here. |
Min. requirements:
+60% to Elemental Resistances
+60 to Maximum Life
Optional affixes:
Curse Enemies with Vulnerability on Hit
Attributes
Non-Channelling Skills have -(7-6) to Total Mana Cost |
 (Boots) Rare Boots - Boots for this Build have a very high potential depending on your budget. You can use regular modifiers such as Life or Movement Speed and add some Cooldowns and Action Speed with Eldritch Implicits, or get very expensive Influenced Boots with much more advanced modifiers of each category. (Boots) Rare Boots - Boots for this Build have a very high potential depending on your budget. You can use regular modifiers such as Life or Movement Speed and add some Cooldowns and Action Speed with Eldritch Implicits, or get very expensive Influenced Boots with much more advanced modifiers of each category. |
Min. requirements:
+60% to Elemental Resistances
+60 to Maximum Life
30% increased Movement Speed
Optional affixes:
chance to Suppress Spell Damage
increased Cooldown Recovery Rate
increased Action Speed
You have Tailwind if you have dealt a Critical Strike Recently
chance to gain Elusive on Critical Strike
chance to gain Onslaught for 4 seconds on Kill |
 (Amulet) Rare Amulet - additional Levels for your Physical Spell Gems, Life, and Resistances are good enough for most content in the game. You will need more Mana Reservation Efficiency elsewhere to fit in all Auras. (Amulet) Rare Amulet - additional Levels for your Physical Spell Gems, Life, and Resistances are good enough for most content in the game. You will need more Mana Reservation Efficiency elsewhere to fit in all Auras. |
|
Recommended affixes:
+60% to Elemental Resistances
+60 to Maximum Life
Optional affixes:
+1 to Level of all Physical Skill Gems
Attributes
Critical Strike Multiplier
|
 (Jewel) Rare Jewels - you should have increased Life on each Rare Jewel. Use remaining modifiers to get lacking Resistances or Attributes. Double Critical Strike Multiplier setup for non-elemental Skills is unfortunately quite expensive. (Jewel) Rare Jewels - you should have increased Life on each Rare Jewel. Use remaining modifiers to get lacking Resistances or Attributes. Double Critical Strike Multiplier setup for non-elemental Skills is unfortunately quite expensive. |
|
Recommended affixes:
(5-7)% increased maximum Life
Optional affixes:
Mana Reservation Efficiency
Attributes
Elemental Resistances
Critical Strike Multiplier
|
 (Jewel) Large Cluster Jewels - those are your biggest sources of increases to Physical Damage. Try to get ones with 8 additional Passives to not waste any points. (Jewel) Large Cluster Jewels - those are your biggest sources of increases to Physical Damage. Try to get ones with 8 additional Passives to not waste any points. |
Recommended affixes:
1 Added Passive Skill is Battle-Hardened
1 Added Passive Skill is Force Multiplier
1 Added Passive Skill is Master the Fundamentals |
 (Jewel) Medium Cluster Jewels - you can get a lot of Critical Strike Chance for both your Attacks and Spells. You can also get a lot of Damage or Critical Strike Multiplier. (Jewel) Medium Cluster Jewels - you can get a lot of Critical Strike Chance for both your Attacks and Spells. You can also get a lot of Damage or Critical Strike Multiplier. |
Recommended affixes:
1 Added Passive Skill is Basics of Pain
1 Added Passive Skill is Pressure Points
1 Added Passive Skill is Savage Response |
 (Jewel) Thread of Hope - you can allocate a lot of distant and powerful Notables thanks to this Jewel, but it has to be the correct Ring size. (Jewel) Thread of Hope - you can allocate a lot of distant and powerful Notables thanks to this Jewel, but it has to be the correct Ring size. |
Only affects Passives in Massive Ring
Passives in Radius can be Allocated without being connected to your tree
-(20-10)% to all Elemental Resistances |
  (Jewel) Forbidden Flesh&Flame - Duelist is full of good options here. Most notably Headsman gives you access to a powerful 20% Culling Strike. You can also use the Overwhelm if your Bow lacks base Critical Strike. (Jewel) Forbidden Flesh&Flame - Duelist is full of good options here. Most notably Headsman gives you access to a powerful 20% Culling Strike. You can also use the Overwhelm if your Bow lacks base Critical Strike. |
| Allocates <Random Ascendancy Notable> if you have the matching modifiers on Forbidden Flesh/Flame |
 (Jewel) Watcher's Eye - you can greatly enhance the effect of your Impales with the relevant modifier here. You can pair it with many other useful modifiers since you use a lot of Auras. (Jewel) Watcher's Eye - you can greatly enhance the effect of your Impales with the relevant modifier here. You can pair it with many other useful modifiers since you use a lot of Auras. |
(4-6)% increased maximum Energy Shield
(4-6)% increased maximum Life
(4-6)% increased maximum Mana
<Two or Three random aura modifiers>
Recommended Aura mods:
Impales you inflict last 2 additional Hits while using Pride |
 (Flask) Bottled Faith - provides a significant boost to your Damage against a single target. You should aim to Cap your Critical Strike Chance without it for smoother gameplay. (Flask) Bottled Faith - provides a significant boost to your Damage against a single target. You should aim to Cap your Critical Strike Chance without it for smoother gameplay. |
(30-15)% reduced Duration
Consecrated Ground created by this Flask has Tripled Radius
Consecrated Ground created during Effect applies (7-10)% increased Damage taken to Enemies
(100-150)% increased Critical Strike Chance against Enemies on Consecrated Ground during Effect |
|
Suggested Flasks:
- Life Flask with Bleeding removal
- Diamond Flask with an increased Critical Strike Chance modifier
- Granite Flask with an increased Armour Rating modifier
- Quicksilver Flask with an increased Movement Speed modifier
|
    |
|
Odealo is one of the biggest Path of Exile marketplaces. It allows regular players to buy, sell, and trade PoE Currency with the use of real cash
|
If you have any other build requests please leave that in the comments below. We are always open to suggestions and constructive feedback.
Pictures used in this article are the intellectual property of Grinding Gear Games.