Crackling Lance
Elementalist Build
Updated for Patch 3.18
The Best Crafty Guides by Odealo
| Guide notes |
February 24, 2021
-Build created
July 16, 2022
-Updated for Patch 3.18 |
| Build overview |
| Tags: [CASTER] [ELEMENTAL] [LIFE] |
|
Budget:
Defenses:
|


|
Boss DPS:
AoE:
|

|
Crackling Lance is a very interesting Spell that was added in Patch 3.12 and then severely boosted later on. It deals massive Lightning Damage, which is increased by each stack of Intensity (on top of the standard bonuses granted by the corresponding Support Gem). This build revolves around converting 50% of your Lightning Damage to Cold Element via Call of the Brotherhood Ring and using Trinity Support that boosts your Elemental Damage significantly. The use of Trinity is optional, as you could technically reach similar DPS with other Gems, but sounds cool and looks cool (adds a new circular buff indicator on top).
As of lately, Elementalist became one of the best and most popular Spell-caster classes which is oriented on increasing Elemental Damage and effects of Ailments they inflict, but also it became much more efficient to boost your damage by using different types of Golems. In this build, you are going to use three to five different Golems which boost your damage and survivability, and by also being linked to Meat Shield Support, they will taunt nearby enemies reducing the number of hits your character takes directly. For the defenses, you are looking at a very tanky hybrid build which up to 9,000 combined Life and Energy Shield, with decent block Chance, Corrupted Soul Passive, two types of Leech, Physical Damage mitigation, and Life Recovery. Overall, this build is quite tanky, and thanks to massive DPS (over 10,000,000 Shaper DPS when fully buffed), you can easily farm all the content in the game.
There are two main ways to play this build, with Doryani's Prototype Body Armour and without it. The Item changes how to assemble the rest of your gear substantially - by setting your Armour as the most important defensive and focusing on lowering Lightning Resistance, as it becomes a liability. The build is also flexible enough to easily implement some of the more exotic additions such as Uul-Netol's Vow, Impossible Escape, and Melding of the Flesh. We will include them as optional choices and list their merits in the final section of the guide.
You can also check our other Path of Exile builds right here: Odealo's Crafty Guides - Full List
1. Gameplay
This is a tanky Hybrid Spell-caster build which allows you to Dash/Flame Dash around Maps and obliterate everything by self-casting Crackling Lance. Entire screens of enemies will die nearly instantly, with only Bosses requiring several hits to be killed. This build offers amazing defenses, so you can basically jump into packs of enemies without worrying too much about surviving. As a character, you should be even able to easily take on most of the AoE hits the game has to "offer" - like for example Shaper's Slam. This build utilizes five different Golems, but thanks to Elementalist Ascendancy they will be resummoned automatically when slain. It leaves you with only 3 Skills that you are going to use, your Movement Spell of Choice (Flame Dash or Dash), Crackling Lance, and Hydrosphere. Hydrosphere reduces Cold and Lightning Resistances of all enemies in its' radius, and should be used mainly against Bosses - you should know that you need to hit it with Crackling Lance so that it starts pulsing and applying Cold/Lightning Exposure with increased effect from Mastermind of Discord Passive.
This build also requires Glorious Vanity Jewel, in order to gain the bonuses of Corrupted Soul Passive. It causes the damage you take to be divided nearly equally between your Life and Energy Shield, which allows you to Leech both simultaneously, greatly boosting your defenses.
|
Full gameplay video:
This video was recorded on a level 95 Elementalist using Doryani's Prototype with approx. -180% Lightning Resistance. This was presumable one of the most expensive variants you could use for this build, but at the same time it secured most of our Uber Bosses kills (including Searing Exarch, Sirius, Cortex)
|
|
 
Odealo is a secure trading platform for MMO gamers. Here you can buy, sell, and trade PoE Currency for real cash.
|
2. Build's PROS & CONS
| PROS |
- insane single-target DPS
- amazing AoE and clear speed
- easy to level up
- multi-layer defenses
- high effective Life and Energy Shield with dual Leech
- immunity to Elemental Ailments
|
| CONS |
- vulnerable to Elemental Reflect
- requires a number of Specific Uniques
|
3. Leveling tips
Leveling up a Witch/Elementalist is very easy. You can breeze through the campaign using Freezing Pulse and Frostbomb (which can be later switched to Crackling Lance/Hydrosphere). You can greatly increase the damage of those two Spells by adding Flat Spell Damage by Support Gems like Added Cold Damage Support and cheap Uniques like Replica Prismweave, and Axiom Perpetuum which will let you quickly deal even with the toughest enemies and Bosses. You will also gain high DPS bonuses from Golems starting from Act 4, where you should be able to already have three Summoned for high DPS bonuses. Below you will find the recommended Gem setups and several Unique Items that will be extremely useful on lower levels.
Suggested leveling Gem setups:
| Freezing Pulse setup |
 |
Freezing Pulse - one of the best Spells for leveling. It fires long-range projectiles that deal higher damage the closer you are to your enemy. You should get the First Snow Threshold Jewel for it as soon as possible |
 |
Added Cold Damage Support - adds additional Cold Damage |
 |
Added Lightning Damage Support - adds high flat Lightning Damage |
 |
Faster Casting Support |
 |
Elemental Focus Support - greatly increases Elemental Damage dealt, and its one of the core Gems you will use on higher levels |
| Frost Bomb setup |
 |
Frost Bomb - creates a pulsing Sphere on the ground that deals a moderate amount of Damage with each tick and applies powerful Cold Exposure to enemies. It will work best against Bosses, but also provides some extra AoE damage against big packs of enemies |
 |
Bonechill Support - increases the effect of Chill and Cold Damage you deal to affected enemies |
 |
Hypothermia Support - greatly increases your Damage against Chilled enemies |
|
Added Cold Damage Support |
| Utility Gems |
 |
Clarity - grants increased Mana Regeneration which might be extremely useful on lower levels |
 |
Herald of Ice - the best Herald for this build as it grants damage bonus Cold damage and causes AoE explosions when you slay Frozen enemies |
 |
Dash - the best mobility skill for this build |
|
Frostbite - the recommended Curse for the leveling phase as it grants the highest bonus to your Cold DPS |
Bandits:
You should kill all the Bandits for two additional Passive Skill Points
Leveling Skill Trees:
32 Points Skill Tree
Priorities: 1) Frost Walker 2) Heart and Soul 3) Cruel Preparation 4) Heart of Ice 5) Mental Rapidity
70 Points Skill Tree
Priorities: 1) Holy Dominion and surrounding passives 2) Sovereignty 3) Purity of Flesh 4) Divine Judgement
Recommended leveling items:
 Goldrim - one of the best leveling Helmets in Path of Exile as it covers up basically all the needs for Elemental Resistances on lower levels Goldrim - one of the best leveling Helmets in Path of Exile as it covers up basically all the needs for Elemental Resistances on lower levels |
+(30-50) to Evasion Rating
10% increased Rarity of Items found
+(30-40)% to all Elemental Resistances
Reflects 4 Physical Damage to Melee Attackers
Level Requirement reduced by 100 (Hidden) |
 Axiom Perpetuum - one of the best leveling weapons for Spell Casters which adds a ton of flat Elemental Damage to your Spells Axiom Perpetuum - one of the best leveling weapons for Spell Casters which adds a ton of flat Elemental Damage to your Spells |
12% increased Elemental Damage
Adds (2-3) to (5-6) Fire Damage to Spells
Adds (2-3) to (5-6) Cold Damage to Spells
Adds 1 to (10-12) Lightning Damage to Spells
(4-6)% increased Cast Speed
(100-140)% increased Critical Strike Chance for Spells |
 Replica Prismweave - an amazing Belt which adds a lot of flat Damage to your Spells (make sure you are getting the Replica one) Replica Prismweave - an amazing Belt which adds a lot of flat Damage to your Spells (make sure you are getting the Replica one) |
(12-24)% increased Global Physical Damage
Adds (7-8) to (15-16) Fire Damage to Spells
Adds (5-6) to (12-14) Cold Damage to Spells
Adds 1 to (30-34) Lightning Damage to Spells
+(6-8)% to all Elemental Resistances
10% increased Elemental Damage
30% increased Elemental Damage during any Flask Effect |
 Praxis - a great leveling Ring that reduces the Mana Cost of all abilities. It makes leveling much smoother as you won't get much Mana/Mana Regen from your Passive Tree Praxis - a great leveling Ring that reduces the Mana Cost of all abilities. It makes leveling much smoother as you won't get much Mana/Mana Regen from your Passive Tree |
+(20-25) to maximum Mana
+(30-60) to maximum Mana
(3-6) Mana Regenerated per second
-(8-4) to Mana Cost of Skills
8% of Damage taken gained as Mana over 4 seconds when Hit |
 Victario's Flight - a great pair of Boots that offers very high bonus Movement Speed, Mana Recovery, and extra Attributes Victario's Flight - a great pair of Boots that offers very high bonus Movement Speed, Mana Recovery, and extra Attributes |
+15 to Dexterity
+15 to Intelligence
(100-150)% increased Evasion Rating
15% increased Movement Speed
(5-10)% of Damage taken gained as Mana over 4 seconds when Hit
10% increased Movement Speed for you and nearby Allies |
4. Final Skill Tree, Ascendancy Points, and Pantheon
Final Skill Tree:
106 Points Skill Tree (doesn't include Passives from Cluster Jewel and Intuitive Leap)
118 Points Path of Building (PoB) link
Ascendancy points:
Preferably in that order:
- Mastermind of Discord
- Heart of Destruction
- Liege of the Primordial
- Shaper of Winter
Pantheon:
Major God: Soul of Solaris: 6% additional Physical Damage Reduction while there is only one nearby Enemy; 20% chance to take 50% less Area Damage from Hits
Minor God: Soul of Gruthkul: 1% additional Physical Damage Reduction for each Hit you've taken Recently up to a maximum of 5%
5. Final Gems links
| [DPS] Crackling Lance setup |
 |
Crackling Lance - the primary and build-defining skill that is self-casted in this setup. It builds up Intensity stacks and deals greatly increased damage with consecutive cats. |
 |
Increased Critical Damage Support - increases Critical Strike multiplier, meaning your critical strikes are more powerful |
 |
Intensify Support - grants a very strong damage multiplier based on the number of Intensify charges; basically increasing it when you are stationary, with each consecutive hit |
 |
Inspiration Support - reduces the Mana Cost and increases Elemental Damage and Critical Strike Chance of your Crackling Lance. If Mana cost is not a problem, use  Increased Critical Strikes Support instead. Increased Critical Strikes Support instead. |
 |
Spell Echo Support - makes supported Spell repeat itself an additional time. This Gem has an even more powerful Awakened variant |
 |
Added Lightning Damage Support - grants high bonus Lightning Damage added to your Crackling Lance. It also has an Awakened variant |
| [UTILITY] Golems to choose from |
 |
Summon Flame Golem - you are going to use all 5 Golems that actually benefit this build, so only Carrion will be left behind. Flame Golem increases your Damage directly |
 |
Summon Lightning Golem - Lightning Golem increases your Attack and Cast Speed (only the latter matters for us in this build) |
 |
Summon Ice Golem - increases Accuracy Rating (irrelevant) and Critical Strike Chance |
 |
Summon Chaos Golem - grants high Physical Damage mitigation |
 |
Summon Stone Golem - increases Life Regeneration |
 |
Meat Shield Support - makes linked Golem defensive, meaning they will take less damage and Taunt enemies that try to attack you |
| [UTILITY] Petrified Blood setup |
 |
Petrified Blood - Skill that protects the lower half of your Life Pool, causing it to redistribute a portion of incoming Hit damage to be taken as damage over time, which buys you some time to regenerate it back. With over half of your Life reserved it's always applicable and enables Pain Attunement. |
 |
Arrogance Support - Arrogance makes the linked Mana-reserving Skill reserve Life instead of Mana. |
 |
Enlighten Support |
| [UTILITY] Auras setup |
 |
Defiance Banner - increases Armour and Evasion Rating, reduces enemies' Critical Strike Chance.  Zealotry can be used here instead, it increases your Spell Damage and Spell Critical Strike Chance, but it's usually too expensive to include. Zealotry can be used here instead, it increases your Spell Damage and Spell Critical Strike Chance, but it's usually too expensive to include. |
 |
Wrath - use it for more Lightning Spell Damage, very powerful Aura |
 |
Determination - adds and increases Armour Rating for your character |
|
Enlighten Support - reduces the Mana Reservation cost of linked Spells |
| [UTILITY] Vitality |
 |
Vitality - If you want to push the defensive properties of the build further, apply Vitality Aura to regenerate Life faster |
| [UTILITY] Molten Shell |
 |
Molten Shell - It is a very basic Guard Spell that reduces incoming Hit Damage to some degree for some time, it scales up with the Armour. |
| [UTILITY] Hydrosphere setup |
 |
Hydrosphere - A powerful AoE utility Spell that applies Cold and Lightning Exposure to nearby enemies. The effect is increased by using Mastermind of Discord Passive. |
 |
Hextouch Support - this Gem allows you to apply a second Curse via Hydrosphere's pulses |
 |
Conductivity - This Curse lowers the Lightning Resistance of the opponent. Use it only if you're able to apply more than one Curse, as The Assassin's Mark is a better one. |
 |
Increased Area of Effect Support |
| [MOBITY] Flame Dash setup |
 |
Flame Dash - The recommended Movement Skill for this build. It allows you to progress faster through Maps and avoid heavy damage. |
 |
Arcane Surge Support - Causes linked Spells to grant Arcane Surge buff when you spend a certain amount of Mana on them. Keep this Gem at level 5 so that it is triggered after each cast of Flame Dash |
| [UTILITY] Assassin's Mark |
 |
Assassin's Mark - The best Curse for this build which increases your effective Crit. Chance, Crit. Multiplier, and generates Power Charges on kills. It has to be applied manually. |
|
Odealo supports player-to-player trading for the Path of Exile Currency, Orbs, and Unique Items. Buying from regular players on Odealo guarantees the best prices and highest security of every transaction.
|
5. Gear Setup
Below you will find the recommended gear for our Crackling Lance Elementalist. There are no mandatory unique items, although some are heavily recommended. if you're looking for the cheap ones, try Crown of the Inward Eye and The Brass Dome for impenetrable defenses. Rare Items is where the bulk of your Maximum Life and Elemental Resistances resides. Other important aspects of the build are Critical Strike Chance and Multiplier, Cast Speed, Gem Level of Crackling Lance, Lightning Penetration, and general Spell Damage. To increase defenses seek Armour and Spell Suppression Chance. Try to gain additional mana reservation efficiency and reduced mana cost of skills. Overall, this build can get pretty expensive, but it can be played on a medium budget as well.
We guarantee that our list will:
- Cap your Elemental Resistances
- Give you enough DPS, Life, and Energy Shield to start mapping successfully
- Save you at least a couple of hours!
|
Stat priorities on items:
- Elemental Resistances
- Maximum Life
- Cast Speed
- Gem Level of Crackling Lance
- Critical Strike Chance
- Critical Strike Multiplier
- Attributes
- increased Spell Damage
- Added Lightning Damage to Spells
- Mana Regeneration Rate and low Mana Cost of Skills
- Spell Suppression Chance
- Chaos Resistance
|
 (Helmet) Crown of the Inward Eye - one of the best Helmets for this build as it grants high bonus DPS and overall Defences such as Armour, Energy Shield, and Maximum Life. (Helmet) Crown of the Inward Eye - one of the best Helmets for this build as it grants high bonus DPS and overall Defences such as Armour, Energy Shield, and Maximum Life. |
333% increased Armour and Energy Shield
(9-21)% increased maximum Life, Mana and Global Energy Shield
Transfiguration of Soul
Transfiguration of Body
Transfiguration of Mind |
 (Helmet) Rare Helmet - It is always a decent option. You can pick an Energy Shield base with high bonus Life for defensive utility. (Helmet) Rare Helmet - It is always a decent option. You can pick an Energy Shield base with high bonus Life for defensive utility. |
Recommended affixes:
+90 Maximum Life
Optional affixes:
Elemental Resistances
Nearby Enemies have -#% to Lightning Resistance
Critical Strike Multiplier
Attributes
Armour |
Helmet enchantment:
Crackling Lance deals 40% increased Damage
Crackling Lance has 16% increased Cast Speed |
 (Body Armour) Rare Body Armour - the best all-around Armour you can use for this build. You need to have a Crafted affix that will increase your Maximum Energy Shield based on your Max Life (Body Armour) Rare Body Armour - the best all-around Armour you can use for this build. You need to have a Crafted affix that will increase your Maximum Energy Shield based on your Max Life |
Recommended affixes:
+100 Maximum Life
60% Total Elemental Resistances
Gain 10% of Maximum Life as Extra Maximum Energy Shield
Optional affixes:
Attributes
Spell Critical Strike Chance
You can apply an additional Curse |
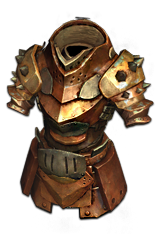 (Body Armour) The Brass Dome - This Body Armour requires a lot of Strength and reduces the Maximum Life slightly, but in return provides a lot of Maximum Elemental Resistances, Armour, and protection against Critical Strikes. It's very defensive-oriented. (Body Armour) The Brass Dome - This Body Armour requires a lot of Strength and reduces the Maximum Life slightly, but in return provides a lot of Maximum Elemental Resistances, Armour, and protection against Critical Strikes. It's very defensive-oriented. |
(350-400)% increased Armour
+(1-5)% to all maximum Elemental Resistances
Strength provides no bonus to Maximum Life
Take no Extra Damage from Critical Strikes |
 (Body Armour) Doryani's Prototype - With this Armour you have to be careful, you can't just put it on, the whole build must be customized accordingly to its unique properties. It requires absurd amounts of Armour and equally absurd amounts of negative lightning resistance to be worth putting in. (Body Armour) Doryani's Prototype - With this Armour you have to be careful, you can't just put it on, the whole build must be customized accordingly to its unique properties. It requires absurd amounts of Armour and equally absurd amounts of negative lightning resistance to be worth putting in. |
(150-200)% increased Armour and Energy Shield
+(60-90) to maximum Life
Deal no Non-Lightning Damage
Armour also applies to Lightning Damage taken from Hits
Lightning Resistance does not affect Lightning Damage taken
Nearby Enemies have Lightning Resistance equal to yours |
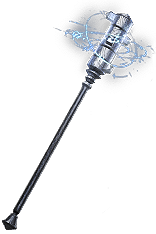
 (Weapon) Rare Staff - The sky is the limit when it comes to picking up your Staff for this build. Simply aim for the highest Lightning Spell Damage bonuses and possibly increases to the level of All Lightning Spell Gems as well. We recommend getting a staff with Attack Block Chance implicit, but if you want to maximize your DPS, Spell Crit. Chance ones will also work. (Weapon) Rare Staff - The sky is the limit when it comes to picking up your Staff for this build. Simply aim for the highest Lightning Spell Damage bonuses and possibly increases to the level of All Lightning Spell Gems as well. We recommend getting a staff with Attack Block Chance implicit, but if you want to maximize your DPS, Spell Crit. Chance ones will also work. |
Recommended affixes:
100% Lightning Spell Damage
Added Lightning Damage to Spells
30% Cast Speed
Optional affixes:
Critical Strike Chance for Spells
+2-3 to All Lightning Spell Skill Gems |
 (Weapon) Agnerod West - quite ok budget alternative to a much more expensive Rare. It offers most of the required stats, but only lacks bonuses to Crit. Chance and Cast Speed (Weapon) Agnerod West - quite ok budget alternative to a much more expensive Rare. It offers most of the required stats, but only lacks bonuses to Crit. Chance and Cast Speed |
+18% Chance to Block Attack Damage while wielding a Staff
+2 to Level of all Lightning Spell Skill Gems
+(80-120) to Intelligence
(30-50)% increased Lightning Damage
Adds (5-15) to (100-140) Lightning Damage to Spells
40% increased Strength Requirement
Damage Penetrates 20% Lightning Resistance |
 (Weapon) Rare Wand/Scepter/Dagger - One-handed weapons are great for they allow you to equip a Shield, magnifying your defenses. We recommend one with mods increasing Gem Level of Cracking Lance by two or more, some Critical Strike mods, Cast Speed, and Spell Damage. (Weapon) Rare Wand/Scepter/Dagger - One-handed weapons are great for they allow you to equip a Shield, magnifying your defenses. We recommend one with mods increasing Gem Level of Cracking Lance by two or more, some Critical Strike mods, Cast Speed, and Spell Damage. |
Recommended affixes:
+1 to Level of all Spell Skill Gems
+1 to Level of all Lightning Spell Skill Gems
70% increased Lightning Spell Damage
20% Cast Speed
Optional affixes:
Global Critical Strike Chance
Global Critical Strike Multiplier
Added Lightning Damage to Spells |
 (Off-hand) Aegis Aurora - Aegis Aurora is great as it replenishes your Energy Shield on Block and provides extra Maximum Cold Resistance. Definitely worth picking when your Armour and Block Chance are high. (Off-hand) Aegis Aurora - Aegis Aurora is great as it replenishes your Energy Shield on Block and provides extra Maximum Cold Resistance. Definitely worth picking when your Armour and Block Chance are high. |
(300-400)% increased Armour and Energy Shield
+10% to all Elemental Resistances
+5% to maximum Cold Resistance
+6% Chance to Block
Replenishes Energy Shield by 2% of Armour when you Block
(10-20)% increased Elemental Damage with Attack Skills |
 (Off-hand) Rare Shield - A Shield would be good to gain some of the extra Maximum Life, Resistances, Attributes, and Mana Reservation Efficiency. (Off-hand) Rare Shield - A Shield would be good to gain some of the extra Maximum Life, Resistances, Attributes, and Mana Reservation Efficiency. |
Min. requirements:
+80 to maximum Life
+60% to Elemental Resistances
Optional affixes:
Socketed Gems have 30% increased Reservation Efficiency
Attributes
increased maximum Life |
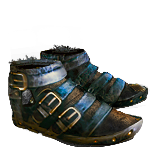
 (Boots) Rare Boots - pick a pair with the highest Life/Resistances combo with at least 25% bonus Movement Speed (Boots) Rare Boots - pick a pair with the highest Life/Resistances combo with at least 25% bonus Movement Speed |
Recommended affixes:
+70 Maximum Life
25% Increased Movement Speed
90% Total Elemental Resistances
Optional affixes:
Attributes
You have Tailwind if you have dealt a Critical Strike Recently
Chance to Suppress Spell Damage
Gain Elusive on Critical Strike
chance to gain Onslaught for 4 seconds on Kill |
Boot Enchantment:
16% increased Attack and Cast Speed if you've Killed Recently
18% reduced Mana Cost of Skills if you've been Hit Recently |
 (Belt) Stygian Vise - It is one of the best options for this build. Get as much Life here as possible, and some extra Resistances on top of that. (Belt) Stygian Vise - It is one of the best options for this build. Get as much Life here as possible, and some extra Resistances on top of that. |
Recommended affixes:
+100 Maximum Life
80% Total Elemental Resistances
Optional affixes:
Increased Damage
increased Maximum Life
Strength |
 (Amulet) Rare Amulet - A decent option for this build. If you have problems with Mana you can get the Reduced Mana cost of Skills or increased mana reservation efficiency for specific Auras affixes here which should help you easily maintain all the Auras and cast Spells comfortably. (Amulet) Rare Amulet - A decent option for this build. If you have problems with Mana you can get the Reduced Mana cost of Skills or increased mana reservation efficiency for specific Auras affixes here which should help you easily maintain all the Auras and cast Spells comfortably. |
Recommended affixes:
+60 Maximum Life
35% Critical Strike Multiplier
Optional affixes:
#% Reduced Mana Reserved (if necessary)
Non-Channelling Skills have -7 to Total Mana Cost
Spell Damage
Elemental Resistances
Attributes
Mana Regeneration Rate |
 (Amulet) Uul-Netol's Vow - It is the amulet known for allowing you to turn any Body Armour setup into a seven-linked one, but if you're lucky enough it can provide decent Resistances too. Combined with Doryani's Prototype, it might be especially good. (Amulet) Uul-Netol's Vow - It is the amulet known for allowing you to turn any Body Armour setup into a seven-linked one, but if you're lucky enough it can provide decent Resistances too. Combined with Doryani's Prototype, it might be especially good. |
Has 1 Socket
Socketed Support Gems can also Support Skills from your Body Armour
+(-30-30)% to Fire Resistance
+(-30-30)% to Cold Resistance
+(-30-30)% to Lightning Resistance
+(-23-23)% to Chaos Resistance |
 (Amulet) Ashes of the Stars - Ashes of the stars can easily find its way into any build in the game as it's extremely versatile and the bonuses it provides are overall in high demand. (Amulet) Ashes of the Stars - Ashes of the stars can easily find its way into any build in the game as it's extremely versatile and the bonuses it provides are overall in high demand. |
+(10-16) to all Attributes
(5-10)% increased Experience Gain of Gems
(10-20)% increased Reservation Efficiency of Skills
+1 to Level of all Skill Gems
+(20-30)% to Quality of all Skill Gems |
Recommended Anointments:
Doom Cast
Charisma |
 (Ring) Rare Rings - Aim to get high Maximum Life, Resistances, and Attributes. Conductivity on Hit is not very important as applying it via Hydrosphere is already a great solution. Additionally, seek the mods for reduced Mana Cost of Skills, Cast Speed, and Critical Strike ones. (Ring) Rare Rings - Aim to get high Maximum Life, Resistances, and Attributes. Conductivity on Hit is not very important as applying it via Hydrosphere is already a great solution. Additionally, seek the mods for reduced Mana Cost of Skills, Cast Speed, and Critical Strike ones. |
Recommended affixes:
+60 Maximum Life
80% Total Elemental Resistances
Attributes
Optional affixes:
Mana/Mana Regeneration Rate
Global Critical Strike mods
increased Cast Speed
Non-channeling Skills have -# to Total Mana Cost |
 (Gloves) Rare Gloves - once again aim for high defensive stats and some of the offensive ones if you have the means to do so. (Gloves) Rare Gloves - once again aim for high defensive stats and some of the offensive ones if you have the means to do so. |
Recommended affixes:
+70 Maximum Life
60% Total Elemental Resistances
Optional affixes:
Spell Damage
Global Critical Strike Chance / Elemental Damage if you've dealt a Critical Strike Recently
Attributes
Spell Suppression Chance |
 (Gloves) Hands of the High Templar - Due to the lack of any significant mods on rare gloves, you can try your luck with Hands of the High Templar. Aim for increased Cast Speed, maximum Life, and Spell Critical Strike Chance. (Gloves) Hands of the High Templar - Due to the lack of any significant mods on rare gloves, you can try your luck with Hands of the High Templar. Aim for increased Cast Speed, maximum Life, and Spell Critical Strike Chance. |
Can be modified while Corrupted
Can have up to 5 Implicit Modifiers while Item has this Modifier
(150-200)% increased Armour and Energy Shield
(7-12)% increased maximum Life
+(20-30)% to Fire and Lightning Resistances |
 (Jewel) Large Cluster Jewel - it's pretty much mandatory to grab a Large Cluster Jewel with Doryani's Lessons (among other Passives) as it's one of the few ways to gain Life Leech in this build (Jewel) Large Cluster Jewel - it's pretty much mandatory to grab a Large Cluster Jewel with Doryani's Lessons (among other Passives) as it's one of the few ways to gain Life Leech in this build |
Recommended affixes:
1 Added Passive Skill is Doryani's Lesson
1 Added Passive Skill is Prismatic Heart
1 Added Passive Skill is Mage Hunter
1 Added Passive Skill is Sap Psyche
1 Added Passive Skill is Conjured Wall
1 Added Passive Skill is Essence Rush
1 Added Passive Skill is Arcane Heroism |
 (Jewel) Medium Cluster Jewel - if you can invest some extra cash into this build we recommend getting a Medium Cluster Jewel with Master of Fear and Wish for Death Passives. You basically gain Culling Strike and Unnerve enemies on hit when you get it, but it will most likely cost a couple of Exalted Orbs. (Jewel) Medium Cluster Jewel - if you can invest some extra cash into this build we recommend getting a Medium Cluster Jewel with Master of Fear and Wish for Death Passives. You basically gain Culling Strike and Unnerve enemies on hit when you get it, but it will most likely cost a couple of Exalted Orbs. |
Recommended affixes:
1 Added Passive Skill is Master of Fear
1 Added Passive Skill is Wish for Death
1 Added Passive Skill is Quick Gateway
1 Added Passive Skill is Basics of Pain
1 Added Passive Skill is Pressure Points |
 (Jewel) Thread of Hope - Thread of Hope creates rings where you can allocate passives separated from your Skill Tree. It also reduces Elemental Resistances which is great with Doryani's Prototype. (Jewel) Thread of Hope - Thread of Hope creates rings where you can allocate passives separated from your Skill Tree. It also reduces Elemental Resistances which is great with Doryani's Prototype. |
Only affects Passives in <size> Ring
Passives in Radius can be Allocated without being connected to your tree
-(20-10)% to all Elemental Resistances |
 (Jewel) Glorious Vanity - Allows you to convert one of the Keystone Passives to Corrupted Soul. It grants you ES and redistributes the damage you take to Maximum Life and ES equally. (Jewel) Glorious Vanity - Allows you to convert one of the Keystone Passives to Corrupted Soul. It grants you ES and redistributes the damage you take to Maximum Life and ES equally. |
Bathed in the blood of (100-8000) sacrificed in the name of (Ahuana-Doryani-Xibaqua)
Passives in radius are Conquered by the Vaal
Historic |
 (Jewel) Nadir Mode - if you can Cast the Spell faster than once every 0.5 seconds, and you lack Critical Strike Chance, it's a Jewels you can use (Jewel) Nadir Mode - if you can Cast the Spell faster than once every 0.5 seconds, and you lack Critical Strike Chance, it's a Jewels you can use |
(20-25)% increased Spell Damage
Spells have 30% increased Critical Strike Chance per Intensity
Spells which have gained Intensity Recently lose 1 Intensity every 0.5 Seconds |
 (Jewel) Melding of the Flesh - If you're able to withstand the reduction of Elemental Resistances, and your Maximum Resistance to one particular element is especially high, we recommend this Jewel. Great with Aegis Aurora and Doryani's Prototype. (Jewel) Melding of the Flesh - If you're able to withstand the reduction of Elemental Resistances, and your Maximum Resistance to one particular element is especially high, we recommend this Jewel. Great with Aegis Aurora and Doryani's Prototype. |
-(80-70)% to all Elemental Resistances
Elemental Resistances are capped by your highest Maximum Elemental Resistance instead |
 (Jewel) Watcher's Eye - we recommend getting a Watcher's Eye Jewel with double Zealotry or Zealotry + Wrath bonuses, which shouldn't cost a fortune, and grant simply a massive DPS bonus. (Jewel) Watcher's Eye - we recommend getting a Watcher's Eye Jewel with double Zealotry or Zealotry + Wrath bonuses, which shouldn't cost a fortune, and grant simply a massive DPS bonus. |
(4-6)% increased maximum Energy Shield
(4-6)% increased maximum Life
(4-6)% increased maximum Mana
<Two or Three random aura modifiers>
Recommended Aura modifiers:
Consecrated Ground you create while affected by Zealotry causes enemies to take (8-10)% increased Damage
(100-120)% increased Critical Strike Chance against Enemies on Consecrated Ground while affected by Zealotry
Critical Strikes Penetrate (8-10)% of Enemy Elemental Resistances while affected by Zealotry
(40-60)% increased Lightning Damage while affected by Wrath(40-60)% increased Lightning Damage while affected by Wrath
|
 (Jewel) Rare Jewels - just get Maximum Life, Attributes, Resistances, Crit Multiplier, and Spell Damage here. (Jewel) Rare Jewels - just get Maximum Life, Attributes, Resistances, Crit Multiplier, and Spell Damage here. |
Recommended affixes:
maximum Life
Global Critical Strike Multiplier / Critical Strike Multiplier with Elemental / Lightning Skills
Optional affixes:
Increased Spell/Area Damage
Elemental Resistances
Attributes |
 (Flask) Bottled Faith - the best Utility Flask for this build. It grants very high DPS by adding extra Crit. Chance (Flask) Bottled Faith - the best Utility Flask for this build. It grants very high DPS by adding extra Crit. Chance |
40% increased Damage
Creates Consecrated Ground on Use
(30-15)% reduced Duration
Consecrated Ground created by this Flask has Tripled Radius
Consecrated Ground created during Effect applies (7-10)% increased Damage taken to Enemies
(100-150)% increased Critical Strike Chance against Enemies on Consecrated Ground during Flask effect |
 (Flask) Rumi's Concoction - a great defensive Flask that increases your Chance to Block Spells and Attacks (Flask) Rumi's Concoction - a great defensive Flask that increases your Chance to Block Spells and Attacks |
+1500 to Armour
+(8-12)% Chance to Block Attack Damage during Flask effect
+(4-6)% Chance to Block Spell Damage during Flask effect |
Other suggested Flasks:
- Life Flask of Staunching for Bleed removal
- Diamond Flask with Immunity to Poison during Flask Effect
- Mana Flask with random ailment removal
|
   |
|
Buying PoE Currency with real money is a hassle-free way to get all the items you need for your character.
|
If you have any feedback about this build or suggestions for the next one, please let us know in the comments below!
Pictures used in this article are the intellectual property of Grinding Gear Games