Ignite Discharge
Elementalist Build
Updated for Patch 3.16
The Best Crafty Guides by Odealo
Estimated budget: high

| Guide notes |
February 25, 2021
-Build created
February 28, 2021
-Added gameplay video
December 1, 2021
-Updated for Patch 3.16 |
The Shaper of Flames Passive allows you to Ignite enemies will all types of damage, which synergizes extremely well with Discharge. Discharge deals base damage of all Elemental Types depending on the number of Frenzy/Power/Endurance Charges that you have, and it can deal massive damage if you aim at increasing their count. By utilizing specific Items, you can reach a total of over 20 Charges, greatly boosting the base damage of your Discharge. The Fire DoT from Ignites it inflicts, assuming you had all the Charges, can reach tens of Millions. You are also going to make them generate quickly by using Uniques like Voll's Devotion and Farrul's Fur - unleashing devastating explosions whenever Discharge is off cooldown. This is the most powerful Fire Damage over Time build we have ever played, but also one of the most expensive ones. The gear has to be specifically selected for this build with not much flexibility in that matter, making it quite costly and hard to build.
For the defenses, this build offers high and Evasion. Since you have to get all the specific Uniques and Passives, there is not really a more efficient way to prevent incoming damage. Combined with around 5,000 Maximum Life, and Bastion of Elements that absorbs Elemental Damage, it will give you enough survivability to face even the toughest Bosses in the game. It's not like you are going to be hit often with entire screens of enemies dying in under a second.
You can also check our other Path of Exile builds right here: Odealo's Crafty Guides - Full List
1. Gameplay
This is a very easy-to-play build, you just run around and cast Discharge whenever off cooldown. Each explosion will cover your entire screen, with the extra spread from Ignite Proliferation, even enemies that are not yet visible will die nearly instantly. With proper gear, all the enemies will die in under a second, and most Bosses will also melt during just one instance of Ignite. The gear on our character let us reach approximately tens of Million Ignite DoT. By killing enemies so quickly you don't really have to worry much about getting hit. You should have a decent Life pool, high Dodge and Evasion, and Bastion of Elements, so you can feel pretty comfortable taking some damage, but you should definitely avoid DoT/Area Effects like Burning Ground/Caustic Clouds, etc.
The main idea behind this build is to increase the number of all three types of Charges and generate them as quickly as possible. The most efficient way is to get Farrell's Fur which will grant a maximum number of Frenzy and Power Charges every 6 seconds. If you socket Less Duration and Awakened Awakened Swift Affliction Support Gems in the item that has your Aspect of the Cat affix, you can reduce that number to around 2.4 seconds. By using Voll's Devotion, whenever you Discharge and have your Power Charges consumed, you will generate your maximum number of Endurance Charges. If you count in charges gained meanwhile from Blood Rage and Power Charge in Critical Support Gem, you should have plenty of new Charges ready for a new Discharge.
|
This is an outdated video from the Ritual League - we plan to release an updated one in the following days
|
|
 
Odealo is a secure trading platform for MMO gamers. Here you can buy, sell, and trade PoE Currency for real cash.
|
2. Build's PROS & CONS
| PROS |
- MASSIVE AoE explosions
- insane DoT from Ignites (over 10kk at maximum Charges)
- easy to level up
- multi-layer defenses
- all content viable
- immunity to Damage Reflect
|
| CONS |
- very expensive
- requires a number of Specific Uniques and Items
|
3. Leveling tips
Leveling up a Witch/Elementalist is very easy. We recommend leveling up using Freezing Pulse and Frost Bomb which will deal tons of Cold Damage and offer decent AoE. Respeccing to Discharge will require you to actually get all the Items beforehand. It's pretty much a must-have to get all the specific Uniques to make it run properly, before then you will be better off playing a standard Spell Caster build. In most cases, you should be well into Maps before you switch to Discharge, in our case it was at level 90. Assuming you are creating your character from scratch for this build, you will find the recommended leveling setup below. This includes basic Spell setups for the campaign and low/mid Tier Maps, as well as several extremely useful low-level Uniques that will help you finish the campaign in no time.
Suggested leveling Gem setups:
| Freezing Pulse setup |
 |
Freezing Pulse - one of the best Spells for leveling. It fires long-range projectiles that deal higher damage the closer you are to your enemy. You should get the First Snow Threshold Jewel for it as soon as possible |
 |
Added Cold Damage Support - adds additional Cold Damage |
 |
Added Lightning Damage Support - adds high flat Lightning Damage |
 |
Faster Casting Support |
 |
Elemental Focus Support - greatly increases Elemental Damage dealt, and its one of the core Gems you will use on higher levels |
| Frost Bomb setup |
 |
Frost Bomb - creates a pulsing Sphere on the ground which deals a moderate amount of Damage with each tick and applies powerful Cold Exposure to enemies. It will work best against Bosses, but also provides some extra AoE damage against big packs of enemies |
 |
Bonechill Support - increases the effect of Chill and Cold Damage you deal to affected enemies |
 |
Hypothermia Support - greatly increases your Damage against Chilled enemies |
|
Added Cold Damage Support |
| Utility Gems |
 |
Clarity - grants increased Mana Regeneration which might be extremely useful on lower levels |
 |
Herald of Ice - the best Herald for this build as it grants damage bonus Cold damage and causes AoE explosions when you slay Frozen enemies |
 |
Dash - the best mobility skill for this build |
|
Frostbite - the recommended Curse for the leveling phase as it grants the highest bonus to your Cold DPS |
Bandits:
You should kill all the Bandits for two additional Passive Skill Points
Leveling Skill Trees:
38 Points Skill Tree
Priorities: 1) Frost Walker 2) Heart and Soul 3) Discipline and Training 4) Elemental Overload 5) Divine Judgement
75 Points Skill Tree
Priorities: 1) Devotion 2) Cruel Preparation 3) Elemental Focus 4) Heart of Ice
Level 85+ Points Skill Tree level 85 is approximately the minimum level when you should respect Discharge. At this point, you should have all the gear ready
Level 85+ Points Skill Tree the Tree after you swap to Discharge. It should include one Large Cluster Jewel and all the Passives from Intuitive Leap Jewels. After switching to Discharge, you are going to fill in the missing Passives on all the Cluster Jewels and do some minor adjustments depending on your character level.
Recommended leveling items:
 Goldrim - one of the best leveling Helmets in Path of Exile as it covers up basically all the needs for Elemental Resistances on lower levels Goldrim - one of the best leveling Helmets in Path of Exile as it covers up basically all the needs for Elemental Resistances on lower levels |
+(30-50) to Evasion Rating
10% increased Rarity of Items found
+(30-40)% to all Elemental Resistances
Reflects 4 Physical Damage to Melee Attackers
Level Requirement reduced by 100 (Hidden) |
|
 Axiom Perpetuum - one of the best leveling weapons for Spell Casters which adds a ton of flat Elemental Damage to your Spells Axiom Perpetuum - one of the best leveling weapons for Spell Casters which adds a ton of flat Elemental Damage to your Spells |
12% increased Elemental Damage
Adds (2-3) to (5-6) Fire Damage to Spells
Adds (2-3) to (5-6) Cold Damage to Spells
Adds 1 to (10-12) Lightning Damage to Spells
(4-6)% increased Cast Speed
(100-140)% increased Critical Strike Chance for Spells |
|
 Replica Prismweave - an amazing Belt that adds a lot of flat Damage to your Spells Replica Prismweave - an amazing Belt that adds a lot of flat Damage to your Spells |
(12-24)% increased Global Physical Damage
Adds (7-8) to (15-16) Fire Damage to Spells
Adds (5-6) to (12-14) Cold Damage to Spells
Adds 1 to (30-34) Lightning Damage to Spells
+(6-8)% to all Elemental Resistances
10% increased Elemental Damage
30% increased Elemental Damage during any Flask Effect |
|
 Praxis - one of the best Spell-Caster leveling Rings which reduces the Mana Cost of all Spells allowing you to freely cast them even if you use Freezing Pulse in a six linked Tabula Rasa Praxis - one of the best Spell-Caster leveling Rings which reduces the Mana Cost of all Spells allowing you to freely cast them even if you use Freezing Pulse in a six linked Tabula Rasa |
+(20-25) to maximum Mana
+(30-60) to maximum Mana
(3-6) Mana Regenerated per second
-(8-4) to Mana Cost of Skills
8% of Damage taken gained as Mana over 4 seconds when Hit |
 Victario's Flight - a great pair of Boots that offers very high bonus Movement Speed, Mana Recovery, and extra Attributes Victario's Flight - a great pair of Boots that offers very high bonus Movement Speed, Mana Recovery, and extra Attributes |
+15 to Dexterity
+15 to Intelligence
(100-150)% increased Evasion Rating
15% increased Movement Speed
(5-10)% of Damage taken gained as Mana over 4 seconds when Hit
10% increased Movement Speed for you and nearby Allies |
|
4. Final Skill Tree, Ascendancy Points, and Pantheon
Final Skill Tree:
105 Points Skill Tree (doesn't include Passives from Cluster Jewel and Intuitive Leap)
123 Points Path of Building(PoB) link (includes all Passives and Items)
Ascendancy points:
Preferably in that order:
- Mastermind of Discord
- Heart of Destruction
- Bastion of Elements
- Shaper of Flames
Pantheon:
Major God: Soul of Solaris 6% additional Physical Damage Reduction while there is only one nearby Enemy; 20% chance to take 50% less Area Damage from Hits
Minor God: Soul of Gruthkul 1% additional Physical Damage Reduction for each Hit you've taken Recently up to a maximum of 5%
5. Final Gems links
| [DPS] Discharge |
 |
Discharge - the primary Spell for this build which consumes all your Charges while Cast dealing base damage equal to the number of charges consumed that way. In this build, it has to best self-cast, and all the Support Gems are selected to increase the Ignite DPS it deals, while base damage is increased by maximizing the number of charges you have ready for each cast |
 |
Burning Damage Support - core Support Gems for all Ignite builds. It's recommended to pick up the Awakened variant of this Gem |
 |
Swift Affliction Support - increases the Damage over Time caused by linked Spells. It also has an Awakened version |
 |
Deadly Ailments Support - greatly increases the damage you deal with Ailments, including Ignite. It also has Awakened ver. |
 |
Unbound Ailments Support - just like above, affects the damage you deal with Ailments. The Awakened version is available here once again |
 |
Ignite Proliferation Support - increases the damage you deal with Ignite, and also makes it spread to nearby enemies greatly increasing your area coverage |
| [UTILITY] Storm Brand |
 |
Storm Brand - a very important Utility Skill in this build. You can use a low-level one so that it's triggered more often by a level 1 Cast when Damage Taken. Storm Brand will generate Power Charges, apply a second Curse, and trigger Elemental Overload (without it, the buff is pretty inconsistent) |
 |
Cast when Damage Taken Support - use a level 1 Gem for more frequent Casts of Storm Brand |
 |
Awakened Hextouch Support - allows you to apply a second Curse via Storm Brand (assuming you have Flammability applied by your Ring) |
 |
Elemental Weakness - the second-best Curse for this build which reduces Elemental Resistances of affected enemies |
 |
Culling Strike Support - makes it possible to execute enemies that have less than 10% of Maximum Life |
 |
Combustion Support - enemies Ignited by Storm Brand will have their Fire Resistance reduced |
| [UTILITY] Auras |
 |
Malevolence - grants high Damage over Time Multiplier making it the best Aura for this build. It also allows you to use powerful Watcher's Eye Jewel with extra Malevolence-related bonuses |
 |
Summon Skitterbots - summons two invincible Minions that will Chill and Shock nearby enemies |
 |
Enlighten Support - reduces the Mana Reservation cost of linked Spells |
| [UTILITY] Immortal Call |
|
Cast when Damage Taken Support - it will trigger an Immortal Call whenever you take a certain amount of damage. Keep this Gem on level 5 in this setup |
 |
Immortal Call - grants a brief but very strong damage reduction buff. Keep this Gem at level 7 |
| [UTILITY] Dash |
|
Dash - the recommended Movement Skill for this build. It allows you to progress faster through Maps and avoid heavy damage |
 |
Second Wind Support - increases the Cooldown Recovery Speed of linked spells and adds an additional charge to Dash |
| [UTILITY] Blood Rage |
 |
Blood Rage - killing enemies will let you generate Frenzy Charges quickly |
[UTILITY] Reducing duration of Aspects
(in the Item with Aspect of the Cat crafted) |
 |
Less Duration Support - the reduces the duration of Aspect of the Cat, which causes the effects of Farrul's Fur to proc at a much higher frequency |
|
Swift Affliction Support - another Gem that lets you reduce the Duration of Aspects. You can try getting Awakened Gem here as well. Even though Aspects don't deal any damage, the Awakened Gem has a higher value on the Skill Effect Duration mod |
| [UTILITY] Wave of Conviction |
 |
Wave of Conviction - is used to apply Exposure to enemies. It can be either triggered by a low-level Cast when Damage Taken, or Cast manually after supporting it with Faster Casting |
|
Cast when Damage Taken Support - again, use a level 1 here for most frequent casts |
[UTILITY] Flammability
(Ring affix) |
 |
Flammability - the best Curse for this build which has to be applied by a Ring affix in our recommended setup |
|
Odealo supports player-to-player trading for the Path of Exile Currency, Orbs, and Unique Items. Buying from regular players on Odealo guarantees the best prices and highest security of every transaction.
|
5. Gear Setup
Below you will find the recommended gear for our Ignite Discharge Elementalist build. This is quite an expensive build that doesn't leave much space for inventions. You are required to pick specific Uniques in many of the equipment slots, and you have a bunch of extremely important modifiers on Rare equipment as well. We are also going to include information on how to maximize the number of your Charges, though some of the items may cost as much as our base build in total, just for a single piece (like the Fractured Rings for example). Still, this build isn't meant to be played on a budget, so be prepared to spend tens of Exalted Ors on it, in the best-case scenario.
|
Stat priorities on items:
- Elemental Resistances
- Maximum Life
- Maximum Frenzy/Power/Endurance Charges
- Fire Damage over Time Multiplier
- Spell Damage/Damage/Damage over Time
|
 (Helmet) Rare Helmet - the BiS. It shouldn't be hard to get one with Life and +1 to Maximum Power Charges where you can Beast craft Aspect of the Cat. The best possible Item would be a corrupted one with a second Power Charge from Implicit Modifier, but this can be outrageously expensive (Helmet) Rare Helmet - the BiS. It shouldn't be hard to get one with Life and +1 to Maximum Power Charges where you can Beast craft Aspect of the Cat. The best possible Item would be a corrupted one with a second Power Charge from Implicit Modifier, but this can be outrageously expensive |
Recommended affixes:
70 Maximum Life
+1 to Maximum Power Charges
Grants level 20 Aspect of the Cat Skill
Optional affixes:
Elemental Resistances
Attributes
+1 to Maximum Power Charges (Corrupted Implicit) |
Helmet enchantment:
Discharge has +5 to Radius |
 (Body Armour) Farrul's Fur - a must-have Body Armour that lets you instantly generate your Maximum Frenzy and Power Charges every 2.5 seconds. It also grants extra Life and Phasing (Body Armour) Farrul's Fur - a must-have Body Armour that lets you instantly generate your Maximum Frenzy and Power Charges every 2.5 seconds. It also grants extra Life and Phasing |
(100-150)% increased Armour and Evasion
+(80-100) to maximum Life
Aspect of the Cat Reserves no Mana
+2 seconds to Cat's Stealth Duration
Gain up to your maximum number of Frenzy and Power Charges when you gain Cat's Stealth
You have Phasing while you have Cat's Stealth |
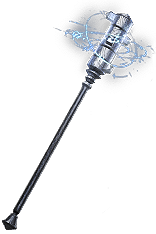
 (Weapon) Rare Capacity Rod - the best possible base for the Weapon as it grants two extra total Charges from its implicit modifier. Other than that you obviously want a Fire DoT multiplier and some extra Spell/Fire Damage bonuses (Weapon) Rare Capacity Rod - the best possible base for the Weapon as it grants two extra total Charges from its implicit modifier. Other than that you obviously want a Fire DoT multiplier and some extra Spell/Fire Damage bonuses |
Recommended affixes:
40% Fire Damage over Time Multiplier
+2 to Level of All Fire Spell Skill Gems
Optional affixes:
Fire/Spell Damage
Damage over Time |
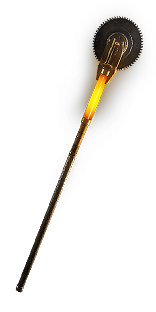
 (Weapon) The Searing Touch - this will obviously work in this build, though it doesn't get close to the best Crafted Rares. It's like a budget alternative in a completely non-budget build, but it surely does work okay here (Weapon) The Searing Touch - this will obviously work in this build, though it doesn't get close to the best Crafted Rares. It's like a budget alternative in a completely non-budget build, but it surely does work okay here |
+18% Chance to Block Attack Damage while wielding a Staff
+2 to Level of all Fire Spell Skill Gems
(70-90)% increased Fire Damage
10% increased Cast Speed
+(40-60)% to Fire Damage over Time Multiplier |
 (Weapon) Cane of Kulemak - it's potentially a decent choice for the build, given that all of the Veiled Mods are of some value (Weapon) Cane of Kulemak - it's potentially a decent choice for the build, given that all of the Veiled Mods are of some value |
+20% Chance to Block Attack Damage while wielding a Staff
(60–90)% increased Unveiled Modifier magnitudes
Veiled Prefix
Veiled Suffix
Veiled Prefix |
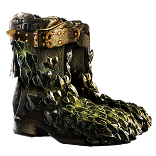 (Boots) Darkray Vectors - pick a Corrupted pair with an extra Endurance Charge, giving you a total of two extra Charges, and increasing your Dodge via Frenzy Charges (Boots) Darkray Vectors - pick a Corrupted pair with an extra Endurance Charge, giving you a total of two extra Charges, and increasing your Dodge via Frenzy Charges |
(40-70)% increased Armour and Evasion
+(20-40)% to Lightning Resistance
5% increased Movement Speed per Frenzy Charge
+1 to Maximum Frenzy Charges
40% reduced Frenzy Charge Duration
25% reduced Light Radius
2% chance to Dodge Attack Hits per Frenzy Charge |
Boot Enchantment:
80% chance to Avoid being Stunned if you've Killed Recently
Damage Penetrates 10% of Enemy Elemental Resistances if you haven't Killed Recently |
 (Belt) Stygian Vise - the best option for this build. Get as much Life here as possible, and some extra Resistances (Belt) Stygian Vise - the best option for this build. Get as much Life here as possible, and some extra Resistances |
Recommended affixes:
110 Maximum Life
10% Maximum Life
80% Total Elemental Resistances
Optional affixes:
Increased Damage |
 (Amulet) Voll's Devotion - another must-have item for this build that lets you instantly generate Endurance Charges when your Power Charges are consumed by Discharge (Amulet) Voll's Devotion - another must-have item for this build that lets you instantly generate Endurance Charges when your Power Charges are consumed by Discharge |
+(16-24) to Strength and Intelligence
+(20-30) to maximum Energy Shield
+(30-40) to maximum Life
+(15-20)% to all Elemental Resistances
30% reduced Endurance Charge Duration
30% reduced Power Charge Duration
Gain an Endurance Charge when you lose a Power Charge |
Recommended Anointments:
Savagery |
 (Ring) Rare Rings - Rings should provide extra Life and Resistances. Since you have a lot of Uniques in this build, you will surely primarily focus on the latter. Also, you should have Flammability Curse on one of the Rings, and if you are looking to spend Mirrors+ on this build, you can get Fractured Rings with +1 to Maximum Frenzy Charges as well (Ring) Rare Rings - Rings should provide extra Life and Resistances. Since you have a lot of Uniques in this build, you will surely primarily focus on the latter. Also, you should have Flammability Curse on one of the Rings, and if you are looking to spend Mirrors+ on this build, you can get Fractured Rings with +1 to Maximum Frenzy Charges as well |
Recommended affixes:
60 Maximum Life
100% Total Elemental Resistances
Curse Enemies with Flammability on Hit, with 20% increased Effect
Optional affixes:
+1 to Maximum Frenzy Charges (Fractured)
Attributes |
 (Gloves) Rare Gloves - you should look for a pair with an extra Frenzy Charge and a chance to generate your Maximum Frenzy Charges when you gain Frenzy Charges. Other than that, just get extra Life and Resistances (Gloves) Rare Gloves - you should look for a pair with an extra Frenzy Charge and a chance to generate your Maximum Frenzy Charges when you gain Frenzy Charges. Other than that, just get extra Life and Resistances |
Recommended affixes:
60 Maximum Life
+1 to Maximum Frenzy Charges
10% chance that if you would gain Frenzy Charges, you instead gain up to your maximum number of Frenzy Charges
Optional affixes:
Spell Damage/Damage over Time
Elemental Resistances
Attributes |
 (Jewel) Large Cluster Jewel - you are going to use two Large Cluster Jewels in this build as Medium Cluster Jewels are one of the best ways to maximize Ignite DPS (which you want 4 of eventually) (Jewel) Large Cluster Jewel - you are going to use two Large Cluster Jewels in this build as Medium Cluster Jewels are one of the best ways to maximize Ignite DPS (which you want 4 of eventually) |
Recommended affixes:
1 Added Passive Skill is Burning Bright
1 Added Passive Skill is Doryani's Lesson
1 Added Passive Skill is Widespread Destruction
1 Added Passive Skill is Cremator (just once)
1 Added Passive Skill is Smoking Remains (just once) |
 (Jewel) Medium Cluster Jewel - you are going to use four Medium Cluster Jewels. Just aim for the highest Fire DoT Multiplier bonuses here (Jewel) Medium Cluster Jewel - you are going to use four Medium Cluster Jewels. Just aim for the highest Fire DoT Multiplier bonuses here |
Recommended affixes:
1 Added Passive Skill is Blowback
1 Added Passive Skill is Burning Bright |
 (Jewel) Intuitive Leap - you can socket it near Instability and allocate Notables such as Deep Thoughts, Enigmatic Defense, and Mystic Bulwark (Jewel) Intuitive Leap - you can socket it near Instability and allocate Notables such as Deep Thoughts, Enigmatic Defense, and Mystic Bulwark |
| Passives in Radius can be Allocated without being connected to your tree |
 (Jewel) Watcher's Eye - allows you to get very powerful DoT Aura modifiers while you are affected by Malevolence (Jewel) Watcher's Eye - allows you to get very powerful DoT Aura modifiers while you are affected by Malevolence |
(4-6)% increased maximum Energy Shield
(4-6)% increased maximum Life
(4-6)% increased maximum Mana
<Two or Three random aura modifiers>
Recommended Aura modifiers:
+(18-22)% to Damage over Time Multiplier while affected by Malevolence
Damaging Ailments you inflict deal Damage (10-15)% faster while affected by Malevolence |
 (Jewel) Anatomical Knowledge - can be socketed to the right of Witch's Starting Point for some extra Life. It's a great way to get a cheap immunity to Corrupted Blood. If you don't have that implicit, you will be better off with a standard Cobalt Jewel with Fire DoT Multiplier and Extra Life (Jewel) Anatomical Knowledge - can be socketed to the right of Witch's Starting Point for some extra Life. It's a great way to get a cheap immunity to Corrupted Blood. If you don't have that implicit, you will be better off with a standard Cobalt Jewel with Fire DoT Multiplier and Extra Life |
(6-8)% increased maximum Life
Adds 1 to Maximum Life per 3 Intelligence Allocated in Radius |
 (Jewel) Rare Abyss Jewel - you can get extra Life/Resistances here and a chance to Hinder enemies on Spell Hits (Jewel) Rare Abyss Jewel - you can get extra Life/Resistances here and a chance to Hinder enemies on Spell Hits |
Recommended affixes:
maximum Life
Chance to Hinder enemies on Spell hit
Optional affixes:
Increased Damage if you've Killed Recently
Elemental Resistances |
 (Jewel) Rare Jewels - just get Maximum Life, Fire DoT Multiplier, and some additional optional bonuses like for example Spell Damage (Jewel) Rare Jewels - just get Maximum Life, Fire DoT Multiplier, and some additional optional bonuses like for example Spell Damage |
Recommended affixes:
maximum Life
Fire Damage over Time Multiplier
Optional affixes:
Increased Spell Damage/Damage over Time
Attributes |
 (Flask) Atziri's Promise - grants a lot of extra Chaos Damage, which can also Ignite enemies thanks to the Shaper of Flames Passive (Flask) Atziri's Promise - grants a lot of extra Chaos Damage, which can also Ignite enemies thanks to the Shaper of Flames Passive |
+35% to Chaos Resistance
2% of Chaos Damage Leeched as Life during Flask effect
Gain (15-20)% of Physical Damage as Extra Chaos Damage during effect
Gain (10-15)% of Elemental Damage as Extra Chaos Damage during effect |
 (Flask) Cinderswallow Urn - grants high bonus Damage, Onslaught, and Life/Mana Recovery which boosts your defenses as well (Flask) Cinderswallow Urn - grants high bonus Damage, Onslaught, and Life/Mana Recovery which boosts your defenses as well |
Onslaught
Recharges 1 Charge when you Consume an Ignited corpse
Enemies Ignited by you during Flask Effect take 10% increased Damage
Recover (1-3)% of Life when you Kill an Enemy during Flask Effect
Recover (1-3)% of Mana when you Kill an Enemy during Flask Effect
Recover (1-3)% of Energy Shield when you Kill an Enemy during Flask Effect
Veiled Suffix |
 (Flask) Rumi's Concoction - it's the least important Unique Flask, it grants more Armour and Chance to Block Hits (Flask) Rumi's Concoction - it's the least important Unique Flask, it grants more Armour and Chance to Block Hits |
+(8-12)% Chance to Block Attack Damage during Flask effect
+(4-6)% Chance to Block Spell Damage during Flask effect |
Other suggested Flasks:
- Bubbling Divine Life Flask of Staunching (Bleeding Immunity)
- Experimenter's Quartz of Warding (Curse immunity)
- Ample Quicksilver Flask of Heat (Freeze immunity)
|
   |
|
Buying PoE Currency with real money is a hassle-free way to get all the items you need for your character.
|
If you have any feedback about this build or suggestions for the next one, please let us know in the comments below!
Pictures used in this article are the intellectual property of Grinding Gear Games