Purifying Flame
Miner Saboteur build
Updated for Patch 3.14
The Best Crafty Guides by Odealo
Estimated budget: low to medium

| Guide notes |
April 28, 2021
-Build created
May 11, 2021
-Added link to the end-game Low-Life variation of this build
May 12, 2021
-Added gameplay video |
FOR THE LOW-LIFE/ENERGY SHIELD VARIATION OF THIS BUILD PLEASE CHECK:
Purifying Flame Low-Life Saboteur
Purifying Flame is one of the most beginner-friendly mine-based builds currently in the game, it’s cheap when it comes to getting mandatory equipment and its overall high damage not only to single targets but also packs of mobs makes it one of the strongest contestants for a league-starter. There are many variations of this build, even the gear stated as mandatory is not really required, but for the sake of simplicity, it will be declared as such in the version I’m about to present. Consecrated Ground – a mechanic inherent to this skill elevates the survivability of the character, whilst it also provides a huge damage bonus – 6% of Maximum Health regenerated per second and 100% Increased Critical Strike Chance against enemies standing on it. The main quirk that makes this build stand out from other generic mine builds is the necessity to venture to the left side of the skill tree – it is a crucial condition shared among all the variations of this build and will be explained later in the guide.
For a Saboteur to use Purifying Flame might be counter-intuitive at first, for all the notable nodes increasing Fire and Physical Damage are on the opposite side from the Shadow’s starting location on the skill tree, however, the fact that that we’re using it with Multiple Mines makes each mine explosion deal damage to all the enemies standing on the Consecrated Ground – created by other mines. It’s just the Shadow’s ascendancy – Saboteur that makes it all worth the trouble. This mechanic makes this build one of the best clearing mine builds.
You can also check our other Path of Exile builds right over here Best PoE Builds by Odealo
1. Gameplay
For people already acquainted with the Mine or even - Trap builds, no introduction on how to play it is really needed, it plays like a standard mine build. The key element to smooth clearing is to have a “Detonate Mines” on left-click (or any other key that is used for walking). It’s a white skill gem one can get from Lilly Roth in act 6. Of course, some people prefer to have an option to stay still while throwing mines, or to throw mines in the direction they’re not moving - mainly for boss fights sequences. Standing on Consecrated Ground - as mentioned before - increases your health regeneration so it’s good to keep that in mind.
|
This video was recorded on a level 91 Saboteur on Standard League wearing Kaom's Heart, Tremor Rod, Circle of Anguish, and random Rares. It allowed us to smoothly farm most of the content including Guardians and Shaper
|
|
 
Odealo is a secure trading platform for MMO gamers. Here you can buy, sell, and trade PoE Currency for real cash.
|
2. Build's PROS & CONS
| PROS |
- insane DPS both single-target and AoE
- versatile
- cheap and straightforward
- great as a League Starter build
- Saboteur's defensive layers
|
| CONS |
- despite being one of the smoothest Mine builds, for some, it might still be too clunky
- as with every other popular build - high-end gear requires tons of currency
|
3. Leveling tips
Before you’re able to reach fire nodes on the Skill Tree, you can use any mine really, especially skills with an innate “mine” tag, granting you one extra Support Gem slot by removing the need for the required “Blastchain Mine Support”. Self-casting Purifying Flame is a bad idea for you will start picking up Mine Damage nodes early on anyway. By the time you reach level 41 - the level required to wield Tremor Rod - a unique staff, the weapon of your choice should have added Mine or Spell Damage correlating to the type of Spell Damage your mines are dealing (mines are also spells). And as with every other build, do not neglect the defensive layers, especially after act 6. If more damage is needed - use a Brand Skill with Hextouch and Curse (Hex). For movement use Flame Dash. If you own Tabula Rasa, at level 8 you can already link Gems as listed below.
Suggested leveling Gem setups:
| Purifying Flame setup |
 |
Purifying Flame - the core Spell used in this build. It can be used from level 1 so initially, you can simply self-cast that Spell |
 |
Blastchain Mine Support - allows you to throw Mines that will cast Purifying Flame when triggered making it one of the core Support Gems in this build |
 |
Added Fire Damage Support - adds a ton of extra Fire Damage based on Purifying Flame's base Physical DPS |
 |
Trap and Mine Damage Support - significantly increases the damage of Traps and Mines |
 |
Concentrated Effect Support - this Gem grants a massive DPS buff but reduces the radius of linked Spell |
| Armageddon Brand/Storm Brand setup |
 |
Armageddon Brand - it's a good idea to use an alternative source of damage while leveling to boost your overall DPS output. Using one of the Brands is recommended |
 |
Hextouch Support - your Brand will apply your Curse during leveling, increasing your DPS |
 |
Flammability - the recommended Curse for this build |
 |
Combustion Support - enemies Ignited by your Brand will have reduced Fire Resistance |
| Utility Gems |
 |
Clarity - Mana management can get tricky on lower levels so it's best to fix it by using Clarity Aura |
 |
Herald of Ash - the best Herald for this build which adds a ton of extra Fire Damage |
 |
Flame Dash - the recommended Mobility Spell used in this build |
 |
Summon Skitterbots - summon two invincible Minions that increase your Mine's Damage and have Chilling and Shocking Auras |
Bandits:
We recommend killing all the Bandits for two additional Passive Points is an okay option
Leveling Skill Trees:
36 Points Skill Tree
Priorities: Go for Volatile Mines cluster and then the big Mines and Traps cluster on the right grabbing other very useful notables on the way
57 Points Skill Tree
Priorities: After that head for the Phase Acrobatics Keystone, and then Wind Dancer Keystone. Grab nearby notables with Maximum Life
71 Points Skill Tree
Priorities: The next step is getting the Avatar of Fire and there are many viable paths to reach it. The bottom one I pictured is the most common due to Mana and Spell Damage, but you are very welcome to consider other options
Recommended leveling items:
 Praxis - one of the best leveling Rings for this build which reduces the base Mana Cost of all your Spells. It will help you freely use all the different Spells that you want to use to maximize your DPS Praxis - one of the best leveling Rings for this build which reduces the base Mana Cost of all your Spells. It will help you freely use all the different Spells that you want to use to maximize your DPS |
+(20-30) to maximum Mana
+(30-60) to maximum Mana
Regenerate (3-6) Mana per second
-(8-4) to Total Mana Cost of Skills
8% of Damage taken gained as Mana over 4 seconds when Hit |
|
 Wanderlust - another unique very common during leveling phase, cheap, grants Movement Speed and Mana regen and immunity to Freeze Wanderlust - another unique very common during leveling phase, cheap, grants Movement Speed and Mana regen and immunity to Freeze |
(10-30)% increased Damage
+(10-30) to all Attributes
(10-30)% increased Rarity of Items found
+(10-30)% to all Elemental Resistances |
|
 Goldrim - one of the best leveling Helmets in PoE which solves all your Resistances issues on lower levels Goldrim - one of the best leveling Helmets in PoE which solves all your Resistances issues on lower levels |
+(30-50) to Evasion Rating
10% increased Rarity of Items found
+(30-40)% to all Elemental Resistances
Reflects 4 Physical Damage to Melee Attackers
Level Requirement reduced by 100 (Hidden) |
|
 Tabula Rasa - key item for leveling characters, provides 6 linked Sockets Tabula Rasa - key item for leveling characters, provides 6 linked Sockets |
Item has no level requirement and Energy Shield (Hidden)
Item has 6 White Sockets and is fully linked (Hidden) |
|
Useful Vendor Recipes:
- White Boots + Quicksilver Flask + Orb of Augmentation = Magic Boots with 10% increased Movement Speed. To get past leveling phase quickly it is vital to have high Movement Speed
- Magic Sceptre/Wand/Rune Dagger + Ruby Ring + Orb of Alteration = Magic Weapon with added x Fire Damage to Spells. Whereas a Magic Weapon like that will be very useful before getting your hands on Tremor Rod, moreover, all the components needed can be bought in Act 1. Different Rings provide different type of Elemental Damage: Topaz Ring - Lightning Damage, Sapphire Ring - Cold Damage
4. Final Skill Tree, Ascendancy Points, and Pantheon
Final Skill Tree:
117 Points Final Skill Tree
117 Points PoB pastebin link
Ascendancy points:
Preferably in that order:
- Bomb Specialist
- Pyromaniac
- Born in the Shadows
- Explosives Expert
Pantheon:
Major God: Soul of the Brine King You cannot be Stunned if you've been Stunned or Blocked a Stunning Hit in the past 2 seconds
Minor God: Soul of Garukhan for +5% chance to Evade Attack Hits if you've taken a Savage Hit Recently
5. Final Gems links
[DPS] Purifying Flame Mines
(Socketed in Tremor Rod) |
|
Purifying Flame - the Skill this build is centered around. It will be cast by Mines for increased Damage and frequency. Purifying Flame in this setup has 100% of its base Physical Damage converted to Fire |
|
Trap and Mine Damage Support - obvious choice, provides a lot of damage for a price of Mine Throwing Speed |
 |
Minefield Support - allows you to throw more Mines, which is great, but you can also pick Swift Assembly instead if you value clearing speed more, but I do not recommend it |
 |
Charged Mines Support - great Support Gem on its own that allows you to generate Power and Frenzy Charges in this build. It makes you want to pick up additional Charges nodes, but it is not necessary. The basic 3 are enough. |
 |
Inspiration Support - as previously stated in the skill tree section - Mana is a valuable resource, this Gem makes your Skills cheaper to cast, and with the increases to Critical Strike Chance and Elemental Damage, it’s just perfect |
|
Added Fire Damage Support - elevates your damage by a lot, keep in mind that you can also replace it with Combustion Support only if you’re not using it already on a Brand. It's best to use an Awakened version of this Gem |
| Gems granted by Tremor Rod: |
|
Level 10 Blastchain Mine Support - it comes free with Tremor Rod unique affix, making the build 7-linked |
| [UTILITY] Arcanist Brand |
 |
Arcanist Brand - a Brand Spell that will trigger all linked Spells when cast, applying your Curse and various debuffs on enemies |
 |
Wave of Conviction - inflicts Fire Exposure to enemies, reducing their Fire Resistance |
|
Flammability - the recommended Curse that lowers enemies' Fire Resistance and increases your chance to ignite |
|
Combustion Support - enemies Ignited by Wave of Conviction will have further reduced Fire Resistance thanks to Combustion debuff |
| [UTILITY] Auras |
|
Clarity - grants additional help with the Mana issues that can arise when playing this build |
|
Herald of Ash - grants more Fire Damage which is very important in this build |
|
Summon Skitterbots - more Mine Damage, also a very important Mana Reservation Spell for pretty much all Mine builds |
 |
Enlighten Support - decreases the amount of Reserved Mana |
| [UTILITY] Flame Dash |
 |
Arcane Surge Support - use a level 7 Arcane Suport so that each cast of Flame Dash grants you increased Spell Damage, Cast Speed, and Mana Regen |
 |
Faster Casting Support - increases your travel speed with Flame Dash |
|
Flame Dash - the recommended mobility Skill for this build. It allows you to progress faster through Maps and avoid heavy damage |
| [UTILITY] Steelskin |
 |
Steelskin - the best Guard Spell for this build which grants a protective shield that absorbs some of the incoming damage. Use whenever off cooldown |
|
On Odealo dozens of sellers compete for your attention. Buying PoE Currency here guarantees the best prices, prompt delivery, and the best quality of service.
|
5. Gear Setup
In this section, you will find the recommended Items for our Purifying Flame Miner Saboteur Build. This build should be quite easy to set up as it requires only a few specific Uniques. This guide shows the Life version build, it is more accessible and can be later converted to Energy Shield which offers much higher damage thanks to using multiple powerful Spell DPS Auras with increased effectiveness.
Our recommended items will:
- Cap your resistances
- Give you enough DPS/Life to start mapping successfully
|
Stat priorities on items:
- Elemental Resistances
- Maximum Life
- Mine Damage
- Mine Throwing Speed
- Mana Regen
- Increased Spell Damage
- Critical Strike Chance
- Added Physical and Fire Damage to Spells
- Physical to Fire Damage Conversion
- DO NOT look for Attack Damage/Speed, it grants you nothing
|
 (Helmet) Rare Helmet - there is no good Unique helmet for this build, target the affixes prioritized above. Try to fill it with as many Resistances and Maximum Life as possible for these come in great quantities on a Helmet slot. (Helmet) Rare Helmet - there is no good Unique helmet for this build, target the affixes prioritized above. Try to fill it with as many Resistances and Maximum Life as possible for these come in great quantities on a Helmet slot. |
Min. requirements:
80 Maximum Life
80% Total Elemental Resistances
Optional affixes:
Critical Strike Multiplier
Nearby enemies have -#% Fire Resistance
Attributes |
Helmet enchantments:
Purifying Flame deals 40% increased Damage
Consecrated Ground from Purifying Flame applies 9% increased Damage taken to Enemies |
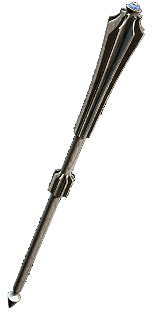 (Weapon) Tremor Rod - easy choice – every affix is extremely useful, there is no substitution for this Staff (Weapon) Tremor Rod - easy choice – every affix is extremely useful, there is no substitution for this Staff |
+18% Chance to Block Attack Damage while wielding a Staff
+2 to Level of Socketed Spell Gems
Socketed Gems are Supported by Level 10 Blastchain Mine
(40-60)% increased Spell Damage
(15-20)% reduced Enemy Stun Threshold
Mines can be Detonated an additional time |
 (Body Armour) Rare Armor - just aim for the highest Life/Resistances if you can't afford/obtain Kaom's Heart. Sockets are irrelevant if you have Tremor Rod already equipped (Body Armour) Rare Armor - just aim for the highest Life/Resistances if you can't afford/obtain Kaom's Heart. Sockets are irrelevant if you have Tremor Rod already equipped |
Min. requirements:
100 Maximum Life
10% Maximum Life
Optional affixes:
Elemental Resistances
Socketed Spells have +#% to Critical Strike Chance |
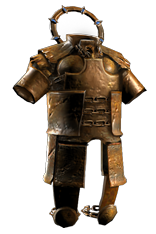
 (Body Armour) Kaom's Heart - the most preferable Body Armour, gives a lot of Life and Fire Damage. (Body Armour) Kaom's Heart - the most preferable Body Armour, gives a lot of Life and Fire Damage. |
Has no Sockets
(20-40)% increased Fire Damage
+500 to maximum Life |
 (Boots) Rare Boots - the exact same case as with Helmet, additionally aim for Movement Speed - up to 30%. Tailwind is one of the most valuable and rare mods in this slot, plan for it at the late stages of the game. (Boots) Rare Boots - the exact same case as with Helmet, additionally aim for Movement Speed - up to 30%. Tailwind is one of the most valuable and rare mods in this slot, plan for it at the late stages of the game. |
Min. requirements:
70 maximum Life
70% Total Elemental Resistances
30% Movement Speed
Optional affixes:
You have Tailwind if you have dealt a Critical Strike Recently |
Boot enchantment:
10% Chance to Dodge Attack Hits if you've taken a Critical Strike Recently
70% increased Mana Regeneration Rate if you've cast a Spell Recently |
 (Gloves) Rare Gloves - again, always a solid pick when you are just starting Maps. Look for high defensive stats (Gloves) Rare Gloves - again, always a solid pick when you are just starting Maps. Look for high defensive stats |
Min. requirements:
90 maximum Life
70% Total Elemental Resistances
Optional affixes:
Spell Damage
Attributes |
 (Gloves) Machina Mitts - Unique Gloves, highly recommended, especially with Charged Mines Support Gem. Increased Evasion and ES is a solid defense layer, as much as Life Leech from Mines. To further utilize the advantage provided by Power Charges - opt for more Maximum Power Charges on the Skill Tree (Gloves) Machina Mitts - Unique Gloves, highly recommended, especially with Charged Mines Support Gem. Increased Evasion and ES is a solid defense layer, as much as Life Leech from Mines. To further utilize the advantage provided by Power Charges - opt for more Maximum Power Charges on the Skill Tree |
(200-250)% increased Evasion and Energy Shield
1% of Damage dealt by your Mines is Leeched to you as Life
(30-20)% reduced Recovery rate of Life and Energy Shield
5% increased Recovery rate of Life and Energy Shield per Power Charge
Lose a Power Charge each second if you have not Detonated Mines Recently |
 (Belt) Rare Belt - the best option for this build. Aim to the highest possible Life bonus and some extra Resistances (Belt) Rare Belt - the best option for this build. Aim to the highest possible Life bonus and some extra Resistances |
Min. requirements:
100 Maximum Life
10% Maximum Life
Optional affixes:
Elemental Resistances
Attributes
Global Physical Damage/Elemental Damage |
 (Amulet) Rare Amulet - aim for Resistances, Critical Strike-related affixes, Increased Elemental Damage, Area of Effect, and Area Damage (Amulet) Rare Amulet - aim for Resistances, Critical Strike-related affixes, Increased Elemental Damage, Area of Effect, and Area Damage |
Min. requirements:
70 maximum Life
30% Global Critical Strikes Multiplier
Optional affixes:
Increased Area of Effect/Area Damage
Increased Fire Damage
Attributes
Elemental Resistances |
 (Amulet) Xoph's Blood - very expensive option, but the stats make up for its price, it gives Strength, Maximum Life, Fire Resistance, Fire Penetration, and Covers Enemies in Ash making them take more Fire Damage and Slowing them. It also grants Avatar of Fire, which gives you extra Skill Point or can completely alter your Skill Tree, granting a lot of new possibilities - if you feel comfortable experimenting (Amulet) Xoph's Blood - very expensive option, but the stats make up for its price, it gives Strength, Maximum Life, Fire Resistance, Fire Penetration, and Covers Enemies in Ash making them take more Fire Damage and Slowing them. It also grants Avatar of Fire, which gives you extra Skill Point or can completely alter your Skill Tree, granting a lot of new possibilities - if you feel comfortable experimenting |
+(20-30) to Strength
10% increased maximum Life
+(20-40)% to Fire Resistance
10% increased Strength
Damage Penetrates 10% Fire Resistance
Cover Enemies in Ash when they Hit you
Avatar of Fire |
Recommended Anointments:
Efficient Explosives |
 (Ring) Rare Rings - basically look for high bonus Life and Resistances. If needed also get Attributes here. If Mana costs is still an issue try crafting Reduced Mana Cost for Non-Channeling Skills (Ring) Rare Rings - basically look for high bonus Life and Resistances. If needed also get Attributes here. If Mana costs is still an issue try crafting Reduced Mana Cost for Non-Channeling Skills |
Min. requirements:
70 maximum Life
70% Total Elemental Resistances
Optional affixes:
Critical Strike Multiplier
Attributes
Non-channeling Skills have -# to Total Mana Cost |
 (Ring) Circle of Anguish - Unique Synthesis Item - gives random Implicit Synthesis Mods, so try to get the ones you need the most. It grants Strength, Fire Resistance, and Fire Damage which is all good, but the most important part of this Ring that overshadows all the other Mods are two out of five possible Herald of Ash effect - aim for increased Buff Effect and Increased Fire Damage while affected by this buff. It can be quite expensive (Ring) Circle of Anguish - Unique Synthesis Item - gives random Implicit Synthesis Mods, so try to get the ones you need the most. It grants Strength, Fire Resistance, and Fire Damage which is all good, but the most important part of this Ring that overshadows all the other Mods are two out of five possible Herald of Ash effect - aim for increased Buff Effect and Increased Fire Damage while affected by this buff. It can be quite expensive |
+(20-30)% to Fire Resistance
<One to three random Synthesis implicit modifiers>
+(20-30) to Strength
Adds (20-25) to (26-35) Fire Damage
+(20-30)% to Fire Resistance
<Two Random Herald of Ash modifier> |
 (Jewel) Watcher's Eye - it is always good to have one as long as you’re using an Aura, and the Aura you’re recommended to use is Clarity, so look for a cheap Watcher's Eye Jewel with modifiers to it (Jewel) Watcher's Eye - it is always good to have one as long as you’re using an Aura, and the Aura you’re recommended to use is Clarity, so look for a cheap Watcher's Eye Jewel with modifiers to it |
(4-6)% increased maximum Energy Shield
(4-6)% increased maximum Life
(4-6)% increased maximum Mana
<Two or Three random aura modifiers>
Recommended Aura Modifiers:
Gain (6-10)% of Maximum Mana as Extra Maximum Energy Shield while affected by Clarity
(10-15)% increased Mana Recovery Rate while affected by Clarity |
 (Jewel) Rare Jewels - they should provide extra Life and Damage bonuses (Jewel) Rare Jewels - they should provide extra Life and Damage bonuses |
Recommended affixes:
maximum Life
Critical Strike Multiplier
Increased Mine Throwing Speed
Optional affixes:
Spell Damage/Area Damage |
 (Jewel) Abyss Jewel - try to get affixes that grant you stats listed on stat priority list (Jewel) Abyss Jewel - try to get affixes that grant you stats listed on stat priority list |
Recommended affixes:
maximum Life
Critical Strike Multiplier
Optional affixes:
Added Physical or Fire Damage to Spells
Chance to Hinder enemies on Spell Hits |
 (Flask) Bottled Faith - the best Utility Flask for this build which greatly increases your Critical Strike Chance and grants Life Regeneration. It's very expensive so if you are playing this as a League Starter, just replace it with a random Quicksilver or Mana Flask (Flask) Bottled Faith - the best Utility Flask for this build which greatly increases your Critical Strike Chance and grants Life Regeneration. It's very expensive so if you are playing this as a League Starter, just replace it with a random Quicksilver or Mana Flask |
Creates Consecrated Ground on Use
(30-50)% increased Duration
Consecrated Ground created by this Flask has Tripled Radius
+(1-2)% to Critical Strike Chance against Enemies on Consecrated Ground during Effect
Consecrated Ground created during Effect applies (7-10)% increased Damage taken to Enemies |
 (Flask) Cinderswallow Urn - one of the best Utility Flask in the game which grants amazing Life/Mana/ES Recovery on Kills and Onslaught buff (Flask) Cinderswallow Urn - one of the best Utility Flask in the game which grants amazing Life/Mana/ES Recovery on Kills and Onslaught buff |
Onslaught
Recharges 1 Charge when you Consume an Ignited corpse
Enemies Ignited by you during Flask Effect take 10% increased Damage
Recover (1-3)% of Life when you Kill an Enemy during Flask Effect
Recover (1-3)% of Mana when you Kill an Enemy during Flask Effect
Recover (1-3)% of Energy Shield when you Kill an Enemy during Flask Effect
Veiled Suffix |
 (Flask) The Wise Oak - an amazing and inexpensive Flask which grants high Elemental Damage penetration based on your highest Resistance. If it's Fire, just go for it (Flask) The Wise Oak - an amazing and inexpensive Flask which grants high Elemental Damage penetration based on your highest Resistance. If it's Fire, just go for it |
+35% to all Elemental Resistances
During Flask Effect, 10% reduced Damage taken of each Element for which your Uncapped Elemental Resistance is lowest
During Flask Effect, Damage Penetrates (10-15)% Resistance of each Element for which your Uncapped Elemental Resistance is highest |
Other suggested Flasks:
- Bubbling Divine Life Flask of Staunching (immunity to Bleeding)
- Experimenter's Quicksilver Flask of Warding (Curse Immunity) or
Enduring Eternal Mana Flask of Warding (Curse immunity)
- Ample Diamond Flask of Heat (Freeze Immunity)
It is important to have mods to remove Bleeding, Freeze and Curses on your non-unique flasks. The best way to get it is through Einhar’s Beastcrafting
|
   |
|
Odealo is one of the biggest Path of Exile marketplaces. It allows regular players to buy, sell, and trade PoE Currency with the use of real cash.
|
If you have any feedback about this build or suggestions for the next one, please let us know in the comments below! We are always glad to make all kinds of build guides, from end-game monsters to beginner-friendly and budget builds just as this Purifying Flame Miner Saboteur!
Pictures used in this article are the intellectual property of Grinding Gear Games