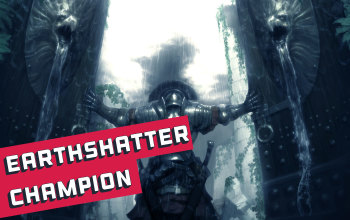
Facebreaker Earthshatter
Champion Build
Updated for Patch 3.18
The Best Crafty Guides by Odealo
| Guide notes |
May 27, 2021
-Build created
February 05, 2022
-Updated for Patch 3.17
July 04, 2022
-Updated for Patch 3.18 |
| Build overview |
| Tags: [MELEE] [PHYSICAL] [IMPALE] [LIFE] |
|
Budget:
Defenses:
|


|
Boss DPS:
AoE:
|

|
Facebreaker is an item that will give you up to 800% increased Physical Damage but under the condition - you're not allowed to wear any weapon. It's such a significant boost of damage that relinquishing your weapon is a valid option, it scales really well with flat added damage so you'll need to pick up as much of it as you can - for example from Steel Rings and any Rare Item able to provide it. Rigwald's Curse is a Unique Amulet that will increase your Critical Strike Chance and Damage only when you're unarmed, so it's a good match. The build, however, can be non-crit - with Resolute Technique - it can be adjusted easily with only a few tweaks. This guide is about the Critical Strike version of the Build.
The build is really cheap - Ryslatha's Coil Studded Belt is a Unique item that costs twice as much as the rest of the build but it's absolutely not mandatory, you can use Replica Soul Tether or any other rare belt - the build is versatile and there are only two cheap Uniques you have to obtain. You can for example use Unique Shields such as Lycosidae - so you won't have to worry about Accuracy Rating, Great Old One's Ward - for more Damage in general, or Saffell's Frame - for more Elemental Resists and Chance to Block Spell Hits. Your Defences will mainly consist of Maximum Life - around 7k, Armour, permanent Fortify, Adrenaline Buff from Ascendancy, and a small amount of Evasion Rating.
You can also check our other Path of Exile builds right over here Odealo's Crafty Guides - Full List
1. Gameplay
Earthshatter is a Slam type of Attack - it's slow with considerable AoE. It creates Fissures - structures that can be detonated using another slam, or in this case - a Warcry Skill. When choosing to use Slam as your main clear speed Skill be prepared for it to be sluggish, that's why it's important to have at least some Attack Speed increases on your Skill Tree and Gear. Master of Metal is probably the single most impactful Ascendancy Point - it gives you flat physical damage for each Impale - a quite complex mechanics, a debuff you inflict on your enemies that basically increases your damage with each hit by a lot on its own. The amount of damage you can scale goes really high, reaching Millions of DPS.
|
This video was recorded on a level 93 Champion on Standard League. We had no exceptionally expensive Items used with the Ryslatha's Coil being the most pricy one. The build had a lot of potential spots for improving the DPS with more Added Damage from Abyssal Jewels and possibly using Abyssus if you wanted to farm less challenging content faster
|
|
 
Odealo is a secure trading platform for MMO gamers. Here you can buy, sell, and trade PoE Currency for real cash.
|
2. Build's PROS & CONS
| PROS |
- cheap
- great League Starter
- tanky with a lot of damage
- decent for Mapping but great for Boss fights
|
| CONS |
- quite slow clear speed
- it has more than three Skill buttons to press constantly
- no Leech and reflect Maps are off-limits
|
3. Leveling tips
Equip any Facebreaker at level 16, use Lycosidae Unique Shield with it - with that by level 16 your damage will be already off the charts. You can use any Slam Attack: Earthquake, Groundslam, Sunder - it doesn't really matter at first, but it's good to get used to Earthshatter from the start. Deidbellow is a very good helmet for leveling with this build. Look for resistances and Attributes on Iron Rings, Belt, Amulet and Gloves
Suggested leveling Gem setups:
| Earthshatter setup |
 |
Earthsatter - use Earthshatter as your main DPS Skill |
 |
Melee Physical Damage Support - best in slot Support Gem to increase your damage |
 |
Impale Support - gives your Attacks a chance to Impale and improves their effectiveness |
 |
Fist of War Support - Every few seconds your Slam Attack will be enhanced with more Aoe and increased Damage |
| Curse setup |
 |
Vulnerability - enemies take more Physical Damage and have a chance to Bleed on a hit |
| Aura and Banner setup |
 |
Pride - offensive aura for more Physical Damage |
 |
Dread Banner - increases Fortify and Impale Effect and provide a chance to Impale |
 |
Precision - for Accuracy Rating and Critical Strike Chance |
| Warcry setup |
 |
Enduring Cry - regenerate your life and gives you endurance charges |
 |
Seismic Cry - empowers your next Slam Attacks and makes enemies easier to stun |
 |
Intimidating Cry - enemies take more damage |
 |
Second Wind Support - allows you to use your Warcries a second time |
Bandits:
Kill all three Bandits for two additional Skill Points
Leveling Skill Trees:
32 Points Skill Tree
Go for the Call to Arms as shown, allocate Warcry Clusters and some Maximum Life
73 Points Skill Tree
Get some Accuracy Rating, more Life, more Physical Damage, and more Armour
Recommended leveling items:
 Lycosidae - You can use this Shield from level 11 until you're ready to invest in Accuracy Rating. Some variations of this build never actually swap it and use this Shield in the finished version. Lycosidae - You can use this Shield from level 11 until you're ready to invest in Accuracy Rating. Some variations of this build never actually swap it and use this Shield in the finished version. |
+(10-20) to maximum Life
+(120-160) to Armour
+(30-40) to maximum Life
Your hits can't be Evaded
+(3-5)% Chance to Block
Adds 250 to 300 Cold Damage to Counterattacks |
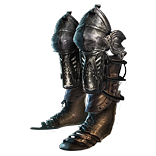 Redblade Tramplers - this Pair of Boots will give you all the important stats you need, including added flat Physical Damage Redblade Tramplers - this Pair of Boots will give you all the important stats you need, including added flat Physical Damage |
Adds (2-5) to (7-10) Physical Damage to Attacks
(5-10)% reduced Enemy Stun Threshold
(150-200)% increased Armour
+(50-70) to maximum Life
+(20-30)% to Fire Resistance
25% increased Movement Speed
Unaffected by Burning Ground |
 Deidbellow - adds flat Physical Damage to your attacks, increases your melee damage, gives you Attributes, Armour, and it synergizes well with your Warcries. Deidbellow - adds flat Physical Damage to your attacks, increases your melee damage, gives you Attributes, Armour, and it synergizes well with your Warcries. |
+(20-30) to Strength
+(20-30) to Dexterity
Adds 10 to 20 Physical Damage to Attacks
+(200-300) to Armour
20% increased Melee Damage
Cannot Leech when on Low Life
If you've Warcried Recently, you and nearby allies have 20% increased Attack, Cast and Movement Speed |
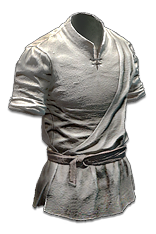 Tabula Rasa - outstanding Body Armour for leveling, can be used even up to level 90 or maybe higher Tabula Rasa - outstanding Body Armour for leveling, can be used even up to level 90 or maybe higher |
Item has no level requirement and Energy Shield (Hidden)
Item has 6 White Sockets and is fully linked (Hidden) |
4. Final Skill Tree, Ascendancy Points, and Pantheon
Final Skill Tree:
99 Points Final Skill Tree (doesn't include Cluster Jewels)
121 Points Path of Building (PoB) link
Ascendancy points:
Preferably in that order:
- Unstoppable Hero
- Fortitude
- Master of Metal
- First to Strike, Last to Fall, or Inspirational
Pantheon:
Major God: Soul of Lunaris: 1% additional Physical Damage Reduction for each nearby Enemy, up to 8%; 1% increased Movement Speed for each
nearby Enemy, up to 8%
Minor God: Soul of Ryslatha: Life Flasks gain 3 Charges every 3 seconds if you haven't used a Life Flask Recently
5. Final Gems links
| [DPS] Earthshatter setup |
|
Earthshatter - the main reason for using Earthshatter over any other Slam Attack is its synergy with Warcries - your spikes are detonated dealing even more damage. It's a solid choice for the main Skill overall |
 |
Brutality Support - your Elementa Damage is negligible, take Brutality for extra Physical damage |
|
Melee Physical Damage Support - more Physical Damage - pretty straightforward |
 |
Pulverise Support - more Aoe and more Damage for AoE Attacks at the cost of Attack Speed |
|
Fist of War Support - every few seconds your Slam Attack will be enhanced with more Aoe and increased Damage |
|
Impale Support - very Important to have it - Impale is extraordinarily powerful mechanics, and your Ascendancy pushes it to its limit |
| [UTILITY] Warcry setup |
|
Enduring Cry - regenerate your life and gives you endurance charges, use it when you expect to receive a big hit. |
|
Seismic Cry - empowers your next Slam Attacks and makes enemies easier to stun, use it after Intimidating Cry |
|
Intimidating Cry - enemies take more damage, use it as your first Warcry |
|
Second Wind Support - allows you to use your Warcries a second time |
| [UTILITY] Aura setup |
|
Pride - offensive aura for more Physical Damage. Its' effect is increased the longer an enemy stays in radius, so it works best against Bosses |
|
Precision - for Accuracy Rating and Critical Strike Chance. Depending on your Mana Pool, you can use a lower-level Precision |
 |
Determination - more and increased Armour, one of the best defensive Auras in the game |
 |
Enlighten Support - Linked Spells reserve less Mana |
| [UTILITY] Stance and Banner setup |
|
Dread Banner - increases Fortify and Impale Effect, it also provides you with an additional chance to Impale |
 |
Blood and Sand - use Blood Stance for more Damage and Sand Stance if you want to feel safer. In case of serious Mana issues, you may want to drop this Aura entirely |
| [MOBILITY] Dash |
 |
Dash - used for increased mobility, it allows you to dash |
| [UTILITY] Blood Rage |
 |
Blood Rage - keep it at level 10, it gives more Life Leech and Attack Speed. It also allows you to generate Frenzy Charges on kills |
| [UTILITY] Vulnerability |
|
Vulnerability - The best Curse for this build that increases your Physical Damage. It should be triggered automatically. |
| [UTILITY] Guard Spell |
 |
Steelskin - It's recommended to keep it under your Left Mouse Button so that it's triggered nearly automatically as you play. You can also swap it for  Molten Shell if your Armour is high enough. Molten Shell if your Armour is high enough. |
| [UTILITY] Totems support |
 |
Ancestral Warchief - summons a Totem that increases your Melee Damage |
 |
Ancestral Protector - summons a Totem that increases your Attack Speed |
 |
Multiple Totems Support - you can have two of the Ancestral Totems summoned at once |
|
On Odealo dozens of sellers compete for your attention. Buying PoE Currency here guarantees the best prices, prompt delivery, and the best quality of service.
|
6. Gear Setup
The only items necessary for this build to work are Facebreaker Unique Gloves, the rest is purely optional, that's why I'll list more than one item per gear slot so you can compare its pros and cons. Bury in mind that the skill tree presented here is for a Critical Strikes enabled version so if you wish to alter the build according to your needs, be sure not to blindly follow the path presented in it.
Our recommended items will:
- Cap your resistances at 75%
- Provide you with enough DPS and Life to start mapping
|
Stat priorities on items:
- Maximum Life
- Elemental Resistances
- added Physical Damage
- Dexterity and Intelligence
- Armour
- Accuracy Rating (don't look for it if you took Resolute Technique)
- Critical Strike Chance (don't look for it if you took Resolute Technique)
- Attack Speed
|
 (Helmet) Rare Helmet - Your best, most balanced option for a Helmet. There's no special mod you should look for, maybe with an exception for the increased Physical Damage taken by your opponents but that's pretty much it. Look for Life and Resistances. (Helmet) Rare Helmet - Your best, most balanced option for a Helmet. There's no special mod you should look for, maybe with an exception for the increased Physical Damage taken by your opponents but that's pretty much it. Look for Life and Resistances. |
|
Min. requirements:
+90 to Maximum Life
+80% to Elemental Resistances
Optional affixes:
Increased Global Accuracy Rating
+(3–5) to maximum Fortification
Nearby Enemies take increased Physical Damage
|
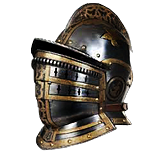
 (Helmet) Abyssus - this is the "fun" Helmet. It switches your character from a decent tank into a complete glass cannon. The amount of flat Physical Damage it gives is ridiculous but it also makes you take much more damage. You can equip it to deal with Conquerors you're familiar with or use it all the time if you don't mind dying too often. (Helmet) Abyssus - this is the "fun" Helmet. It switches your character from a decent tank into a complete glass cannon. The amount of flat Physical Damage it gives is ridiculous but it also makes you take much more damage. You can equip it to deal with Conquerors you're familiar with or use it all the time if you don't mind dying too often. |
+(20-25) to all Attributes
Adds 40 to 60 Physical Damage to Attacks
+(100-125)% to Melee Critical Strike Multiplier
(100-120)% increased Armour
(40-50)% increased Physical Damage taken |
Helmet enchantments:
Earthshatter or some of your Warcries related enchantment |
 (Shield) Rare Shield - the best option if you are struggling with capping your Resistances. You can also get the 15% Reduced Mana Reservation Cost and socket your Auras here (Shield) Rare Shield - the best option if you are struggling with capping your Resistances. You can also get the 15% Reduced Mana Reservation Cost and socket your Auras here |
Min. requirements:
+100 to Maximum Life
+80% to Elemental Resistances
Optional affixes:
Increased Armour
Socketed Gems have 15% reduced Reservation
Attributes |
 (Shield) Great Old One's Ward - The default Shield. It gives you flat Physical Damage and Attack Speed which are really good stats you should prioritize. However, it lacks Elemental Resistances. (Shield) Great Old One's Ward - The default Shield. It gives you flat Physical Damage and Attack Speed which are really good stats you should prioritize. However, it lacks Elemental Resistances. |
3% increased Movement Speed
(8-12)% Chance to Block Spell Damage
Adds (8-12) to (15-20) Physical Damage to Attacks
(6-10)% increased Attack Speed
+(50-70) to maximum Life |
 (Shield) Saffell's Frame - A decent budget and defensive option for a Shield. You cannot Block Attack, but it's not a big deal for your Fortified Champion. In return, you're able to Block Spell Damage and have more Maximum Elemental Resistance. For generic defenses such as these consider a Rare Shield as well (Shield) Saffell's Frame - A decent budget and defensive option for a Shield. You cannot Block Attack, but it's not a big deal for your Fortified Champion. In return, you're able to Block Spell Damage and have more Maximum Elemental Resistance. For generic defenses such as these consider a Rare Shield as well |
+4% to all Elemental Resistances
(15-20)% Chance to Block Spell Damage
(20-30)% increased Spell Damage
+10% to all Elemental Resistances
+4% to all maximum Resistances
Cannot Block Attacks |
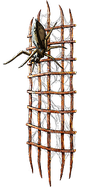
| (Shield) Lycosidae - With this Shield on you won't ever have to worry about Accuracy Rating, you will always hit enemies (unless they block or dodge). The other stats are minuscule. It is recommended for leveling, but consider switching later in the game. |
+(10-20) to maximum Life
+(120-160) to Armour
+(30-40) to maximum Life
Your hits can't be Evaded
+(3-5)% Chance to Block
Adds 250 to 300 Cold Damage to Counterattacks |
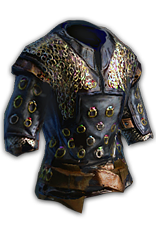
 (Body Armour) Rare Body Armour - A regular Body Armour is your best option. it's the only place for your six-link so Kaom's Heart is off the table. Look for Maximum Life, Elemental Resistances, and Armour. (Body Armour) Rare Body Armour - A regular Body Armour is your best option. it's the only place for your six-link so Kaom's Heart is off the table. Look for Maximum Life, Elemental Resistances, and Armour. |
Min. requirements:
+100 to Maximum Life
+80% to Elemental Resistances
Attacks have +1% to Critical Strike Chance
Optional affixes:
Increased Armour
Maximum Life %
You Can Apply Additional Curse
Attributes |
 (Body Armour) Loreweave - It's another valid choice. It has decent stats, provides you with enough Life, Attributes, flat Physical Damage, Critical Strike Chance, and sets a new cap for Maximum Elemental Resistances. Don't use it with Saffell's Frame. (Body Armour) Loreweave - It's another valid choice. It has decent stats, provides you with enough Life, Attributes, flat Physical Damage, Critical Strike Chance, and sets a new cap for Maximum Elemental Resistances. Don't use it with Saffell's Frame. |
Has 6 Sockets
+(8-24) to all Attributes
Adds (4-10) to (14-36) Physical Damage to Attacks
(20-60)% increased Global Critical Strike Chance
+(15-50) to maximum Energy Shield
+(20-60) to maximum Life
+(20-50) to maximum Mana
(6-30)% increased Rarity of Items found
(15-50)% increased Elemental Damage
Your Maximum Resistances are (76-78)% |
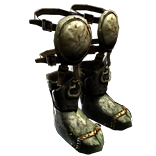 (Boots) Rare Boots - Rare Boots is what you're looking for. look for Maximum Life and Elemental Resistances. It is also mandatory to have a respectable Movement Speed mod there. (Boots) Rare Boots - Rare Boots is what you're looking for. look for Maximum Life and Elemental Resistances. It is also mandatory to have a respectable Movement Speed mod there. |
Min. requirements:
+70 to Maximum Life in total
+80% to Elemental Resistances
+25% increased Movement Speed
Optional affixes:
Increased Armour
You have Tailwind if you have dealt a Critical Strike Recently
#% chance to gain Onslaught for 4 seconds on Kill
Attributes |
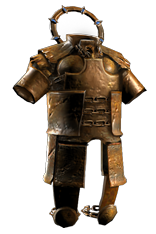
 (Gloves) Facebreaker - It's so easy to get Facebreakers with a good roll on them that you should consider looking for Corrupted versions of it. Be wary: if you already have Curse on Cast When Damage Taken - look for an Additional Curse mod on your Body Armour or replace the Curse Skill Gem with something else. (Gloves) Facebreaker - It's so easy to get Facebreakers with a good roll on them that you should consider looking for Corrupted versions of it. Be wary: if you already have Curse on Cast When Damage Taken - look for an Additional Curse mod on your Body Armour or replace the Curse Skill Gem with something else. |
+30% to Global Critical Strike Multiplier
10% reduced Enemy Stun Threshold
(600-800)% more Physical Damage with Unarmed Attacks
Extra gore
Optional Corrupted Implicits:
Curse Enemies with Vulnerability on Hit
Attacks have +#% to Critical Strike Chance
#% increased Attack Speed
#% increased maximum Life
+2 to Level of Socketed Warcry Gems
+2 to Level of Socketed Aura Gems |
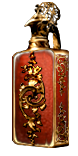
 (Belt) Ryslatha's Coil - This item will cost you a small fortune, but it's worth every Chaos Orb you're willing to spend on it. Not only does it give you flat Physical Damage and a lot of Maximum Life, but it also widens the range of your Minimum and Maximum Damage. It translates to a lot more damage. It's even better when your opponents are cursed with Vulnerability - The Bleeding will always be overwritten by the highest roll from your Attack. (Belt) Ryslatha's Coil - This item will cost you a small fortune, but it's worth every Chaos Orb you're willing to spend on it. Not only does it give you flat Physical Damage and a lot of Maximum Life, but it also widens the range of your Minimum and Maximum Damage. It translates to a lot more damage. It's even better when your opponents are cursed with Vulnerability - The Bleeding will always be overwritten by the highest roll from your Attack. |
(20-30)% increased Stun Duration on Enemies
+(20-40) to Strength
(30-40)% more Maximum Physical Attack Damage
(40-30)% less Minimum Physical Attack Damage
Adds 1 to (15-20) Physical Damage to Attacks
+(80-100) to maximum Life
Gain 50 Life when you Stun an Enemy |
 (Belt) Soul Tether - A much cheaper substitute for a belt. It grants an extra defensive layer to your build by providing you with Energy Shield that is based on your Maximum Life. Life Leech will apply to your ES when you're on full life, so it allows you to use Damage on Full Life Support Gem instead of Fist of War Support or some other Skill Gem. Immortal Ambition is optional. (Belt) Soul Tether - A much cheaper substitute for a belt. It grants an extra defensive layer to your build by providing you with Energy Shield that is based on your Maximum Life. Life Leech will apply to your ES when you're on full life, so it allows you to use Damage on Full Life Support Gem instead of Fist of War Support or some other Skill Gem. Immortal Ambition is optional. |
(15-25)% increased Stun and Block Recovery
+(20-40) to Intelligence
Gain (4-6)% of Maximum Life as Extra Maximum Energy Shield
Immortal Ambition
(Energy Shield starts at zero
Cannot Recharge or Regenerate Energy Shield
Lose 5% of Energy Shield per second
Life Leech effects are not removed at Full Life
Life Leech effects Recover Energy Shield instead while on Full Life) |
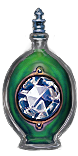
 (Amulet) Rigwald's Curse - This Amulet is considered one of the best for this build, it gives a lot of Crit. Chance. (Amulet) Rigwald's Curse - This Amulet is considered one of the best for this build, it gives a lot of Crit. Chance. |
+(24-36)% to Global Critical Strike Multiplier
+7% to Unarmed Attack Critical Strike Chance
Modifiers to Claw Damage also apply to Unarmed Attack Damage
Modifiers to Claw Attack Speed also apply to Unarmed Attack Speed
Modifiers to Claw Critical Strike Chance also apply to Unarmed Attack Critical Strike Chance
Corrupted |
Recommended Anointments:
Essence Sap
Spirit Void
Tenacity - if you have Mana Leech from another Source |
 (Ring) Rare Steel Rings - both your Rings Should be Steel Rings with added flat Physical Damage as Implicit, and additionally - the same mod as a Prefix. The numbers are surely unimpressive, but thanks to your Facebreaker they are increased. That's why Added Physical Damage is so important. (Ring) Rare Steel Rings - both your Rings Should be Steel Rings with added flat Physical Damage as Implicit, and additionally - the same mod as a Prefix. The numbers are surely unimpressive, but thanks to your Facebreaker they are increased. That's why Added Physical Damage is so important. |
Min. requirements:
Adds 9 to 15 Physical Damage to Attacks
Attributes
+60 to Maximum Life
Optional affixes:
Elemental Resistances
Accuracy Rating |
 (Jewel) Rare Jewels - you won't have many of these, but try to get ones with Maximum Life, Elemental Resistances, and Attributes. It's good to have "Corrupted Blood cannot be inflicted on you". (Jewel) Rare Jewels - you won't have many of these, but try to get ones with Maximum Life, Elemental Resistances, and Attributes. It's good to have "Corrupted Blood cannot be inflicted on you". |
Min. requirements:
+30 to maximum Life
increased Physical Damage to Attacks
Elemental Resistances
Optional affixes:
Attributes |
 (Jewel) Watcher's Eye - The crown jewel of your build. Your auras are Precision and Pride, try to obtain a Watcher's Eye with at least one mod that'd have these as modifiers. (Jewel) Watcher's Eye - The crown jewel of your build. Your auras are Precision and Pride, try to obtain a Watcher's Eye with at least one mod that'd have these as modifiers. |
(4-6)% increased maximum Energy Shield
(4-6)% increased maximum Life
(4-6)% increased maximum Mana
<Two or Three random aura modifiers>
Recommended Aura modifiers:
Impales you inflict last 2 additional Hits while using Pride
(40-60)% increased Attack Physical Damage while using Pride
(40-60)% increased Attack Damage while affected by Precision |
 (Flask) Lion's Roar - Use Lion's Roar more Armour. It's a great defensive Flask: it adds a Knockback effect, causes Enemies to Flee, and increases your damage. (Flask) Lion's Roar - Use Lion's Roar more Armour. It's a great defensive Flask: it adds a Knockback effect, causes Enemies to Flee, and increases your damage. |
+1500 to Armour
Adds Knockback to Melee Attacks during Flask effect
Knocks Back Enemies in an Area when you use a Flask
75% chance to cause Enemies to Flee on use
(7-10)% more Melee Physical Damage during effect |
 (Flask) Bottled Faith - It's one of the best flasks in the game, quite pricey at that. Use Bottled Faith for more Critical Strike Chance, More DPS, and Life Regeneration. (Flask) Bottled Faith - It's one of the best flasks in the game, quite pricey at that. Use Bottled Faith for more Critical Strike Chance, More DPS, and Life Regeneration. |
40% increased Damage
Creates Consecrated Ground on Use
(30-15)% reduced Duration
Consecrated Ground created by this Flask has Tripled Radius
Consecrated Ground created during Effect applies (7-10)% increased Damage taken to Enemies
(100-150)% increased Critical Strike Chance against Enemies on Consecrated Ground during Flask effect |
|
Other suggested Flasks:
- Quicksilver Flask with Bleeding immunity/removal
- Life Flask with random ailment removal
- Diamond Flask with random ailment removal
|
   |
|
Odealo is one of the biggest Path of Exile marketplaces. It allows regular players to buy, sell, and trade PoE Currency with the use of real cash
|
If you have any other build requests please leave that in the comments below. We are always open to suggestions and constructive feedback.
Pictures used in this article are the intellectual property of Grinding Gear Games.