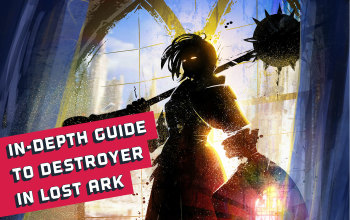
Destroyer Lost Ark Raiding Build
Complete Guide to Raiding as Destroyer in Lost Ark Online Destroyer
PvE Raiding Build
for Lost Ark
Last Update: 16th June 2022
Introduction
If Berserker's giant sword was a bit too tame for you, you'll be pleased with Destroyer's enormous hammer. This new Warrior Advanced Class is a true dreadnaught that lumbers through the battlefield, clad in heavy armor, and obliterates everything on its path. Destroyer is rather slow, but He more than makes up for His lack of mobility with high resilience and devastating burst damage. He uses a builder-spender system with Concentration (Blue) Skills that feed into His Identity Gauge, creating Gravity Cores, and Gravity Release (Purple) Skills that consume the Cores to deal extra damage and cover him with powerful defensive shields that can prevent him from being hurt by bosses. If this wasn't enough, Destroyer has access to a defensive Cooldown that reduces all incoming damage by 90% ( Endure Pain), making Him virtually unkillable for the duration. On top of that, He has access to the Taunt mechanic, just like the Gunlancer. As for downsides, well... there's the previously mentioned low mobility. Also, Destroyer's Gravity Release Skills have quite long animations that won't appeal to some people.
Destroyer has two Class Engravings that alter the build and playstyle a bit. These are:
 Rage Hammer, which improves Destroyer's sustained Damage by making His Critical Hits much more consistent.
  Gravity Training which is a Class Engraving that improves Destroyer's Burst Damage by allowing him to build up His Identity Meter quickly and providing bonuses when
  Hypergravity is active.
This build guide will present you with multiple alternatives that aim to help you fine-tune the build to work better with your chosen Destroyer Class Engraving.
You can also check our other Lost Ark Builds
 Pros Pros |
 Cons Cons |
| Great Survivability |
Low Mobility |
| High Stagger Damage |
Long Skill Animations |
| Good Burst Damage |
Hard to Play without proper Encounter Knowledge |
| Has access to Taunt |
Directional Requirements on most Attacks |
Stat Priority
|
As you've probably guessed, your desired stat distribution will differ based on your chosen Class Engraving, as
|
Skills
 DREADNOUGHT |
Destroyer takes a ready stance with His hammer on His shoulder, concentrating energy on His Cores, and then He hits the ground to send forth a shockwave, dealing moderate amounts of damage, and using the momentum to jump high. While jumping, He slams His hammer down onto enemies, dealing moderate amounts of damage. This is your Counter Skill that can also be used defensively, thanks to the
|
|
Level 12
|
|
 JUMPING SMASH |
Destroyer leaps to the target location within 10 meters of Him and swings His hammer down to the ground, inflicting high amounts of Damage. On hit, Destroyer obtains 2 Gravity Cores. This Skill serves two important purposes in the build: It applies an
Alternatives
|
|
Level 12
|
|
 EARTH EATER |
Destroyer smashes the ground behind Him, dealing high amounts of damage, then he delivers a horizontal swing that makes chunks of rocks follow it. He spins a total of 3 times, each spin inflicts low amounts of damage. His hammer goes higher with each spin until he swings it down to the ground to inflict high amounts of damage. While rather slow-to-use,
Alternatives
|
|
Level 12
|
|
 FULL SWING |
Destroyer strikes behind him with His hammer and spins 360 degrees, attacking all surrounding enemies three times, dealing moderate amounts of damage three times. Overcharging will make the skill deal more damage with its hits.
|
|
Level 12
|
|
 PERFECT SWING |
Destroyer can Charge this Skill for up to 2 seconds. When used midway, He will advance 3 meters forward and charge at enemies to deal low amounts of damage, followed by a powerful smash that inflicts high amounts of damage. Overcharging the skill will result in a 4 meters movement followed up by a fierce blow that deals extremely high amounts of damage.
|
|
Level 12
|
|
 SEISMIC HAMMER |
Destroyer holds His Hammer upside down, then He jumps and smashes the ground, dealing low amounts of Damage. The crash forms a cone-shaped wall that stretches 11 meters, dealing extremely high amounts of damage. This is a powerful Gravity Release Skill that will be one of your main damage sources and a rather solid Stagger damage dealer. It can deal a lot of Burst Damage, especially when combined with the
|
|
Level 12
|
|
ENDURE PAIN |
Destroyer lets out a roar, dealing high amounts of Damage to enemies within a 6 meters radius. Upon using the skill, Destroyer gains Push Immunity and a high Damage reduction for 5 seconds. This powerful defensive Skill can be used to set up your main burst skills (
|
|
Level 10
|
|
 HEAVY CRUSH |
Destroyer raises His Hammer above His head, then he smashes the ground with enormous gravitational force, inflicting moderate amounts of damage. On hit, Destroyer obtains 1 Gravity Core. This Skill has a very low base Cooldown of just 5 seconds, which makes it extremely useful for filling gaps in your Rotation. Moreover, it generates Gravity Cores which is simply amazing. Its main purpose is to generate Gravity Cores cheaply, quickly, and efficiently.
|
|
Level 4
|
|
| AWAKENING | |
 BIG BANG |
Destroyer gathers gravitational energy and explodes it, dealing Extremely High amounts of damage to enemies within a 3.2 meters radius and knocking them back. All incoming damage is reduced by 50% and Destroyer gains immunity against Move Speed reductions, Pushes, and Debuffs. You can move your character while gathering gravitational energy. This Skill's Damage can be tripled and the explosion radius can be increased up to 8 meters, depending on how long the gravitational energy is gathered. This skill deals apocalyptic amounts of AoE Damage but it does not generate Gravity Meter. Also, your mobility is severely reduced during its use. These properties make it more suited for the
|
 TERRA BREAK |
Destroyer hammers the ground in front of Him, dealing Extremely high amounts of damage as gravitational energy falls from the sky, damaging all enemies in range. The ground cracks, casting a gravitational field. All enemies within the field are knocked down. Destroyer can Swing His Hammer upward to create anti-gravity and deal two more devastating hits. All enemies within range will then be shot into the air. Destroyer can then concentrate his energy and jump, hammering enemies flat to the ground with yet another devastating attack. While this Awakening Skill doesn't deal anywhere near as much Damage as |
 Toughened Body Engraving and the damage reduction effect it provides.
  Tenacity Tripod)
  Violent Hammer - Attack one additional time while in the air. Outgoing Damage is also increased by up to +94.8% (at Rank 5). This offers a very significant Damage boost.
  Protection - While casting a Skill, gain a Shield with X% of your Max HP.
  Armor Destruction debuff to your enemies and makes you travel 10 meters. In other words, it's a mobility tool that can also be used as a team synergy skill.
  Power Strike - This is a solid option if you don't need a mobility tool (because you're knowledgable enough, for example). It's also a source of
  Power Shoulder (
 Toughened Body Tripod is selected).
  Superior Change - Increases the skill's maximum use distance by up to +4 meters (at Rank 5). With this, you'll be able to use
  Smash - Changes the Skill to Normal mode. Using the Skill makes you leap 5 meters towards the target area while spinning in the air. Skill's Damage is increased by up to +144% (at Rank 5). This trades a portion of
  Overwhelm - A rune that makes the Skill deal up to +30% Stagger Damage (Legendary). This will help you help your team with stagger checks.
  Tenacity Tripod)
  Running Crush (
 Target Focus Tripod), which makes it handy for some encounters. If you like to play a support role, consider picking it up.
  Neutralizer (
 Enhanced Strike - Increases Hammer's Direct Hot Damage by up to +73% (at Rank 5). This offers a solid Damage increase to the two already hard-hitting portions of the skill.
  Agile Movement - Increases the Skill's Attack Speed by up to +18% (at Rank 5). This makes
  Galewind alone is not enough in our opinion).
  Scary Hammer - Increases The Skill's Damage by up to +17% (at Rank 5) per swing, up to a maximum of +102% (at Rank 5). This offers a significant damage increase when paired with
  Weak Point Detection - Increases Damage dealt to Push-Immune enemies by 45% (at Rank 5). This Tripod makes
  Absolute Strength - While on 3 Cores, Damage to Enemies is increased by up to +60% (at Rank 5). This Engraving will increase
  Intemperance - Reduces Charge Duration by 50%. Increases Charge Level by 1. Increases Overcharge Damage by up to +145% (at Rank 5). This is a must-have, especially if you're running the
  Hour of Slaughter - Changes the Skill to normal mode. Immediately swings the hammer, dealing the same Damage as Overcharge. Generates a gravitational wave that inflicts up to 60% (Rank 5) base damage ⇒ This is a great choice for
  Quick Preparation - Reduces the Skill's Cooldown by up to -11 seconds (at Rank 5). This can cut over 1/3 of
  Starving Strength - Creates the wall by warping the ground in 7 meters radius around the Destroyer. Wall Damage is increased by up to +95% (at Rank 5). This adds a lot of Damage and makes the skill easier to hit with.
  Hidden Pain Engraving,
  Taunt Engraving, you can also use it to interrupt deadly boss attack patterns to make encounters much easier for your team.
  Wide Hit - Increases the skill's AoE Radius by 25%. This ensures that Endure Pain hits its target, even if you're relatively far away from it.
  Focus - This Rune lowers the skill's Mana consumption by quite a lot, making it much more cost-effective.
  Quick Hit - Reduces the skill wind-up by 0.3 seconds. With this,
  Quick Recharge - Gives a chance to reduce all Cooldowns on skill use.
Rotations/Skill Usage
Destroyer's rotation revolves around charging up 3 Gravity Cores with Concentration (Blue) Skills to then spend the Cores enhancing the Gravity Release (Purple) Skills. Purple Skills benefit the most from consuming all 3 Cores, so charging up all 3 before unleashing them gives the best results. Gravity Release (Purple) Skills will not only deal massive damage but also surround you with a potent defensive shield. Your Basic Rotation looks as follows:
During a Stagger Check, use the following Skill Priority (attack with the skills closer to the top of the list if they are available):
|
Recommended Engravings
The more Gravity Cores you consume with a Gravity Release (Purple) Skill, the higher of a benefit this Engraving will give you. With this, your Purple Skills will hit much harder and they'll become even more reliable than they already are (when it comes to sustained damage). |
This powerful Engraving makes your damage skyrocket while in the Hypergravity Mode. With it, you'll deal much higher Burst Damage but your sustained DPS won't be as high. |
As a Destroyer, you can have a shield active, thanks to the Gravity Release Skills, almost all the time which makes this a constant DPS boost with no drawbacks. |
As the description suggests, this Engraving will make your charging skills better, so use it if you want to improve your |
This Engraving is extremely powerful, but it will punish you if you make a mistake. If you can live with the downside, it will serve you as an unconditional damage increase. Destroyer is one of the easiest Classes for running |
This Engraving can boost your offensive power rather significantly, but the tradeoff is quite painful. Only pick it if you know encounter mechanics very well; or if you believe in Destroyer's defensive capabilities enough (which is fair). Also, using this at Levels 1 and 2 is not worth the risks involved (so, use it at Level 3 or don't use it at all). |
The majority of the Destroyer's attacks have the Head Attack modifier, so this Engraving is a great choice. It will increase your damage output without making you suffer any drawbacks. Run it at Level 3 (it should be quite cheap as it's not a very popular Engraving). Both build versions benefit greatly from this one. |
Destroyer moves like a tank and tanks are not really known for their dynamics, so any boost to mobility is welcome. With this Engraving at Level 3, you'll move significantly quicker and your skill animations will become much faster. In other words, pick this engraving if you want your Destroyer to feel like He's got a tad bit more horsepower. |
The more Crit Rate you have, the more powerful this Engraving becomes. When you have ~60% Crit, this really starts to contribute to your DPS, but, if you want to optimize the build, you should only pick it up when you have at least ~70% Crit Rate. In other words, this is a niche Engraving for Destroyers that like to stack Crit Rate. |
|
Rage Hammer Destroyer Engravings As a Rage Hammer Destroyer, pick your Engravings in the following order:
|
|
Gravity Training Destroyer Engravings As a Gravity Training Destroyer, pick your Engravings in the following order:
|
 Barricade - Increases your Damage done while shielded by (Level 1: +3%, Level 2: +8%, Level 3: +16%).
  Super Charge - Increases the Charging Speed and Damage of Charging Skills (Level 1: +8% Speed, +4% Damage; Level 2: +20% Speed, +10% Damage; Level 3: +40% Speed, +20% Damage).
  Grudge - Increases your Damage Dealt to Bosses (Level 1: +4%, Level 2: +10%, Level 3: +20%), but makes you take 20% more damage from them.
  Cursed Doll - Increases Attack Power at the cost of reduced 25% Healing Received (does not affect natural Health recovery (Level 1 - +3% Attack Power, Level 2 - 8% Attack Power, Level 3 - +16% Attack Power).
 Master Brawler - Increases Head Attack Damage by (Level 1: +5%, Level 2: +12%, Level 3: +25%).
  Spirit Absorption - Increases Attack Speed and Movement Speed by (Level 1 - 3%, Level 2 - 8%, Level 3 - 15%).
  Keen Blunt Weapon - Increases your Crit Damage (Level 1: +10%, Level 2: +25%, Level 3: +50%) but also gives your attacks a chance to deal 20% Reduced Damage.
Gear Sets, Gems, Cards, etc.
|
|
|
|
|
 Gravity Impact,
|
ENDNOTE This is the initial version of our Destroyer Raiding Build for Lost Ark, where we tried to include all of the important information on how to set up this character while keeping the guide as compact as possible. If we've missed something of importance, please let us know! If you have any Build requests, please post them in the Comments section below. We will be happy to cover your most requested builds in the future! Also, we hope that you have found this guide useful and informative. Also, we will be happy to receive constructive criticism that will help us improve our future work, so don't hesitate to give us your feedback. |
Pictures used in this article are the intellectual property of Tripod Studio and Smilegate RPG
