Last Epoch
Corruption & Shade of Orobyss Guide
Introduction
Corruption is a mechanic that affects the difficulty of a timeline. It works in multiple ways and offers a smooth increase to the difficulty curve, which allows you to tailor the dungeoneering experience to your needs and preferences. In this guide, we'll explain how Corruption works and how to increase it. We will also tell you what to expect during your fights against the Shade of Orobyss, as it's tied to the Corruption mechanic.
How Corruption Works
- The more Corruption you accumulate in a timeline, the more damage the monsters deal and the more health they have.
|
- If you increase Corruption in a regular (non-empowered) timeline, its level will also increase, further affecting the difficulty.
|
- Increasing Corruption will also affect experience gained, monster health, monster damage, item rarity, and how much Stability echoes give.
|
- Regular Timelines always start at 0 Corruption and their Corruption can be increased to a maximum of 50.
|
- Empowered Timelines start with 100 Corruption and their Corruption can be increased indefinitely giving you the ability to challenge yourself against harder and harder content, for a better chance of obtaining powerful rewards.
|
- Increasing Corruption in an empowered timeline (level 100) won't increase its level any further, instead, it will increase the average rarity of the guaranteed rewards you receive from its echoes (so, you will be much more likely to drop exalted and even unique items).
|
The Shade of Orobyss
Now that you know how Corruption actually works, it's time to talk about how to increase it.
|
The Shade of Orobyss Overwiev
During your Monolith explorations, you will sometimes encounter nodes called "Echo of A World" in them, you will find a miniboss called The Shade of Orobyss. It can appear in one of Five different forms:
- Physical Shade (Blood Form)
- Lightning Shade (Storm Form)
- Poison Shade (Vile Form)
- Fire Shade (Infernal Form)
- Frost Shade (Frost Form)
Depending on the form, Shade will have access to a different set of Skills and offer a different challenge because of that. Moreover, Shade's power will increase proportionally to the amount of Corruption the player has accumulated (but so will the possible rewards from defeating it).
|
|
The Shade of Orobyss's Skills
The Shade of Orobyss has a total of ~30 Skills (3 Basic, 5 Movement, 11 Void, 2 Physical, 2 Frost, 2 Fire, 2 Poison, 2 Lightning, and a Melee Attack). It won't use all of these skills, however. Instead, its set of skills will comprise of:
- Both Form-based Skills (Lightning, Fire, etc.)
- 2 random Void Skills
- 1 Movement Skill
- 1 Basic Skill
- The Shade will also always have the ability to use a basic Melee Attack
- Basic Skills (Shade will use these only if you're at a distance from it):
- Oblivion Bolt - Shade sends a Void Bolt at the target.
- Melee Slash - Shade slashes the target, dealing Void and Physical Damage.
- Concentrated Burst - Shade Channels a Void Explosion at an area. Step out of this.
- Movement Skills:
- Oblivion Dash - Shade rapidly dashes a fixed distance in the target direction.
- Spike Teleport - Shade Teleports and Conjures a Spike that crashes down in front of the player.
- Oblivion Leap - Shade Leaps to the target location, dealing Damage to nearby enemies when He hits the ground.
- Quick Dash - Shade quickly warps to the target location.
- Crystal Smash - Shade creates a Void Crystal and dashes toward the player to smash him with it (if used in melee, the movement component will be absent).
- Void Skills:
- Erasing Explosion - Shade channels to a void explosion in a large area around itself. This leaves three narrow cones that can be used as safe spots.
- Starburst - Shade sends down a Meteor at a target location. This Skill has a 1s Delay, so you should be able to dodge it quite easily.
- Black Holes - Shade summons homing Black Holes that explode on contact with the player, after a short delay. Keep moving to avoid the blasts.
- Summon Omen's Eyes - Shade summons Omen's Eyes, in a circular pattern, which periodically take aim and discharge a void beam at a target.
- Exploding Black Hole - Shade creates three growing Black Holes that deal Void Damage and explode into multiple projectiles after a set duration. Don't stand in these.
- Absorbing Meteors - Shade opens a Black Hole, calling in Meteors from all directions.
- Void Meteor - Shade Marks an area and sends a sweeping Meteor down its path. Step out of the way!
- Circle of Death - Shade creates three concentric circles around Itself that explode inward with a delay. Step out of these.
- Summon Abyssal Tendrils - Shade summons three Abyssal Tendrils with timed life that strike in a narrow area. These can be destroyed with melee damage or simply ignored.
- Void Reform - Shade Creates a new body for itself at the target location, then detonates Its old body to deal physical damage to enemies around it. Don't stand near the exploding body.
- Piercing Void - Shade opens two portals and fires a Piercing Wave that goes in one and comes out in the other towards the target.
- Poison Skills:
- Poison Puke - Shade vomits poison in front of it in a cone, applying 2 stacks of poison per tick.
- Toxic Spread - Shade creates puddles in a line that explode into corrosive acid.
- Fire Skills:
- Starburst - Shade summons stationary giant stars that explode upon contact or a delay.
- Flamethrower - Shade channels to release a cone of fire in front of it.
- Lightning Skills:
- Spark - Shade conjures wandering lightning sparks that deal damage on contact. These won't disappear when touched, they have 50% chance to shred your Lightning Res when they Hit you, and they deal their Damage as a ground effect.
- Lightning Bolt - Shade releases a lightning bolt in a narrow area in front of him.
- Cold Skills:
- Orbiting Comets - Shade conjures icy comets that spiral around Him, dealing damage on contact.
- Frozen Ice Storm - Shade releases a swirling vortex that travels forward, dealing damage in its wake.
- Physical Skills:
- Blood Effigy - Shade summons a Blood Effigy that tethers itself to an enemy and drains its life force. This can be destroyed with Melee Damage.
- Blood Orbs - Shade summons three Blood Orbs that slowly home in on their target and explode on contact.
|
|
The Shade of Orobyss's Drops
Just like other Monolith Bosses, Shade of Orobyss has its unique Drop Table. Some of the items will drop only when certain Corruption requirements are met.
|
 |
- (14-22)% Increased Cooldown Recovery Speed for Teleport
- (14-22)% Increased Cooldown Recovery Speed for Fury Leap
- (14-22)% Increased Cooldown Recovery Speed for Lunge
- (14-22)% Increased Cooldown Recovery Speed for Transplant
- (14-22)% Increased Cooldown Recovery Speed for Shift
- (64-128)% increased Damage Over Time
- +(14-22)% Chance to apply Doom on Hit
- (14-22)% Chance to gain Haste for 1 second on Hit
|
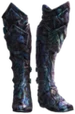
Stymied Fate - These Unique Boots offer a range of bonuses that will make your character more dynamic, provided that you have access to the affected skills. They also give a solid bonus to Damage over Time, which makes them a solid choice for DoT-heavy builds.
 |
- (1-3)% of Melee Damage Leeched as Health
- (1-3)% of Void Damage Leeched as Health
- (10-30)% Increased Leech Rate
- (3-8)% increased Movement Speed
- +(10-30)% Chance to apply Doom on Hit
- (10-30)% Increased Doom Effect
|
Siphon of Anguish - This Unique Ring will be perfect for builds that mix Void and Physical damage, and are in need of some extra Health Leech.
 |
- +(90-120) Melee Void Damage
- +100% Chance to apply Doom on Hit
- (20-50)% Increased Doom Effect
- (20-50)% Increased Doom Duration
- (50-100)% increased Melee Damage
- (50-100)% Increased Leech Rate
|
Apathy's Maw (50+ Corruption) - This Two-Handed Axe offers an amazing bonus to Melee Void Damage and one of the biggest increases to Leech Rate in the entire game. If you like Void Knight, you definitely should have it in your arsenal.
 |
- (50-70)% increased Armor
- +(5-10) Melee Void Damage
- (50-70)% increased Melee Damage
- Using a Potion Cleanses Stun and Freeze
- Stun Immunity for 4 seconds when you use a Potion
|
Shattered Chains (120+ Corruption) - This universal Belt will come in handy if you don't like being stunned or frozen. Moreover, it will greatly increase the Damage you do with Melee Skills.
 |
- +1 to All Skills
- +(1-45)% Physical Resistance
- +(1-45)% Fire Resistance
- +(1-45)% Cold Resistance
- +(1-45)% Lightning Resistance
- +(1-45)% Void Resistance
- +(1-45)% Necrotic Resistance
- +(1-45)% Poison Resistance
|
Omnis (200+ Corruption) - If you lack Resistances and can't afford to change multiple items to fix that, Omnis might be just what you need. It can single-handedly take care of your Resistance-needs and increase your Skills by +1 as a bonus!
|
|
END NOTE
If you've found this guide helpful and informative, don't hesitate to leave a comment below, it will motivate us to continue our work. If you have a question regarding a part of the guide, or if something is unclear, please let us know and we'll do our best to answer it! Also, please note that this is an early version of our guide, and we will be happy to receive constructive criticism, that will help us improve it, so leave your suggestions in the comments section below.
|
Pictures used in this article are the intellectual property of Eleventh Hour Games