
Clay Golem Necromancer Build for PD2
Complete Build Guide on one of the most popular Minions/Pet Build for the Necromancer ClassClay Golemancer
Necromancer Build
Updated for Season 4
| Build notes: |
|
June 8, 2021 January 12, 2022 |
Build Overview
The Golemancer is one of the most iconic Diablo 2 build archetypes. Almost everyone has tried it in the original game and almost everyone was amazed (or bored to death) by the power of Golems and the fact that they do all the work by themselves. In Project Diablo 2, a Golem Necro is more powerful than it was in the original game, as Clay Golems have received a buff - They now deal Splash Damage which makes them much more effective against packs of enemies. Thanks to this, you can successfully farm with a Golemancer in the end-game.
This version of the popular Golemancer Necro Build is fully capable of solo clearing high-end content without putting too much effort into it - your Golems will take care of pretty much everything. The build offers a very laid-back playstyle and is a great choice for Hardcore as dying with it is very unlikely if you pay at least some attention to what's happening on your screen. It also offers very good mobility with Vigor merc and Blood Warp so its clear speeds are solid. If you're looking for a low-effort, cheap to gear up (you can run this build on a budget, no problem) farming build, it should meet your requirements.
Season 4 Note: With the recent AI improvements, all summon-based Necromancer builds are much more reliable and seem even stronger than before. As for Golemancer, the build has received a rather substantial buff (Clay Golem had its synergies doubled, basically) and performs better than ever.
You can also check our other Best Project Diablo 2 Builds
 Pros Pros |
 Cons Cons |
| Very easy to play |
Not as powerful as Summoner Druid |
| Good Mobility and Great Survivability |
Can get very boring if you like active builds |
| Very Versatile thanks to resistance-breaking curses |
Fully relies on Summons - little to no direct damage options |
| Can be played on a budget |
Skills
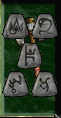
| ATTRIBUTES |
|
| SUMMONING SPELLS |
|
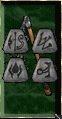
This is the core Skill Tree of this Build. It contains not only the main source of its offensive power - Golems, but also the powerful Blood Warp which offers mobility comparable to Sorc's Teleport. Skills:
|
|
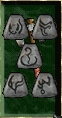
CURSES |
|
This build utilizes Curses to break the enemy's physical resistance. With maxed-out Amplify Damage and Curse Mastery, you can lower enemy physical res by 75%. The rest of the Curses is not really worth spending any additional points on, but you can do it if you like their effects. Skills:
|
| POISON AND BONE SPELLS |
|
This skill tree is not the focus of this build and all the skill points are needed elsewhere, but we can afford to invest 2 points to get Bone Armor. Skills:
|
Items
|
As per usual with PD2 Builds, you want to get as many Skill Levels (Necromancer/Summoning Spells in this case) as possible to increase the build's overall power level. Resistances are also important, but they should never come before the offensive power. A faster cast rate is nice to have, but not nearly as essential as with other types of necro builds. Defensive stats, like faster hit recovery and life on each kill, are a nice addition but you should not choose gear for them specifically. |
|
|
HELMETS |
|
|
Harlequin Crest (Shako) - You can't go wrong with Shako (and chances are, you already have one). This helmet gives you everything you might want for your Necromancer - Skill levels, Mana, Health, Damage taken reduction, attributes, and magic find.
|
|
|
Delirium (Rune Word) - A very powerful Helmet Runeword that gives a solid boost to Magic Find and +2 to Skill Levels. A good budget alternative that will also help you make some more money.
|
|
|
Steel Shade (Armet) - This Helmet is a surprisingly solid option as we use an off-hand that works as a Shield. It provides +2 to All Skills, a 30% Faster Cast Rate, and offers a solid defensive boost on top (with 20% better blocking and 30% faster block rate). Moreover, it has high Magic Find bonus which makes it a great choice for farming.
|
|
|
WEAPONS |
|
|
Beast (Runeword) - A very solid Weapon Choice for a Summon Necro. This gives 8-10 levels of Fanaticism Aura when equipped which greatly increases the damage output of your summons. The downside is its extortionate price. It can be inscribed into Axes, Scepters, and Hammers that have 5 sockets.
|
|
|
Heart of the Oak (Runeword) - This is a solid "budget" alternative to the beast Runeword. It gives +3 to All Skills, provides a nice cast rate boost, and some resistances.
|
|
| OFF-HANDS/SHIELDS | |
|
Boneflame (Succubus Skull) - One of the most powerful off-hands in the game. It makes you Run faster, improves your elemental Resistances, and boosts your offensive power by a lot. You should try to get one that has +3 to Necromancer Skill Levels.
|
|
|
Homonculus (Hierophant Trophy) - An extremely powerful Class item that increases Necromancer's Skills by 2 and provides some nice defensive bonuses (increased block chance and faster block rate are great). Homonculus pairs especially well with the Steel Shade. If you go for this one, you should invest some more points into Dexterity to make your block relevant.
|
|
|
Stormshield (Monarch) - a BiS defensive option that will allow you to achieve Max Block. Pick it if you want to make your Summon Necro even less likely to die.
|
|
| WEAPON SWAP | |
|
Call to Arms (Rune Word) - This powerful Runeword will allow you to pre-buff yourself up with Warcries (buffs persist through weapon swap).
|
|
|
Lidless Wall (Grim Shield) - A very powerful Shield that grants up to +2 Skills and high FCR.
|
|
|
AMULETS |
|
|
Mara's Kaleidoscope - In a build that wants +All Skills, this amulet is a must for the end game. It provides a great combination of offensive (+2 to all skills) and defensive (+20-30 to all resistances) properties.
|
|
|
[Alternative] Rare/Magic Amulets with + Necromancer/Summoning Spells are great budget choices and solid fillers before you are able to get Mara's Kaleidoscope.
|
|
|
ARMORS |
|
|
Enigma (Runeword) - A solid all-around choice that takes care of your defense and offense. Blink Charges it gives you are less relevant because of Blood Warp, but still handy to have in some situations, as you won't achieve 0 Cooldown Bloodwarp (unless you want to sacrifice your offensive power for it). Because of the Jah • Ith • Ber runes required to complete it, it is very expensive, however.
|
|
|
Atma's Wail (Embossed Plate) - A solid defensive choice with very high defense, replenish life, +1 to All Skills, and a nice bonus to magic find.
|
|
|
Trang-Oul's Scales (Chaos Armor) - A solid defensively-oriented armor that will also make your summons better. A solid choice, even if you don't plan on using a full Trang's set.
|
|
|
RINGS |
|
|
The Stone of Jordan - One of the most iconic items in Diablo 2, which increases the level of all your Skills and your max Mana. A solid offensive choice.
|
|
|
Raven Frost - This ring provides Freeze immunity which is extremely important to have. If you have freeze immunity from another item, you can choose a different ring.
|
|
|
Wisp Projector - This is a BiS build for this build as it allows you to buff your summons with Heart of the Wolverine.
|
|
|
GLOVES |
|
|
Gravepalm (Sharkskin Gloves) - These gloves give us +1 to Summoning Skills which automatically makes them a BiS item. They also increase Strength which is rather nice as it allows us to put fewer points into it.
|
|
|
Bloodfist (Heavy Gloves) - A solid defensively focused choice. Alternatively, you can use gloves with magic find - we prefer to go for these ones as they give +30% faster hit recovery which is often life-saving.
|
|
|
BOOTS |
|
|
Waterwalk (Sharkskin Boots) - You can't go wrong with these boots - they are an extremely solid all-around choice. The most important thing about them is the very high, up to +65, Life bonus. 20% Faster Block Rate is amazing as well. Also, you will appreciate their amazing +40% faster Run/Walk and almost infinite Stamina.
|
|
|
Aldur's Advance (Battle Boots) - This pair of Boots offers very high bonus Movement Speed and Life. Also, they have a very high bonus to Fire Resistance, which is handy if you don't have fire resistance charms or want your charms to have other bonuses.
|
|
|
Itherael's Path (Mirrored Boots) - These versatile boots will not only boost your attributes, defense, and hit recovery, but also increase your running speed and casting rate which makes it a solid option for the build.
|
|
|
BELTS |
|
|
Arachnid Mesh (Spiderweb Sash) - Definitely a Best in Slot Belt for this build. Arachnid Mesh gives +1 to all Skills in addition to increasing your Cast Rate. This belt is a must-have in a wide range of caster builds, so purchasing it is a good investment.
|
|
|
String of Ears (Demonhide Sash) - A great option if you're after some additional survivability. The String of Ears provides up to a 15% damage reduction bonus which is just amazing for this Item slot.
|
|
|
CHARMS |
|
|
|
|
MERCENARY |
|
|
We recommend picking up Act 1 Vigor Mercenary for extra mobility (Vigor Aura makes your Golems Much faster, which is EXTREMELY important) that helps with clear speeds by a lot, and for the ability to use a Bow with a chance to cast Amplify Damage. She should be equipped with:
|
|


|
END NOTE This is our premiere Project Diablo 2 build where we tried to include all of the important information on how to set up this character while keeping the guide as compact as possible. If we've missed something of importance, please let us know! If you have any Build requests, please post them in the Comments section below. We will be happy to cover your most requested builds in the future! Also, we hope that you have found this guide useful and informative. Also, we will be happy to receive constructive criticism that will help us improve our future work, so don't hesitate to give us your feedback. |