CoC Rolling Magma
Blind Prophet
Created for Legacy of Phrecia
The Best Crafty Guides by Odealo
| Guide notes |
March 23, 2025
-Build created |
| Build overview |
| Tags: [ELEMENTAL] [ES] [CRIT] [TRIGGER] |
|
Budget:
Defenses:
|


|
Boss DPS:
AoE:
|

|
The Blind Prophet Ascendency available during the Legacy of Phrecia Event League is ideal for any Cast on Critical Strike Build, as it sets the base Critical Strike Chance of any Weapon to 12%, which is simply absurdly high and makes scaling much easier. It applies to all Weapon types in each category: Rare, Unique, Ranged, or Melee. It also inflicts you with the Blind Debuff, which lowers your Accuracy and Evasion Ratings, but you can easily shrug it off with the help of Minor Pantheon Power, investing more into Accuracy Rating, or using a Weapon with a special modifier that always Hits, removing the need for Accuracy completely.
Another important property of this Ascendency are the Directionless and Careless Notables: they make your Projectiles fire in random directions, have a 50% chance to Return to you, and your Skills fire two additional Projectiles. Usually, random Projectile direction is considered a downside, but this is not the case for the Rolling Magma Spell. Normally, it fires a Projectile that bounces a few times in a straight line, dealing AoE Damage with every bounce. The random direction applies to every bounce, and when paired with Returning Projectile modification it makes this Skill extremely deadly as it will easily Hit the same area multiple times. When you equip the Ashes of the Stars Amulet it can Chain from the ground up to 9 times, with a 50% Chance to do it again when Returning. Of course, not all Hits will land in the same spot, although with two extra Projectiles from the Careless Notable you can expect an extraordinary amount of Hits with each Cast. It also makes the Clear Speed great, as the bouncing Projectiles will eventually cover the entire Area.
Naturally, you will not Cast this Spell manually. Instead, you should use the Cast on Crit Support. There are a few Attacks worth considering for such a Build, such as Cyclone, Lancing Steel, or Blast Rain. Each Skill has its own advantages and disadvantages that require specialized Setup to make the most out of it. We have chosen the Cyclone for simple and comfortable Clear Speed, but with minor adjustments you can make any Skill work with this Setup. The additional benefit for Cyclone is the aforementioned Ashes of the Stars Amulet, which lowers the Movement Speed when Channeling Cyclone. It now slows you by only 5%, so you can comfortably hold the Cyclone button the entire time.
The Unique Tides of Time Belt can greatly improve your Flask Sustain. Notably, with a little help on your Passive Tree, it can make the Coruscating Elixir always active, allowing you to opt for a Low-life Setup reserving all your Life for extra Auras, and enabling the Pain Attunement for a 30% More Damage bonus. Your other Flasks are also very useful, such as magic Quicksilver Flask for additional Movement Speed when Cycloning, or Oriath's End Flask that improves your Clear Speed thanks to elemental explosions it creates, and the extra Elemental Resistances it provides makes your overall gearing much cheaper.
You can also check all our Guides for the on-going Event right here: Best Builds for Legacy of Phrecia
1. Gameplay
Keep Channeling the Cyclone for the entirety of your gameplay. It will trigger the Rolling Magma when you Critically Strike an Enemy. The Flame Wall and your Curses will be also triggered automatically. For extra mobility use Frostblink, which allows you to blink without interrupting the Cyclone. It is a Low-Life Setup, so you will use a lot of Auras.
|
 
Odealo is a secure trading platform for MMO gamers. Here you can buy, sell, and trade PoE Currency for real cash.
|
2. Build's PROS & CONS
| PROS |
- Comfortable Clear Speed
- High Energy Shield
- Good Damage against Bosses
- Fast Movement Speed
|
| CONS |
- Delayed Damage profile
- Weak without decent Items
|
3. Leveling tips
With the Blind Prophet Ascendency you could start using the Cast on Crit setup right after the first Ascendency Trial, but it will be hard to sustain the Mana Costs and get satisfying Damage without proper Items. The Energy Shield setup is not possible during the campaign, you should use a regular Life setup first. We recommend temporarily choosing the Servant of Arakaali Ascendency for the free level 15 Envy Aura, which will carry you through the early game effortlessly with any setup. It can also be obtained via Runesmith Enchants. It is especially potent with Cobra Lash and Blade Trap with Claws. You can check out our Shadow Leveling Guide using Traps in PoE for more tips and ideas on how to speed up your leveling process.
Bandits:
We recommend helping the Alira Bandit for the bonus Elemental Resistance.
Leveling Skill Trees:
40 Points Passive Tree
At first, Poison will be just okay, but once you unlock the Envy Aura it will be insanely powerful.
73 Points Passive Tree
Continue to boost your Poison and Claw Attacks. The Blade Trap doesn't require any particular boost other than increased Trigger Area, it is a Trap but scales like regular Attacks. Transitioning to the final version is not easy, it requires all the necessary Items and many Passive Points.
4. Final Skill Tree, Ascendancy Points, and Pantheon
Final Skill Tree:
104 Points Final Skill Tree (doesn't include Unique or Cluster Jewels)
119 Points Path of Building(PoB) link
Ascendancy points:
Preferably in the order:
- Sightless
- Directionless
- Careless
- Shapeless
Pantheon:
Major God: Soul of the Brine King: You cannot be Stunned if you've been Stunned or Blocked a Stunning Hit in the past 2 seconds
Minor God: Soul of Ralakesh: 25% reduced Physical Damage over Time taken while moving; Moving while Bleeding doesn't cause you to take extra Damage
5. Final Gems links
| [DPS] Rolling Magma setup |
 |
Rolling Magma - fires a fiery Orb that Chains from the ground a few times, dealing AoE Damage with each bounce. |
 |
Cyclone - a Channeling Attack that continuously Hits nearby Enemies while moving forward. Try to match your Attack Speed to the Trigger Cooldown. |
 |
Cast on Critical Strike Support |
 |
Fire Penetration Support |
 |
Elemental Focus Support |
 |
Inspiration Support |
| [UTILITY] Auras setup |
 |
Zealotry - an offensive Aura that improves your Spell Damage and Critical Strike Chance with Spells. |
 |
Summon Skitterbots - creates immortal Minions that apply Shock and Chill to nearby Enemies. |
 |
Discipline - a defensive Aura that improves your maximum Energy Shield. |
 |
Enlighten Support |
[UTILITY] Auras setup
Socketed in the Shield |
 |
Anger - an offensive Aura that grants you additional Fire Damage and enables powerful Watcher's Eye modifiers. |
 |
Grace - a defensive Aura that grants you a lot of Evasion Rating. |
 |
Clarity - a vital Aura that grants you a lot of Mana Regeneration to sustain your triggers. |
| [UTILITY] Curse setup |
 |
Assassin's Mark - increases your Critical Strike Chace and Damage, as well as generates Power Charges when you Hit an Enemy. |
 |
Mark on Hit Support |
|
Inspiration Support |
| [UTILITY] Guard setup |
 |
Immortal Call - a Guard Skill that briefly reduces the Damage you take. Keep it on the same level as the Support Gem to trigger it. |
 |
Cast when Damage Taken Support - use a low-level Gem to trigger it as often as possible. |
| [UTILITY] Cwdt setup |
 |
Flame Wall - creates a fiery wall that adds extra Fire Damage to any Projectile that passes through it. |
 |
Flammability - your second Curse, it lowers the Fire Resistance of your Enemies. |
|
Cast when Damage Taken Support - here you should use a high-level Gem to get the best results. It will trigger any time you fight with stronger enemies. |
 |
More Duration Support |
| [UTILITY] Other Utility setups |
 |
Frostblink - an instant blink Skill that allows you to dodge incoming Attacks or cross terrain gaps without interrupting your Cyclone. |
 |
Frost Shield - optionally you can use this Skill to create a barrier that absorbs a big portion of the incoming Damage and increases your Critical Strike Chance. |
|
On Odealo dozens of sellers compete for your attention. Buying PoE Currency here guarantees the best prices, prompt delivery, and the best quality of service.
|
5. Gear Setup
To comfortably play with a Low-life setup you will need some important, although not very expensive, Unique Items. The Tides of Time and Coruscating Elixir are mandatory to ensure the Chaos Damage does not bypass your Energy Shield. You will also need the Prism Guardian Shield to efficiently Reserve your Life with Auras. Other than that you should focus on getting Rare gear pieces with lots of Energy Shield and cap your Resistance. It will be considerably easier thanks to the permanent uptime on your Elemental Flasks. To scale your Damage you should focus on Spell Damage, additional Gem Levels, and Critical Strike Chance and Multiplier. You will also need to match your Attack Speed to the trigger Rate of CoC Support.
|
Stat priorities on items:
- Energy Shield
- Elemental and Chaos Resistances
- Attribute Requirements
- Attack Speed
- Spell Damage
- Fire Spell Gem Levels
- Critical Strike Multiplier
|
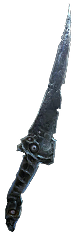 (Weapon) Rare Dagger - look for Spell Damage and Gem Level bonuses. We recommend getting roughly 1.7 Attack Speed, adjusting your other Attack Speed bonuses to match different base Speed can be problematic. You will also need to craft a special modifier to always Hit with your Attacks. (Weapon) Rare Dagger - look for Spell Damage and Gem Level bonuses. We recommend getting roughly 1.7 Attack Speed, adjusting your other Attack Speed bonuses to match different base Speed can be problematic. You will also need to craft a special modifier to always Hit with your Attacks. |
Min. requirements:
60% increased Spell Damage
1.7 Attack Speed
+1 to Level of all Fire Spell Skill Gems
Hits can't be Evaded (Crafted)
Optional affixes:
% increased Spell Critical Strike Chance
% to Global Critical Strike Multiplier
Adds # Fire Damage to Spells |
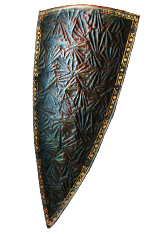 (Shield) Prism Guardian - with this Shield you can efficiently Reserve Life with Auras without the massive penalty of the Arrogance Support. It also grants a decent bonus to Elemental Resistance. (Shield) Prism Guardian - with this Shield you can efficiently Reserve Life with Auras without the massive penalty of the Arrogance Support. It also grants a decent bonus to Elemental Resistance. |
+12% to all Elemental Resistances
+2 to Level of Socketed Aura Gems
Socketed Gems Cost and Reserve Life instead of Mana
Socketed Gems have 30% increased Reservation Efficiency
+(20-30) to Dexterity
+25% to all Elemental Resistances |
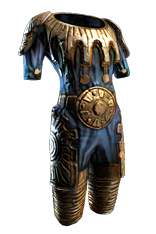 (Body Armour) Rare Armour - it is the most important piece for the Energy Shield, make sure you get a lot of it here. You can also use a hybrid ES/Evasion piece to include Spell Suppression, but it is only more valuable if you fight dangerous Bosses often, or use a very expensive Forbidden Jewel combo. (Body Armour) Rare Armour - it is the most important piece for the Energy Shield, make sure you get a lot of it here. You can also use a hybrid ES/Evasion piece to include Spell Suppression, but it is only more valuable if you fight dangerous Bosses often, or use a very expensive Forbidden Jewel combo. |
Min. requirements:
+900 maximum Energy Shield
Optional affixes:
Resistance
% chance to Suppress Spell Damage
% to Critical Strike Multiplier for Spell Damage
% of Physical Damage from Hits taken as Fire Damage |
 (Amulet) Ashes of the Stars - boost the Quality of all your Gems, adding extra Chains to the Rolling Magma and lowering the Movement Speed penalty of the Cyclone. Getting a perfect 30% Quality roll adds extra bounce, but it is not necessary at first. (Amulet) Ashes of the Stars - boost the Quality of all your Gems, adding extra Chains to the Rolling Magma and lowering the Movement Speed penalty of the Cyclone. Getting a perfect 30% Quality roll adds extra bounce, but it is not necessary at first. |
+(10-16) to all Attributes
(5-10)% increased Experience Gain of Gems
+1 to Level of all Skill Gems
+(20-30)% to Quality of all Skill Gems |
 (Helmet) Rare Helmet - primarily look for a high Energy Shield, Resistance, and possibly an open Prefix to improve your AoE a bit. The Eldritch Influence can be used to improve your Reservation Efficiency or shift Physical Damage to be taken as Elemental. (Helmet) Rare Helmet - primarily look for a high Energy Shield, Resistance, and possibly an open Prefix to improve your AoE a bit. The Eldritch Influence can be used to improve your Reservation Efficiency or shift Physical Damage to be taken as Elemental. |
Min. requirements:
+300 maximum Energy Shield
40% Elemental and Chaos Resistance
Optional affixes:
% of Physical Damage from Hits taken as Fire Damage
% increased Spell Critical Strike Chance
% increased Mana Reservation Efficiency of Skills
% increased Area of Effect |
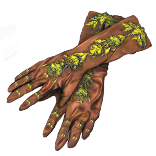 (Gloves) Rare Gloves - on your Gloves look for Attack Speed, high Energy Shield, and Resistance. The Energy Shield granted by this slot is not very impactful, you might want to choose a hybrid variant that grants you Spell Suppression as well. (Gloves) Rare Gloves - on your Gloves look for Attack Speed, high Energy Shield, and Resistance. The Energy Shield granted by this slot is not very impactful, you might want to choose a hybrid variant that grants you Spell Suppression as well. |
Min. requirements:
+100 maximum Energy Shield
40% Elemental and Chaos Resistance
15% increased Attack Speed
Optional affixes:
% chance to Suppress Spell Damage
% chance to Unnerve Enemies for 4 seconds on Hit
#% increased Damage with Hits against Chilled Enemies
% increased Area of Effect |
 (Belt) The Tides of Time - this Belt is mandatory to ensure 100% uptime on your vital Flasks. You need a version that grants 3 Utility Flask Charges, other types do not matter. (Belt) The Tides of Time - this Belt is mandatory to ensure 100% uptime on your vital Flasks. You need a version that grants 3 Utility Flask Charges, other types do not matter. |
+(260-320) to Armour and Evasion Rating
100% increased Life Recovery from Flasks
100% increased Mana Recovery from Flasks
Flasks applied to you have 25% increased Effect
Life Flasks gain (0-3) Charges every 3 seconds
Mana Flasks gain (0-3) Charges every 3 seconds
Utility Flasks gain (0-3) Charges every 3 seconds |
 (Boots) Rare Boots - look for high Energy Shield, Movement Speed, and Resistance. The Brittle Ground is an easy way to add tons of Critical Strike Chance for the Rolling Magma as you will spin on top of your enemies anyway. (Boots) Rare Boots - look for high Energy Shield, Movement Speed, and Resistance. The Brittle Ground is an easy way to add tons of Critical Strike Chance for the Rolling Magma as you will spin on top of your enemies anyway. |
Min. requirements:
+100 maximum Energy Shield
+40% to Elemental and Chaos Resistance
+30% Movement Speed
Drops Brittle Ground while moving, lasting 2 seconds (Exarch Influence)
Optional affixes:
#% chance to Avoid Bleeding
#% chance to Avoid being Poisoned
% chance to Suppress Spell Damage |
 (Ring) Shavronne's Revelation - grants a massive amount of flat Mana Regeneration and Energy Shield. The downsides are irrelevant, as you will pick the Ghost Reaver Keystone, which disables Recharge anyway. (Ring) Shavronne's Revelation - grants a massive amount of flat Mana Regeneration and Energy Shield. The downsides are irrelevant, as you will pick the Ghost Reaver Keystone, which disables Recharge anyway. |
+(60-75) to Intelligence
Right ring slot: You cannot Regenerate Mana
Right ring slot: Regenerate 6% of Energy Shield per second
Right ring slot: +250 to maximum Mana
Left ring slot: You cannot Recharge or Regenerate Energy Shield
Left ring slot: Regenerate 40 Mana per Second
Left ring slot: +250 to maximum Energy Shield |
 (Ring) Rare Ring - on your second Ring you will want Strength and Mana Regeneration bonuses, as well as a Crafted modifier, to lower the Mana Costs of your Skills. It should also provide some Resistance. It is possible to get a bit of Fire Damage or Critical Strike Multiplier here with Essences. (Ring) Rare Ring - on your second Ring you will want Strength and Mana Regeneration bonuses, as well as a Crafted modifier, to lower the Mana Costs of your Skills. It should also provide some Resistance. It is possible to get a bit of Fire Damage or Critical Strike Multiplier here with Essences. |
Min. requirements:
+40 to Strength
+40% to Elemental and Chaos Resistance
Non-Channelling Skills have -7 to Total Mana Cos
Optional affixes:
% increased Fire Damage
% to global Critical Strike Multiplier
+1 to minimum Endurance Charge |
 (Jewel) Pure Talent - with this Jewel, you can easily improve the Critical Strike Chance of the Rolling Magma. It is rather cheap, so you should aim for a Corrupted Implicit that prevents Corrupting Blood. (Jewel) Pure Talent - with this Jewel, you can easily improve the Critical Strike Chance of the Rolling Magma. It is rather cheap, so you should aim for a Corrupted Implicit that prevents Corrupting Blood. |
While your Passive Skill Tree connects to the Shadow's starting location, you gain:
+0.5% to Critical Strike Chance |
 (Jewel) Watcher's Eye - you will use a lot of Auras, so this Jewel can be extremely potent. Zealotry and Anger modifiers offer a lot of Damage, while Grace and Clarity can be used defensively. (Jewel) Watcher's Eye - you will use a lot of Auras, so this Jewel can be extremely potent. Zealotry and Anger modifiers offer a lot of Damage, while Grace and Clarity can be used defensively. |
(4-6)% increased maximum Energy Shield
(4-6)% increased maximum Life
(4-6)% increased maximum Mana
<Two or Three random aura modifiers>
Recommended modifiers:
Damage Penetrates (10-15)% Fire Resistance while affected by Anger
+(30-50)% to Critical Strike Multiplier while affected by Anger
(40-60)% increased Fire Damage while affected by Anger
Consecrated Ground you create while affected by Zealotry causes enemies to take (8-10)% increased Damage
(100-120)% increased Critical Strike Chance against Enemies on Consecrated Ground while affected by Zealotry
Critical Strikes Penetrate (8-10)% of Enemy Elemental Resistances while affected by Zealotry
Non-Channelling Skills have -(10-5) to Total Mana Cost while affected by Clarity |
 (Jewel) Energy From Within - this Jewel grants you a total of 22% increased maximum Energy Shield when socketed near the Melding Notable, which is 3 times more than regular Jewel. However, it doesn't provide any Damage. (Jewel) Energy From Within - this Jewel grants you a total of 22% increased maximum Energy Shield when socketed near the Melding Notable, which is 3 times more than regular Jewel. However, it doesn't provide any Damage. |
(3-6)% increased maximum Energy Shield
Increases and Reductions to Life in Radius are Transformed to apply to Energy Shield |
  (Jewel) Forbidden Flesh&Flame - there are a lot of powerful Shadow Notables you can borrow with this set of Jewel, but most of them are very expensive. It is a luxury upgrade, you don't need it at first. (Jewel) Forbidden Flesh&Flame - there are a lot of powerful Shadow Notables you can borrow with this set of Jewel, but most of them are very expensive. It is a luxury upgrade, you don't need it at first. |
| Allocates <Random Ascendancy Notable> if you have the matching modifier on Forbidden Flesh/Flame |
 (Jewel) Large Cluster Jewel - here you can get a lot of increases to your Fire or Elemental Damage. It can also provide a bit of utility in the form of extra Resistance or AoE. (Jewel) Large Cluster Jewel - here you can get a lot of increases to your Fire or Elemental Damage. It can also provide a bit of utility in the form of extra Resistance or AoE. |
Recommended affixes:
1 Added Passive Skill is Prismatic Heart
1 Added Passive Skill is Smoking Remains
1 Added Passive Skill is Widespread Destruction
1 Added Passive Skill is Cremator
1 Added Passive Skill is Disorienting Display |
 (Jewel) Medium Cluster Jewel - the Quick Getaway is very important as it improves your Speed. The Pressure Points is the default best option for most Crit Builds. Try to get extra Resistance or Attributes on small nodes, it is not a massive boost but can quickly add up. (Jewel) Medium Cluster Jewel - the Quick Getaway is very important as it improves your Speed. The Pressure Points is the default best option for most Crit Builds. Try to get extra Resistance or Attributes on small nodes, it is not a massive boost but can quickly add up. |
1 Added Passive Skill is Pressure Points
1 Added Passive Skill is Quick Getaway
Added Small Passive Skills also grant: Resistance/Attribute |
 (Jewel) Rare Jewel - here you can get two very important modifiers: increases to your Energy Shield and Critical Strike Multiplier. You can also get a bit of Attack Speed here to help match your trigger rate, but it is usually very expensive to get all good modifiers at once. (Jewel) Rare Jewel - here you can get two very important modifiers: increases to your Energy Shield and Critical Strike Multiplier. You can also get a bit of Attack Speed here to help match your trigger rate, but it is usually very expensive to get all good modifiers at once. |
Recommended affixes:
% to Critical Strike Multiplier for Spell Damage
% to global Critical Strike Multiplier
% to Critical Strike Multiplier with Fire Skills
% to Critical Strike Multiplier with Elemental Skills
% increased maximum Energy Shield
% increased Attack Speed |
 (Flask) Coruscating Elixir - a mandatory Flask. It prevents Chaos Damage from bypassing the Energy Shield, so you can safely Reserve it all with your Auras. Use an Enchant to trigger it at the end of the Duration and activate it once when you enter a new Map. (Flask) Coruscating Elixir - a mandatory Flask. It prevents Chaos Damage from bypassing the Energy Shield, so you can safely Reserve it all with your Auras. Use an Enchant to trigger it at the end of the Duration and activate it once when you enter a new Map. |
+40% to Fire Resistance
Chaos Damage taken does not bypass Energy Shield during effect
Removes all but one Life on use
Removed life is Regenerated as Energy Shield over 2 seconds
25% increased Duration |
 (Flask) Oriath's End - this Flask greatly helps with your Clear Speed by creating Elemental Explosions when you kill an Enemy. In this setup it will be active all the time, so you can use it to cap your Resistance. (Flask) Oriath's End - this Flask greatly helps with your Clear Speed by creating Elemental Explosions when you kill an Enemy. In this setup it will be active all the time, so you can use it to cap your Resistance. |
+35% to all Elemental Resistances
(20-40)% increased Charge Recovery
Enemies you Kill during Effect have a (20-30)% chance to Explode, dealing a tenth of their maximum Life as Damage of a Random Element |
|
Other suggested Flasks:
- Jade Flask with Evasion Rating bonus
- Diamond Flask with Critical Strike bonus
- Quicksilver Flask with Stun Avoidance bonus
|
   |
|
Odealo is one of the biggest Path of Exile marketplaces. It allows regular players to buy, sell, and trade PoE Currency with the use of real cash.
|
If you have any other build requests please leave that in the comments below. We are always open to suggestions and constructive feedback.
Pictures used in this article are the intellectual property of Grinding Gear Games.