CwS Detonate Dead/Cremation Chieftain Build
An autobomber AFK-type build for the Chieftain, which unleashes insanely strong Ignites while tanking all incoming damageCast when Stunned
Hinekora Chieftain Build
Updated for Patch 3.26
The Best Crafty Guides by Odealo
| Guide notes | |||
| July 10, 2025 -Build created |
|||
| Build overview | |||
| Tags: [ELEMENTAL] [TRIGGER] [LIFE] | |||
|
Budget: Defenses: |
|
Boss DPS: AoE: |
|
The reason to pick Chieftain for an Ignite build is predominantly for the Hinekora Ascendancy Passive. Enemies you kill have a 5% chance to deal 500% of their Life as Fire Damage. That's a lot. It's not a Spell or Attack, so the ways in which you can scale it are somewhat limiting - mostly regular Burning Damage, Fire Damage, and DoT Multiplier. With Ignite proliferation and a crowded enough area, it has an unparalleled clear potential. There are just a few nuances to take care of. First of all is capping Chance to Ignite. Critical Strikes will inherently Ignite, but Critical damage won't increase Ignite's Damage, thus it's very inefficient. We can only benefit from Elemental Overload to gain more Burning Damage now and then. Be sure to have 100% to Ignite gained from a weapon or Tattoos (which are very expensive). The second obstruction to overcome is dealing with situations in which the enemy won't explode and won't spread the Ignite, initiating this desired chain reaction, like trying to kill a pinnacle boss. Relying on the 5%-having-chance-of-occurring effect alone won't do much, so we will also use many other Fire Skills to supplement the build, most notably, Cremation of Volcano and Detonate Dead of Scavenging. Against bosses, we will cast the Penance Mark, so that enemies, ripe to detonate, will be spawned on Hit. Now, all that is left to do is to implement some mechanism to Hit the enemy many times a second to ensure that the Penance Mark spawns the right enemy.
Link all your Spells with Cast when Stunned Support Gem. This will trigger them on Stun, which will be with every Hit received. Equip the Valyrium Ring and allocate the Agnostic for this effect. For the Stuns not to affect you, you will also need the Immutable Force Jewel. This setup also encourages you to equip Bloodnotch to Recover Life from all Hits. Combined with Petrified Blood and Defiance of Destiny, you will reach the best Recovery the game has to offer. You can even upgrade it with Life Leech from a Flask and Gloves and Life Regeneration, found commonly everywhere. To mitigate Elemental Hit Damage, the build has 90% all Elemental Resistances via the Valako Keystone and some Maximum Fire Resistance gathered from passives, Shield, Jewels, and a Ruby Flask. To mitigate Physical Damage, you will equip the Cloak of Flame, stack some Endurance Charges, and acquire a bit of Armour. It all makes for one of the most durable builds in the game, just be mindful of Chaos Damage. Get 75% Chaos Resistance too. It all may sound complex, but it's the easiest build to pilot. An Autobomber with but a Penance Mark to cast once in a while.
You can also check our other Path of Exile builds right over here Odealo's Crafty Guides - Full List
1. Gameplay
Run into enemies and get Hit. That will trigger a whole set of various Spells - Cremation, Detonate Dead, Purifying Flame, Flame Surge, Firestorm, Punishment, and Molten Shell. They will annihilate everything on the screen. What you have to actively do is seek out singled-out enemies and put the Penance Mark on them. This should kill them. To move around, cast Flame Dash or Attack with Shield Charge. Your passive Skills are Petrified Blood, Tempest Shield, and Malevolence.
|
|
|
|
2. Build's PROS & CONS
| PROS |
|
| CONS |
|
3. Leveling tips
Start as the most regular RF build. You can follow our Righteous Fire Chieftain Build for more info. Levelling with RF is the most well-documented way of doing so, so you should have no problems here. Switch to this version of the build after the fourth lab and put on the required items. Be sure your Ignite Chance is capped, your Resistances are capped, you have good Life Recovery, and you have the Attributes. The damage will grow eventually.
Bandits:
Kill all for a Skill Point
4. Final Skill Tree, Ascendancy Points, and Pantheon
Final Skill Tree:
103 Points Final Passive Tree (doesn't include Unique and Cluster Jewels)
120 Points Path of Building (PoB) link
Ascendancy points:
Preferably in that order:
- Tasalio
- Ramako
- Valako
- Hinekora
Pantheon:
Major God: Soul of Lunaris: 1% increased Movement Speed for each nearby Enemy, up to 8%; 1% additional Physical Damage Reduction for each nearby Enemy, up to 8%
Minor God: Soul of Tukohama: 3% additional Physical Damage Reduction per second you've been stationary, up to a maximum of 9%
5. Final Gems links
| [DPS] Cremation of the Volcano setup | |
 |
Cremation of the Volcano - A version of Cremation that requires no Corpse. It deals Fire Damage with Projectiles that spawn from volcanoes. |
 |
Detonate Dead of Scavenging - Detonates Corpses that you didn't create. It deals Fire Damage, which can Ignite. |
 |
Cast when Stunned Support - Linked Spells are Triggered when stunned, which is each time you get Hit due to the combination of Valyrium and no Energy Shield. Most of your Spells will be linked to it. |
 |
Burning Damage Support - More Fire Damage over Time. |
 |
Swift Affliction Support - Ignite has reduced Duration but deals damage faster. |
 |
Unbound Ailments Support - More Ignite Damage and ignite Duration. |
| [UTILITY] CwS setup | |
 |
Cast when Stunned Support |
 |
Purifying Flame of Revelations - This Purifying Flame creates a big Consecrated Ground for you to stand on. |
 |
Firestorm of Pelting - A rapidly-hitting Fire Spell whose main role is to spawn enemies via Penance Mark. Enemies spawn on Hit. |
| [UTILITY] CwS setup | |
 |
Cast when Stunned Support |
 |
Molten Shell - A Guard Spell that absorbs some of the incoming damage before it breaks or expires. |
 |
Punishment - A Curse that causes enemies to take increased damage while on Low Life and Debilitates them. You should replace it with Flammability if your Merc does not apply this Curse. |
 |
Flame Surge of Combusting - This Flame Surge Ignites an enemy and creates a Burning Ground underneath them. |
| [UTILITY] CwS setup | |
 |
Cast when Stunned Support |
 |
Flame Wall - Projectiles passing through the Flame Wall have added Fire Damage. |
 |
Burning Damage Support |
 |
Elemental Focus Support - More Elemental Damage for Flame Wall with no drawback whatsoever. |
| [UTILITY] Reservation setup | |
 |
Petrified Blood - Causes some of the incoming damage to be taken as DoT, rendering you less vulnerable to big Hits. You want over half of your Life Reserved for it to work. Combined with Bloodnotch, you will nearly instantly Recover all the damage from Hits. |
 |
Tempest Shield - It's mainly used for Spell Block Chance, but can also Shock enemies. |
| [UTILITY] Eternal Blessing setup | |
 |
Malevolence - An Aura to deal more Damage over Time. |
 |
Eternal Blessing Support - Malevolence is your only Aura. You may link it with Eternal Blessing, so that it will Reserve no Mana at all. |
| [MOBILITY] Shield Charge setup | |
 |
Shield Charge - A mobility Skill to move faster in a straight line. |
 |
Faster Attacks Support - Faster Attacks for Shield Charge. |
| [MOBILITY] Flame Dash | |
 |
Flame Dash - Another movement ability, used to dash through the ledges and pits. |
|
|
6. Gear Setup
You're dealing Fire Damage over Time with Spells, but the Hinekora passive explosion is not a Spell and will scale only with Fire Damage or Burning Damage, and given it's you main damaging ability against the toughest enemies, you won't need a lot of stats that typical Spell builds strive for, like Gem Level for a particular Spell or Spell Damage. Instead, focus on Damage over Time Multiplier and Burning Damage. You also need to Ignite with your Fire Hits, so get a 100% chance to Ignite via passives, Tattoos (which are expensive), and a good weapon. Maximum Fire Resistance is important. With the Valako passive, the other Maximum Elemental Resistances will tag along. You also don't need many, if at all, Lightning or Cold Resistances. Fire Resistance from the mandatory items should be roughly enough. Instead, focus on Chaos Resistance and Life Regeneration. With Supreme Ostentation, you won't even need Attributes, so that gearing up is much easier and cheaper.
|
Stat priorities on items:
|
 (Helmet) Rare Helmet - You want a sturdy Helmet with Life, Armour, and Resistances. Many players will put their Righteous Fire here after acquiring a Helmet with two built-in Support Gems, but we don't do that - it's not a RF build, but the Skill can be easily implemented after some tinkering. (Helmet) Rare Helmet - You want a sturdy Helmet with Life, Armour, and Resistances. Many players will put their Righteous Fire here after acquiring a Helmet with two built-in Support Gems, but we don't do that - it's not a RF build, but the Skill can be easily implemented after some tinkering. |
|
| Min. requirements: +90 to Maximum Life +40% to Resistances Optional affixes: Socketed Gems are Supported by Level # Burning Damage Socketed Gems are Supported by Level # Concentrated Effect Socketed Gems deal 30% more Elemental Damage (Essence) +1 to Level of Socketed AoE Gems; #% increased Area of Effect (crafted) Attributes |
|
 (Weapon) Rare Weapon - You're dealing Fire Damage over Time (Burning Damage). We recommend the Oscillating Sceptre for a base to get Elemental Overload (more damage). Damage over Time Multiplier is the most valued stat, but keep in mind that it can provide you with a lot of Chance to Ignite, which is otherwise hard and expensive to get. (Weapon) Rare Weapon - You're dealing Fire Damage over Time (Burning Damage). We recommend the Oscillating Sceptre for a base to get Elemental Overload (more damage). Damage over Time Multiplier is the most valued stat, but keep in mind that it can provide you with a lot of Chance to Ignite, which is otherwise hard and expensive to get. |
|
| Min. requirements: 80% Increased Fire Damage +1 to Level of all Fire Spell Skill Gems Damage Over Time Multiplier Optional affixes: +1 to Level of all Spell Skill Gems increased Fire Damage over Time (crafted) Fire Damage Over Time Multiplier (crafted) Burning Damage Chance to Ignite |
|
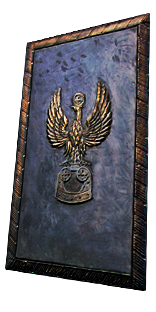 (Off-hand) Rare Shield - You will need a Shield. Otherwise, the build's too fragile. You want to have some additional Maximum Fire Resistance here because of your Valako passive. Prioritize Maximum Life, Resistances, high Block Chance, Armour, and Life Regeneration. (Off-hand) Rare Shield - You will need a Shield. Otherwise, the build's too fragile. You want to have some additional Maximum Fire Resistance here because of your Valako passive. Prioritize Maximum Life, Resistances, high Block Chance, Armour, and Life Regeneration. |
|
| Min. requirements: +100 Maximum Life high Block Chance maximum Fire Resistance +40% to Resistances Optional affixes: Socketed Gems have #% increased Reservation Efficiency (Shaper's Suffix) Life Regeneration Armour |
|
 (Off-hand) Rise of the Phoenix - A very convenient solution if you can't find a good Rare Shield with Maximum Fire Resistance. It only lacks Maximum Life, but it's good otherwise. (Off-hand) Rise of the Phoenix - A very convenient solution if you can't find a good Rare Shield with Maximum Fire Resistance. It only lacks Maximum Life, but it's good otherwise. |
|
| +8% to all Elemental Resistances (240-300)% increased Armour and Energy Shield Regenerate (100-200) Life per second +5% to maximum Fire Resistance +(20-25)% to Fire Resistance +25% to Fire Resistance while on Low Life 10% increased Movement Speed when on Low Life 100% chance to Avoid being Ignited while on Low Life |
|
 (Off-hand) Svalinn - Svalinn is very expensive, but pairs up well with Block Chance, making you nearly invincible. You can put in its sockets Spells like Flame Wall or Frost Bomb to negate enemies' Life Regeneration. (Off-hand) Svalinn - Svalinn is very expensive, but pairs up well with Block Chance, making you nearly invincible. You can put in its sockets Spells like Flame Wall or Frost Bomb to negate enemies' Life Regeneration. |
|
| +(10-20) to maximum Life (10-15)% Chance to Block Spell Damage +(100-150) to Ward -10% to maximum Chance to Block Attack Damage -10% to maximum Chance to Block Spell Damage Chance to Block is Lucky Trigger a Socketed Elemental Spell on Block, with a 0.25 second Cooldown |
|
 (Body Armour) Cloak of Flame - A must-have Armour. It shifts a big portion of Physical Damage to be taken as Fire, increases the Duration of Ignite on enemies, and grants Fire Resistance. All of these are incalculably useful, downright mandatory. (Body Armour) Cloak of Flame - A must-have Armour. It shifts a big portion of Physical Damage to be taken as Fire, increases the Duration of Ignite on enemies, and grants Fire Resistance. All of these are incalculably useful, downright mandatory. |
|
| +(50-75)% to Fire Resistance (40-75)% increased Ignite Duration on Enemies Reflects 100 Fire Damage to Melee Attackers 40% of Physical Damage taken as Fire Damage |
|
 (Boots) Rare Boots - Boots will get you some Movement Speed, Life, Resistances, and maybe Life Regeneration or Freeze Immunity. For the eldritch mods, go for Maximum Fire Resistance and Life Regeneration Rate. (Boots) Rare Boots - Boots will get you some Movement Speed, Life, Resistances, and maybe Life Regeneration or Freeze Immunity. For the eldritch mods, go for Maximum Fire Resistance and Life Regeneration Rate. |
|
| Min. requirements: +90 to Maximum Life 25% increased Movement Speed +40% to Resistances Optional affixes: Resistances Increased Life Regeneration Rate Chill avoidance (crafted) Freeze immunity (crafted) |
|
 (Gloves) Rare Gloves - If you don't have Supreme Ostentation, now's the opportunity to get Dexterity. Gloves will get you Life, Resistances, and Armour or Life Regeneration. Eldritch mods shall grant you Ignite proliferation and Life Leech from Fire Damage. (Gloves) Rare Gloves - If you don't have Supreme Ostentation, now's the opportunity to get Dexterity. Gloves will get you Life, Resistances, and Armour or Life Regeneration. Eldritch mods shall grant you Ignite proliferation and Life Leech from Fire Damage. |
|
| Min. requirements: +90 to maximum Life +40% to Resistances Optional affixes: Life Regeneration Increased Life Regeneration Rate Armour Chaos Resistance Dexterity |
|
 (Belt) Rare Belt - As much Life as you can afford with Chaos Resistance and Life Regeneration or Armour on a Belt. A Hunter-influenced Stygian Vise will be your best option; it can roll increased Maximum Life. (Belt) Rare Belt - As much Life as you can afford with Chaos Resistance and Life Regeneration or Armour on a Belt. A Hunter-influenced Stygian Vise will be your best option; it can roll increased Maximum Life. |
|
| Min. requirements: +110 to maximum Life +40% to Resistances Optional affixes: increased Maximum Life (Hunter's Prefix) Life Regeneration Chaos Resistance |
|
 (Amulet) Defiance of Destiny - DoD is heavily encouraged, because relying only on Life Regeneration and even Life Leech alone is foolish in the end-game environments for this build. It will recover your Life before you get Hit, making it great against barrages of rapid attacks. (Amulet) Defiance of Destiny - DoD is heavily encouraged, because relying only on Life Regeneration and even Life Leech alone is foolish in the end-game environments for this build. It will recover your Life before you get Hit, making it great against barrages of rapid attacks. |
|
| (20-30)% increased Mana Regeneration Rate +(60-80) to maximum Life +(10-40)% to Fire Resistance +(10-40)% to Cold Resistance +(10-40)% to Lightning Resistance Gain (10-20)% of Missing Unreserved Life before being Hit by an Enemy |
|
| Recommended Anointments: Defiled Forces |
|
 (Ring) Valyrium - Stun Threshold is now based on Energy Shield, which is 0, which causes all Hits to Stun you. It's very important for the build that has all Spells linked to Cast-when-Stunned. Be sure none of your other items have ES, or allocate the Agnostic Keystone. (Ring) Valyrium - Stun Threshold is now based on Energy Shield, which is 0, which causes all Hits to Stun you. It's very important for the build that has all Spells linked to Cast-when-Stunned. Be sure none of your other items have ES, or allocate the Agnostic Keystone. |
|
| +(15-25) to maximum Energy Shield +(30-40) to maximum Energy Shield +(30-40)% to Fire Resistance -40% to Cold Resistance Stun Threshold is based on Energy Shield instead of Life |
|
 (Ring) The Hateful Accuser - Hateful Accuser has good implicits and solid stats, but it's the Penance Mark you're interested in. Marked enemy spawns enemies that you can kill, and given luck is on your side, they will explode, dealing 500% of their Life as Fire Damage. It's important when fighting big enemies. (Ring) The Hateful Accuser - Hateful Accuser has good implicits and solid stats, but it's the Penance Mark you're interested in. Marked enemy spawns enemies that you can kill, and given luck is on your side, they will explode, dealing 500% of their Life as Fire Damage. It's important when fighting big enemies. |
|
| 50% reduced Effect of Curses on you 50% increased Elemental Ailment Duration on you Grants level 20 Penance Mark (6-12)% increased Cast Speed +(30-60) to maximum Life +(7-19)% to Chaos Resistance |
|
 (Jewel) Rare Jewels - Jewels can be very powerful. Look for Fire Damage, Burning Damage, Burning Damage Multiplier, DoT Multiplier, and Maximum Fire Resistance, of course. (Jewel) Rare Jewels - Jewels can be very powerful. Look for Fire Damage, Burning Damage, Burning Damage Multiplier, DoT Multiplier, and Maximum Fire Resistance, of course. |
|
| Recommended affixes: increased Maximum Life Maximum Fire Resistance Fire Damage over Time Multiplier Burning Damage |
|
 (Jewel) Bloodnotch - If all Hits Stun you, it's very wise to put the Bloodnotch on and Recover most of that damage back as Life. (Jewel) Bloodnotch - If all Hits Stun you, it's very wise to put the Bloodnotch on and Recover most of that damage back as Life. |
|
| (40-60)% of Damage taken from Stunning Hits is Recovered as Life | |
 (Jewel) Immutable Force - If all Hits are Stunning, you want to equip Immutable Force to increase your Recovery to a point where they will have no effect on you whatsoever. You need a total of 961% increased Stun and Block Recovery, all of which can be sourced from this one Jewel. (Jewel) Immutable Force - If all Hits are Stunning, you want to equip Immutable Force to increase your Recovery to a point where they will have no effect on you whatsoever. You need a total of 961% increased Stun and Block Recovery, all of which can be sourced from this one Jewel. |
|
| (500-1000)% increased Stun and Block Recovery | |
 (Jewel) Elegant Hubris - You can socket it near Eternal Youth and transform it into Supreme Ostentation. This way, you will need no Attributes at all. Expertise and Ancestral Knowledge may be transformed too into something more useful. (Jewel) Elegant Hubris - You can socket it near Eternal Youth and transform it into Supreme Ostentation. This way, you will need no Attributes at all. Expertise and Ancestral Knowledge may be transformed too into something more useful. |
|
| Commissioned (2000-160000) coins to commemorate (Cadiro-Caspiro-Victario) Passives in radius are Conquered by the Eternal Empire Historic |
|
 (Jewel) Watcher's Eye - Your sole Aura is Malevolence. Look for Chaos Resistance and Damage over Time Multiplier if affected by it on your Watcher's Eye. (Jewel) Watcher's Eye - Your sole Aura is Malevolence. Look for Chaos Resistance and Damage over Time Multiplier if affected by it on your Watcher's Eye. |
|
| (4-6)% increased maximum Energy Shield (4-6)% increased maximum Life (4-6)% increased maximum Mana <Two or Three random aura modifiers> |
|
 (Jewel) Large Cluster Jewel - Almost all notables from a Large Fire Damage Cluster Jewel are good, especially ones granting Fire Damage and Burning Damage, like Burning Bright. You'll need only one such Jewel, but the build can accommodate two. (Jewel) Large Cluster Jewel - Almost all notables from a Large Fire Damage Cluster Jewel are good, especially ones granting Fire Damage and Burning Damage, like Burning Bright. You'll need only one such Jewel, but the build can accommodate two. |
|
| Recommended Affixes: 1 Added Passive Skill is Burning Bright 1 Added Passive Skill is Master of Fire 1 Added Passive Skill is Cremator 1 Added Passive Skill is Widespread Destruction 1 Added Passive Skill is Smoking Remains |
|
 (Jewel) Medium Cluster Jewel - Medium Cluster Jewels shall increase your Area of Effect, for the explosions of Hinekora's passive to be more effective. (Jewel) Medium Cluster Jewel - Medium Cluster Jewels shall increase your Area of Effect, for the explosions of Hinekora's passive to be more effective. |
|
| Recommended Affixes: 1 Added Passive Skill is Towering Threat 1 Added Passive Skill is Assert Dominance 1 Added Passive Skill is Expansive Might |
|
 (Jewel) Small Cluster Jewel - Enduring Composure will generate Endurance Charges, an important survivability layer. (Jewel) Small Cluster Jewel - Enduring Composure will generate Endurance Charges, an important survivability layer. |
|
| Recommended Affixes: 1 Added Passive Skill is Enduring Composure |
|
 (Flask) Cinderswallow Urn - Ignited enemies take increased Damage and should recover a portion of your Life when killed. (Flask) Cinderswallow Urn - Ignited enemies take increased Damage and should recover a portion of your Life when killed. |
|
| Onslaught +(10-20) to Maximum Charges Recharges 5 Charges when you Consume an Ignited corpse Enemies Ignited by you during Effect take (7-10)% increased Damage Catarina's Veiled (prefix) <Random recovery on kill modifier> |
|
|
Suggested Flasks:
|
|
     |
6. Mercenary Setup
Our Mercenary can be a damage dealer with the right Skills, but that's not their main role. They should enhance your performance and not die. We've selected a Flame Charlatan since they're good with Ignite Damage, but you can pick one with Malevolence and Temporal Chains, like Withertouch. Just be sure they can apply additional Curses, as we're already using Punishment or Flammability. Eruptor is good too - they can wield Kingmaker.
| [UTILITY] Mercenary Skills | |
 |
Malevolence - Available on Toxicologist, Bladebitter, and Withertouch. If you don't use this Aura, your Merc should. You can then pick a defensive Aura for yourself, like Determination. |
 |
Temporal Chains - Available on Withertouch, but the best way to get it on any Merc is to Corrupt their Gloves or use Asenath's Gentle Touch. Use if their Curse limit is two or more. Makes the Ignite last longer and slows enemies down. |
 |
Holy Flame Totem - It creates a special type of Consecrated Ground that makes you Curse-immune. |
 |
Flammability - Available on Flamehand and Flamequiver. As was the case with Temporal Chains, use only if the Curse limit of your Merc is two or more. |
|
Stat priorities on items:
|
 (Helmet) Rare Helmet - Get a Warlord Helmet that reduces nearby enemies' Fire Resistance. (Helmet) Rare Helmet - Get a Warlord Helmet that reduces nearby enemies' Fire Resistance. |
|
| Min. requirements: Nearby Enemies have -9% to Fire Resistance (Warlord Suffix) +80% total Elemental Resistance Optional affixes: Chaos Resistance |
|
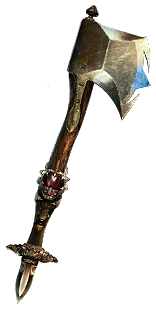 (Weapon) Kingmaker - Crit Multiplier, Item Rarity, Culling Strike, and Fortification for you. It can be wielded by Eruptor. (Weapon) Kingmaker - Crit Multiplier, Item Rarity, Culling Strike, and Fortification for you. It can be wielded by Eruptor. |
|
| (300-360)% increased Physical Damage (7-12)% increased Attack Speed (30-40)% increased Critical Strike Chance Nearby Allies have 30% increased Item Rarity Nearby Allies have Culling Strike Insufficient Mana doesn't prevent your Melee Attacks Nearby Allies have +50% to Critical Strike Multiplier Nearby Allies have +10 Fortification |
|
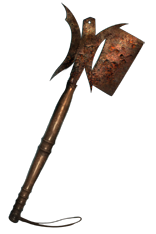 (Weapon) Dreadarc - It has the Flammability on Hit, so be sure the enemies' Curse Limit is two or more. (Weapon) Dreadarc - It has the Flammability on Hit, so be sure the enemies' Curse Limit is two or more. |
|
| Adds (5-15) to (20-25) Physical Damage Adds (5-15) to (20-25) Fire Damage (7-10)% increased Attack Speed +(15-25)% to Fire Resistance 5% increased Movement Speed Curse Enemies with Flammability on Hit |
|
 (Weapon) Singularity - Hinders the enemy; they will move much slower with it. Hindered enemies take increased damage. (Weapon) Singularity - Hinders the enemy; they will move much slower with it. Hindered enemies take increased damage. |
|
| 30% increased Elemental Damage Adds (1-10) to (150-200) Lightning Damage to Spells (14-18)% increased Cast Speed (6-8)% reduced Mana Cost of Skills Nearby Enemies are Hindered, with 25% reduced Movement Speed 100% increased Damage with Hits and Ailments against Hindered Enemies |
|
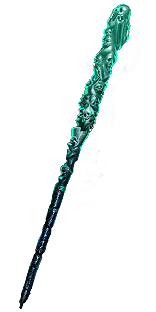 (Weapon) Dying Breath - Increases your overall damage. It's better if your Mercenary uses Auras, and the enemy is affected by Curses. (Weapon) Dying Breath - Increases your overall damage. It's better if your Mercenary uses Auras, and the enemy is affected by Curses. |
|
| 18% increased Cast Speed 18% increased maximum Mana 18% increased Area of Effect of Aura Skills 18% increased Area of Effect of Hex Skills Nearby Enemies have 18% increased Effect of Curses on them Nearby allies gain 18% increased Damage 18% increased effect of Non-Curse Auras from your Skills |
|
 (Body Armour) Kaom's Heart - A lot of Life for your Mercenary. (Body Armour) Kaom's Heart - A lot of Life for your Mercenary. |
|
| Has no Sockets +1000 to maximum Life |
|
 (Body Armour) Garb of the Ephemeral - Prevents your Action Speed from falling below 100%. Disables nearby enemies' Critical Strikes. (Body Armour) Garb of the Ephemeral - Prevents your Action Speed from falling below 100%. Disables nearby enemies' Critical Strikes. |
|
| (180-230)% increased Energy Shield +600 Strength and Intelligence Requirement Gain a Divine Charge on Hit +10 to maximum Divine Charges You gain Divinity for 10 seconds on reaching maximum Divine Charges Lose all Divine Charges when you gain Divinity Nearby Allies' Action Speed cannot be modified to below Base Value Nearby Enemies cannot deal Critical Strikes |
|
 (Boots) Windscream - An additional Curse, like Temporal Chains, that can be applied on top of your own Curse without overriding it. (Boots) Windscream - An additional Curse, like Temporal Chains, that can be applied on top of your own Curse without overriding it. |
|
| (50-80)% increased Armour +(10-15)% to all Elemental Resistances 50% increased Area of Effect of Hex Skills 20% increased Movement Speed You can apply an additional Curse |
|
 (Boots) Rare Boots - Rare Boots are for Resistances and one Eldritch Implicit mod. That's Scorching Ground. Scorched enemies take increased Elemental Damage. (Boots) Rare Boots - Rare Boots are for Resistances and one Eldritch Implicit mod. That's Scorching Ground. Scorched enemies take increased Elemental Damage. |
|
| Min. requirements: Drops Scorched Ground while moving +80% total Elemental Resistance Optional affixes: Chaos Resistance increased Life Regeneration rate |
|
 (Gloves) Asenath's Gentle Touch - Aim for these Gloves. Temporal Chains Curse makes Ignite last longer. It also causes enemies to explode. (Gloves) Asenath's Gentle Touch - Aim for these Gloves. Temporal Chains Curse makes Ignite last longer. It also causes enemies to explode. |
|
| +(20-30) to Intelligence +(60-80) to maximum Life +(60-80) to maximum Mana Curse Enemies with Temporal Chains on Hit Non-Aura Curses you inflict are not removed from Dying Enemies Enemies near corpses affected by your Curses are Blinded Enemies Killed near corpses affected by your Curses explode, dealing 3% of their Life as Physical Damage |
|
 (Belt) Kaom's Binding - "Nearby Enemies Convert 25% of their Physical Damage to Fire" reduces the Physical Damage you take. It makes your Armour much more effective against skills that deal a lot of Physical Damage. (Belt) Kaom's Binding - "Nearby Enemies Convert 25% of their Physical Damage to Fire" reduces the Physical Damage you take. It makes your Armour much more effective against skills that deal a lot of Physical Damage. |
|
| +(25-35) to Strength +(30-40) to Strength +(300-500) to Armour Take no Burning Damage if you've stopped taking Burning Damage Recently Nearby Enemies Convert 25% of their Physical Damage to Fire |
|
 (Amulet) Xoph's Heart - Covers nearby enemies in Ash so that they take increased damage and move slower. It's not needed if your Merc Covers enemies in Ash with their Skills. (Amulet) Xoph's Heart - Covers nearby enemies in Ash so that they take increased damage and move slower. It's not needed if your Merc Covers enemies in Ash with their Skills. |
|
| +(20-30) to Strength +(20-30) to Strength 25% increased Fire Damage +(25-35) to maximum Life +(20-40)% to Fire Resistance Nearby Enemies are Covered in Ash |
|
 (Amulet) The Eternal Struggle - Eternal Struggle increases Armour, Evasion, and Energy Shield. It may cause the Merc to have a 15% Culling effect or reduce enemies' damage and Movement Speed. (Amulet) The Eternal Struggle - Eternal Struggle increases Armour, Evasion, and Energy Shield. It may cause the Merc to have a 15% Culling effect or reduce enemies' damage and Movement Speed. |
|
| <<Random Searing Exarch implicit>> <<Random Eater of Worlds implicit>> +(20-50) to Strength +(20-50) to Dexterity +(20-50) to Intelligence (10-15)% increased Global Defences Critical Strikes inflict Malignant Madness if The Eater of Worlds is dominant Kill Enemies that have 15% or lower Life on Hit if The Searing Exarch is dominant |
|
 (Ring) Rare Rings - Rings are for Resistances and for Curse on Hit. Flammability or elemental Weakness will increase your Burning Damage. (Ring) Rare Rings - Rings are for Resistances and for Curse on Hit. Flammability or elemental Weakness will increase your Burning Damage. |
|
| Min. requirements: +80% to Elemental Resistances Curse Enemies with Flammability on Hit (Warlord Suffix) Curse Enemies with Elemental Weakness on Hit (Hunter Suffix) Optional affixes: Maximum Life Chaos Resistance |
|
 (Ring) Squirming Terror - Mercenary will spawn a worm every two seconds. It's not much when compared to the enemies spawned by your Penance Mark, but it can help. (Ring) Squirming Terror - Mercenary will spawn a worm every two seconds. It's not much when compared to the enemies spawned by your Penance Mark, but it can help. |
|
| Has 1 Socket An Enemy Writhing Worm spawns every 2 seconds 20% chance to Trigger Socketed Spell on Kill, with a 0.5 second Cooldown Lose (20-10) Life per Enemy Killed Gain (5-10) Mana per Enemy Killed |
|
|
If you have any other build requests please leave that in the comments below. We are always open to suggestions and constructive feedback.
Pictures used in this article are the intellectual property of Grinding Gear Games.


