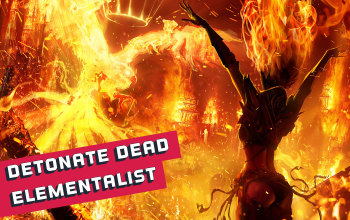
Detonate Dead Ignite Elementalist
Elementalist Build that uses Corpses to cause devastating Ignites with Detonate Dead SkillDetonate Dead
Elementalist Build
Updated for Patch 3.17
The Best Crafty Guides by Odealo
| Guide notes | |||
| February 03, 2022 -Build created February 07, 2022 -Updated for Patch 3.17 |
|||
| Build overview | |||
| Tags: [CASTER] [ELEMENTAL] [IGNITE] [HYBRID] [STARTER] | |||
|
Budget: Defenses: |
|
Boss DPS: AoE: |
|
It's an Elementalist build that Ignites enemies by Detonating the Dead. An important part of the build is the Blackflame Unique Ring - Your Ignite Damage deals Chaos Damage instead, making it possible to increase your damage output by investing in Fire and Chaos Damage over time, both types of damage are massively widespread in such form. Elementalist's Ascendancy ensures that all of your Hits Ignite and Shock enemies, and greatly improve your Elemental Damage. To create corpses use Corpsewalker and Desecrate - you can guarantee to some extent that the Corpses you create have a lot of Maximum Life by having specific Spectres from your Raise Spectre Skill. The Damage of the Detonate Dead explosion is partially sourced from the Maximum Life of the targeted Corpse. The Enemies that you should turn into Spectres with a lot of Life are High Lithomancers from Primordial Blocks Map.
This build has simple but one of the most reliable defensive layers - a lot of Maximum Life and Energy Shield, Elemental Resistances at over 80%, and a lot of Armour for Physical Damage mitigation. Use Keystones such as Divine Shield and Corrupted Soul to make use of your Life and Armour, it will enhance the effectiveness of your ES. The Damage you deal is based on your Fire and Chaos Damage over Time, and the Corpses' Maximum Life which you have control over to some extent as mentioned before; it will have huge implications during boss fights. Bury in mind that the Price of Blackflame and other Uniques might be very high. Rare Items should not be too expensive.
It's one of the few builds that has been nerfed for 3.17. The chance to spawn your Spectres as corpses is now 15%, that's less than it was before but it is more consistent. You don't have to bring multiple different high-level Spectres with you as the chance to spawn one as a corpse is not relative to the total pool of available monsters - it's always 15% now. You can still inflict massive Ignites on enemies just as before, but it's not guaranteed to happen each time.
You can also check our other Path of Exile builds right over here Odealo's Crafty Guides - Full List
1. Gameplay
To consistently deal damage with Detonate Deat you will need an equally consistent source of Corpses, one of which is granted by Corpse Walk Skill from Unique boots Corpsewalker, another one is Desecrate cast automatically via for example Cast when Damage Taken. Detonate Dead and Vaal Detonate Dead Skills are used as the only damage source. Molten Shell is the preferred Guard Spell due to your abundance of Armour, and for Movement use Flame Dash and Withering Step which doubles as a source of Withered Debuff. Periodically use Bone Offering and Convocation to enhance your Minions, and for Auras, you should have active Malevolence, Determination, and depending on your preferences - Discipline, Tempest Shield, and/or Dread Banner. For Spectres use High Lithomancer and Stoneskin Flayer. Animate Guardian is a Minion that grants various buffs depending on the Items it wears, details about it will be provided in section 5 of the guide - Final Gems links.
|
Full gameplay video:
This video was recorded on a level 94 Elementalist using Brass Dome, Saffell's Frame, and Breathstealer. Given the budget, this build offers simply ABSURD single-target DPS, and if you wanted to add Ignite Proliferation, the clear speed would also shine. It's one of the best builds we made in Patch 3.16 overall, and one of the most underrated one in the entire game currently |
|
|

2. Build's PROS & CONS
| PROS |
|
| CONS |
|
3. Leveling tips
It'd be easy to start as a generic Elemental Damage build and later specialize in Detonate Dead. Detonate Dead is available since level 1, but leveling can be faster with others Skills such as Burning Arrow. After allocating the first Ascendancy Keystone - Shaper of Flames you can focus more on Fire Damage over Time and Burning Damage. At Level 49 you can equip Blackflame and build up some Chaos Damage. Start using Detonate Dead as soon as you can get Spectres with a lot of Life such as the Giant Gladiator Statue from Act 3, and combine it with Desecrate.
Suggested leveling Gem setups:
| Detonate Dead setup | |
 |
Detonate Dead - becomes really strong after obtaining a source of Corpses and Spectres with high Maximum Life |
 |
Burning Damage Support - increases the Burning Damage |
 |
Efficacy Support - Damage over Time you inflict is more powerful and lasts longer |
 |
Unbound Ailments Support - Elemental Ailments such as Ignite last longer and deal more Damage |
| Specters setup | |
 |
Raise Spectre - Spectres are used mainly to be re-summoned as corpses via Desecrate |
 |
Minion Life Support - increases Maximum Life of Spectres |
 |
Desecrate - creates a few Corpses that can be detonated |
| Auras, Curses, and Flame Dash setup | |
 |
Flammability - Curse that lowers Fire Resistance |
 |
Malevolence - an Aura that increases your Damage over Time |
 |
Flame Dash - Mobility Spell used to instantly teleport over a short distance |
Bandits:
Kill all three bandits for two additional Skill Points
Leveling Skill Trees:
32 Points Passive Tree
Head for the Fire Damage Cluster in such a way to pick some Maximum Life and other useful stats
67 Points Passive Tree
Get Searing Heat, Acrimony, Holy Fire, and Divine Judgment for Damage. Purity of Flesh and Devotion are used to increase your Maximum Life.
Recommended leveling items:
 Le Heup of All - grants more Damage, Attributes, and Elemental Resistances Le Heup of All - grants more Damage, Attributes, and Elemental Resistances |
|
| Adds 1 to 4 Physical Damage to Attacks +(10-30) to all Attributes (10-30)% increased Damage (10-30)% increased Rarity of Items found +(10-30)% to all Elemental Resistances |
|
 Goldrim - a Helmet to give you tons of Elemental Resistances Goldrim - a Helmet to give you tons of Elemental Resistances |
|
| +(30-50) to Evasion Rating 10% increased Rarity of Items found +(30-40)% to all Elemental Resistances Reflects 4 Physical Damage to Melee Attackers Level Requirement reduced by 100 (Hidden) |
 Tabula Rasa - you can six-link a setup from the start Tabula Rasa - you can six-link a setup from the start |
|
| Item has no level requirement and Energy Shield (Hidden) Item has 6 White Sockets and is fully linked (Hidden) |
|
 Berek's Respite - useful Ring to enhance your Clear Speed by inflicting Ignite more efficiently Berek's Respite - useful Ring to enhance your Clear Speed by inflicting Ignite more efficiently |
|
| +(12-16)% to Fire and Lightning Resistances Adds (20-25) to (30-50) Fire Damage to Spells and Attacks (25-30)% increased Lightning Damage +(30-40) to maximum Mana When you Kill a Shocked Enemy, inflict an equivalent Shock on each nearby Enemy When you Kill an Ignited Enemy, inflict an equivalent Ignite on each nearby Enemy |
|
 Ashcaller - although Spell Damage won't affect Detonate Dead Damage, it increases Burning and Fire DoT while summoning Raging Spirits Ashcaller - although Spell Damage won't affect Detonate Dead Damage, it increases Burning and Fire DoT while summoning Raging Spirits |
|
| (18-22)% increased Spell Damage 10% chance to Trigger Level 8 Summon Raging Spirit on Kill +(15-25)% to Fire Damage over Time Multiplier Adds (4-6) to (7-9) Fire Damage to Spells (20-30)% increased Burning Damage (16-22)% chance to Ignite |
|
4. Final Skill Tree, Ascendancy Points, and Pantheon
Final Skill Tree:
98 Points Final Passive Tree (doesn't include Cluster Jewels)
115 Points Path of Building (PoB) link
Ascendancy points:
Preferably in that order:
- Shaper of Flames
- Mastermind of Discord
- Heart of Destruction
- Shaper of Storms
Pantheon:
Major God: Soul of The Brine King: 1% You cannot be Stunned if you've been Stunned or Blocked a Stunning Hit in the past 2 seconds
Minor God: Soul of Abberath: 60% less Duration of Ignite on You
5. Final Gems links
| [DPS] Detonate Dead setup | |
|
Vaal Detonate Dead - The source of all your Damage. Ignites caused by the Explosions deals a lot of DoT and with an abundance of Corpses, you don't have to worry about AoE. |
 |
Swift Affliction Support - more Damage over Time, but less Ignite Duration |
|
Burning Damage Support - the best way to increase your Burning Damage |
 |
Inspiration Support - Used mostly to cope with the high Mana Cost of Detonate Dead but it also increases your Elemental Damage. Can be swapped for  Deadly Ailments Support if you can withstand the Mana Cost of this setup. Deadly Ailments Support if you can withstand the Mana Cost of this setup. |
|
Efficacy Support - Efficacy extends the duration of DoT effects and increase the Damage of it |
|
Unbound Ailments Support - more Damage and Duration for Ignite, and increased Shock Effect |
| [UTILITY] Animate Guardian and Raise Spectre setup | |
 |
Animate Guardian - Creates a Minion that uses Items. You can equip him with ones you own (excluding Ranged Weapons and Jewelry), but these will disappear if the Minion dies and cannot be recovered. His Maximum Life is very high. Recommended items:
|
|
Raise Spectre - High Lithomancer (found in Primordial Blocks Map) and Stoneskin Flayer (found in Primeval Fortress Map) are the two best Spectres, get them as soon as you can |
|
Minion Life Support - Increases Maximum Life for Spectres and Animated Guardian |
 |
Meat Shield Support - keeps Animated Guardian with Kingmaker close to you which is important |
| [UTILITY] Desecrate setup | |
|
Desecrate - Creates Corpses - copies of your Specters that you can later detonate |
 |
Cast when Damage Taken - automates the Desecrate Spell Casts, it's optional |
| [UTILITY] Offering and Mobility setup | |
 |
Bone Offering - Block Chance for your Minions and Life Regen if they blocked recently |
 |
Withering Step - applies Withered Debuff on enemies and makes you Elusive |
 |
Arcane Surge Support - Arcane Surge increases your Mana Regeneration |
|
Flame Dash - a Blink Skill that makes you more mobile, it shares a cooldown with Withering Step |
| [UTILITY] Auras setup | |
|
Malevolence - you deal more DoT and the Skill Effects last longer |
 |
Determination - you have increased and additional Armour |
 |
Discipline - Grants Additional ES and Recharge Rate.  Tempest Shield is an Alternative to it, used for more Spell Block Chance. Tempest Shield is an Alternative to it, used for more Spell Block Chance. |
 |
Enlighten Support - lowers Mana Reservation Cost for Linked Auras |
| [UTILITY] Defiance Banner setup | |
 |
Defiance Banner - more Armour and Evasion Rating, it reduces enemies' Crit Chance too |
| [UTILITY] Molten Shell and Convocation setup | |
 |
Molten Shell - mitigates a portion of incoming damage when active; it is more effective the more Armour you have |
 |
Convocation - recalls your Minions back to you giving them a temporary Life Regeneration Buff |
 |
Lifetap Support - linked Skills cost Life instead of Mana |
|
|
6. Gear Setup
Corpsewalker and Blackflame are very important, other Unique items are heavily recommended. To increase your Damage look for Chaos Damage, Fire Damage, Burning Damage, Damage over Time, and Elemental Damage. You don't need Spell Damage as it won't affect Detonate Dead. In addition to that seek Minion Life mods to cause more Damage with your Spectres' Corpses. One of the best mods to increase your DPS are ones that make your Ignites deal damage Faster. For better defense try to get Maximum Life, Energy Shield, Armour, and Maximum Elemental Resistances. With this build, you will receive Hits more often than usually, Recouping Life and mods affecting you after you get Hit are particularly handy. For Attributes try to get Strength and a lot of Dexterity, some of your Gems require over 100 of it and your Passive Skill Tree does not grant you much.
Our recommended items will:
- Cap your resistances at 75%
- Provide you with enough DPS and Life to start mapping
|
Stat priorities on items:
|
 (Helmet) Rare Helmet - a Helmet with high Maximum Life and Elemental Resistances is usually all you will ever need, but there are some mods worth looking for too (Helmet) Rare Helmet - a Helmet with high Maximum Life and Elemental Resistances is usually all you will ever need, but there are some mods worth looking for too |
|
| Min. requirements: +60 to maximum Life +60% to Elemental Resistances Optional affixes: Dexterity Ignites you inflict deal Damage faster Nearby Enemies have -9% to Chaos Resistance |
|
| Helmet enchantments: 40% increased Detonate Dead Damage |
|
 (Weapon) Rare Wand or Sceptre - a weapon that increases your Burning Damage by at least 100% and has some of the additional Damage over Time Multiplier mods is sufficient (Weapon) Rare Wand or Sceptre - a weapon that increases your Burning Damage by at least 100% and has some of the additional Damage over Time Multiplier mods is sufficient |
|
| Recommended affixes: Damage over Time Multiplier Fire Damage over Time Multiplier Chaos Damage over Time Multiplier increased Damage over Time increased Burning Damage increased Fire Damage increased Elemental Damage Cast Level 20 Fire Burst on Hit |
|
 (Weapon) Saffell's Frame - you won't be able to Block Attacks but your Chance to Block Spell Damage is greatly increased, as are your Maximum Elemental Resistances (Weapon) Saffell's Frame - you won't be able to Block Attacks but your Chance to Block Spell Damage is greatly increased, as are your Maximum Elemental Resistances |
|
| +4% to all Elemental Resistances (15-20)% Chance to Block Spell Damage (20-30)% increased Spell Damage +10% to all Elemental Resistances +4% to all maximum Resistances Cannot Block Attacks |
|
 (Body Armour) The Brass Dome - It provides you with a lot of Armour and Maximum Elemental Resistances, you take no Extra Damage from Critical Strikes, but your Maximum Life is slightly reduced (Body Armour) The Brass Dome - It provides you with a lot of Armour and Maximum Elemental Resistances, you take no Extra Damage from Critical Strikes, but your Maximum Life is slightly reduced |
|
| (350-400)% increased Armour +(1-5)% to all maximum Elemental Resistances Strength provides no bonus to Maximum Life Take no Extra Damage from Critical Strikes |
|
 (Boots) Corpsewalker - Corpse Walk Skill constantly creates Corpses when you move which is great for the build, it also Regenerates you a lot of Life (Boots) Corpsewalker - Corpse Walk Skill constantly creates Corpses when you move which is great for the build, it also Regenerates you a lot of Life |
|
| Triggers Level 20 Corpse Walk when Equipped (80-120)% increased Evasion and Energy Shield 25% increased Movement Speed (20-40)% increased Damage if you have Consumed a corpse Recently For each nearby corpse, Regenerate 0.25% Life per second, up to 3% |
|
 (Gloves) Rare Gloves - It's a great item slot to look for additional Dexterity and Fire Damage over Time (Gloves) Rare Gloves - It's a great item slot to look for additional Dexterity and Fire Damage over Time |
|
| Min. requirements: +70 to maximum Life +70% to Elemental Resistances Optional affixes: Fire Damage over Time Multiplier Dexterity |
|
 (Belt) Rare Belt - Focus mostly on Maximum Life and Elemental Resistances. Dexterity and Strength can be easily crafted. (Belt) Rare Belt - Focus mostly on Maximum Life and Elemental Resistances. Dexterity and Strength can be easily crafted. |
|
| Min. requirements: +100 to maximum Life +70% to Elemental Resistances Optional affixes: Strength and Dexterity Armour increased Attributes increased Maximum Life |
|
 (Amulet) Rare Amulet - besides the generic Maximum Life and Resistances go for Damage over Time Multiplier, Attributes, and a craftable mod that reduces Mana Cost of Skills (Amulet) Rare Amulet - besides the generic Maximum Life and Resistances go for Damage over Time Multiplier, Attributes, and a craftable mod that reduces Mana Cost of Skills |
|
| Min. requirements: +60 to maximum Life +70% to Elemental Resistances +20% to Damage over Time Multiplier Optional affixes: Dexterity Strength Non-Channelling Skills have -7 to Total Mana Cost (crafted) |
|
| Recommended Anointments: Searing Heat Dirty Techniques Prismatic Skin Static Blows |
|
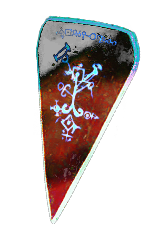
 (Ring) Blackflame - It's a very important part of the build as it "converts" your Ignite Damage to Chaos Damage. It also grants some minor but ultimately useful mods. (Ring) Blackflame - It's a very important part of the build as it "converts" your Ignite Damage to Chaos Damage. It also grants some minor but ultimately useful mods. |
|
| +(17-23)% to Chaos Resistance +(8–12)% to Fire Damage over Time Multiplier 50% reduced Ignite Duration on Enemies (10–15)% chance to Ignite Enemies Ignited by you take Chaos Damage instead of Fire Damage from Ignite Withered does not expire on Enemies Ignited by you +(20–25)% to Fire and Chaos Resistances |
|
 (Ring) Rare Ring - Despair on Hit is important - it's the best way to apply a Curse upon enemies. It's recommended to Craft Reduced Mana cost of Skills and get additional Attributes and defensive Affixes. (Ring) Rare Ring - Despair on Hit is important - it's the best way to apply a Curse upon enemies. It's recommended to Craft Reduced Mana cost of Skills and get additional Attributes and defensive Affixes. |
|
| Min. requirements: +60 to maximum Life +60% to Elemental Resistances Curse Enemies with Despair on Hit Optional affixes: Strength Dexterity Fire Damage Leeched as Life increased Fire Damage Non-Channelling Skills have -7 to Total Mana Cost (crafted) |
|
 (Jewel) Rare Jewels - increase your Maximum Life, get missing Attributes, Resistances, and for Damage prioritize "Damaging Ailments deal damage faster" (Jewel) Rare Jewels - increase your Maximum Life, get missing Attributes, Resistances, and for Damage prioritize "Damaging Ailments deal damage faster" |
|
|
Recommended affixes: |
|
 (Jewel) Transcendent Mind - The best place for it is in a socket near Instability, in will increase your Damage over Time Multiplier (Jewel) Transcendent Mind - The best place for it is in a socket near Instability, in will increase your Damage over Time Multiplier |
|
| -1 Intelligence per 1 Intelligence on Allocated Passives in Radius +3% to Damage over Time Multiplier per 10 Intelligence on Unallocated Passives in Radius 3% increased Mana Recovery Rate per 10 Intelligence on Allocated Passives in Radius 2% reduced Mana Recovery Rate per 10 Intelligence on Unallocated Passives in Radius |
|
 (Jewel) Glorious Vanity - a Doryani variant can transform one of your Keystones into a Corrupted Soul granting you ES based on your Maximum Life (Jewel) Glorious Vanity - a Doryani variant can transform one of your Keystones into a Corrupted Soul granting you ES based on your Maximum Life |
|
| Bathed in the blood of (100-8000) sacrificed in the name of (Ahuana-Doryani-Xibaqua) Passives in radius are Conquered by the Vaal Historic |
|
 (Jewel) Watcher's Eye - "Damaging Ailments you inflict deal Damage faster while affected by Malevolence" and "Damage over Time Multiplier while affected by Malevolence" are the two best mods you can find (Jewel) Watcher's Eye - "Damaging Ailments you inflict deal Damage faster while affected by Malevolence" and "Damage over Time Multiplier while affected by Malevolence" are the two best mods you can find |
|
| (4-6)% increased maximum Energy Shield (4-6)% increased maximum Life (4-6)% increased maximum Mana <Two or Three random aura modifiers> |
|
 (Jewel) Large Cluster Jewels - Sadist is a Notable that's good to keep if you need DPS, Doryani's Lesson is a great source of Life Leech (Jewel) Large Cluster Jewels - Sadist is a Notable that's good to keep if you need DPS, Doryani's Lesson is a great source of Life Leech |
|
| Recommended affixes: 1 Added Passive Skill is Prismatic Heart 1 Added Passive Skill is Sadist 1 Added Passive Skill is Widespread Destruction 1 Added Passive Skill is Doryani's Lesson |
|
 (Jewel) Medium Cluster Jewels - There are a lot of Fire-related Notables worth Picking. Fan of Flames is really good to enhance your clear speed, other Notables should grant you more DoT or increase the speed at which Ignite deals damage. (Jewel) Medium Cluster Jewels - There are a lot of Fire-related Notables worth Picking. Fan of Flames is really good to enhance your clear speed, other Notables should grant you more DoT or increase the speed at which Ignite deals damage. |
|
| Recommended affixes: 1 Added Passive Skill is Fan the Flames 1 Added Passive Skill is Wasting Affliction 1 Added Passive Skill is Blowback 1 Added Passive Skill is Burning Bright 1 Added Passive Skill is Exposure Therapy |
|
 (Jewel) Small Cluster Jewels - Enduring Composure increases your Armour and is a source of Endurance Charges (Jewel) Small Cluster Jewels - Enduring Composure increases your Armour and is a source of Endurance Charges |
|
| Recommended affixes: 1 Added Passive Skill is Enduring Composure |
|
 (Flask) Atziri's Promise - It grants you extra Chaos Damage based on your Elemental Damage (Flask) Atziri's Promise - It grants you extra Chaos Damage based on your Elemental Damage |
|
| +35% to Chaos Resistance 2% of Chaos Damage Leeched as Life during Flask effect Gain (5-8)% of Physical Damage as Extra Chaos Damage during effect Gain (5-8)% of Elemental Damage as Extra Chaos Damage during effect |
|
 (Flask) Cinderswallow Urn - a source of Onslaught and additional Damage against Ignited enemies. For a modifier look for reduced Mana Cost of Skills during Flask Effect. (Flask) Cinderswallow Urn - a source of Onslaught and additional Damage against Ignited enemies. For a modifier look for reduced Mana Cost of Skills during Flask Effect. |
|
| Onslaught +90 to Maximum Charges Recharges 5 Charges when you Consume an Ignited corpse (175-200)% increased Charges per use Enemies Ignited by you during Flask Effect take (7-10)% increased Damage Veiled Suffix <One of the three modifiers> |
|
|
Suggested Flasks:
|
|
    |
|
|
If you have any other build requests please leave that in the comments below. We are always open to suggestions and constructive feedback.
Pictures used in this article are the intellectual property of Grinding Gear Games.
