Exploding Totems
Saboteur Build
Updated for Patch 3.21
The Best Crafty Guides by Odealo
| Guide notes |
April 20, 2023
-Build created |
| Build Overview |
| Tags: ["TRAP"] [ELEMENTAL] [LIFE] |
|
Budget:
Defenses:
|


|
Boss DPS:
AoE:
|

|
The new Crucible mod introduced in Patch 3.21 which makes your Totems explode dealing up to 600% of their Life as Physical Damage to enemies around it, appears to be the most interesting addition to the game. This build's main concept is to summon Totems as quickly as possible to trigger those explosions. When you exceed your Maximum Totem Limit, all existing Totems will despawn, and trigger those massive explosions. If you use Traps to summon them with greatly increased frequency, you will be able to cause tens of explosions per second, with your DPS reaching over one billion.
This build can be played on many Asendency Classes, but you should be looking mainly at ones on the upper side of the Skill Tree, where Trap and Totem nodes are located. We have chosen Saboteur for extra defensive utility, and the new Bomb Specialist passive that increases your AoE Damage globally. Our setup revolves around Elemental Damage conversion, which would also work on Occultists and Elementalist, and there are other popular Pathfinder Poison variants, and Chieftain/Juggernaut ones that convert the Damage to Fire Element via Avatar of Fire.
Your damage scales mainly with the Totem Life, so you should use Devouring Totem which has the highest base Life out of all Totem Spells in the game. The explosion damage is fully converted to Cold Element, and then more than doubled via Heatshiver Helmet offering simply massive DPS. On the other hand, this build is also quite tanky. You should have around 5,000 Maximum Life, with tons of Life Regeneration and instant Life Recovery from Tinkersking. Combined with extra Armour, Spell Suppression, Born in the Shadows, and possibly Heartstopper from Trickster's Tree, you can comfortably farm all the content including Ubers.
You can also check our other Path of Exile builds right over here Odealo's Crafty Guides - Full List
1. Gameplay
This is basically a very smooth Trapper build, but since everything simply dies instantly, and you have some insane Life and Energy Shield recovery from Tinkerskin, it feels like something completely different. You have just a handful of active skills here, which include the Devouring Totem Traps that can be spammed for massive explosions, Hatred Blessing Aura that will be needed only against the toughest Bosses, and a self-cast Curse, which is completely optional, but can either boost your DPS or defenses, depending which one you pick for yourself.
|
 
Odealo is a secure trading platform for MMO gamers. Here you can buy, sell, and trade PoE Currency for real cash.
|
2. Build's PROS & CONS
| PROS |
- Pretty much the highest DPS in the game currently
- Actually really cheap when you look at the numbers and overall performance
- Amazing self-sustain with good defenses and regeneration
- Good AoE with extra explosions from Herald skills
|
| CONS |
- The Totem mod itself can cast several Divines
- Might be unplayable mid-League, or almost certainly, in the upcoming ones
|
3. Leveling tips
It is impossible to level up using the exploding Totems, so for the earlier levels, you will need to do it the more traditional way. The most efficient way to level up this character will be with regular Traps. You can use any of the popular leveling templates from the previous Leagues which include Seismic/Exsanguinate Traps, Ice Trap, Lightning Trap, and such. We will not cover the details here, you can simply check our Shadow/Saboteur Leveling Guide for more comprehensive data on the subject. For the Bandit quest, just make sure to kill all of them to get additional 2 Passive Tree Skill Points
4. Final Skill Tree, Ascendancy Points, and Pantheon
Final Skill Tree:
118 Points Final Passive Tree
118 Points Path of Building (PoB) link
Ascendancy points:
- Bomb Specialist
- Born in the Shadows
- Chain Reaction
- Pyromaniac
Pantheon:
Major God: Brine King: You cannot be Stunned if you've been Stunned in the past 2 seconds, Cannot be Frozen, 50% reduced Effect of Chill on you
Minor God: Soul of Ralakesh: 25% reduced Physical Damage over Time taken while moving; Moving while Bleeding doesn't cause you to take extra Damage
5. Final Gems links
[DPS] Devouring Totems
(socketed in your Bow) |
 |
Devouring Totem - Devouring Totems are your main source of damage, as they have the highest base Life and the explosions they cause will be more punishing. You will be summoning them via Traps, aiming at summoning as many at once as possible |
 |
Empower Support - increases the Level of Supported Skill Gems, increasing the Maximum Life of your Devouring Totems |
 |
Trap Support - will allow you to throw Traps that will summon Devouring Totems when triggered |
 |
Cluster Traps Support - increases the number of Traps you throw at once. The downside is negligible as it does not affect the damage from Totems exploding |
 |
Multiple Traps Support - another Support Gem with the basically exact same effect as Cluster Traps |
 |
Multiple Totem Support - a core Support gem that will allow you to double the number of Summoned Totems by each Trap, basically doubling your Damage |
| [UTILITY] Auras and Herald Skills |
 |
Determination - Determination Aura increases your Armour Rating which is one of the core defensive layers you rely on with this character. You can alternatively use Grace, but we believe Armour will be more consistent |
 |
Vitality - another very important Aura that increases your Life Regeneration. This may be even more important if you are using Life to Cast your Mines through Items |
 |
Herald of Purity - grants Physical Damage Multiplier, which is a very good way to scale your damage. You can take all the Herald-related nodes with Herald Mastery, and benefit further from using several different Herald Skills |
 |
Herald of Ash - grants extra Fire Damage based on your Physical Damage and causes AoE explosions to slightly boost your clear speed |
 |
Herald of Ice - Herald of Ice increases your Cold Damage and causes additional explosions when you kil Frozen enemies. Sadly, the added Cold Damage part of this skill won't affect your DPS, so just use it if you want to clear Maps faster |
 |
Enlighten Support - link it with your most Mana-reserving Auras to reduce their costs. Level 3 Enlighten will allow you to use all of the above |
| [UTILITY] Hatred Blessing |
 |
Hatred - if you are playing this build with Eldritch Battery (and that's the optimal way) you will be able to use an extra Aura as a temporary Blessing skill. Select Hatred for it which massively boosts your DPS |
 |
Divine Blessing Support - turns a permanent Aura into a temporary Buff. Thanks to the Eldritch Battery Keystone you can pay its cost with Energy Shield and Reserve 100% of your Mana anyway. |
 |
Inspiration Support - reduces the cost of casting Hatred Blessing |
| [UTILITY] Stone Golem |
 |
Summon Stone Golem - to further boost your Life Regeneration you can have a Stone Golem summoned by Cast When Damage Taken Gem. It will also instantly kill enemies below 10% Life if you link it to Culling Strike Support |
 |
Cast when Damage Taken Support - this Gem can automatically resummon your Golem making it a more convenient setup to use |
 |
Culling Strike Support - makes your Golem instantly kill enemies below 10% Life |
| [UTILITY] Curse and Flame Dash setup |
 |
Elemental Weakness - this build doesn't exactly need Curses, but if you want you can use Elemental Weakness for some extra damage or Enfeeble/Temporal Chains for better defenses. Either of those might need to be cast manually |
 |
Flame Dash - Flame Dash is the recommended Movement skill for this build which allows you to travel quickly or avoid incoming damage |
 |
Hex Bloom Support - if you decide on using any Curse, this will allow it to transfer quickly from slain enemies, in the result, reducing the number of times you have to cast it manually |
 |
Faster Casting Support - simply increases the Cast Speed of linked abilities |
| [UTILITY] Steelskin |
 |
Steelskin - Steelskin is the recommended Guard Skill for this build which grants a protective Barrier that blocks some incoming damage and removes Bleeding. Allocate it under your left mouse button so that it is cast automatically when you play |
|
On Odealo dozens of sellers compete for your attention. Buying PoE Currency here guarantees the best prices, prompt delivery, and the best quality of service.
|
6. Gear Setup
This build is quite versatile when it comes to gear choices, as it doesn't require any particular Uniques to function. All you need is an Item with a Crucible Tree and the mod that will cause your Totems to explode upon death dealing 600% of their Maximum Life as Physical Damage. There is a number of possible variants here, but in our case, we are using Bows. This allows you to easily scale the Gem level of Devouring Totem and use Quiver with extra Damage conversion, and defensive mods. Other than that, you are going to determine how to be able to sustain your Mana while spamming your Traps, and for Saboteur, using Tinkerskin with Eldritch Battery, in our opinion, is the best solution. The rest of your equipment will consist of Rare Items with generic defensive mods, as the possible affixes allowing you to scale your damage are greatly limited here (Explosion damage is not affected by modifiers to Trap Damage, Totem Damage, or Spell Damage while it could seem otherwise).
|
Stat priorities on items:
- Maximum Life
- Elemental Resistances
- Gem Level of Devouring Totems
(Strength or All Skill Gems)
- Spell Suppression Chance
- Trap Throwing Speed
- Armour Rating
- Maximum Energy Shield
|
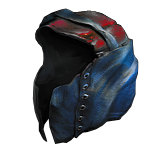 (Helmet) Heatshiver - Heatshiver is the best in the slot Helmet for this build. It grants simply absurd extra damage for several Chaos Orbs, so we will not even try to list alternatives. If you don't have it yet though, just get a random Rare with defensive stats (Helmet) Heatshiver - Heatshiver is the best in the slot Helmet for this build. It grants simply absurd extra damage for several Chaos Orbs, so we will not even try to list alternatives. If you don't have it yet though, just get a random Rare with defensive stats |
(80–100)% increased Evasion Rating
60% increased Mana Regeneration Rate
+(20–30)% to Fire Resistance
+(20–30)% to Cold Resistance
Gain 1% of Cold Damage as Extra Fire Damage per 1% Chill Effect on Enemy
Gain 100% of Cold Damage as Extra Fire Damage against Frozen Enemies |
Helmet enchantments:
15% increased Elemental Weakness Curse Effect |
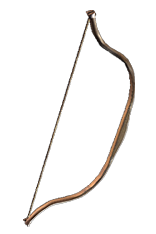 (Weapon) Rare Crafted Bow - you are looking for a Bow with the Crucible mod that will cause your Totems to explode. Then you should roll a +1 to the Level of Socketed Gems and multi-mod it for +2 to the Level of Socketed Support Gems and Trap Throwing Speed. It's recommended to craft it with Essences of Fear for extra Minion Damage which applies to you thanks to the Spiritual Aid node (Weapon) Rare Crafted Bow - you are looking for a Bow with the Crucible mod that will cause your Totems to explode. Then you should roll a +1 to the Level of Socketed Gems and multi-mod it for +2 to the Level of Socketed Support Gems and Trap Throwing Speed. It's recommended to craft it with Essences of Fear for extra Minion Damage which applies to you thanks to the Spiritual Aid node |
Min. requirements:
Totems Explode on Death, dealing 600% of their Life as Physical Damage
+1 to Level of Socketed Gems
+2 to Level of Socketed Support Gems
Optional affixes:
Increased Minion Damage
Chance to Deal Double Damage
Trap Throwing Speed
Attributes/Resistances |
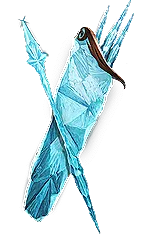 (Quiver) Asphyxia's Wrath - Asphyxia's Wrath is a cheaper alternative to a Rare Quiver that offers high bonus Cold Damage based on your Physical one (Quiver) Asphyxia's Wrath - Asphyxia's Wrath is a cheaper alternative to a Rare Quiver that offers high bonus Cold Damage based on your Physical one |
(20–30)% increased Projectile Speed
Grants Level 5 Frostbite Skill
(8–12)% increased Attack Speed
+(30–40)% to Cold Resistance
(30–40)% increased Chill Duration on Enemies
Gain 20% of Physical Damage as Extra Cold Damage
(7–10)% chance to Freeze
Hexes Transfer to all Enemies in a range of 30 when Hexed Enemy dies |
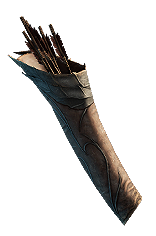 (Quiver) Rare Quiver - a good Vile Arrow Quiver can add tons of extra Elemental and Chaos Damage. It can also carry extra defensive mods and possibly a chance to gain Onslaught on kill, giving you an extra Flask space (Quiver) Rare Quiver - a good Vile Arrow Quiver can add tons of extra Elemental and Chaos Damage. It can also carry extra defensive mods and possibly a chance to gain Onslaught on kill, giving you an extra Flask space |
Min. requirements:
Gain #% of Physical Damage as Extra Chaos Damage (Implicit)
Gain #% of Physical Damage as Extra Fire Damage
Gain #% of Physical Damage as Extra Cold Damage
Optional affixes:
Maximum Life
Attributes
9% chance to gain Onslaught for 4 seconds on Kill |
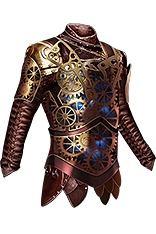 (Body Armour) Tinkerskin - is one of the best Armours for this build, as combined with Eldritch Battery it fixes your Mana issues entirely, and you also benefit from insane and instant Life Recovery (Body Armour) Tinkerskin - is one of the best Armours for this build, as combined with Eldritch Battery it fixes your Mana issues entirely, and you also benefit from insane and instant Life Recovery |
(140–170)% increased Evasion and Energy Shield
+(60–90) to maximum Life
(10–15)% increased Cooldown Recovery Rate for throwing Traps
15% chance to gain a Frenzy Charge when your Trap is triggered by an Enemy
Recover 50 Energy Shield when your Trap is triggered by an Enemy
30% chance to gain Phasing for 4 seconds when your Trap is triggered by an Enemy
Recover 100 Life when your Trap is triggered by an Enemy |
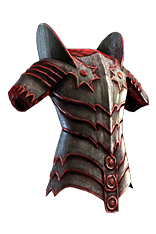 (Body Armour) Rare Armour - a Rare Body Armour can offer a lot of defensive stats, and potentially boost the effect of your Auras like Hatred or Determination (Body Armour) Rare Armour - a Rare Body Armour can offer a lot of defensive stats, and potentially boost the effect of your Auras like Hatred or Determination |
Min. requirements:
+100 to maximum Life
70% total Elemental Resistance
Optional affixes:
Chaos Resistances
Maximum Life %
Life Regeneration per Second
increased effect of Non-Curse Auras from your Skills |
 (Boots) Rare Boots - on your Boots simply look for generic defensive stats with high Movement Speed. You can also try getting a bonus to Action Speed from Searing Exarch Implicit (Boots) Rare Boots - on your Boots simply look for generic defensive stats with high Movement Speed. You can also try getting a bonus to Action Speed from Searing Exarch Implicit |
Min. requirements:
+70 to maximum Life
60% total Elemental Resistance
25% Increased Movement Speed
Optional affixes:
Attributes
Chaos Resistance
5% increased Action Speed (Searing Exarch Implicit)
Chance to gain Onslaught for 4 seconds on Kill |
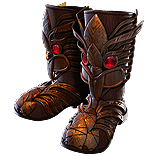 (Boots) Torchoak Step - Torchoak Step is an inexpensive pair of Boots that increases the Maximum Life of your Totems and as a result, your DPS output. It provides very low defensive stats, so keep that in mind (Boots) Torchoak Step - Torchoak Step is an inexpensive pair of Boots that increases the Maximum Life of your Totems and as a result, your DPS output. It provides very low defensive stats, so keep that in mind |
(80–120)% increased Armour
(20–30)% increased Totem Life
25% increased Movement Speed
(30–50)% increased Totem Placement speed
Totems Reflect 100% of their maximum Life as Fire Damage to nearby Enemies when Hit |
Boot enchantment:
Regenerate 2% of Life per second if you were Hit Recently
18% reduced Mana Cost of Skills if you've been Hit Recently |
 (Gloves) Rare Gloves - on your pair of Gloves, you will need 60% Damage Converted to Cold (or as close to that as possible). You can also live with less and have Watcher's Eye with Hatred modifier convert the rest (Gloves) Rare Gloves - on your pair of Gloves, you will need 60% Damage Converted to Cold (or as close to that as possible). You can also live with less and have Watcher's Eye with Hatred modifier convert the rest |
Min. requirements:
+70 to maximum Life
40% Physical Damage Converted to Cold (Implicit + Explicit mods combined)
Optional affixes:
Elemental Resistances
Chaos Resistance
Attributes |
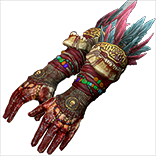 (Gloves) Slavedriver's Hand - this pair of Gloves is not recommended for our setup, however, it's one of the most popular alternatives to using Eldritch Battery and Tinkerskin. It will have you pay Life instead of Traps Mana cost, and allows you to scale Cast Speed instead of Trap Throwing Speed on your Gear and Passives (Gloves) Slavedriver's Hand - this pair of Gloves is not recommended for our setup, however, it's one of the most popular alternatives to using Eldritch Battery and Tinkerskin. It will have you pay Life instead of Traps Mana cost, and allows you to scale Cast Speed instead of Trap Throwing Speed on your Gear and Passives |
+(30–40) to Dexterity
(200–250)% increased Evasion and Energy Shield
(20–30)% reduced Trap Throwing Speed
Skills used by Traps have (10–20)% increased Area of Effect
Increases and Reductions to Cast Speed also Apply to Trap Throwing Speed
10% chance to gain an Endurance, Frenzy or Power Charge when any
of your Traps are Triggered by an Enemy
Skills which throw Traps Cost Life instead of Mana |
 (Belt) Rare Belt - for the Belt it's best to pick Stygian Vise for the extra Abyssal Socket. You should look for a high Life bonus here, and possibly extra Armour and Strength. Other than that, you can get some Resistance or Global Physical/Elemental Damage mods (Belt) Rare Belt - for the Belt it's best to pick Stygian Vise for the extra Abyssal Socket. You should look for a high Life bonus here, and possibly extra Armour and Strength. Other than that, you can get some Resistance or Global Physical/Elemental Damage mods |
Min. requirements:
+70 to maximum Life
300 Armour Rating
40 Strength
Optional affixes:
Elemental Resistances
Chaos Resistance
Global Physical/Elemental Damage |
 (Amulet) Rare Amulet - on your Amulet you should aim to get +1 to the Level of All Skill Gems which is used to increase the maximum Life of your Devouring Totem. Other than that look for standard defensive stats like Life, Resistance, and possibly increased global Armour Rating. For the Anointment you should pick Ironwood which is the best possible option (Amulet) Rare Amulet - on your Amulet you should aim to get +1 to the Level of All Skill Gems which is used to increase the maximum Life of your Devouring Totem. Other than that look for standard defensive stats like Life, Resistance, and possibly increased global Armour Rating. For the Anointment you should pick Ironwood which is the best possible option |
Min. requirements:
60 to maximum Life
+1 to Level of All Skill Gems
Optional affixes:
Attributes
Resistances
Gain #% of Physical Damage as Extra Cold Damage (Shaper prefix)
Armour |
 (Amulet) Ashes of the Stars - Ashes of the Stars is one of the best Unique amulets in the game and works for this build perfectly. You might not be able to use extra Auras thanks to it, but it can save you some Mana Efficiency Passives which can be spent elsewhere. Also, Devouring Totem benefits greatly from the increased Quality in this particular case (Amulet) Ashes of the Stars - Ashes of the Stars is one of the best Unique amulets in the game and works for this build perfectly. You might not be able to use extra Auras thanks to it, but it can save you some Mana Efficiency Passives which can be spent elsewhere. Also, Devouring Totem benefits greatly from the increased Quality in this particular case |
+(10-19) to all Attributes
(5-10)% increased Experience Gain of Gems
(10-20)% increased Reservation Efficiency of Skills
+1 to Level of all Skill Gems
+(20-30)% to Quality of all Skill Gems |
Amulet Anointments:
Ironwood |
 (Ring) Rare Rings - Rare Rings should fulfill all your needs for Resistances and Attributes, as they can have a lot to them while not offering much in terms of offenses for this build (Ring) Rare Rings - Rare Rings should fulfill all your needs for Resistances and Attributes, as they can have a lot to them while not offering much in terms of offenses for this build |
Min. requirements:
60 to maximum Life
100% Total Resistances
Optional affixes:
Attributes
Increased Cold or Fire Damage
#% increased Effect of Non-Damaging Ailments (Redeemer suffix) |
 (Jewel) Rare Abyss Jewel - on the Abyss Jewel just look for extra Life, Armour, Attributes, and Resistances. There aren't many particularly powerful mods here that will boost your DPS (Jewel) Rare Abyss Jewel - on the Abyss Jewel just look for extra Life, Armour, Attributes, and Resistances. There aren't many particularly powerful mods here that will boost your DPS |
Min. requirements:
+30 to maximum Life
Optional affixes:
Attributes
Resistances
Corrupted Blood cannot be inflicted on you |
 (Jewel) Rare Jewels - Rare Jewels are a with extra Life, Resistances, and Attributes. You can also get Global Physical Damage if you want some minor damage bonuses here (Jewel) Rare Jewels - Rare Jewels are a with extra Life, Resistances, and Attributes. You can also get Global Physical Damage if you want some minor damage bonuses here |
Recommended affixes:
Maximum Life
Resistances
Attributes
Optional affixes:
Global Physical Damage/Area Damage/Minion Damage
#% increased Trap Throwing Speed |
 (Jewel) Watcher's Eye - there are plenty of interesting mods for all three Auras that you are using. Hatred and Determination one's are the most desirable (Jewel) Watcher's Eye - there are plenty of interesting mods for all three Auras that you are using. Hatred and Determination one's are the most desirable |
(4-6)% increased maximum Energy Shield
(4-6)% increased maximum Life
(4-6)% increased maximum Mana
<Two or Three random aura modifiers>
Recommended Aura mods:
(40–60)% increased Cold Damage while affected by Hatred
+(600–1000) to Armour while affected by Determination |
  (Jewel) Forbidden Flesh and Flame - this pair of Unique Jewels can further boost the damage or survivability of your character. Polymath is the best when it comes to DPS but it's quite expensive, while Heartsopper greatly supplements this build with its' damage reduction buffs at a very low price (Jewel) Forbidden Flesh and Flame - this pair of Unique Jewels can further boost the damage or survivability of your character. Polymath is the best when it comes to DPS but it's quite expensive, while Heartsopper greatly supplements this build with its' damage reduction buffs at a very low price |
Allocates <Random Ascendancy Notable> if you have the matching modifiers on Forbidden Flame
Allocates <Random Ascendancy Notable> if you have the matching modifiers on Forbidden Flesh |
 (Flask) Bottled Faith - Bottled Faith is one of the best utility Flasks in Path of Exile. It grants a high damage multiplier and allows you to benefit from Consecrated Ground, but since it's expensive and you don't benefit from extra Crit, getting it is optional (Flask) Bottled Faith - Bottled Faith is one of the best utility Flasks in Path of Exile. It grants a high damage multiplier and allows you to benefit from Consecrated Ground, but since it's expensive and you don't benefit from extra Crit, getting it is optional |
(30-15)% reduced Duration
Consecrated Ground created by this Flask has Tripled Radius
Consecrated Ground created during Effect applies (7-10)% increased Damage taken to Enemies
(100-150)% increased Critical Strike Chance against Enemies on Consecrated Ground during Effect |
 (Flask) Taste of Hate - Taste of Hate grants a high bonus Cold Damage based on your Physical Damage and offers very powerful defensive utility reducing Physical and Cold Damage taken (Flask) Taste of Hate - Taste of Hate grants a high bonus Cold Damage based on your Physical Damage and offers very powerful defensive utility reducing Physical and Cold Damage taken |
20% less Cold Damage taken
+50% to Cold Resistance
30% chance to Avoid being Chilled during Effect
30% chance to Avoid being Frozen during Effect
Gain (10–15)% of Physical Damage as Extra Cold Damage during effect
(10–15)% of Physical Damage from Hits taken as Cold Damage during Effect |
 (Flask) Atziri's Promise - Atziri's Promise offers a lot of extra Chaos Damage based on all three types of damage Totem explosion will cause - the base Physical, and converted Cold and Fire (Flask) Atziri's Promise - Atziri's Promise offers a lot of extra Chaos Damage based on all three types of damage Totem explosion will cause - the base Physical, and converted Cold and Fire |
+35% to Chaos Resistance
2% of Chaos Damage Leeched as Life during Effect
Gain (5–8)% of Elemental Damage as Extra Chaos Damage during effect
Gain (5–8)% of Physical Damage as Extra Chaos Damage during effect |
|
Other suggested Flasks:
- Life Flask with Bleeding Removal
- Quicksilver Flask with increased Movement Speed or random ailment/Curse removal
- Granite Flask with extra Armour Rating
|
   |
|
Odealo is one of the biggest Path of Exile marketplaces. It allows regular players to buy, sell, and trade PoE Currency with the use of real cash
|
If you have any other build requests please leave that in the comments below. We are always open to suggestions and constructive feedback.
Pictures used in this article are the intellectual property of Grinding Gear Games.

