Path of Exile 2
Arbiter of Ash Guide
Last Update: 17/04/2025
⏎ Return to the main article about PoE2 end-game mechanics
The Arbiter of Ash is the current final Boss of the Path of Exile 2. Unlike other Pinnacle Bosses, he is not associated with any other end-game mechanics other than the Atlas itself. To challenge him you will have to take a long journey through your Atlas to find the various Citadels and defeat their guardians to obtain 3 types of Fragments used together as a key to unlock the Burning Monolith.
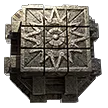
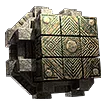
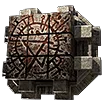
Crisis Fragments
While progressing through Maps on your Atlas you will randomly encounter mysterious Citadels. To make it easier, they will be highlighted by beam of light and visible through the fog once you get close enough. There are no rules to deterministically find them - if you want to find them faster, you just have to complete more maps. Unfortunately, it means you shouldn't engage with the Towers too much - clearing all the good Maps with extra mechanics from Tablets slow down your progression through Atlas.
There are 3 types of Citadels, each with distinguished beam colour, map layout, finall Boss encounter, and type of Fragment rewarded upon completion.
| Citadel |
Boss |
Fragment |
| Stone Citadel |
Doryani, Royal Thaumaturge |
Weathered Crisis Fragment |
 |
| The Copper Citadel |
Jamanra, the Abomination |
Faded Crisis Fragment |
 |
| The Iron Citadel |
Count Geonor |
Ancient Crisis Fragment |
 |
The Citadels works just like a regular Map, but to enter you will have to use a Waystone with at least 4 modifiers. All Boss encounters and the Map layouts are very similar to what you saw during the Campaign. Obviously, their abilities are faster and more deadly, especially if you add Waystone modifiers that empower them further, but nothing in their toolkit should surprise you at that point.
You should come to the fight prepared. Unlike regular Maps that simply erase additional mechanics upon fail, the Citadels shut down completely, depriving you from the valuable Fragments. If you are not comfortable with your build yet, its recommended to Bookmark the Citadel and come back to it at a later date.
The number of Fragments obtained from each Boss is affected by the bonus Waystone drop chance on your Map. You will always obtain at least one Fragment, but completing a more challenging encounter can reward you with 2 or even 3 Fragments at once. Pushing your limits its important to improve your profits, but the punishment for failing the map is also severe.
|
 
Odealo is a secure trading platform for MMO gamers. Here you can buy, sell, and trade PoE 2 Currency for real cash.
|
Burning Monolith Final Challenge - The Arbiter of Ash
Once you collect all Crisis Fragments, or buy them from the market, you can finally challenge the Arbiter of Ash residing in the Burning Monolith, found at the very beginning of your Atlas. There are 4 Difficulty levels, each increasing the maximum Life of Arbiter, and adding extra Skills to hit toolkit, making the fight even more dangerous. Conquering each Difficulty level for the first time will grant you a special Arbiter Atlas Passive Points, which can be used to raise the Difficulty levels and boost the loot from further fights. Additionaly, the first Difficulty level of this encounter will also grant you 2 Passive Points for the general Atlas Passive Tree.
There are few Unique Items obtainable only through defeating this Boss, and some of them also require specific Difficulty level. The chances for the valuable drops are extremely slim, but that's what makes them equally expensive. A well-rolled Sacred Flame, or Prism of Belief for the popular Skill can worth tens or hundreds of Divine Orbs. If you do not enjoy taking the risk, its recommended to sell your Crisis Fragments instead.
| List of Arbiter of Ash Loot |
| Icon |
Name and modifiers |
Required
Tier |
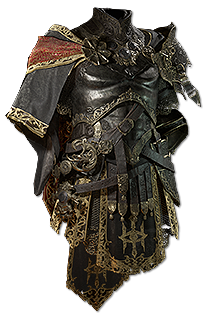 |
Morior Invictus
(200–300)% increased Armour, Evasion and Energy Shield
<3 random socket modifiers>
Has 4 Rune Sockets |
1 |
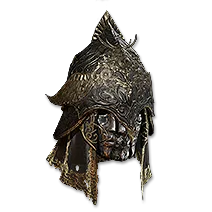 |
Solus Ipse
+(60-100) to Maximum Mana
25% increased Light Radius
(100-150)% increased Armour, Evasion and Energy Shield
Equipment and Skill Gems have 25% increased Attribute Requirements
You can use each type of Support Gem an additional time in different Skills |
1 |
 |
Sine Aequo
(10–15)% increased Skill Speed
(40–60)% increased Armour, Evasion and Energy Shield
Immobilise enemies at 50% buildup instead of 100%
Enemies Immobilised by you take 25% less Damage |
1 |
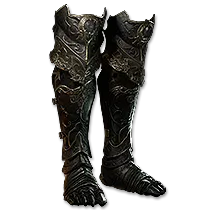 |
Ab Aeterno
(15–30)% increased Movement Speed
(60–80)% increased Armour, Evasion and Energy Shield
Dodge Roll avoids all Hits
10% less Movement and Skill Speed per Dodge Roll in the past 20 seconds |
1 |
 |
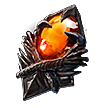
Sacred Flame
Gain (40-60)% of Damage as Extra Fire Damage
Allies in your Presence Gain (20-30)% of Damage as Extra Fire Damage
Allies in your Presence Regenerate (2-3)% of their Maximum Life per second
Enemies in your Presence Resist Elemental Damage based on their Lowest Resistance |
4 |
 |
Prism of Belief
+(1-3) to Level of all <Random skill> Skills |
4 |
Arbiter of Ash Atlas Passive Tree
The Arbiter Passive Tree is very important to improve your odds of getting a valuable reward, but it afects only the Arbiter encounter itself. Unlike other endgame mechanics encountered on regular basis, this content requires a lot of commitment from the player to see any results. If you only plan of farming the Citadels, you don't need those Passives at all.
If you, however, plan on conquering all 4 Difficulty levels of this fight, here are out recommended Passive Points to pick:
- Ancient Relics
- Wtiness to History
- Modular Servant
- Lost Techniques
| Prerequisite |
Notable |
| - |
Ancient Relics
25% increased Rarity of Items dropped by the Arbiter |
| Ancient Relics |
Central Terraformer
Arbiter drops an additional Corrupted Rare Precusor Tablet |
| Ancient Relics |
The Way Forward
Arbiter drops 3 additional tier 15 Waystones |
| Ancient Relics |
Lost Techniques
Arbiter has 10% chance to drop a valuable Gem |
| Ancient Relics |
Modular Servant
Arbiter has 10% chance to drop a valuable Socket Currency |
| Ancient Relics |
Wtiness to History
Arbiter has 20% chance to drop an additional Unique item |
|
Odealo is a secure trading platform for MMO gamers. Here you can buy, sell, and trade PoE 2 Currency for real cash.
|
If you have any other Guide requests, please leave them in the comments below. We are always open to suggestions and constructive feedback.
Pictures used in this article are the intellectual property of Grinding Gear Games.