Path of Exile 2
Delirium Guide
Last Update: 05/04/2025
⏎ Return to the main article about PoE2 end-game mechanics
Delirium is one of the major Endgame mechanics available for players who have reached Atlas of Worlds. It occurs naturally on some Maps, but you can also use special Tablets after completing one of the many Towers to apply it to nearby Maps. Injecting Distilled Emotions into a Waystone directly works too.
The Delirium Mirrors exist in the form of interactable portals. Once activated, a Fog encompassing the entire Map will appear. It creates Delirium Monsters, increases all monsters' damage, and decreases the damage they receive. To keep the Fog afloat, one has to travel away from the initial point in a straight line. Slain enemies will drop loot when the Delirium ends - Simulacrum Splinters, Distilled Emotions, and special rewards from the bottom-left bar.
A Waystone instilled with Emotions has no Delirium Mirror in it. Instead, it has a permanent Delirium with a fixed Delirium level that does not change and the Fog does not dissipate, but since the Delirium does not end, progressing through the map grants no special rewards. You can increase the Delirium level by over 100% this way if you wish to. Three exact Distilled Emotions can be combined at a Reforging Bench to receive one that's one tier higher.
While Delirious, you will encounter small mirrors, Fracturing Mirrors is what they're called, that release Delirium Monsters as you approach them. They don't do anything else.
Delirium Final Challenge - the 15th wave of Simulacrum
A full stack of Simulacrum Splinters creates a Simulacrum. You can activate it at the Realmgate in your Atlas to access the Simulacrum (encounter). There are 5 Tiers of difficulty to it, increased each time you expand your Delirium Atlas Skill Tree. To get the Delirium Atlas Skill Tree Points, you have to complete the Simulacrum at your highest unlocked difficulty level. The difficulty doesn't introduce any novel challenges that are in any way different from the previous tiers, it's just a plain area level increase with a higher Delirium Level, which translates into stronger foes. The encounter's difficulty plateaus at wave 10.
The fight in the Simulacrum can be challenging for some builds, especially ones that rely on on-kill effect (like Herald's damage), because the monsters in it leave no corpses behind. The Unique bosses there are Omniphobia and Kosis; they can spawn after the fifth wave and have a higher chance of spawning the deeper into the encounter you delve. Omniphobia is considered the weaker of the two. Kosis introduces a demanding DPS check. It often recharges its Energy Shield (that cannot be penetrated with Chaos Damage), so if you cannot break it in time it starts Recharging it again, you will never kill it.
|
 
Odealo is a secure trading platform for MMO gamers. Here you can buy, sell, and trade PoE 2 Currency for real cash.
|
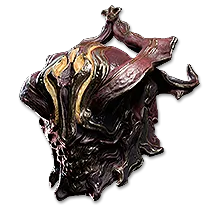
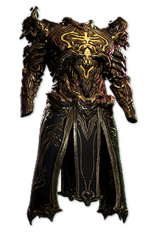
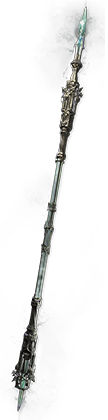
Simulacrum Rewards
To receive a Unique Item from the list one has to complete the final, 15th wave, of a Simulacrum. It involves slaying the unique boss: Kosis, The Revelation. The most valued rewards are Megalomaniacs and they drop only at the highest Simulacrum difficulty, so be sure your character can withstand it. The Flask can be expensive too, but it is found in Simulacrums at any difficulty level. You will also receive a lot of Distilled Emotions - a Currency used to enhance Amulets and Waystones.
| Simulacrum Unique Loot |
| Icon |
Name and modifiers |
Required
Tier |
 |
Assailum
(50–100)% increased Armour and Evasion
+(200–400) to Accuracy Rating
(30–50)% increased Critical Hit Chance
Skills have a (100–150)% longer Perfect Timing window |
0 |
 |
Perfidy
(100–150)% increased Armour and Evasion
(10–40)% chance to Avoid Physical Damage from Hits
(10–40)% chance to Avoid Chaos Damage from Hits
Enemies in your Presence are Intimidated |
0 |
 |
Melting Maelstrom
Effect is not removed when Unreserved Mana is Filled
(200–250)% increased Duration
Every 3 seconds during Effect, deal 50% of Mana spent in those seconds as Chaos Damage to Enemies within 3 metres
Deals 25% of current Mana as Chaos Damage to you when Effect ends |
0 |
 |
Collapsing Horizon
100% increased Elemental Damage with Attacks
+(5–10)% to Critical Hit Chance
+(2–4) to Level of all Elemental Skills
Trigger skills refund half of Energy spent |
3 |
 |
Strugglescream
+(5–7) to all Attributes
Can have 2 additional Instilled Modifiers |
3 |
 |
Megalomaniac (2 mod)
Allocates Passive Skill
Allocates Passive Skill |
4 |
|
Megalomaniac (3 mod)
Allocates Passive Skill
Allocates Passive Skill
Allocates Passive Skill |
4 |
|
Odealo is one of the biggest Path of Exile marketplaces. It allows regular players to buy, sell, and trade PoE Currency with the use of real cash
|
| List of regular Delirium Loot |
| Icon |
Name and modifiers |
 |
Simulacrum Splinter
Stack Size: 300
Combine 300 Splinters to create a Simulacrum |
 |
Simulacrum
Travel to the Simulacrum encounter by using this item at The Realm Gate. Can only be used once. |
 |
Delirium Precursor Tablet
(12-18) Maps in Range contain Mirrors of Delirium |
List of Distilled Emotions
Can be consumed with other Distilled Emotions to Instil Amulets with Notable Passive Skills or Waystones with Layers of Delirium |
| Icon |
Name |
Effect |
 |
Distilled Ire |
Players in Area are 7% Delirious
20% increased Magic Monsters |
 |
Distilled Guilt |
Players in Area are 9% Delirious
8% increased Pack Size |
 |
Distilled Greed |
Players in Area are 10% Delirious
8% increased Rarity of Items found in this Area |
 |
Distilled Paranoia |
Players in Area are 12% Delirious
15% increased number of Rare Monsters |
 |
Distilled Envy |
Players in Area are 15% Delirious
30% increased Waystones found in Area |
 |
Distilled Disgust |
Players in Area are 18% Delirious
30% increased Precursor Tablets found in Area |
 |
Distilled Despair |
Players in Area are 20% Delirious
30% increased Stack size of Simulacrum Splinters found in Area |
 |
Distilled Fear |
Players in Area are 22% Delirious
Rare Monsters have a 25% chance to have an additional Modifier |
 |
Distilled Suffering |
Players in Area are 25% Delirious
Unique Monsters have 1 additional Modifier |
 |
Distilled Isolation |
Players in Area are 50% Delirious |
If you have any other Guide requests, please leave them in the comments below. We are always open to suggestions and constructive feedback.
Pictures used in this article are the intellectual property of Grinding Gear Games.