
Shockwave Cyclone Slayer Build
A simple Cyclone Slayer build that uses Warstaves. A variation of the possibly most popular build archetype in the game for a long time now.Shockwave Cyclone
Slayer Build
Updated for Patch 3.27
The Best Crafty Guides by Odealo
| Guide notes |
| July 26, 2025 -Updated for Patch 3.26 October 28, 2025 -Updated for Patch 3.27 |
| Build overview | |||
| Tags: [MELEE] [PHYSICAL] [IMPALE] [LIFE] | |||
|
Budget: Defenses: |
|
Boss DPS: AoE: |
|
Cyclone has been one of the most popular Melee builds in the game for a long time now. It's a Channeling Melee Attack that allows you to move while dealing damage to surrounding enemies. This build focuses on expanding the benefits of using it with Warstaves. Staves usually offer a little bit less Physical Damage compared to Axes or Swords, but they have a much easier time capping Critical Strike Chances, provide a lot of Block Chance with minimal investments, and have easy access to generating Fortify and Endurance Charges. They can also use Shockwave Support, which creates a burst of Damage in a large area around the Enemy you Hit with your Cyclone, which greatly improves your Clear Speed and makes your gameplay more dynamic.
The Transfigured Cyclone of Tumult accumulates stages as you keep channeling this Skill, which greatly improves your Attack Speed and AoE, but drastically slows your Movement Speed. The stages disappear over 3 seconds of not channeling, so the only realistic way to deal with the slower Movement Speed is using The Stampede Boots. They set your Movement Speed to a fixed amount of 150% of the base value, which can't be increased or lowered. Modifiers to your Action Speed still apply. In this Guide, we focused on the Transfigured version as it is stronger, easier, and ultimately cheaper to set up as a main form of dealing Damage.
It is very easy to sustain the Mana with Mana Leech, but it becomes problematic if you don't want to interrupt your Cycloning between the packs. To remove the Mana Cost completely, you will need to use a combination of special modifiers on Warlord-influenced Armour, Rare Ring or Amulet, and Mana Cost Reduction on your Helmet or Mana Mastery. You can also simply use the Lifetap Support, which offers 15% less Damage than other options but allows you to get more defense on your Items.
The Impale is a special mechanic only available for pure Physical setups. Your every Attack will inflict a stacking debuff that reflects a portion of your Damage every time you Hit the Enemy again, up to a limit. With the insane Attack Speed of your Cyclone, the ramp-up takes less than a second, and it will easily double your Damage output. To make the most out of it, you will need the Watcher's Eye with the relevant modifier and borrow the Master of Metal Keystone using Forbidden Flesh&Flame Jewels, but even the baseline version is strong on its own.
In Patch 3.27, the build received one change: the Cyclone itself deals straight up 20% more damage. It elevates the build by one tier. No Bloodline passives are relevant substitutes for Slayer's ones.
You can also check our other Path of Exile builds: Odealo's Crafty Guides - Full List
1. Gameplay
Cyclone is one of the smoothest Skills to use - your Movement and Attack Skills are under one button, making this build extremely easy to play, even with just one hand. To jump over obstacles, use Frostblink, which can be used while channeling your Cyclone. To boost your damage during long fights plant a War Banner and swap Stances, which can also be done without interrupting the Cyclone.
|
|
|
|

2. Build's PROS & CONS
| PROS |
|
| CONS |
|
3. Leveling tips
It is recommended to follow the Duelist Leveling Guide with Melee/Impale in PoE guide on how to go through the leveling process. Switch to the final version - without the Precise Technique Keystone later in the game, after acquiring the respectable Accuracy rating and Critical Strike Chance.
Bandits:
We recommend killing all the Bandits for the additional Passive Point, but helping Alira is also a good option.
Leveling Skill Trees:
37 Points Skill Tree
Your leveling Passive Tree will differ a lot from the final version, as Critical Strikes are weak during the leveling. You should opt for the Precise Technique for 40% More Damage, pick up Mana Leech for sustain, Onslaught for faster campaign progression, and nearby Damage and Life Notables.
67 Points Skill Tree
Pick up Damage, a bit of AoE, and maximum Life. Capping Elemental Resistance is the only important defense during the leveling.
4. Final Skill Tree, Ascendancy Points, and Pantheon
Final Skill Tree:
112 Points Final Skill Tree (does not include Cluster Jewels)
122 Points Path of Building (PoB) link
Ascendancy points:
Preferably in that order:
- Bane of Legends
- Brutal Fervour
- Impact
- Headsman
Pantheon:
Major God: Soul of the Brine King: You cannot be Stunned if you've been Stunned or Blocked a Stunning Hit in the past 2 seconds; 100% chance to Avoid being Frozen
Minor God: Soul of Garukhan: 60% reduced Effect of Shock on you; Cannot be Blinded, Cannot be Maimed
5. Final Gems links
| [DPS] Cyclone setup | |
 |
Cyclone of Tumult - gains Stages while Channeling, which greatly improves your Attack Speed and Range, but lowers your Movement Speed. You can also use the regular version that deals less Damage but can reach higher Movement Speed with proper investments. |
 |
Melee Physical Damage Support - greatly improves your Physical DPS. The Awakened version provides a chance to Intimidate Enemies. |
 |
Shockwave Support - it is a great boost for both your Clear Speed and Damage against Bosses. It deals AoE Damage around the target. It has a short Cooldown and can store 3 Charges. |
 |
Increased Critical Damage Support - adds a lot of Critical Strike Multiplier. You can also use the  Increased Critical Strikes Support if your Crit Chance is low. Increased Critical Strikes Support if your Crit Chance is low. |
 |
Pulverise Support - grants a very high Melee Area DPS bonus and increases the radius of your Cyclone. |
 |
Brutality Support - grants a very high increase to Physical Damage, but makes supported Skills deal no Chaos or Elemental Damage |
| [UTILITY] Mana-reserved Spells | |
 |
Pride - makes enemies receive more Physical Damage, this bonus is amplified the longer your target stays in Melee Range. |
 |
Blood and Sand - allows you to switch between Blood and Sand stances, which grants you bonuses to your Damage or AoE Radius. |
 |
Flesh and Stone - another Stance Skill, it offers you a massive Damage Taken Reduction or amplification of Physical Damage Taken by Enemies. |
 |
Herald of Purity - improves your Physical Damage. It is more valuable if you use the relevant Circle of Guilt Ring. |
 |
Precision - Aura that grants you Critical Strike-related benefits. At level 1 it reserves little to no mana, while you can still benefit from its minor buffs and Watcher's Eye upgrades. |
 |
Enlighten Support - if your Mana Pool is low with all the Auras enabled, you can use Enlighten Support to reduce the amount of Mana Reserved by them. |
| [UTILITY] Assassin's Mark setup | |
 |
Assassin's Mark - Use Assassin's Mark to increase the Critical Strike Chance and Critical Strike Multiplier. Hitting Marked Enemies will also generate Power Charges for you. |
 |
Mark on Hit Support - applies linked Curse on Hit against Rare and Unique Enemies. |
 |
Lifetap Support - causes linked Skills to cost Life instead of Mana. |
| [UTILITY] CwDT setup | |
 |
Molten Shell - Grants a protective shield and extra Physical Damage mitigation based on your Armour. |
 |
Vulnerability - your second Curse increases the Physical Damage received by your Enemies. You will need to anoint the Whispers of Doom or have a specific modifier on your Body Armour to use it. |
 |
Cast when Damage Taken Support - auto-casts all the supported Utility Skills when you take enough Damage. |
|
Lifetap Support - you will have low reservoirs of Mana, so you can use this Support to pay the Mana Costs with your Life instead. |
| [UTILITY] Banner setup | |
 |
War Banner - Planting the Banner on the ground greatly improves your Physical Damage if you stay within its range. It consumes stacks of Valor, which you gain by fighting enemies. |
 |
More Duration Support - makes your Banner last longer. You can't gain Valor while the Banner is active. |
| [UTILITY] Other Utility setups | |
 |
Frostblink - it is an instant teleport, so you can use it without interrupting the Cyclone. You can keep it at a low level to reduce the Mana Cost and Attribute Requirement. |
 |
Blood Rage - a Buff that increases your Attack Speed and generates Frenzy Charges on Kill. |
 |
Berserk - consumes your Rage at an accelerating rate but greatly improves the effect of it during its duration. |
|
|
5. Gear Setup
No uniques are required, but The Stampede boots are heavily recommended if you don't have a quicksilver flask with a mageblood and like 4 quick gateway notables, but only if you are using the Cyclone of Tumult. For the regular Cyclone, you can simply stop Channeling between the packs, or use Ashes of the Stars and Dialla's Malefaction to instead move 10% faster than regular walking. Other Unique Items used in this Build boost your Damage but are not essential for the functionality. On the Rare Items, you will look for Physical Damage, Critical Strike Multiplier, Attack Speed, and enough Accuracy to reach the cap. Defensively, you will need high maximum Life, Armour, and enough Resistance and Attributes.
|
Stat priorities on items:
|
 (Helmet) Rare Helmet - Aim for decent Life, Elemental Resistances, Attributes, and Accuracy Rating. For the Eldritch mods get reduced Mana Cost of Attacks and Mana Reservation Efficiency. If it's an elder helmet, it can increase the physical damage that nearby enemies take. (Helmet) Rare Helmet - Aim for decent Life, Elemental Resistances, Attributes, and Accuracy Rating. For the Eldritch mods get reduced Mana Cost of Attacks and Mana Reservation Efficiency. If it's an elder helmet, it can increase the physical damage that nearby enemies take. |
|
| Min. requirements: +100 to maximum Life 80% Total Elemental Resistances Optional affixes: Attributes Mana Reservation Efficiency Nearby Enemies take 9% increased Physical Damage (Elder Suffix) Accuracy Rating |
|
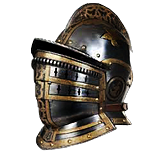
 (Helmet) Abyssus - Damage-oriented option. It has a lot of it, but also increases Physical Damage taken, making the character very fragile. We'll leave it up to you if it's a justifiable tradeoff. (Helmet) Abyssus - Damage-oriented option. It has a lot of it, but also increases Physical Damage taken, making the character very fragile. We'll leave it up to you if it's a justifiable tradeoff. |
|
| +(20-25) to all Attributes Adds 40 to 60 Physical Damage to Attacks +(100-125)% to Melee Critical Strike Multiplier (100-120)% increased Armour (40-50)% increased Physical Damage taken |
|
 (Weapon) Rare Staff - look for the highest Physical DPS staff you can afford, but it should also have a high base Critical Strike Chance. The Staff Implicit is defensive-oriented - it grants you a 25% chance to completely negate the Damage from incoming Attacks. (Weapon) Rare Staff - look for the highest Physical DPS staff you can afford, but it should also have a high base Critical Strike Chance. The Staff Implicit is defensive-oriented - it grants you a 25% chance to completely negate the Damage from incoming Attacks. |
|
| Min. requirements: 800 Physical DPS 20% increased Attack Speed Optional affixes: Chance to deal Double Damage Increased Critical Strike Chance/Multiplier Accuracy Rating Socketed Skills deal 20% more Attack Damage (Shaper Prefix) |
|
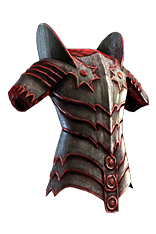 (Body Armour) Rare Body Armour - removing the Mana Cost is a huge Quality of Life upgrade, which you can achieve via Warlord modifier. Try to match it with defensive bonuses like Armour, Physical Damage Reduction, or Resistance. Later on, you can upgrade it for the much more expensive Double Influenced version with Hunter modifiers that grant you additional Curse or raise your base Critical Strike Chance. (Body Armour) Rare Body Armour - removing the Mana Cost is a huge Quality of Life upgrade, which you can achieve via Warlord modifier. Try to match it with defensive bonuses like Armour, Physical Damage Reduction, or Resistance. Later on, you can upgrade it for the much more expensive Double Influenced version with Hunter modifiers that grant you additional Curse or raise your base Critical Strike Chance. |
|
| Min. requirements: +120 to Maximum Life Optional affixes: Armour Elemental or Chaos Resistance Additional physical Damage Reduction Socketed Attacks have -15 to Total Mana Cost (Warlord Suffix) Additional Critical Strike Chance (Hunter Suffix) You can apply an additional Curse (Hunter Prefix) Enemies you Kill have a chance to Explode, dealing a tenth of their maximum Life as Physical Damage (Crusader Prefix) |
|
 (Amulet) Rare Amulet - there are a lot of modifiers you will want on your Jewelry, which you can mix and match freely. You should look for high maximum Life, Critical Strike Multiplier, and Accuracy, but you will also need a lot of Resistance and Attributes. You can also get the Mana Leech here, which will make your Cluster Jewels cheaper. (Amulet) Rare Amulet - there are a lot of modifiers you will want on your Jewelry, which you can mix and match freely. You should look for high maximum Life, Critical Strike Multiplier, and Accuracy, but you will also need a lot of Resistance and Attributes. You can also get the Mana Leech here, which will make your Cluster Jewels cheaper. |
|
| Min. requirements: +100 to Maximum Life 40% total Elemental Resistance Optional affixes: Attributes Accuracy % increased Damage while Leeching Channelling Skills have -3 to Total Mana Cost (Crafted) Added Physical Damage to Attacks Global Critical Strike Multiplier |
|
 (Amulet) Uul-Netol's Vow - There are some very good Support Gems that you just won't fit. A good Uul-Netol's Vow will let you link one more such gem to your Cyclone. (Amulet) Uul-Netol's Vow - There are some very good Support Gems that you just won't fit. A good Uul-Netol's Vow will let you link one more such gem to your Cyclone. |
|
| Has 1 Socket Socketed Support Gems can also Support Skills from Equipped Body Armour +(-30-30)% to Fire Resistance +(-30-30)% to Cold Resistance +(-30-30)% to Lightning Resistance +(-23-23)% to Chaos Resistance |
|
| Recommended Anointments: Charisma Always Angry Serpent Stance |
|
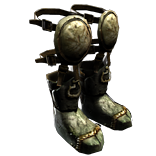
 (Boots) The Stampede - with those Boots your Movement Speed will always be at 150% of the base value, which can only be affected by modifiers to your Action Speed, such as Shrines, Tailwind, or Chill. (Boots) The Stampede - with those Boots your Movement Speed will always be at 150% of the base value, which can only be affected by modifiers to your Action Speed, such as Shrines, Tailwind, or Chill. |
|
| (100-150)% increased Evasion and Energy Shield (30-40)% increased Stun and Block Recovery (50-80)% increased Cooldown Recovery Rate of Travel Skills (30-40)% increased Mana Regeneration Rate while moving Your Movement Speed is 150% of its base value |
|
 (Boots) Rare Boots - stacking Quality on the regular Cyclone is reasonable only if you can get a lot of Movement Speed from other sources, such as your Boots. At the very least it should provide a Movement Speed bonus, but they also can grant you Buffs such as Onslaught, Elusive, or Tailwind. If you prefer the cheaper, Eldritch mods, get Action Speed and Cooldown Recovery Rate of Travel Skills. (Boots) Rare Boots - stacking Quality on the regular Cyclone is reasonable only if you can get a lot of Movement Speed from other sources, such as your Boots. At the very least it should provide a Movement Speed bonus, but they also can grant you Buffs such as Onslaught, Elusive, or Tailwind. If you prefer the cheaper, Eldritch mods, get Action Speed and Cooldown Recovery Rate of Travel Skills. |
|
| Min. requirements: 90 Maximum Life 80% Total Elemental Resistances 35% increased Movement Speed Optional affixes: You have Tailwind if you have dealt a Critical Strike Recently (Hunter Suffix) chance to gain Onslaught for 4 seconds on Kill (Reedemer Suffix) chance to gain Elusive on Critical Strike (Reedemer Prefix) Freeze and Chill immunity |
|
 (Belt) The Magnate - a great offensive option if you don't have other sources of Double and Triple Damage and can reach 400 Strength. It also improves your Flask Sustain and makes capping Resistances much easier. Try to get a Corrupted version that grants even more Resistance. (Belt) The Magnate - a great offensive option if you don't have other sources of Double and Triple Damage and can reach 400 Strength. It also improves your Flask Sustain and makes capping Resistances much easier. Try to get a Corrupted version that grants even more Resistance. |
|
| (20-30)% increased Stun Duration on Enemies +(40-50) to Strength +(20-25)% to all Elemental Resistances 50% increased Flask Charges gained 10% chance to deal Double Damage while you have at least 200 Strength 5% chance to deal Triple Damage while you have at least 400 Strength |
|
 (Belt) Ryslatha's Coil - a very good Belt for most Physical Attack Builds. Try to get as much more Maximum Attack Damage without lowering the Minimum Damage range too much. You can also amplify those effects with Catalyst. (Belt) Ryslatha's Coil - a very good Belt for most Physical Attack Builds. Try to get as much more Maximum Attack Damage without lowering the Minimum Damage range too much. You can also amplify those effects with Catalyst. |
|
| (20-30)% increased Stun Duration on Enemies +(20-40) to Strength (30-40)% more Maximum Physical Attack Damage (40-30)% less Minimum Physical Attack Damage Adds 1 to (15-20) Physical Damage to Attacks +(80-100) to maximum Life Gain 50 Life when you Stun an Enemy |
|
 (Ring) Circle of Guilt - you can get some extra Damage while wearing this Ring and using Herald of Purity. The Synthesis Impliticits are also quite useful, as they can provide a bit of extra Resistance or Attributes. (Ring) Circle of Guilt - you can get some extra Damage while wearing this Ring and using Herald of Purity. The Synthesis Impliticits are also quite useful, as they can provide a bit of extra Resistance or Attributes. |
|
| <One to three random Synthesis implicit modifiers> +(10-20) to all Attributes Adds (8-10) to (13-15) Physical Damage +(350-400) to Armour Recommended Herlad modifiers: Herald of Purity has (40-60)% increased Buff Effect (40-60)% increased Physical Damage while affected by Herald of Purity 4% additional Physical Damage Reduction while affected by Herald of Purity |
|
 (Ring) Rare Rings - look for maximum Life, Resistance, Attributes, and open Prefix to Craft the Mana Cost Reduction. It can also grant you the Mana Leech. For Damage, you can look for Critical Strike Multiplier crafted via Essence of Scorn on a Fractured Base. (Ring) Rare Rings - look for maximum Life, Resistance, Attributes, and open Prefix to Craft the Mana Cost Reduction. It can also grant you the Mana Leech. For Damage, you can look for Critical Strike Multiplier crafted via Essence of Scorn on a Fractured Base. |
|
| Min. requirements: +90 to Maximum Life 80% Total Elemental Resistances Channelling Skills have -3 to Total Mana Cost (Crafted) Optional affixes: Global Critical Strike Multiplier (Warlord Suffix) Attributes Accuracy Rating Added Physical Damage to Attacks Mana Leech Gain Life per Enemy Hit with Attacks (Hunter Prefix) |
|
 (Gloves) Rare Gloves - here you can get a lot of Damage. Look for Attack Speed, increased Damage while Leeching, and optionally added flat Physical Damage to Attacks or Accuracy Rating. Don't forget about maximum Life and Resistances or Attributes. The Eldritch Implicits can grant you a chance to Intimidate Enemies, speed up your Rage generation, or cover lacking chance to Impale Enemies. (Gloves) Rare Gloves - here you can get a lot of Damage. Look for Attack Speed, increased Damage while Leeching, and optionally added flat Physical Damage to Attacks or Accuracy Rating. Don't forget about maximum Life and Resistances or Attributes. The Eldritch Implicits can grant you a chance to Intimidate Enemies, speed up your Rage generation, or cover lacking chance to Impale Enemies. |
|
| Min. requirements: +90 to Maximum Life 80% Total Elemental Resistances Optional affixes: Increased Damage while Leeching Attack Speed Added Physical Damage to Attacks Accuracy Mana Leech Attributes |
|
 (Jewels) Rare Jewels - try to get increased Life on your Jewels - preferably 7%, and some damage modifiers like Attack Speed or Critical Strike Multiplier. You can also look for lacking Resistances, Attributes, Mana Leech, or Corrupted Blood Immunity. (Jewels) Rare Jewels - try to get increased Life on your Jewels - preferably 7%, and some damage modifiers like Attack Speed or Critical Strike Multiplier. You can also look for lacking Resistances, Attributes, Mana Leech, or Corrupted Blood Immunity. |
|
| Recommended affixes: increased maximum Life increased Attack Speed Critical Strike Multiplier Attributes Resistance Corrupted Blood cannot be inflicted on you |
|
 (Jewels) Watcher's Eye - thanks to this Jewel your Impales can last for 2 additional Hits while you are using Pride Aura. It can also provide plenty of other useful modifiers, but the Impale is the most important one. (Jewels) Watcher's Eye - thanks to this Jewel your Impales can last for 2 additional Hits while you are using Pride Aura. It can also provide plenty of other useful modifiers, but the Impale is the most important one. |
|
| (4-6)% increased maximum Energy Shield (4-6)% increased maximum Life (4-6)% increased maximum Mana <Two or Three random aura modifiers> Pride: (8-12)% chance to deal Double Damage 25% chance to Impale Enemies on Hit Impales you inflict last 2 additional Hits (40-60)% increased Physical Damage Precision: Gain a Flask Charge when you deal a Critical Strike (40-60)% increased Attack Damage (10-15)% increased Attack Speed +(20-30)% to Critical Strike Multiplier |
|
 (Jewels) The Light of Meaning - this Jewel quite simply increases your Physical Damage by a large amount. Socket it near the Stamina Notable. (Jewels) The Light of Meaning - this Jewel quite simply increases your Physical Damage by a large amount. Socket it near the Stamina Notable. |
|
| Passive Skills in Radius also grant 6% increased Physical Damage | |
  (Jewels) Forbidden Flesh&Flame - you can use those Jewels to borrow any Duelist's Ascendency Notable. The Master of Metal is quite cheap and offers a lot of flat Physical Damage in this setup. The Inspirational is also very good with this War Banner of yours. (Jewels) Forbidden Flesh&Flame - you can use those Jewels to borrow any Duelist's Ascendency Notable. The Master of Metal is quite cheap and offers a lot of flat Physical Damage in this setup. The Inspirational is also very good with this War Banner of yours. |
|
| Allocates <Random Ascendancy Notable> if you have the matching modifier on Forbidden Flesh Allocates <Random Ascendancy Notable> if you have the matching modifier on Forbidden Flame |
|
 (Jewels) Large Cluster Jewel - the Overlord Notable grants you Fortify on Hit, which saves you a lot of Passive Points. The Feed the Fury has great value as you are always Leeching, but you might also need the Fuel the Fight if you can't get the Mana Leech elsewhere. (Jewels) Large Cluster Jewel - the Overlord Notable grants you Fortify on Hit, which saves you a lot of Passive Points. The Feed the Fury has great value as you are always Leeching, but you might also need the Fuel the Fight if you can't get the Mana Leech elsewhere. |
|
| Recommended Affixes: 1 Added Passive Skill is Feed the Fury 1 Added Passive Skill is Fuel the Fight 1 Added Passive Skill is Martial Prowess 1 Added Passive Skill is Overlord 1 Added Passive Skill is Master the Fundamentals |
|
 (Jewels) Medium Cluster Jewel - you can get 100% Stun avoidance if you get two Medium Jewels with the Unwavering Focus Notable, but usually, it is not that much of a problem. Critical Strike's better - Pressure Points, Basics of Pain, and Quick Gateway if not using Stampede. (Jewels) Medium Cluster Jewel - you can get 100% Stun avoidance if you get two Medium Jewels with the Unwavering Focus Notable, but usually, it is not that much of a problem. Critical Strike's better - Pressure Points, Basics of Pain, and Quick Gateway if not using Stampede. |
|
| Recommended Affixes: 1 Added Passive Skill is Stoic Focus 1 Added Passive Skill is Unwavering Focus 1 Added Passive Skill is Precise Focus 1 Added Passive Skill is Unrestrained Focus 1 Added Passive Skill is Pressure Points 1 Added Passive Skill is Basics of Pain 1 Added Passive Skill is Quick Gateway |
|
 (Flask) Rosethorn Tincture - at first you can use this Tincture for the massive amount of Critical Strike Chance and Attack Speed, but it can be annoying to use with the small amount of Unreserved Mana. (Flask) Rosethorn Tincture - at first you can use this Tincture for the massive amount of Critical Strike Chance and Attack Speed, but it can be annoying to use with the small amount of Unreserved Mana. |
|
| (100-150)% increased Critical Strike Chance with Melee Weapons Recommended modifiers: Increased Effect Increased Melee Weapon Attack Speed |
|
 (Flask) Bottled Faith - One of the best offensive Flasks in the game for every build that uses Critical Strikes. Use Enchant to trigger it upon Hitting a Rare or Unique Enemy, as it is the only source of Consecrated Ground for this Build. (Flask) Bottled Faith - One of the best offensive Flasks in the game for every build that uses Critical Strikes. Use Enchant to trigger it upon Hitting a Rare or Unique Enemy, as it is the only source of Consecrated Ground for this Build. |
|
| 40% increased Damage Creates Consecrated Ground on Use (20-40)% increased Duration Consecrated Ground created by this Flask has Tripled Radius Consecrated Ground created during Effect applies (7-10)% increased Damage taken to Enemies (100-150)% increased Critical Strike Chance against Enemies on Consecrated Ground during Flask effect |
|
Other suggested Flasks:
|
|
    |
|
|
If you have any other build requests please leave that in the comments below.
Pictures used in this article are the intellectual property of Grinding Gear Games.
