
Snipe Witchhunter POE2 Build
A very potent Setup for the Witchhunter Ascendency that uses well-timed Snipe to deal a tremendous amount of Critical Damage to Enemies.Snipe/Spiral Volley Bleed
Witchhunter Build
Updated for Path of Exile 2 Early Access
The Best Crafty Guides by Odealo
| Guide notes |
| December 13, 2024 - Created for Early Access. |
| Build Overview | |||
| Tags: [ATTACK] [CRIT] [LIFE] [BOW] | |||
|
Budget: Defenses: |
|
Boss DPS: AoE: |
|
Snipe is a very powerful Channeling Bow Skill that guarantees a Critical Strike if you release the arrow at the right moment. With moderate investments, you can easily reach over 500% bonus Critical Strike Damage, which leads to a tremendous amount of Damage from a single Hit. Furthermore, you can use the Barrage Spell to add at least two extra repeats, and one more for each Frenzy Charge it consumes.
The Snipe deals Damage in small AoE, but it is not capable of clearing multiple enemies. For that, you should use Spiral Volley which releases Arrows in a spiral around you. It can also consume Frenzy Charges to make the Arrows Chain to nearby Enemies and deal More Damage. As a Witchhunter, you will also have a 10% chance to Explode any enemy you kill, which often obliterates the entire pack at once.
To generate Frenzy Charges you will use the Combat Frenzy and Sniper's Mark. The Combat Frenzy grants you a Charge every time you Pin an Enemy, which you will easily do with your Spiral Volley. It causes your Enemies to be unable to move, but keep in mind they can still perform Attacks. The Sniper's Mark makes your next Critical Strike against a single enemy stronger and grants you one Frenzy Charge. You can also use the Serpent's Egg to gain an additional Charge anytime you get a Charge.
As you deal a lot of Physical Damage in a single Hit, you can easily spend a few Passive Points to include Bleeding in your Build. By default, this Ailment deals 15% of the initial Damage over the 5 seconds, or 30% if the target is Moving. With some minor investments, you can expect it to deal around 200% of the initial Snipe Damage. It is great for finishing up enemies that barely survived the first Snipe, or to keep damaging enemies when you have to avoid incoming attacks, which happens quite a lot during Boss encounters. It is a very cost-effective way to add plenty of Damage to your Build, but the majority of your Damage is caused by the Snipe Hit Damage itself.
You can choose two Ascendencies for this Build. The Witchhunter offers a reliable 30% More Damage bonus and longer ability Cooldown for Enemies, Explosions, and a Culling Strike effect. The Deadeye offers higher Speed and better Frenzy Charge generation, as well as a 50% chance to double their Effects. Their starting points on the Passive Tree are closely connected, so you can choose whichever version you prefer.
You can also check our other Path of Exile 2 builds right over here Odealo's Crafty Guides - Full List
1. Gameplay
For clearing Maps you will primarily use Spiral Volley, which Pins Enemies, granting you Frenzy Charge making further Spiral Volleys stronger. Use Snipe to kill Rare Enemies without wasting your Frenzy charges on Volleys. Against particularly strong Enemies you will want to Mark them with the Sniper's Mark and activate the Barrage first. You can also Break their Armour with a Gas Arrow to remove any Physical Damage Reduction they might have.
|
|
|
|

2. Build's PROS & CONS
| PROS |
|
| CONS |
|
3. Leveling tips
You can level up using early Elemental Skills like Lightning Arrow or explosions from Gas Arrow. Use Snipe against Bosses to practice perfect timing. You can start using the Spiral Volley at level 52, but without a proper Frenzy Charge generation setup it might feel lackluster. Remember to upgrade your Weapons frequently to speed up your leveling process.
| [DPS] Lightning Arrow setup | |
 |
Lightning Arrow - fires an Arrow that deals Damage to a single Enemy and creates two Beams that target nearby Enemies. |
 |
Martial Tempo - this support increases your Attack Speed. |
 |
Primal Armament - the Arrow will pierce an Enemy, releasing the Chaining Beams on both Hits. |
 |
Inspiration - lowers the Mana Costs of your Skill. |
| [DPS] Lightning Rod setup | |
 |
Lightning Rod - creates a stationary Rods that deal small AoE Damage when a Lightning Beam chains to it. |
 |
Magnified Effect - increases the AoE of your explosions. |
 |
Scattershot - creates more Rods with a single shot. |
 |
Lightning Infusion - grants extra Lightning Damage but lowers other Damage types. |
| [DPS] Snipe setup | |
 |
Snipe - charges up a powerful Attack. Releasing it at the correct time guarantees a Critical Strike with a bonus Damage. |
 |
Supercritical - grants you a lot of bonus Damage. The lower Critical Strike Chance does not apply to guaranteed effect. |
 |
Concentrated Effect - lowers the AoE but increases the Damage of your perfectly charged Snipe. |
 |
Brutality - adds Extra Lightning Damage but lowers other Damage types. |
4. Final Skill Tree, Ascendancy Points, and Pantheon
Final Skill Tree:
 |
|
Click on the image to open the Passive Tree preview in a new window, or use the full browser version: Passive Tree or use the Path of Building (PoB) tool. |
Ascendancy points:
Preferably in this order:
- Pitiless Killer
- Zealous Inquisition
- Witchbane
- No Mercy
5. Final Gems links
| [DPS] Snipe setup | |
|
Snipe - charge up a powerful Arrow. Releasing it at the very right moment guarantees a Critical Strike Chance with a bonus Critical Strike Damage and a small AoE explosion. |
|
Supercritical - grants you free Critical Strike Damage. |
|
Concentrated Effect - increases the Damage of the small Explosion. |
|
Brutality - improves your Physical Damage at the cost of other Elemental types. |
 |
Heft - increases your maximum Physical Damage potential. You can also use the Window of Opportunity if you can utilize it reliably. |
 |
Longshot - improves your Damage against distant targets. You can also use the Window of Opportunity if you are confident in your release timing skills. |
| [DPS] Spiral Volley setup | |
 |
Spiral Volley - fires a volley of Arrows in a spiral around you. Consumes your Frenzy Charges to make Arrow deal more Damage and Chain to nearby Enemies. |
 |
Pin - applies Pin with your Physical Damage, which is used to stop enemies and generate Frenzy Charges. |
|
Martial Tempo - increases your Attack Speed. |
 |
Perpetual Charge - grants you a chance to preserve Frenzy Charges while consuming them to empower this Skill. |
|
Inspiration - lowers the Mana Costs considerably. |
 |
Ricochet - gives you a decent chance to make your Projectiles Chain from the terrain. |
| [UTILITY] Combat Frenzy setup | |
 |
Combat Frenzy - a Spirit Skill that grants you Frenzy Charges when you Pin Enemies. |
 |
Profusion - grants you a 50% chance to get an additional Charge. |
 |
Cannibalism - recovers 4% maximum Life upon killing an Enemy. |
 |
Precision - improves your Accuracy Rating. You can also use Vitality for Life Regeneration. |
 |
Clarity - improves your Mana Regeneration Rate. |
| [UTILITY] Barrage setup | |
 |
Barrage - empowers your next Attack, making it release additional repeats. It consumes Frenzy Charges to grant additional repeats. |
 |
Ingenuity - lowers the Cooldown of this ability. |
 |
Premeditation - your Empowered Attacks deal more Damage. |
 |
Second Wind - grants you a second use of this Skill, but increases the Cooldown. |
| [UTILITY] Sniper's Mark setup | |
 |
Sniper's Mark - your next Critical Strike against Marked Enemy will deal additional Damage and grant you a Frenzy Charge. |
 |
Arcane Tempo - increases your Cast Speed. |
 |
Persistence - makes your Mark last longer. Keep in mind Mark is consumed upon landing a Critical Strike anyway. |
| [UTILITY] Wind Dancer setup | |
 |
Wind Dancer - accumulates stages that make you more evasive. Upon taking a Melee Hit you lose stacks and release a burst of wind that knocks back enemies. |
 |
Blind - the Windburst also Blinds Enemies. |
 |
Maim - Your enemies are also Maimed, which lowers their Movement Speed. |
| [UTILITY] Gas Arrow setup | |
 |
Gas Arrow - fires an arrow that creates a Gas Cloud, which continuously Poisons enemies standing in the area. |
 |
Corrosion - the Poison also Breaks the Armour of your Enemies. |
 |
Demolisher - the Armour is being Broken faster. |
 |
Comorbidity - raises the max amount of Poisons on Enemies by 1. |
 |
Deadly Poison - increases the Poison Damage so it can Break Armour faster. |
|
|
6. Gear Setup
The majority of your Damage comes from your Bow and Quiver. Good Rare Jewels are also very important, and easy to gradually upgrade over time as you get more Currency. Rings and Gloves can also improve your DPS a bit, but it is not very impactful. All your other Gear should be focused on defense. Your main form of defense is maximum Life and Evasion Rating. You will also need plenty of maximum Mana and Regeneration, as Channeling the Snipe can be quite costly. It is useful to have even in low quantities.
|
Stat priorities on items:
|
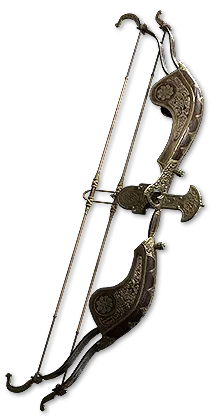 (Weapon) Rare Weapon - it is important that your Bow grant you the base Critical Strike Bonus, which will be increased by your other modifiers. Other than that, just look for the highest Physical DPS you can get. Leech is also very useful to have. (Weapon) Rare Weapon - it is important that your Bow grant you the base Critical Strike Bonus, which will be increased by your other modifiers. Other than that, just look for the highest Physical DPS you can get. Leech is also very useful to have. |
|
| Min. requirements: 300+ DPS +30% to Critical Damage Bonus Optional affixes: Leech Attack Speed |
|
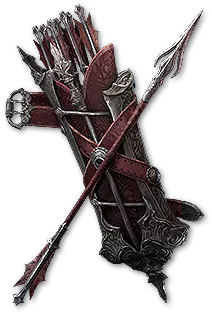 (Quiver) Rare Quiver - here look for flat Physical Damage, increases to Damage or Projectile Speed, Chance to Bleed, and Gem levels. Dexterity is also very useful. (Quiver) Rare Quiver - here look for flat Physical Damage, increases to Damage or Projectile Speed, Chance to Bleed, and Gem levels. Dexterity is also very useful. |
|
| Min. requirements: 40% increased Damage with Bow Skills Attacks have 15% Chance to cause Bleeding (Implicit) Optional affixes: #% increased Projectile Speed Adds # to # Physical Damage to Attacks Dexterity #% increased Critical Strike Bonus |
|
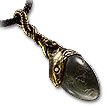 (Amulet) Serpent's Egg - greatly increases your Frenzy Charge generation, which is very important during Clearing Maps and for a better burst of Damage with Barrage. (Amulet) Serpent's Egg - greatly increases your Frenzy Charge generation, which is very important during Clearing Maps and for a better burst of Damage with Barrage. |
|
| (12–20)% increased Rarity of Items found +(10–20) to all Attributes +(17–23)% to Chaos Resistance (20–30)% increased Mana Regeneration Rate Gain an additional Charge when you gain a Charge |
|
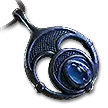 (Amulet) Rare Amulet - you can also use a Rare Amulet that boosts your Critical Strike Damage or raises Gem Levels. Mana is also very useful if you can't sustain your Skills otherwise. It should also provide the usual defensive modifiers like maximum Life or Resistance. (Amulet) Rare Amulet - you can also use a Rare Amulet that boosts your Critical Strike Damage or raises Gem Levels. Mana is also very useful if you can't sustain your Skills otherwise. It should also provide the usual defensive modifiers like maximum Life or Resistance. |
|
| Min. requirements: +100 to maximum Life +25% total Resistance Optional affixes: % increased Critical Damage Bonus % increased Mana Regeneration Rate +# to maximum Mana +# to Level of all Projectile Skills |
|
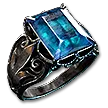 (Amulet) Rare Ring - use Rare Rings to cap your Resistance and Attribute Requirements. They can also grant you Leech and Mana. Adding Physical Damage to your Attacks is also a good option. (Amulet) Rare Ring - use Rare Rings to cap your Resistance and Attribute Requirements. They can also grant you Leech and Mana. Adding Physical Damage to your Attacks is also a good option. |
|
| Min. requirements: +100 to maximum Life +50% total Resistance Optional affixes: Leech #% of Physical Attack Damage as Life/Mana Adds # - # Physical Damage to Attacks |
|
 (Belt) Rare Belt - the Rare Belt can grant you a lot of maximum Life, Strength, and Resistance. Additional Charm Slots can also be useful. (Belt) Rare Belt - the Rare Belt can grant you a lot of maximum Life, Strength, and Resistance. Additional Charm Slots can also be useful. |
|
| Min. requirements: +150 to maximum Mana +50% total Elemental Resistance Optional affixes: Strength +# Charm slots |
|
 (Belt) Ryslatha's Coil - this Belt can improve your Damage, but make sure to have the proper ratio of increasing the maximum Damage as much as possible and lowering the minimum Damage by the least amount. (Belt) Ryslatha's Coil - this Belt can improve your Damage, but make sure to have the proper ratio of increasing the maximum Damage as much as possible and lowering the minimum Damage by the least amount. |
|
| (10–15)% reduced Charm Charges used +(80–100) to maximum Life (30–50)% increased Flask Life Recovery rate (30–40)% more maximum Physical Attack Damage (30–40)% less minimum Physical Attack Damage |
|
 (Helmet) Rare Helmet - it is a simple defensive gear piece, look for high amounts of maximum Life, Resistances, and Evasion. (Helmet) Rare Helmet - it is a simple defensive gear piece, look for high amounts of maximum Life, Resistances, and Evasion. |
|
| Min. requirements: +150 to maximum Life +50% total Elemental Resistance Optional affixes: Attributes Mana |
|
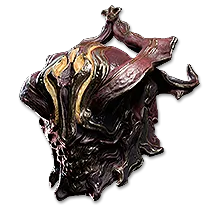 (Helmet) Assailum - with this Helmet you will have a much easier time landing the correct Timing with your Snipe. It lacks any meaningful defensive modifiers, so you should replace it at some point. (Helmet) Assailum - with this Helmet you will have a much easier time landing the correct Timing with your Snipe. It lacks any meaningful defensive modifiers, so you should replace it at some point. |
|
| (50–100)% increased Armour and Evasion +(200–400) to Accuracy Rating (30–50)% increased Critical Hit Chance Skills have a (100–150)% longer Perfect Timing window |
|
 (Body Armour) Rare Armour - your Body Armour is the most important piece for your Evasion Rating, make sure to get a lot of it here. It should also grant the usual maximum Life and Resistance. (Body Armour) Rare Armour - your Body Armour is the most important piece for your Evasion Rating, make sure to get a lot of it here. It should also grant the usual maximum Life and Resistance. |
|
| Min. requirements: +1300 to Evasion Rating +150 to maximum Life Optional affixes: +50% total Elemental Resistance +# to Spirit |
|
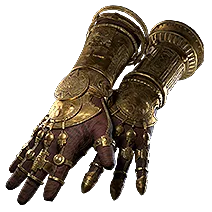 (Gloves) Rare Gloves - your Gloves can also grant you plenty of Damage in the form of Attack Speed and Critical Strike Damage. It can also provide a bit of flat Physical Damage. Other than that, try to ensure it also grants maximum Life. Getting Resistances here might become too costly. (Gloves) Rare Gloves - your Gloves can also grant you plenty of Damage in the form of Attack Speed and Critical Strike Damage. It can also provide a bit of flat Physical Damage. Other than that, try to ensure it also grants maximum Life. Getting Resistances here might become too costly. |
|
| Min. requirements: +140 to maximum Life +13% increased Attack Speed Optional affixes: Resistance % increased Critical Damage Bonus |
|
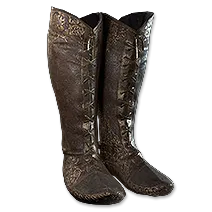 (Boots) Rare Boots - you will need at least 30% increased Movement Speed on your Boots. They should also provide defensive modifiers like maximum Life and Resistance. (Boots) Rare Boots - you will need at least 30% increased Movement Speed on your Boots. They should also provide defensive modifiers like maximum Life and Resistance. |
|
| Min. requirements: 30% Movement Speed +100 to maximum Life +50% total Elemental Resistance Optional affixes: Attributes |
|
 (Jewel) Rare Jewel - on your Jewels look for modifiers that boost your Critical Strike Bonus, increase Damage with Projectile Attacks in any way, and improve your Bleeding effect. It can also boost the bonuses granted by your Quiver, but it makes such Jewels extremely expensive. (Jewel) Rare Jewel - on your Jewels look for modifiers that boost your Critical Strike Bonus, increase Damage with Projectile Attacks in any way, and improve your Bleeding effect. It can also boost the bonuses granted by your Quiver, but it makes such Jewels extremely expensive. |
|
| Min. requirements: % increased Projectile Speed % increased Critical Damage Bonus for Attack Damage % increased Damage % increased Magnitude of Damaging Ailments you inflict with Critical Hits % increased Attack Speed % increased chance to inflict Ailments |
|
|
If you have any other build requests please leave that in the comments below. We are always open to suggestions and constructive feedback.
Pictures used in this article are the intellectual property of Grinding Gear Games.