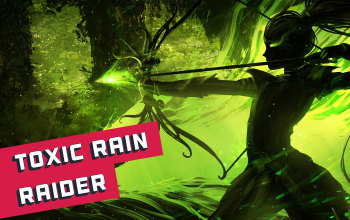
Toxic Rain
Raider Build
Updated for Patch 3.19
The Best Crafty Guides by Odealo
| Guide notes |
June 1, 2021
-Build created
August 27, 2022
-Updated for Patch 3.19 |
| Build overview |
| Tags: [RANGED] [CHAOS] [DOT] [LIFE] [STARTER] |
|
Budget:
Defenses:
|


|
Boss DPS:
AoE:
|

|
Toxic Rain is a unique Skill - It's an attack that has three stages - the initial impact of the arrow, the damage dealt by the spore pod it created, and the spore pod explosion. Spore pods are created when an arrow lands on the ground and it is what most of the builds expand on. It then creates a toxic ground after it explodes that deals Chaos Damage Over Time. The damage from the pods can stack one on top of the other, it means that more arrows equal more spore pods equals more Damage Over Time, even if it overlaps. It's a good idea to invest in Attack Speed and Additional Arrows, but your primary focus should be on increasing Chaos Damage Over Time and Gem Level. Bury in mind that you'll not rely on Poison at all, Poison - although can be described as Choas Damage Over Time - it's not what you'll be utilizing.
The build is simple and inexpensive - it's a good league starter and a great build if you're new to the game in general. You'll need to look for Maximum Life, Increased Skill Effect Duration, and Chaos Damage Over Time on the Skill Tree. Since Toxic Rain allows you to increase your Damage Over Time by increasing Projectile Damage, feel free to invest in your Projectile Damage as well. Your defense will rely on Maximum Life - around 5 or 6k, Evasion Rating - around 30 to 40k, and Ascendancy points. Your Chance to Evade hits should be really high. It is recommended to anoint your Amulet with Corruption for the increased effect of Withered. Thanks to your Ascendancy, you'll have a permanent Onslaught. The build requires no uniques, but few are recommended.
You can also check our other Path of Exile builds right over here Odealo's Crafty Guides - Full List
1. Gameplay
The gameplay is simple - use your Toxic Rain as you run around the map. It's The only DPS Skill in the build and it does more damage the longer you're standing on the ground and attacking - it allows for more spore pods to be created. The cure of your choice is Despair - you'll need to find a Ring that can inflict this specific Curse on hit. For more vital opponents it's recommended to have them withered - use Ballist Totems that will apply Wither for you while you attack the enemies. You actually don't need your Body Armour to be 6-linked, only your Bow, it should have local Gem Level modifiers. Since there are not a lot of Damage Over Time modifiers on a Skill Tree, or at least not that many as you'd like, use two Large Cluster Jewels and Four Medium ones.
|
This video was recorded on a level 94 Raider on Standard League. We used mainly Rare equipment with Chaos Damage over Time Multiplier, rare crafted Bow with Chaos DoT (which is the more expensive variant), and Carcass Jack for extra DPS/AoE. Overall, this build allowed us to comfortably farm most of the content, and offer amazing clear speed with its' increased Mobility thanks to the buffed Onslaught
|
|
 
Odealo is a secure trading platform for MMO gamers. Here you can buy, sell, and trade PoE Currency for real cash.
|
2. Build's PROS & CONS
| PROS |
- beginner-friendly build that's easy to play and understand
- can start Mapping with literally 0 investment
- quite tanky with a lot of Dodge
- insane mobility from Raider's Ascendancy
|
| CONS |
- requires an expensive gear to reach its full potential
|
3. Leveling tips
Pick Caustic Arrow as a reward for killing Hillock. Later in the same act, you'll be able to use Toxic Rain and there is no reason not to do it. You'll start by picking generic Bow passive nodes from the Skill Tree while keeping your defenses high. Going through acts should be an easy process. If you lack Mana even if your flasks are updated for your level - use Clarity. Use mostly Rare items for leveling, you can slam Essence of Envy onto your gear if you have any.
Suggested leveling Gem setups:
| Toxic Rain setup |
 |
Toxic Rain - you can level with this Skill comfortably |
 |
Vicious Projectiles Support - more Chaos Damage Over Time |
 |
Swift Affliction Support - more Damage over Time |
 |
Void Manipulation Support - more Chaos Damage |
| Aura setup |
 |
Malevolence - an aura that's best for increasing your Damage Over Time |
| Curse and Debuff setup |
 |
Despair - a curse that lowers enemies' Chaos Resistance and increases your Damage Over Time against them |
 |
Wither - enemies take more damage and move slower |
 |
Spell Totem Support - by having linked spell being cast by a Totem you can focus more on attacking |
| |
|
Bandits:
Kill all three bandits and be rewarded with two additional Skill Points
Leveling Skill Trees:
33 Points Skill Tree
Take Finesse, Heart of Oak, Master Fletcher, and Hunter's Gambit
67 Points Skill Tree
Take more Maximum Life and some offensive nodes on the right side of the Skill Tree. Make a path for the center of the Skill Tree.
Recommended leveling items:
 Le Heup of All - use this Ring for more damage and Elemental Resistances Le Heup of All - use this Ring for more damage and Elemental Resistances |
Adds 1 to 4 Physical Damage to Attacks
+(10-30) to all Attributes
(10-30)% increased Damage
(10-30)% increased Rarity of Items found
+(10-30)% to all Elemental Resistances |
 Perandus Signet - this Ring will help you with mana and increase the Experience you gain Perandus Signet - this Ring will help you with mana and increase the Experience you gain |
+(20-30) to maximum Mana
+(25-30) to maximum Mana
(45-65)% increased Mana Regeneration Rate
2% increased Experience gain
2% increased Intelligence for each Unique Item Equipped
3% additional chance for Slain monsters to drop Scrolls of Wisdom |
 Quill Rain - it gives you a lot of Attack Speed which is important for stacking spore pods Quill Rain - it gives you a lot of Attack Speed which is important for stacking spore pods |
+(10-20) to Dexterity
100% increased Physical Damage
100% increased Attack Speed
+2 Mana gained for each Enemy hit by Attacks
(50-100)% increased Projectile Speed
+(25-50) to Accuracy Rating
30% less Damage |
 Goldrim - Goldrim gives you a lot of Elemental Resistances and you can use it right from the start Goldrim - Goldrim gives you a lot of Elemental Resistances and you can use it right from the start |
+(30-50) to Evasion Rating
10% increased Rarity of Items found
+(30-40)% to all Elemental Resistances
Reflects 4 Physical Damage to Melee Attackers
Level Requirement reduced by 100 (Hidden) |
|
 Tabula Rasa - use Tabula until you can find yourself a decent 5 or 6-linked Carcass Jack or a Rare Bow Tabula Rasa - use Tabula until you can find yourself a decent 5 or 6-linked Carcass Jack or a Rare Bow |
Item has no level requirement and Energy Shield (Hidden)
Item has 6 White Sockets and is fully linked (Hidden) |
4. Final Skill Tree, Ascendancy Points, and Pantheon
Final Skill Tree:
106 Points Final Skill Tree (doesn't include Cluster Jewels nor Thread of Hope configuration)
117 Points Path of Building (PoB) link
Ascendancy points:
Preferably in that order:
- Rapid Assault
- Avatar of the Chase
- Quartz Infusion
- Avatar of the Veil
Pantheon:
Major God: Soul of Lunaris: 1% additional Physical Damage Reduction for each nearby Enemy, up to 8%; 1% increased Movement Speed for each
nearby Enemy, up to 8%
Minor God: Soul of Ryslatha: Life Flasks gain 3 Charges every 3 seconds if you haven't used a Life Flask Recently
5. Final Gems links
| [DPS] Toxic Rain setup |
|
Toxic Rain - Toxic Rain deals mostly Chaos Damage over time by creating spore pods. It's an Attack Skill. |
|
Vicious Projectiles Support - It grants you more Chaos Damage Over Time - the most important stat you should look for |
 |
Mirage Archer Support - creates a Mirage Archer that fires Toxic Rain as it's linked in this setup, but with less Damage and Attack Speed |
|
Void Manipulation Support - more Chaos Damage at the cost of less Elemental Damage, but you don't deal any |
 |
Empower Support - Skill Gem Level is really important, at level 20 Toxic Rain deals 285 Chaos Damage per second, at level 28 - 643 |
 |
Efficacy Support - Increases Duration and Damage Over Time, both very important stats. |
| [UTILITY] Ballist Toxic Rain setup |
|
Toxic Rain - in this setup, Toxic Rain is being fired by Ballistas, mainly to increase your DPS during Boss fights and to apply Withered Debuff |
 |
Ballista Totem Support - enables Toxic Rain to be fired by Totems |
 |
Multiple Totems Support - you're able to create two more Totems |
 |
Focused Ballista Support - Ballista Totems can be placed Faster, Deal more Damage with increased Attack Speed, and fire only when you use your other Attack |
 |
Withering Touch - Attacks have a chance to apply Withered debuff on Hit |
|
Efficacy Support |
| [UTILITY] Wither setup |
|
Malevolence - an aura that's best for increasing your Damage Over Time and Skill Effect Duration |
 |
Defiance Banner - increases your Armour and Evasion Rating while reducing enemies' Crit Chance, when placed increases your AoE |
 |
Grace - use grace for Added ann Increased Evasion Rating |
 |
Enlighten Support - Link Enlighten Support with all the Skill Gems that Reserve Mana |
| [MOBILITY] Dash setup |
 |
Dash - your mobility spell, it's great to have additional quality on this Skill Gem for more cooldown recovery |
 |
Second Wind Support - you can use your Dash one extra time |
 |
Blood Rage - slowly drains your Life while increasing your damage and Life Leech |
 |
Enhance - use Enhance to provide Quality for linked Gems |
| [UTILITY] Cast When Damage Taken setup |
 |
Immortal Call - level 8, will keep you safe after you take too much damage |
 |
Cast when Damage Taken - level 10, Immortal Call will be activated upon taking 1003 damage |
| [UTILITY] Clarity |
 |
Clarity - you could use Clarity for better Mana sustain and keep it at a low enough level so it won't reserve too much Mana, but you can alternatively take Flesh and Stone for more damage |
| [UTILITY] Withering Step |
 |
Withering Step - it makes you faster by applying a fresh Elusive buff, and it inflicts Withered Debuff on enemies |
|
On Odealo dozens of sellers compete for your attention. Buying PoE Currency here guarantees the best prices, prompt delivery, and the best quality of service.
|
6. Gear Setup
The build relies on Rare items to provide you with damage and defenses. Your Priority as always should be capping your Elemental Resistances. Some versions of the builds use Eternal Youth Keystone from Glorious Vanity Timeless Jewel for Life Regeneration since your chance to Evade and Dodge Hits is so high, however, this build does not have it - by having two large Cluster Jewels you're already tight on Skill Points. Generally, look for Chaos Damage Over Time on your gear. Try to get somewhere at season one mod with Mana Leech.
Our recommended items will:
- Cap your resistances at 75%
- Provide you with enough DPS and Life to start mapping
|
Stat priorities on items:
- Maximum Life
- Elemental Resistances
- Chaos Damage Over Time
- Attack Speed
- Skill Effect Duration
- Area of Effect
|
 (Helmet) Rare Helmet - The only uniquely good mod you should look for is reduced Chaos Resistance of Nearby Enemies. Besides that look for generic good stats such as Maximum Life and Elemental Resistances. (Helmet) Rare Helmet - The only uniquely good mod you should look for is reduced Chaos Resistance of Nearby Enemies. Besides that look for generic good stats such as Maximum Life and Elemental Resistances. |
Min. requirements:
+80 to Maximum Life
+40% to Elemental Resistances
Nearby Enemies have -8% to Chaos Resistance
Optional affixes:
Chaos Resistance
Increased Mana Regeneration Rate
Evasion Rating |
Helmet enchantments:
Toxic Rain deals 40% increased Damage
Toxic Rain fires 1 additional Arrow |
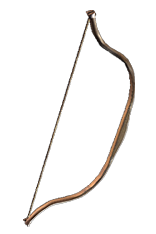 (Weapon) Rare Bow - Focus on increasing the Gem Level of your Socketed Gems, especially Toxic Rain. There are mods - some of them craftable - that can help you with that. There's also Chaos Damage Over Time mod which is pretty much mandatory. I highly recommend crafting two mods: +2 to Level of Socketed Support Gems and Chaos Damage over Time Multiplier (Weapon) Rare Bow - Focus on increasing the Gem Level of your Socketed Gems, especially Toxic Rain. There are mods - some of them craftable - that can help you with that. There's also Chaos Damage Over Time mod which is pretty much mandatory. I highly recommend crafting two mods: +2 to Level of Socketed Support Gems and Chaos Damage over Time Multiplier |
Min. requirements:
+(31-35)% to Chaos Damage over Time Multiplier
+2 to Level of Socketed Bow Gems
Optional affixes:
+1 to Level of Socketed Dexterity Gems
Damage over Time Multiplier
increased Chaos Damage over Time
Bow Attacks Fire 2 Additional Arrows
+1 to Level of Socketed Gems
+2 to Level of Socketed Support Gems
Increased Attack Speed |
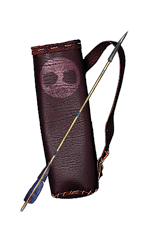 (Weapon) Rare Quiver - The best-case scenario is to have both Damages Over Time modifiers - the general and Chaos Damage one, and Maximum Life on top of that. Additionally, look for Attack Speed and Elemental Resistances. (Weapon) Rare Quiver - The best-case scenario is to have both Damages Over Time modifiers - the general and Chaos Damage one, and Maximum Life on top of that. Additionally, look for Attack Speed and Elemental Resistances. |
Min. requirements:
+80 to maximum Life
+17% to Damage over Time Multiplier with Attack Skills
9% increased Attack Speed
Optional affixes:
+25% to Chaos Damage over Time Multiplier with Attack Skills
Elemental Resists |
 (Weapon) Maloney's Mechanism - Popular quiver choice. It triggers a Bow Skill after you Attack with a bow. You can socket a Caustic Arrow with Arrow Nova Support for better clear speed. (Weapon) Maloney's Mechanism - Popular quiver choice. It triggers a Bow Skill after you Attack with a bow. You can socket a Caustic Arrow with Arrow Nova Support for better clear speed. |
Has 3 Sockets
Trigger a Socketed Bow Skill when you Attack with a Bow
(7-12)% increased Attack Speed
+(50-70) to maximum Life
5% chance to Blind Enemies on Hit with Attacks |
 (Body Armour) Daresso's Defiance - Maximum Life, Armour, Evasion, Life Leech, and a chance to Dodge Attack hits are all good mods, but on top of that, it also increases Onslaught Effect. After Ascension, you can have your Onslaught effect increased by 250%. (Body Armour) Daresso's Defiance - Maximum Life, Armour, Evasion, Life Leech, and a chance to Dodge Attack hits are all good mods, but on top of that, it also increases Onslaught Effect. After Ascension, you can have your Onslaught effect increased by 250%. |
(180-220)% increased Armour and Evasion
+(60-90) to maximum Life
2% of Physical Attack Damage Leeched as Life
You lose all Endurance Charges when Hit
You gain an Endurance Charge on Kill
You gain Onslaught for 5 seconds per Endurance Charge when Hit
100% increased Onslaught Effect |
 (Body Armour) Carcass Jack - It's probably your best choice for Body Armour. What really sells it is the increased Area of Effect and Area Damage - it scales really well with Toxic Rain. (Body Armour) Carcass Jack - It's probably your best choice for Body Armour. What really sells it is the increased Area of Effect and Area Damage - it scales really well with Toxic Rain. |
(120-150)% increased Evasion and Energy Shield
+(50-70) to maximum Life
+(9-12)% to all Elemental Resistances
(40-50)% increased Area of Effect
(40-50)% increased Area Damage
Extra gore |
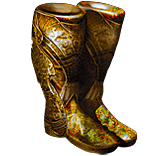 (Boots) Atziri's Step - Really cheap Unique pair of Boots that provides all the stats you need. Additional chance to Dodge Spell Hits is an excellent addition to your build. (Boots) Atziri's Step - Really cheap Unique pair of Boots that provides all the stats you need. Additional chance to Dodge Spell Hits is an excellent addition to your build. |
180% increased Evasion Rating
+(55-75) to maximum Life
30% increased Movement Speed
(14-16)% chance to Dodge Spell Hits |
 (Gloves) Rare Gloves - Gloves are where you can focus on Elemental Resistances and Chaos Damage Over Time Multiplier. Gripped Gloves should be considered a valid choice for a base since it grants Projectile Damage - increasing Toxic Rain Damage Over Time. Apothecary's Gloves base will give you increased Damage over Time. (Gloves) Rare Gloves - Gloves are where you can focus on Elemental Resistances and Chaos Damage Over Time Multiplier. Gripped Gloves should be considered a valid choice for a base since it grants Projectile Damage - increasing Toxic Rain Damage Over Time. Apothecary's Gloves base will give you increased Damage over Time. |
Min. requirements:
70 Maximum Life
40 Elemental Resistances
+19% to Chaos Damage over Time Multiplier
Optional affixes:
Chaos Resistance
Increased Evasion Rating
Physical Damage Leeched as Mana |
 (Belt) Rare Belt - you can't really find any offensive mod that'd benefit you on a Belt, except for increased Chaos Damage, aim for the highest Maximum Life and Elemental Resistances (Belt) Rare Belt - you can't really find any offensive mod that'd benefit you on a Belt, except for increased Chaos Damage, aim for the highest Maximum Life and Elemental Resistances |
Min. requirements:
80 Maximum Life
70 Elemental Resistances
Optional affixes:
increased Chaos Damage
increased Maximum Life |
 (Amulet) Rare Amulet - +1 to Level of all Chaos Skill Gems is really beneficial for your build, you should prioritize finding an Amulet with this mod. Besides obvious Maximum Life, other mods worth mentioning are Chaos Damage over Time, reduction in Mana Reservation for Malevolence, and increased Chaos Damage. If you have problems with Mana, you can craft a lower Cost of non-channeling skills. (Amulet) Rare Amulet - +1 to Level of all Chaos Skill Gems is really beneficial for your build, you should prioritize finding an Amulet with this mod. Besides obvious Maximum Life, other mods worth mentioning are Chaos Damage over Time, reduction in Mana Reservation for Malevolence, and increased Chaos Damage. If you have problems with Mana, you can craft a lower Cost of non-channeling skills. |
Min. requirements:
+1 to Level of all Chaos Skill Gems
+19% to Chaos Damage over Time Multiplier
+60 to Maximum Life
Optional affixes:
Non-channeling Skills have (-10–-9) to Total Mana Cost (crafted)
Malevolence has reduced Reservation
increased Chaos Damage
Elemental Resistances |
 (Amulet) Ashes of the Stars - it's the cheapest way to increase the Gem level of your Toxic Rain, it also reduces Reservation Cost, and Quality of all Gems (Amulet) Ashes of the Stars - it's the cheapest way to increase the Gem level of your Toxic Rain, it also reduces Reservation Cost, and Quality of all Gems |
+(10-16) to all Attributes
(5-10)% increased Experience Gain of Gems
(10-20)% increased Reservation Efficiency of Skills
+1 to Level of all Skill Gems
+(20-30)% to Quality of all Skill Gems |
Recommended Anointments:
Corruption
Growth and Decay |
 (Ring) Rare Ring - One of your Rings should Curse enemies on Hit with Despair, other that there isn't much to say about these. You can easily find a lot of Elemental Resistances and Maximum Life here while also getting a hold of some Mana and Life Leech. If you have problems with Mana, you can craft a lower Cost of non-channeling skills. (Ring) Rare Ring - One of your Rings should Curse enemies on Hit with Despair, other that there isn't much to say about these. You can easily find a lot of Elemental Resistances and Maximum Life here while also getting a hold of some Mana and Life Leech. If you have problems with Mana, you can craft a lower Cost of non-channeling skills. |
Min. requirements:
Curse Enemies with Despair on Hit, with 20% increased Effect
+70% to Elemental Resistances
+70 to Maximum Life
Optional affixes:
Non-channeling Skills have (-7–-6) to Total Mana Cost (crafted)
Chaos Resistance
Physical Attack Damage Leeched as Mana
Chaos Damage Leeched as Life |
 (Jewel) Rare Jewels - Maximum Life and Elemental Resistances are what really matters, additionally look for Attack Speed, Damage Over time, and Corrupted implicit protecting you from Corrupted Blood (Jewel) Rare Jewels - Maximum Life and Elemental Resistances are what really matters, additionally look for Attack Speed, Damage Over time, and Corrupted implicit protecting you from Corrupted Blood |
|
Recommended affixes:
7% Maximum Life
Elemental Resistances
Optional affixes:
increased Attack Speed with Bows
Corrupted Blood cannot be inflicted on you
increased Damage over Time
|
 (Jewel) Thread of Hope - put it above Sentinel Notable so you can grab Harrier, Potency of Will, and the two nodes that lead to it (Jewel) Thread of Hope - put it above Sentinel Notable so you can grab Harrier, Potency of Will, and the two nodes that lead to it |
Only affects Passives in Very Large Ring
Passives in Radius can be Allocated without being connected to your tree
-(20-10)% to all Elemental Resistances |
 (Jewel) Replica Conqueror's Efficiency - Skill Effect Duration and Reduced Total Mana Cost if Skills are very impactful stats (Jewel) Replica Conqueror's Efficiency - Skill Effect Duration and Reduced Total Mana Cost if Skills are very impactful stats |
4% increased Skill Effect Duration
+5 to Maximum Rage
Non-Channelling Skills have -9 to Total Mana Cost |
 (Jewel) Watcher's Eye - Damage over Time Multiplier while affected by Malevolence is the most important Aura mod, you could get another one with Malevolence or Vitality but that's an expensive endeavor (Jewel) Watcher's Eye - Damage over Time Multiplier while affected by Malevolence is the most important Aura mod, you could get another one with Malevolence or Vitality but that's an expensive endeavor |
(4-6)% increased maximum Energy Shield
(4-6)% increased maximum Life
(4-6)% increased maximum Mana
<Two or Three random aura modifiers>
Recommended Aura modifiers:
Damage over Time Multiplier while affected by Malevolence
Unaffected by Poison while affected by Malevolence |
 (Jewel) Large Cluster Jewels - Most build run one or two Large Cluster Jewels for more Chaos Damage Over Time. It's a significant boost to your damage. (Jewel) Large Cluster Jewels - Most build run one or two Large Cluster Jewels for more Chaos Damage Over Time. It's a significant boost to your damage. |
Recommended affixes:
1 Added Passive Skill is Touch of Cruelty
1 Added Passive Skill is Unholy Grace
1 Added Passive Skill is Wicked Pall
1 Added Passive Skill is Unwaveringly Evil |
 (Jewel) Medium Cluster Jewels - Wicked Pall is probably the most impactful Notable you can get so try to have one on all four of these Cluster Jewels. (Jewel) Medium Cluster Jewels - Wicked Pall is probably the most impactful Notable you can get so try to have one on all four of these Cluster Jewels. |
Recommended affixes:
1 Added Passive Skill is Wicked Pall
1 Added Passive Skill is Exposure Therapy
1 Added Passive Skill is Unwaveringly Evil
1 Added Passive Skill is Flow of Life
1 Added Passive Skill is Brewed for Potency |
 (Flask) Witchfire Brew - It's obligatory if you don't have Despair Curse on Hit on your Ring, but even if you do, you can still keep it, it's a good Flask for this build (Flask) Witchfire Brew - It's obligatory if you don't have Despair Curse on Hit on your Ring, but even if you do, you can still keep it, it's a good Flask for this build |
100% increased Evasion Rating
Creates a Smoke Cloud on Use
50% increased Charges used
(25-40)% increased Damage Over Time during Flask Effect
Grants Level 21 Despair Curse Aura during Flask Effect |
 (Flask) Dying Sun - Use This Flask for more Projectiles and increased Area of Effect. There is no substitute, it's really important to have it (Flask) Dying Sun - Use This Flask for more Projectiles and increased Area of Effect. There is no substitute, it's really important to have it |
+50% to Fire Resistance
20% less Fire Damage taken
(-10-10)% increased Charges used
Skills fire 2 additional Projectiles during Flask Effect
(15-25)% increased Area of Effect during Flask Effect |
|
Other suggested Flasks:
- Alchemist's Quicksilver Flask of Adrenaline
- Perpetual Quartz Flask of Warding (Immune to Curses)
- Enduring Hallowed Hybrid Flask of Staunching (Immune to Bleeding)
|
   |
|
Odealo is one of the biggest Path of Exile marketplaces. It allows regular players to buy, sell, and trade PoE Currency with the use of real cash
|
If you have any other build requests please leave that in the comments below. We are always open to suggestions and constructive feedback.
Pictures used in this article are the intellectual property of Grinding Gear Games.