Tornado of Elemental Turbulence
Elementalist build
Created for Patch 3.24
The Best Crafty Guides by Odealo
| Guide notes |
April 10, 2024
-Build created |
| Build overview |
| Tags: [CRIT] [ELEMENTAL] [LIFE] [CASTER] |
|
Budget:
Defenses:
|


|
Boss DPS:
AoE:
|

|
Tornado of Elemental Turbulence is a new variant of the regular Tornado Skill focused solely on dealing damage on its own. It no longer interacts with your Projectiles, but you can send out 3 Tornados at once and they convert all Physical Damage to Fire, Cold, and Lightning Damage, which you can manipulate via Combat Focus Jewels. The Tornados also have higher Movement Speed, which you can further improve with Gem Quality. It is a very versatile Skill that you can build around in many ways, but the Elementalist seems to be the best choice. You can easily apply all types of enhanced Elemental Exposures, inflict powerful Ailments, and benefit from the Elemental Aegis for additional protection against incoming Damage.
With Shaper of Storms Notable, all your Tornados will be able to Shock your Enemies to further improve your Damage, although the Lightning Tornado will be more proficient while doing so. Your Cold Tornado will Chill and Freeze your Enemies. The Fire Tornado inflicts a weak Ignite but also deals slightly more Damage with Hits thanks to the Herald of Ash buff. Since all your Damage will be able to Shock, you can wear the Inpulsa's Broken Heart Unique Armour which will greatly improve your Clear Speed.
Your main defense comes from Spell Suppression and Evasion. You will also use the Petrified Blood to delay part of the incoming Damage and improve your Life Leech, but it will make you more susceptible to Damage over Time effects. It will also enable the Low Life status, which you can take advantage of by picking up the Paint Attunement Keystone for a 30% More Damage bonus, and allow you to Reserve 50% of your Life with other Auras.
You can also check our other Path of Exile builds right over here Odealo's Crafty Guides - Full List
1. Gameplay
Summon up to 3 Tornados that automatically seek Enemies in range, it doesn't matter which type you summon, as they all have their purpose. To improve your Damage you should Curse your opponents with Elemental Weakness and Assassin's Mark, and cast Zealotry as your Blessing. Use Shield Charge and Flame Dash to move around and dodge any danger.
|
 
Odealo is a secure trading platform for MMO gamers. Here you can buy, sell, and trade PoE Currency for real cash.
|
2. Build's PROS & CONS
| PROS |
- Very good Single-target Damage
- Powerful Ailment Effect
- Enjoyable Clear Speed
- Automatic aim
|
| CONS |
- Lack of Cast Speed scaling
- Low duration of your Tornados
|
3. Leveling tips
Tornado of Elemental Turbulence is a Transfigured Gem that requires at least level 34, which makes it quite problematic to start leveling with. You can easily level up using other popular Physical-based Spells, starting with Ethereal Knives at level 1, and Blade Vortex at level 12. Use cheap Hrimsorrow Gloves to convert their Physical Damage into Cold Damage. You could use the regular Tornado if you can't get the Transfigured version yet, but it will be quite lackluster. At level 34 you can fully transition to Tornado of Elemental Turbulence using its final Gem Setup. You can start using the Petrified Blood and Pain Attunement Keystone in Act 3 for a very powerful Damage boost, granting you twice as much as similar Auras at that level, for half of the Reservation cost.
Suggested leveling Gem setups:
| Blade Vortex setup |
 |
Blade Vortex - summons up to 10 spinning Blades that deal Physical Damage around your character for a short duration. |
 |
Added Fire Damage Support - adds a portion of your Physical Damage as extra Fire Damage. |
 |
Faster Casting Support - faster Cast time helps you reach 10 stacks of summoned Blades, which is a great Damage bonus for this Skill. |
 |
Trinity Support - grants tons of Elemental Damage and Penetration if you deal at least two Damage types. Do not use it with the Tornado later on, as it doesn't work with Orb Skills. |
 |
Increased Critical Strikes Support - improves your Chances to deal a Critical Hit. |
 |
Increased Critical Damage Support - improves your Damage with Critical Strikes. |
| Aura setup |
 |
Herald of Purity - improves your Physical Damage and summons helpful Minions. |
 |
Vitality - greatly improves your Life Regeneration. |
 |
Petrified Blood - part of the incoming Hit Damage will be taken over 4 seconds, and you can benefit from the Pain Attunement Keystone. |
| Utility setup |
 |
Flame Dash - a short-range teleport that allows you to skip problematic terrain gaps during the campaign. |
 |
Elemental Weakness - lowers all Elemental Resistance of affected Enemies. |
 |
Steelskin - a very useful Guard Skill that lowers the incoming Damage and disables Bleeding effects. |
Bandits:
Killing all Bandits for 2 bonus Skill Points is the best option, but you can also help Alira to get additional Resistance and Critical Strike Multiplier.
Leveling Skill Trees:
39 Points Passive Tree
Take Spell and Physical Damage Notables, as well as some Critical Strike Chance. A bit of Life and ana is also very helpful during early levels.
70 Points Passive Tree
Grab more Life, Crits, and Spell Suppression. The Lightning Notables grant generic bonuses for all Damage types and further improve your Shock.
Recommended leveling items:
 Replica Tasalio's Sign - the best leveling Ring you can get, it will grant an absurd amount of Damage for your Spells. Replica Tasalio's Sign - the best leveling Ring you can get, it will grant an absurd amount of Damage for your Spells. |
+(20-30)% to Cold Resistance
Adds (15-20) to (25-35) Cold Damage to Spells and Attacks
+(200-300) to Evasion Rating
Your Cold Damage cannot Freeze
Immune to Chill
Adds 60 to 80 Cold Damage against Chilled Enemies |
 Praxis - it is a useful Ring if you greatly lack Mana Regeneration, but it doesn't provide anything else. Praxis - it is a useful Ring if you greatly lack Mana Regeneration, but it doesn't provide anything else. |
+(20-30) to maximum Mana
+(30-60) to maximum Mana
Regenerate (3-6) Mana per second
-(8-4) to Total Mana Cost of Skills
8% of Damage taken Recouped as Mana |
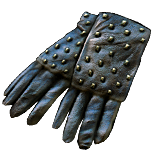 Hrimsorrow - use those Gloves to convert the Physical Damage of your Blade Vortex into cold Damage. It is not needed after you start using the Tornado of Elemental Turbulence. Hrimsorrow - use those Gloves to convert the Physical Damage of your Blade Vortex into cold Damage. It is not needed after you start using the Tornado of Elemental Turbulence. |
+(20-30) to Strength
+(40-50) to Evasion Rating
+(20-30)% to Cold Resistance
100% of Physical Damage Converted to Cold Damage
Reflects 100 Cold Damage to Melee Attackers |
 Axiom Perpetuum - a pair of such Weapons would greatly help with your Critical Strike Chance during early levels. It also adds plenty of flat Damage to your Spells and improves your Cast Speed. Axiom Perpetuum - a pair of such Weapons would greatly help with your Critical Strike Chance during early levels. It also adds plenty of flat Damage to your Spells and improves your Cast Speed. |
12% increased Elemental Damage
Adds (2-3) to (5-6) Fire Damage to Spells
Adds (2-3) to (5-6) Cold Damage to Spells
Adds 1 to (10-12) Lightning Damage to Spells
(4-6)% increased Cast Speed
(100-140)% increased Critical Strike Chance for Spells |
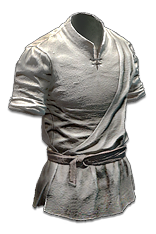 Tabula Rasa - the best leveling Armour, it grants you access to a 6-link setup with White Sockets, allowing you to freely manipulate your Support Gems. Tabula Rasa - the best leveling Armour, it grants you access to a 6-link setup with White Sockets, allowing you to freely manipulate your Support Gems. |
Item has no level requirement and Energy Shield (Hidden)
Item has 6 White Sockets and is fully linked (Hidden) |
 Goldrim - it is a great Helmet for leveling purposes, as capping your Resistance is very important, especially after defeating Kitava in Act 5. Goldrim - it is a great Helmet for leveling purposes, as capping your Resistance is very important, especially after defeating Kitava in Act 5. |
+(30-50) to Evasion Rating
10% increased Rarity of Items found
+(30-40)% to all Elemental Resistances
Reflects 4 Physical Damage to Melee Attackers
Level Requirement reduced by 100 (Hidden) |
 Perandus Blazon - grants all Attributes, which is important for your Gem Requirements. It also improves your Flask Effect Duration. Perandus Blazon - grants all Attributes, which is important for your Gem Requirements. It also improves your Flask Effect Duration. |
(15-25)% increased Stun and Block Recovery
+(20-30) to all Attributes
(6-8)% increased Quantity of Items found
+20% to Fire Resistance
20% increased Flask Effect Duration
-2 Physical Damage taken from Attack Hits |
 Seven-League Step - this pair of Boots allows you to run very fast. If your budget is tight, you can simply sell them after completing the campaign for the same price you bought them. Seven-League Step - this pair of Boots allows you to run very fast. If your budget is tight, you can simply sell them after completing the campaign for the same price you bought them. |
50% increased Movement Speed
Level Requirement reduced by 100 (Hidden) |
4. Final Skill Tree, Ascendancy Points, and Pantheon
Final Skill Tree:
105 Points Final Skill Tree (doesn't include Unique or Cluster Jewels)
120 Points Path of Building(PoB) link
Ascendancy points:
Preferably in the order:
- Shaper of Storms
- Mastermind of Discord
- Heart of Destruction
- Bastion of Elements
Pantheon:
Major God: Soul of the Brine King: You cannot be Stunned if you've been Stunned or Blocked a Stunning Hit in the past 2 seconds; 100% chance to Avoid being Frozen
Minor God: Soul of Shakari: 50% less Duration of Poisons on You; 5% reduced Chaos Damage taken
5. Final Gems links
| [DPS] Tornado of Elemental Turbulence setup |
 |
Tornado of Elemental Turbulence - sends up to 3 Tornados that automatically seek nearby Enemies to deal Fire, Cold, or Lightning Damage depending on the type of Tornado. Additional Quality will improve the Movement Speed of your Tornados. |
 |
Added Fire Damage Support - add a portion of your Physical Damage as Extra Fire Damage to every type of Tornado you spawn. The Awakened version also improves your main Skill Gem Level by 1. |
 |
Hypothermia Support - greatly improves your Damage against Chilled Enemies. |
 |
Elemental Penetration Support - a special Support Gem that you can acquire via Vendor Recipe. It provides Penetration against every Damage type. Remember that you can't use the Trinity Support with Orb Skills. |
|
Increased Critical Damage Support - grants a lot of additional Critical Strike Multiplier for your Skills. |
|
Increased Critical Strikes Support - adds and improves your Critical Strike Chance. If you have enough Critical Strike Chance without this Gem, you can use the Increased Area of Effect Support or Concentrated Effect Support instead. |
| [UTILITY] Auras setup |
|
Petrified Blood - locks your maximum Life at 50%, but delays every Hit Damage to be taken over 4 seconds, which makes your Leech extremely efficient. It also allows you to use Pain Attunement Keystone or Reserve 50% of your Life. |
 |
Grace - a very useful defensive Aura that grants you a lot of Evasion Rating and helps improve it further. |
|
Herald of Purity - a very powerful Herald for this Build, it improves the Physical Damage of your Tornado, which gets Converted to other Damage types. |
 |
Herald of Ash - another useful Herald, it adds part of your Physical Damage as Extra Fire Damage, and improves it further. It makes your Fire Tornado slightly stronger than the other two types. |
| [UTILITY] Arrogance setup |
|
Vitality - a useful defensive Aura that grants you a lot of Life Regeneration, which is very helpful for a Petrified Blood setup. |
 |
Precision - improves your Critical Strike Chance and enables some useful Watcher's Eye modifiers. The Accuracy rating bonus is unnecessary, as it doesn't affect Spells. |
 |
Defiance Banner - this Banner improves your Evasion Rating and reduces the Critical Strike Chance of nearby Enemies. |
 |
Arrogance Support - causes linked Auras to Reserve your Life instead of Mana. You can safely Reserve up to 50% of your maximum Life thanks to the Petrified Blood. |
| [UTILITY] Divine Blessing setup |
 |
Zealotry - a powerful offensive Aura that improves your Spell Damage and raises your Critical Strike Chance for Spells. It will also create Consecrated Ground under the enemies you Critical Strike. |
 |
Divine Blessing Support - changes your permanent Aura into a temporary Buff, which you can Cast using your energy Shield. It also improves its effectiveness. |
 |
Inspiration Support - lowers the Cost of your Blessing, making it easier to maintain. |
| [UTILITY] Movement setup |
 |
Flame Dash - a short teleport that leaves a Burning Ground on its way. It can store up to 3 Charges. You can also use the Frostblink Skill instead. |
 |
Shield Charge - your main Movement Skill is the Shield Charge. It performs a fast Charge towards the targeted location and has no Cooldown. |
 |
Faster Attacks Support - your Shield Charge scales with Movement Speed and Attack Speed, which you can improve with this Gem. |
| [UTILITY] Various Utility Skills |
|
Elemental Weakness - lowers all Elemental Resistances of affected enemies. It will also grant you a lot of Extra Damage if you use the relevant Balance of Terror Jewel. |
 |
Assassin's Mark - improves your Critical Strike Chance and Damage against Marked Enemies. It will also generate Power Charges in single-target scenarios. |
|
Steelskin - a useful Guard Skill that reduces the Damage you take and disables Bleeding during its duration. You can automate it with the Automation or Cast When Damage Taken Support. |
|
On Odealo dozens of sellers compete for your attention. Buying PoE Currency here guarantees the best prices, prompt delivery, and the best quality of service.
|
5. Gear Setup
There are a few useful Unique Items for this Build, but none of them is mandatory. The most impactful is Inpulsa's Broken Heart Armour which provides powerful explosions that improve your Clear Speed, but the automatic targeting of your Tornados is enough for smooth gameplay without it. The Tornado of Elemental Turbulence has all Elemental and Physical Tags, making it very easy to improve its levels via specific modifiers on your Weapons and Amulet or stack a lot of Critical Strike Multiplier with your Rare Jewels. You also won't need any Cast Speed, as the Tornado has a fixed rate of 4 Hits per second. You will, however, need a lot of Critical Strike Chance and bonuses to Spell Damage. Defensively speaking, you should focus on getting high maximum Life, Spell Suppression Chance, and enough Energy Shield to freely cast your Skills. You will need a lot of Strength and Dexterity, while also capping your Elemental Resistance.
|
Stat priorities on items:
- Maximum Life
- Elemental Resistances
- Gem Levels
- Critical Strike Multiplier
- Spell Suppression
- Attributes
- Energy Shield
- Chaos Resistances
|
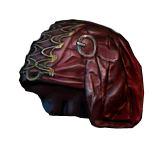
 (Helmet) Rare Helmet - you will need at least one modifier to improve your Mana Reservation Efficiency, which you can achieve via Essence of Loathing or Eldritch Influence. You should also seek maximum Life, Spell Suppression Chance, Elemental Resistance, and Physical Damage mitigation. (Helmet) Rare Helmet - you will need at least one modifier to improve your Mana Reservation Efficiency, which you can achieve via Essence of Loathing or Eldritch Influence. You should also seek maximum Life, Spell Suppression Chance, Elemental Resistance, and Physical Damage mitigation. |
Min. requirements:
+60 to maximum Life
10% chance to Suppress Spell Damage
8% increased Mana Reservation Efficiency of Skills
40% total Elemental Resistance
Optional affixes:
Chaos Resistance
% of Physical Damage from Hits taken as Fire Damage |
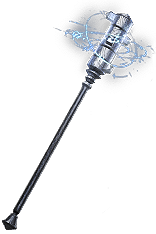
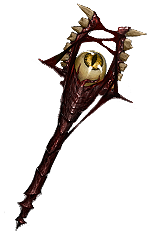 (Weapon) The Dark Seer - this newly reworked Sceptre is a very powerful tool for most Spell Casters. It grants a lot of Damage via additional Gem Levels and improves your survivability by increasing your Life, Blinding Enemies, and inflicting Malediction debuff. (Weapon) The Dark Seer - this newly reworked Sceptre is a very powerful tool for most Spell Casters. It grants a lot of Damage via additional Gem Levels and improves your survivability by increasing your Life, Blinding Enemies, and inflicting Malediction debuff. |
22% increased Elemental Damage
+2 to Level of all Spell Skill Gems
10% Global chance to Blind Enemies on hit
Unaffected by Blind
Enemies Blinded by you have Malediction
+(1-2) Maximum Energy Shield per Level
+(1-2) Maximum Life per Level |
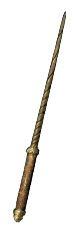 (Weapon) Rare Weapon - you can use any Rare Weapon with bonuses to Spell Damage and Critical Strike Chance for Spells. Remember that you can benefit from all Gem types to improve the level of your Tornado. (Weapon) Rare Weapon - you can use any Rare Weapon with bonuses to Spell Damage and Critical Strike Chance for Spells. Remember that you can benefit from all Gem types to improve the level of your Tornado. |
Min. requirements:
80% increased Spell Damage
90% increased Critical Strike Chance for Spells
+1 to Level of all Fire/Physical/Cold/Lightning Spell Skill Gems
Optional affixes:
% to Global Critical Strike Multiplier
% chance to deal Double Damage |
 (Weapon) Rare Shield - your Shield can provide the same offensive bonuses as your Weapon, with the addition of some defensive bonuses as well. You should seek maximum Life, Gem Levels, Crit chance for Spells, Spell Damage, and an empty Suffix to Craft Spell Suppression Chance via the Crafting Bench. (Weapon) Rare Shield - your Shield can provide the same offensive bonuses as your Weapon, with the addition of some defensive bonuses as well. You should seek maximum Life, Gem Levels, Crit chance for Spells, Spell Damage, and an empty Suffix to Craft Spell Suppression Chance via the Crafting Bench. |
Min. requirements:
60% increased Spell Damage
70% increased Critical Strike Chance for Spells
+1 to Level of all Fire/Physical/Cold/Lightning Spell Skill Gems
+70 to maximum Life
Optional affixes:
% chance to Suppress Spell Damage
% to all Elemental Resistances |
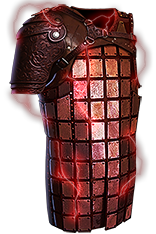 (Body Armour) Inpulsa's Broken Heart - this Armour will greatly improve your Clear Speed by exploding whole packs of Enemies. It also boosts your Damage and Effect of Shock. You should look for a Corrupted Implicit to increase the Gem Levels, and link it using the Tainted Orb of Fusing. (Body Armour) Inpulsa's Broken Heart - this Armour will greatly improve your Clear Speed by exploding whole packs of Enemies. It also boosts your Damage and Effect of Shock. You should look for a Corrupted Implicit to increase the Gem Levels, and link it using the Tainted Orb of Fusing. |
+(60-80) to maximum Life
(20-50)% increased Damage if you have Shocked an Enemy Recently
(15-25)% increased Effect of Shock
Shocked Enemies you Kill Explode, dealing 5% of
their Life as Lightning Damage which cannot Shock
Unaffected by Shock |
Recommended Implicits:
+2 to Level of Socketed AoE Gems
+2 to Level of Socketed Duration Gems |
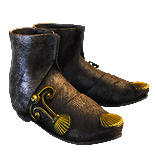
 (Boots) Rare Boots - on your Boots you should focus on defensive bonuses such as maximum Life, Resistances, and Spell Suppression Chance. The Movement Speed is also very important, and you can pair it with the chance to gain Onslaught on Kill. You can also improve the Effect of your Non-damaging Ailments, which will greatly affect your Shock and Chill. (Boots) Rare Boots - on your Boots you should focus on defensive bonuses such as maximum Life, Resistances, and Spell Suppression Chance. The Movement Speed is also very important, and you can pair it with the chance to gain Onslaught on Kill. You can also improve the Effect of your Non-damaging Ailments, which will greatly affect your Shock and Chill. |
Min. requirements:
30% Movement Speed
+70 to maximum Life
10% chance to Suppress Spell Damage
Optional affixes:
%increased Effect of Non-Damaging Ailments
Elemental and Chaos Resistances
Attributes
% chance to Avoid Elemental Ailments/Bleeding/being Stunned |
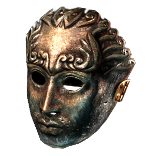
 (Gloves) Rare Gloves - your Gloves should also be focused on defenses, although you can get a bit of Damage here too. The eldritch Implicit is very important, as it allows you to Unnerve your Enemies, which increases all Spell Damage they take. (Gloves) Rare Gloves - your Gloves should also be focused on defenses, although you can get a bit of Damage here too. The eldritch Implicit is very important, as it allows you to Unnerve your Enemies, which increases all Spell Damage they take. |
Min. requirements:
+70 to maximum Life
10% chance to Suppress Spell Damage
60% total Elemental Resistance
Optional affixes:
%increased Damage against Chilled Enemies/while Leeching/during any Flask
%chance to Unnerve Enemies on Hit
Attributes |
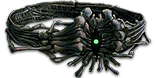 (Belt) Rare Belt - you can get a lot of Strength, Life, and Resistance on your Belt, which should ideally be a Stygian Vise as a base. You can also improve your Flask sustain. (Belt) Rare Belt - you can get a lot of Strength, Life, and Resistance on your Belt, which should ideally be a Stygian Vise as a base. You can also improve your Flask sustain. |
Min. requirements:
+70 to maximum Life
+50 to Strength
60% total Elemental Resistance
Optional affixes:
% increased Flask Charges gained
% reduced Flask Charged used
Chaos Resistance |
 (Amulet) Replica Dragonfang's Flight - this Amulet can improve the Levels of any Skill Gem in the game by 3. It also improves your Reservation Efficiency with Auras, provides Elemental Resistances, and reduces Attribute Requirements. (Amulet) Replica Dragonfang's Flight - this Amulet can improve the Levels of any Skill Gem in the game by 3. It also improves your Reservation Efficiency with Auras, provides Elemental Resistances, and reduces Attribute Requirements. |
+(10-16) to all Attributes
+3 to Level of all Tornado Gems
+(5-10)% to all Elemental Resistances
(5-10)% increased Reservation Efficiency of Skills
Items and Gems have (10-5)% reduced Attribute Requirements |
Recommended anoint:
Whispers of Doom |
 (Amulet) Ashes of the Stars - this Amulet provides less Damage but improves the Quality of your Skills, which improves the Movement Speed of your Tornado quite significantly. (Amulet) Ashes of the Stars - this Amulet provides less Damage but improves the Quality of your Skills, which improves the Movement Speed of your Tornado quite significantly. |
+(10-16) to all Attributes
(5-10)% increased Experience Gain of Gems
+1 to Level of all Skill Gems
+(20-30)% to Quality of all Skill Gems |
 (Ring) Circle of Guilt - it is a very powerful Ring that can greatly improve your Damage, but only if it has the specific modifiers for your Herald, which you can further improve via Catalysts. (Ring) Circle of Guilt - it is a very powerful Ring that can greatly improve your Damage, but only if it has the specific modifiers for your Herald, which you can further improve via Catalysts. |
<One to three random Synthesis implicit modifiers>
+(10-20) to all Attributes
Adds (8-10) to (13-15) Physical Damage
+(350-400) to Armour
<Two Random Herald of Purity modifiers>
Recommended modifiers:
Herald of Purity has (40-60)% increased Buff Effect
(40-60)% increased Physical Damage while affected by Herald of Purity |
 (Ring) Rare Ring - you can also use a Rare Ring that will provide maximum Life and lacking Resistances or Attributes. To improve your Damage you should seek Critical Strike Multiplier and craft a Minimum Frenzy Charge. (Ring) Rare Ring - you can also use a Rare Ring that will provide maximum Life and lacking Resistances or Attributes. To improve your Damage you should seek Critical Strike Multiplier and craft a Minimum Frenzy Charge. |
Min. requirements:
50 to Maximum Life
Optional affixes:
Elemental and Chaos Resistance
Attributes
Minimum Frenzy Charge
Critical Strike Multiplier |
 (Jewel) Lethal Pride - this Jewel will grant you tons of Strength, and provide additional bonuses to all Notables in its Radius. You should try to get one with a chance to Deal Double Damage, maximum Life, and Physical Damage mitigation. (Jewel) Lethal Pride - this Jewel will grant you tons of Strength, and provide additional bonuses to all Notables in its Radius. You should try to get one with a chance to Deal Double Damage, maximum Life, and Physical Damage mitigation. |
Commanded leadership over (10000-18000) warriors under (Akoya-Kaom-Rakiata)
Passives in radius are Conquered by the Karui
Historic |
 (Jewel) Abyss Jewel - here try to get a bit of maximum Life, Critical Strike Multiplier, and lacking Resistances or Attributes. You can also add a bit of Damage to your Spells or get immunity to Corrupted Blood. (Jewel) Abyss Jewel - here try to get a bit of maximum Life, Critical Strike Multiplier, and lacking Resistances or Attributes. You can also add a bit of Damage to your Spells or get immunity to Corrupted Blood. |
Min. requirements:
+30 to Maximum Life
Optional affixes:
Corrupted Blood cannot be inflicted on you
Global Critical Strike Multiplier
Elemental and Chaos Resistance
Attributes |
 (Jewel) Rare Jewels - your Jewels are a very potent source of Critical Strike Multiplier, as you can use a combination of every Element. It should also grant you maximum Life and cover lacking Resistances or Attributes. (Jewel) Rare Jewels - your Jewels are a very potent source of Critical Strike Multiplier, as you can use a combination of every Element. It should also grant you maximum Life and cover lacking Resistances or Attributes. |
Recommended affixes:
Critical Strike Multiplier with Elemental/Lightning/Cold/Fire Skills
Global Critical Strike Multiplier
Critical Strike Multiplier with Spells
increased Maximum Life
Elemental Resistances
Attributes |
 (Jewel) Balance of Terror - a very powerful Jewel for this kind of Build, it will grant you tons of Damage for 10 seconds after you Cast your main Curse. (Jewel) Balance of Terror - a very powerful Jewel for this kind of Build, it will grant you tons of Damage for 10 seconds after you Cast your main Curse. |
+(10-15)% to all Elemental Resistances
<2 random curse modifiers>
Recommended modifiers:
Gain (30-40)% of Physical Damage as a Random Element if you've cast Elemental Weakness in the past 10 seconds |
 (Jewel) Large Cluster Jewel - you will need a specific combination of Notables here. The Corrosive Elements allow any of your Tornado to apply all 3 Elemental Exposures, which is an important part of your Ascendency. The Doryani's Lesson grants you Life Leech, and the Sadist increases your Damage by 60% since you will apply all Ailments very often. (Jewel) Large Cluster Jewel - you will need a specific combination of Notables here. The Corrosive Elements allow any of your Tornado to apply all 3 Elemental Exposures, which is an important part of your Ascendency. The Doryani's Lesson grants you Life Leech, and the Sadist increases your Damage by 60% since you will apply all Ailments very often. |
Recommended affixes:
1 Added Passive Skill is Corrosive Elements
1 Added Passive Skill is Doryani's Lesson
1 Added Passive Skill is Sadist |
 (Jewel) Medium Cluster Jewel - you should use two Medium Cluster Jewels that improve your Critical Strike Chance and grant you a chance to Deal Double Damage. You can also use one that improves the effect of non-damaging Ailments and combine it with Lightning Mastery, so you can easily inflict 65% Shock on your Enemies. (Jewel) Medium Cluster Jewel - you should use two Medium Cluster Jewels that improve your Critical Strike Chance and grant you a chance to Deal Double Damage. You can also use one that improves the effect of non-damaging Ailments and combine it with Lightning Mastery, so you can easily inflict 65% Shock on your Enemies. |
Recommended affixes:
1 Added Passive Skill is Basics of Pain
1 Added Passive Skill is Pressure Points
1 Added Passive Skill is Astonishing Affliction
1 Added Passive Skill is Stormrider
1 Added Passive Skill is Eye of the Storm |
 (Jewel) Watcher's Eye - this Jewel grants powerful bonuses depending on the Aura you are using. You will have many choices, but the best ones to improve your Damage are related to the Zealotry. Bonuses related to Grace and Vitality are excellent choices if you want to improve your defense. (Jewel) Watcher's Eye - this Jewel grants powerful bonuses depending on the Aura you are using. You will have many choices, but the best ones to improve your Damage are related to the Zealotry. Bonuses related to Grace and Vitality are excellent choices if you want to improve your defense. |
(4-6)% increased maximum Energy Shield
(4-6)% increased maximum Life
(4-6)% increased maximum Mana
<Two or Three random aura modifiers>
Recommended modifiers:
+(12-15)% chance to Suppress Spell Damage while affected by Grace
Gain (20-30) Life per Enemy Hit while affected by Vitality
Critical Strikes Penetrate (8-10)% of Enemy Elemental Resistances while affected by Zealotry
Gain a Flask Charge when you deal a Critical Strike while affected by Precision |
 (Flask) Taste of Hate - is a great Flask that combines defense and offense. It will reduce the Physical and Cold Damage you take, as well as add plenty of Cold Damage to all your Tornados, allowing them all to inflict moderate Chill and Freeze. (Flask) Taste of Hate - is a great Flask that combines defense and offense. It will reduce the Physical and Cold Damage you take, as well as add plenty of Cold Damage to all your Tornados, allowing them all to inflict moderate Chill and Freeze. |
(10-15)% of Physical Damage from Hits taken as Cold Damage during Effect
Gain (10-15)% of Physical Damage as Extra Cold Damage during effect
30% chance to Avoid being Chilled during Effect
30% chance to Avoid being Frozen during Effect |
 (Flask) Bottled Faith - a purely offensive Flask, it greatly improves your Damage and Critical Strike against Enemies standing on the Consecrated Ground, which this Flask or your Zealotry Aura creates. (Flask) Bottled Faith - a purely offensive Flask, it greatly improves your Damage and Critical Strike against Enemies standing on the Consecrated Ground, which this Flask or your Zealotry Aura creates. |
(30-15)% reduced Duration
Consecrated Ground created by this Flask has Tripled Radius
Consecrated Ground created during Effect applies (7-10)% increased Damage taken to Enemies
(100-150)% increased Critical Strike Chance against Enemies on Consecrated Ground during Effect |
 (Flask) Oriath's End - This flask can be used to substitute the Inpulsa's Body Armour, or magnify its effects for even more Clear Speed and explosions. (Flask) Oriath's End - This flask can be used to substitute the Inpulsa's Body Armour, or magnify its effects for even more Clear Speed and explosions. |
(20-40)% increased Charge Recovery
Enemies you Kill during Effect have a (20-30)% chance to Explode, dealing a tenth of their maximum Life as Damage of a Random Element |
|
Other suggested Flasks:
- Life Flask with Bleeding Removal
- Quicksilver Flask with Cast or Attack Speed bonus
- Diamond Flask with Critical Strike Chance bonus
- Jade Flask with Evasion Rating bonus
|
    |
|
Odealo is one of the biggest Path of Exile marketplaces. It allows regular players to buy, sell, and trade PoE Currency with the use of real cash.
|
If you have any other build requests please leave that in the comments below. We are always open to suggestions and constructive feedback.
Pictures used in this article are the intellectual property of Grinding Gear Games.