Accuracy-stacking Lightning Strike
Juggernaut Build
Updated for Patch 3.22
The Best Crafty Guides by Odealo
| Guide notes |
June 7, 2022
-Build created
November 1, 2023
-Updated for Patch 3.22 |
| Build overview |
| Tags: [MELEE] [ELEMENTAL] [LIFE] |
|
Budget:
Defenses:
|


|
Boss DPS:
AoE:
|

|
As for the current patch, the Accuracy-stacking Juggernaut is the most powerful form of this ascendancy. It uses many tricks to accumulate an absurd amount of Accuracy and to later benefit from it. How does one translate Accuracy into Damage? By the Undeniable Keystone which grants increased Attack Speed, Obscurantis Unique Helmet, as it provides increased Projectile Damage, Oskarm Unique Gloves, which can get you increased Critical Strike Chance, and Stormrider Boots, for they add flat Lightnin Damage. All these items scale up these stats with the Accuracy Rating of your Attack, which we've managed to accumulate 65 000 of, but getting more is still possible. This setup requires you to use a Melee Projectile Attack dealing Lightning Damage and benefiting from Critical Strikes, and there is no better candidate than Lightning Strike.
The build uses two Replica Last Resort Unique Claws for an enormous boost to your Damage and increased Accuracy when low on Life - that's why using a Bow Skill is out of the question. To make any use of them, the character has to be constantly low on Life. By doing that, an additional benefit in form of Petrified Blood is available. Despite having only 2k of Maximum Life, the actual Life Pool is much higher due to the immunity to Elemental Ailments, high Armour, Block Chance, Spell Suppression Chance, Life Regeneration, and Maximum Resistances. Damage and speed are one of the highest of any builds, so it's not only great at boss-killing, but also at mapping. It uses a lot of Unique Items, most of which are very reasonably priced, but the Jewels, as always, are very expensive.
You can also check our other Path of Exile builds right over here Odealo's Crafty Guides - Full List
1. Gameplay
Lightning Strike is a Melee Attack that releases Projectiles - it's capable of reaching opponents over a distance. Most of them will die from a single Hit. The Auras you should be using are Precision, Determination, Purity of Elements, Petrified Blood, Vitality, Clarity, and War Banner. Some of these Auras are linked with Arrogance because half of your Life has to be reserved. Assassin's Mark on Hit is provided by unique Gloves. To further improve the build's DPS use Blood Rage, Ice Golem, Ancestral Protector, and if you can generate Rage - Berserk. Guard Spell should be Molten Shell, and for movement Skill, we recommend using Dash.
|
In this video was recorded on a level 95 Juggernaut with around 60k Accuracy when fully buffed in Patch 3.18
|
|
 
Odealo is a secure trading platform for MMO gamers. Here you can buy, sell, and trade PoE Currency for real cash.
|
2. Build's PROS & CONS
| PROS |
- a build with one of the highest DPS
- it's surprisingly fast and mobile
- not as expensive as you'd expect from a "Stacking" build
- relatively durable, the Petrified Blood is a big boost to survivability
|
| CONS |
- It's a Meele Strike Skill that can feel clunky
- uses also a lot of expensive unique and Rare Items
|
3. Leveling tips
Leveling this build by stacking accuracy right from the start is possible. The core Unique items require a wide range of levels to equip, so the whole process feels gradual. Scroll down to section 6. to take a look at the mandatory Unique items and equip them as soon as you're able to. If you already have the Brutal Restraint, Unnatural Instinct, and Transcended Spirits - Jewels that can be socketed in your Skill tree since level one, go ahead. First, allocate the Jewels in the central section of the Skill Tree, then go for the Accuracy Clusters. Most players however will have to level it up in a more efficient manner and allocate these Jewels later. Obscurantis require level 70 - that's the moment to switch to the proper form of the build. It's around the time you finish the last, 10th act. Replica Last Resort can be used since level one but requires you to reserve half of your Life. Dying is not a big deal at the start, you can equip them whenever you feel like it's a good time, but no sooner than before you're able to use Petrified Blood.
Suggested leveling Gem setups:
| Totem setup |
 |
Lightning Strike - available at level 12. It converts half of the damage into Lightning type, but it's not a big deal at the start, and even less important later on. |
 |
Nightblade Support - grants the powerful Elusive buff, Critical Strike Multiplier, and Critical Strike Chance |
 |
Ancestral Call Support - Strike Skills target additional enemies increasing clear speed in the result |
 |
Additional Accuracy Support - Additional Accuracy is useful only after the first ascension and allocating Undeniable. before that, use Ruthless Support, or Added Fire Damage Support |
| Auras setup |
 |
Precision - Use it for more Accuracy Rating and Critical Strike Chance |
 |
Clarity - Clarity is used for better Mana Regeneration |
 |
Vitality - Vitality regenerates your Life over Time, which is useful if you take damage over time often |
 |
Determination - use it for more Armour, it will be needed even early on |
 |
War Banner - this Banner grants Accuracy Rating and makes enemies take increased Physical Damage |
 |
Petrified Blood - as soon as you're ready to cut your Life Pool in Half by using Arrogance Support linked with some of the other Auras, use this Gem to make your life loss more gradual |
| other Gems |
 |
Summon Ice Golem - Ice Golem grants Accuracy Rating and Critical Strike Chance |
 |
Cast When Damage Taken - level it up alongside Ice Golem, you want it to be a high level |
 |
Lifetap Support - spent life instead of mana on these skills |
 |
Dash - dashing increases mobility |
Bandits:
Kill all three bandits and be rewarded with two additional Skill Points
Leveling Skill Trees:
27 Points Passive Tree
Seize the Life and Attack Damage Passives near your Starting location. Before the first ascension, you don't need Accuracy.
86 Points Passive Tree
Go for the Claw Cluster as shown if you're using Claws. Grab the Accuracy Clusters and Point Blank. Allocate the three central jewel sockets if you have Brutal Restraint, Transcendent Spirit, and Unnatural Instinct. Pick the nodes in the Aura Cluster with Champion of the Cause. If you need more life, get Herbalism or Thick Skin.
Recommended leveling items:
 Le Heup of All - use it for more Damage with Attacks, Attributes, and Elemental Resistances Le Heup of All - use it for more Damage with Attacks, Attributes, and Elemental Resistances |
Adds 1 to 4 Physical Damage to Attacks
+(10-30) to all Attributes
(10-30)% increased Damage
(10-30)% increased Rarity of Items found
+(10-30)% to all Elemental Resistances |
 Goldrim - a Helmet to give you a lot of Elemental Resistances, available at level 1 Goldrim - a Helmet to give you a lot of Elemental Resistances, available at level 1 |
+(30-50) to Evasion Rating
10% increased Rarity of Items found
+(30-40)% to all Elemental Resistances
Reflects 4 Physical Damage to Melee Attackers
Level Requirement reduced by 100 (Hidden) |
 Tabula Rasa - allows you to six-link a setup from the start Tabula Rasa - allows you to six-link a setup from the start |
Item has no level requirement and Energy Shield (Hidden)
Item has 6 White Sockets and is fully linked (Hidden) |
 Meginord's Girdle - Adds Strength, Maximum Life, Cold Resistance, and Physical Damage to Attacks Meginord's Girdle - Adds Strength, Maximum Life, Cold Resistance, and Physical Damage to Attacks |
+(25-35) to Strength
+25 to Strength
Adds 10 to 20 Physical Damage to Attacks
10% increased maximum Life
+(10-20)% to Cold Resistance
25% increased Flask Life Recovery rate |
 The Ignomon - Cheap and commonly available Amulet for leveling Attack / Fire Damage builds. It also grants an Accuracy Rating (buffed in 3.19). The Ignomon - Cheap and commonly available Amulet for leveling Attack / Fire Damage builds. It also grants an Accuracy Rating (buffed in 3.19). |
(12-20)% increased Rarity of Items found
+20% to Light Radius
Adds (18-24) to (32-40) Fire Damage to Attacks
+(100-150) to Accuracy Rating
+(100-150) to Evasion Rating
+20% to Fire Resistance
Nearby Enemies are Blinded |
4. Final Skill Tree, Ascendancy Points, and Pantheon
Final Skill Tree:
113 Points Final Passive Tree (doesn't include Unique Jewels)
113 Points Path of Building (PoB) link
Ascendancy points:
Preferably in that order:
- Undeniable
- Unbreakable
- Unstoppable
- Unflinching
Pantheon:
Major God: Soul of The Brine King: 1% You cannot be Stunned if you've been Stunned or Blocked a Stunning Hit in the past 2 seconds
Minor God: Soul of Tukohama: While stationary, gain 3% additional Physical Damage Reduction every second, up to a maximum of 9%
5. Final Gems links
| [DPS] Lightning Strike setup |
|
Lightning Strike - It's the only damaging ability - a Strike Attack that shoots Projectiles. There is no replacement for it as it is seemingly tailored for this build specifically. We recommend the Anomalous version for extra Pierce. |
 |
Multistrike Support - The Attack is repeated with a much higher Attack Speed but less damage, it's very beneficial. |
 |
Elemental Damage with Attacks Support - Deal more Elemental Damage with Attacks. |
 |
Lightning Penetration Support - Lightning Damage penetrates a big chunk of Lightning Resistance. |
|
Nightblade Support - The best Support Gem for Claw Attacks - use it for Elusive Buff, increased Critical Strike Chance, and Multiplier. We recommend the Anomalous version for increased Elusive effect. |
|
Additional Accuracy Support - Added Accuracy to the linked Attack. It's recommended to use the Divergent version for even DPS bonus |
| [UTILITY] Ice Golem and Dash setup |
|
Summon Ice Golem - Ice Golem grants you increased Accuracy and Critical Strike Chance. Use the Anomalous Version for an increased buff effect. |
|
Cast When Damage Taken - To be kept at level 20 - it should activate Ice Golem at the same level. |
|
Lifetap Support - Ice Golem and Dash cost Life instead of Mana. |
|
Dash - Dash is used to move around at a greater pace and dodge attacks. |
| [UTILITY] Auras |
|
Determination - This Aura grants an additional Armour, and increases the existing one. |
 |
Purity of Elements - Use it for complete immunity to all Elemental Ailments and a lot of Elemental Resistances - these will be especially needed as a lot of your Items are Unique. |
|
Petrified Blood - Petrified Blood protects the lower half of your Life - which should be all the Life that is not reserved. A portion of incoming Hit Damage is taken as Damage over time instead, giving you time to regenerate it. |
 |
Enlighten Support - With the removal of the Mana Reservation Mastery in 3.19 you're now forced to use Enlighten Support fo fit all the Auras |
| [UTILITY] Life-reserving Auras |
|
Precision - Use it for an additional Accuracy Rating and increased Critical Strike Chance. |
 |
Arrogance Support - Supported Skills which normally reserve Mana, reserve Life instead. Half of your Life has to be reserved. |
|
War Banner - This Banner grants you an increased Accuracy Rating and that's pretty much it. |
 |
Empower Support - Empowering Precision and War Banner grants you more Accuracy. |
| [UTILITY] Life-reserving Auras of lesser importance |
|
Clarity - Clarity is here only because you need half of your Life reserved - tweak the Gem level to achieve the perfect 50%. |
|
Vitality - Vitality Regenerates your Life over Time, it can be leveled all the way up to level 20. |
|
Arrogance Support |
| [UTILITY] Blood Rage |
 |
Blood Rage - Blood Rage is a buff for increased Attack Speed, Life Leech, and Frenzy Charges generation. It drains your Life over Time. |
| [UTILITY] Molten Shell |
 |
Molten Shell - A Guard Spell that scales well with Armour to prevent some of the incoming damage. |
| [UTILITY] Ancestral Protector |
 |
Ancestral Protector - This Totem is used for its buff - increased Attack Speed. Use the Phantasmal version. |
| [UTILITY] Berserk |
 |
Berserk - If you can generate Rage via Searing Exarch's Gloves Implicit or Crave the Slaughter Keystone, use this Skill to gain a temporary boost to your damage. |
|
On Odealo dozens of sellers compete for your attention. Buying PoE Currency here guarantees the best prices, prompt delivery, and the best quality of service.
|
6. Gear Setup
It's a build where you have to equip all the Unique Items listed here as mandatory for the optimal outcome, and there are quite a few of them. These are mostly there to grant you the most Accuracy, or to scale your damage with Accuracy. It leaves you with a little room for Elemental Resistances, but hopefully, you will cap them with Purity of Elements. The Jewels are expensive, especially the Unnatural Instaincs and Transcended Spirit. The only Rare gear pieces you will most likely use are Rings Boots. These have to be of a specific base type - Cloudwhisper, Windbreak, or Stormrider Boots. Jewels are the only place where you can get the mods most likely to be of the most useful - Accuracy, Resistances, and Life.
Our recommended items will:
- Cap your resistances at 75%
- Provide you with enough DPS and Life to start mapping
|
Stat priorities on items:
- to cap your Elemental Resistances
- Accuracy Rating
- Maximum Life
- Attack Speed
- Dexterity
- Armour
- Chaos Resistance
- Chance to Suppress Spell Damage
|
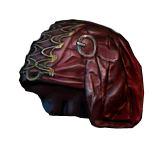
 (Helmet) Obscurantis - The Helmet that grants Maximum Life, a lot of Accuracy Rating, and increased Projectile Attack Damage per Accuracy Rating. (Helmet) Obscurantis - The Helmet that grants Maximum Life, a lot of Accuracy Rating, and increased Projectile Attack Damage per Accuracy Rating. |
+(800-1000) to Accuracy Rating
(100-120)% increased Evasion Rating
+(50-80) to maximum Life
1% increased Projectile Attack Damage per 200 Accuracy Rating |
Helmet enchantments:
War Banner has 40% increased Aura Effect
150% increased Effect of the Buff granted by your Ice Golems
Lightning Strike enchantments |
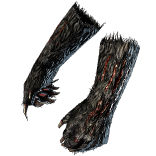
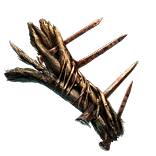 (Weapon) Replica Last Resort - To make any use of these Claws you will need to be below 50% of your Maximum Life at all times, but in return, your damage is significantly increased. Dual Wield these Claws. (Weapon) Replica Last Resort - To make any use of these Claws you will need to be below 50% of your Maximum Life at all times, but in return, your damage is significantly increased. Dual Wield these Claws. |
+3 Life gained for each Enemy hit by Attacks
25% increased Attack Speed when on Low Life
(80-100)% increased Physical Damage
100% increased Accuracy Rating when on Low Life
200% increased Damage with Claws while on Low Life
Deal no Damage when not on Low Life |
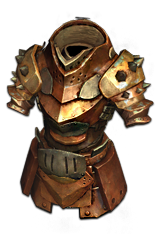 (Boots) The Brass Dome - It's a defensive pick, with Unbreakable Keystone this Armour is especially good - it doubles or even triples your Armour. Heavily recommended, but not mandatory. (Boots) The Brass Dome - It's a defensive pick, with Unbreakable Keystone this Armour is especially good - it doubles or even triples your Armour. Heavily recommended, but not mandatory. |
(350-400)% increased Armour
+(1-5)% to all maximum Elemental Resistances
Strength provides no bonus to Maximum Life
Take no Extra Damage from Critical Strikes |
 (Boots) Rare Body Armour - Rare Body Armour is used when you need Maximum Life, Resistances, and some offensive mods such as the ones increasing the Gem Levels in your main damage setup. (Boots) Rare Body Armour - Rare Body Armour is used when you need Maximum Life, Resistances, and some offensive mods such as the ones increasing the Gem Levels in your main damage setup. |
Min. requirements:
+120 to maximum Life
+100% to Elemental Resistances
Optional affixes:
+# to Level of Socketed Active Skill Gems
+# to Level of Socketed Support Gems
increased Maximum Life
You can apply an additional Curse |
 (Boots) Rare Boots - Use the Boots that adds Lightning Damage to Attacks based on your Accuracy Rating. It's hard to overestimate how important these are. If you can't find any good ones just get the cheapest ones - the base itself is valuable. (Boots) Rare Boots - Use the Boots that adds Lightning Damage to Attacks based on your Accuracy Rating. It's hard to overestimate how important these are. If you can't find any good ones just get the cheapest ones - the base itself is valuable. |
Min. requirements:
+70 to maximum Life
30% increased Movement Speed
+50% to Elemental Resistances
Optional affixes:
You have Tailwind if you have dealt a Critical Strike Recently
chance to gain Onslaught for 4 seconds on Kill |
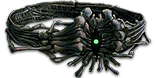
 (Gloves) Oskarm - These Gloves will grant you enough Critical Strike Chance to make it quite likely guaranteed. It's also the best-in-slot Curse on Hit against bosses and other useful stats. A very important part of the build. (Gloves) Oskarm - These Gloves will grant you enough Critical Strike Chance to make it quite likely guaranteed. It's also the best-in-slot Curse on Hit against bosses and other useful stats. A very important part of the build. |
(30-40)% increased Global Accuracy Rating
+(40-50) to maximum Life
-(20-10)% to Chaos Resistance
+(10-12)% chance to Suppress Spell Damage
Trigger Level 10 Assassin's Mark when you Hit a Rare or Unique Enemy and have no Mark
2% increased Attack Critical Strike Chance per 200 Accuracy Rating |
 (Belt) Rare Belt - Rare Belt can be used if you desperately need Life, Resistances, and other stats which can be found there in abundance. Note that there's a Lab Enchant for a Belt for increased Accuracy during Onslaught. (Belt) Rare Belt - Rare Belt can be used if you desperately need Life, Resistances, and other stats which can be found there in abundance. Note that there's a Lab Enchant for a Belt for increased Accuracy during Onslaught. |
Min. requirements:
+90 to maximum Life
40% increased Elemental Damage with Attack Skills
+90% to Elemental Resistances
Optional affixes:
Strength
increased Damage
increased Maximum Life |
 (Belt) Darkness Enthroned - It's the preferable option for a Belt, but only if you have good Abyss Jewels to socket there, which might come much later in the game. (Belt) Darkness Enthroned - It's the preferable option for a Belt, but only if you have good Abyss Jewels to socket there, which might come much later in the game. |
Has 1 Abyssal Socket
Has 1 Abyssal Socket
(50-100)% increased Effect of Socketed Abyss Jewels |
 (Amulet) Hinekora's Sight - This Amulet provides you with a lot of Accuracy Rating, Evasion Rating, Blind Immunity, and other good additions. (Amulet) Hinekora's Sight - This Amulet provides you with a lot of Accuracy Rating, Evasion Rating, Blind Immunity, and other good additions. |
+(10-16) to all Attributes
Prevent +3% of Suppressed Spell Damage
+(600-1000) to Accuracy Rating
+(600-1000) to Evasion Rating
Cannot be Blinded |
Recommended Anointments:
Tribal Fury |
 (Ring) Rare Rings - Rings are the parts of your equipment where you can often fix the Resistances, gain extra Maximum Life, and for other various stats. In this instance, you should focus on Accuracy Rating. Elder or Redeemer-influenced ones can get you increased Accuracy. Remember to use Catalysts for Attack Modifiers. (Ring) Rare Rings - Rings are the parts of your equipment where you can often fix the Resistances, gain extra Maximum Life, and for other various stats. In this instance, you should focus on Accuracy Rating. Elder or Redeemer-influenced ones can get you increased Accuracy. Remember to use Catalysts for Attack Modifiers. |
Min. requirements:
+500 to Accuracy Rating
20% increased Global Accuracy Rating
+60 to Maximum Life
Optional affixes:
Dexterity
increased Elemental Damage with Attack Skills
Elemental Resistances
Attack Speed |
 (Jewel) Rare Abyss Jewels - Murderous (pink) or Searching (white) Abyss Jewels are the ones you should use - these can grant you flat Accuracy, Life, and other Claw-related affixes. (Jewel) Rare Abyss Jewels - Murderous (pink) or Searching (white) Abyss Jewels are the ones you should use - these can grant you flat Accuracy, Life, and other Claw-related affixes. |
Recommended affixes:
maximum Life
up to 300 Accuracy Rating
Elemental Resistances
added Damage with Claws |
 (Jewel) Thread of Hope - Socket it between infused and Frenetic Notables. Get one with a Very Large Ring, and allocate Claws of the Falcon and Life Raker. (Jewel) Thread of Hope - Socket it between infused and Frenetic Notables. Get one with a Very Large Ring, and allocate Claws of the Falcon and Life Raker. |
Only affects Passives in Very Large Ring
Passives in Radius can be Allocated without being connected to your tree
-(20-10)% to all Elemental Resistances |
 (Jewel) Brutal Restraint - Put it near the center of the Skill tree, near Shaper Notable. It will make all other nodes in the radius enriched with Dexterity, but you won't have to allocate them. (Jewel) Brutal Restraint - Put it near the center of the Skill tree, near Shaper Notable. It will make all other nodes in the radius enriched with Dexterity, but you won't have to allocate them. |
Denoted service of (500-8000) dekhara in the akhara of (Asenath-Balbala-Nasima)
Passives in radius are Conquered by the Maraketh
Historic |
 (Jewel) Transcendent Spirit - This Jewel Grants you Accuracy per Dexterity on Unallocated Passives - that's why you needed Brutal Restraint. It's especially potent in the places where the radius of this Jewel and Brutal Restraint overlaps. Get two of these, socket them near the center of a Skill Tree, near Sentinel Notable, and the second one - near Fervour. (Jewel) Transcendent Spirit - This Jewel Grants you Accuracy per Dexterity on Unallocated Passives - that's why you needed Brutal Restraint. It's especially potent in the places where the radius of this Jewel and Brutal Restraint overlaps. Get two of these, socket them near the center of a Skill Tree, near Sentinel Notable, and the second one - near Fervour. |
-1 Dexterity per 1 Dexterity on Allocated Passives in Radius
3% increased Movement Speed per 10 Dexterity on Allocated Passives in Radius
+125 to Accuracy Rating per 10 Dexterity on Unallocated Passives in Radius
2% reduced Movement Speed per 10 Dexterity on Unallocated Passives in Radius |
  (Jewel) Forbidden Flame & Forbidden Flesh - The Keystones which you can allocate are Crave the Slaughter - for Rage generation, or Aspect of the Carnage for 40% more Damage. (Jewel) Forbidden Flame & Forbidden Flesh - The Keystones which you can allocate are Crave the Slaughter - for Rage generation, or Aspect of the Carnage for 40% more Damage. |
Requires Class <<Random Character Class>>
Allocates <<Random Ascendancy Notable>> if you have the matching modifiers on Forbidden Flame/Forbidden Flesh |
 (Jewel) Unnatural Instinct - Socket it near the center of the Skill Tree, right next to Harrier Notable. It will grant you the bonuses of unallocated small passives, which is a lot of Dexterity and Accuracy Rating. It works with the other Jewels - Transcendent Spirit, and Brutal Restraint. (Jewel) Unnatural Instinct - Socket it near the center of the Skill Tree, right next to Harrier Notable. It will grant you the bonuses of unallocated small passives, which is a lot of Dexterity and Accuracy Rating. It works with the other Jewels - Transcendent Spirit, and Brutal Restraint. |
Allocated Small Passive Skills in Radius grant nothing
Grants all bonuses of Unallocated Small Passive Skills in Radius |
 (Jewel) Watcher's Eye - None of the modifiers can grant you more Accuracy, but as you're using multiple Auras - Precision, Vitality, Clarity, Purity of Elements, and Determination - you will surely find some good mods. (Jewel) Watcher's Eye - None of the modifiers can grant you more Accuracy, but as you're using multiple Auras - Precision, Vitality, Clarity, Purity of Elements, and Determination - you will surely find some good mods. |
(4-6)% increased maximum Energy Shield
(4-6)% increased maximum Life
(4-6)% increased maximum Mana
<Two or Three random aura modifiers> |
 (Flask) Bottled Faith - It's the Flasks that grants the most damage, especially in the case of the builds that utilize Critical Strikes. (Flask) Bottled Faith - It's the Flasks that grants the most damage, especially in the case of the builds that utilize Critical Strikes. |
40% increased Damage
Creates Consecrated Ground on Use
(30-15)% reduced Duration
Consecrated Ground created by this Flask has Tripled Radius
Consecrated Ground created during Effect applies (7-10)% increased Damage taken to Enemies
(100-150)% increased Critical Strike Chance against Enemies on Consecrated Ground during Flask effect |
 (Flask) Atziri's Promise - Extra Elemental Damage as Chaos Damage, Chaos Resistance, and Life Leech are very good. (Flask) Atziri's Promise - Extra Elemental Damage as Chaos Damage, Chaos Resistance, and Life Leech are very good. |
+35% to Chaos Resistance
2% of Chaos Damage Leeched as Life during Flask effect
Gain (5-8)% of Physical Damage as Extra Chaos Damage during effect
Gain (5-8)% of Elemental Damage as Extra Chaos Damage during effect |
|
Suggested Flasks:
- Quicksilver Flask with Bleeding immunity/removal
- Life Flask with random ailment removal
- Diamond Flask with random ailment removal
|
   |
|
Odealo is one of the biggest Path of Exile marketplaces. It allows regular players to buy, sell, and trade PoE Currency with the use of real cash
|
If you have any other build requests please leave that in the comments below. We are always open to suggestions and constructive feedback.
Pictures used in this article are the intellectual property of Grinding Gear Games.