Detonate Dead
Necromancer Build
Updated for Patch 3.20
The Best Crafty Guides by Odealo
| Guide notes |
July 12, 2022
-Build Created
December 12, 2022
-Updated for Patch 3.20 |
| Build overview |
| Tags: [CASTER] [IGNITE] [CHAOS] [HYBRID] |
|
Budget:
Defenses:
|


|
Boss DPS:
AoE:
|

|
Detonate Deat is a Skill that we've already covered some time ago, it was one of the most popular builds in the game back then but was played mostly by Elementalists. This is a Necromancer version, which is nowadays the new meta pick. It works on the same principles - causing Ignite via Corpse Explosion, and converting damage to Chaos via Blackflame. Remember that the damage conversion only applies to the Ignite Damage specifically. It's a Fire Damage over Time caused by a Hit - the corpse's explosion in this case. The downsides of not picking Elementalist are mitigated, but still noticeable, this ascendancy was quite good with ensuring that each Hit would ignite, but it can be easily provided by many passives, skills, and affixes. It has also a direct damage boost to this type of damage. As a Necromancer, you have easy access to the four very impactful Keystones: Essence Glutton, Plaguebringer, Corpse Pact, and Mistress of Sacrifice. These are immensely useful for a corpse-consuming "caster" type of playstyle. Shaper of Flames or Mastermind of Discord (this one is slightly worse) can still be obtained via Forbidden Jewels, these are the only good ones that would really impact your DPS.
It can be played as a Life, Energy Shield, or as is in this case - hybrid Build. Energy Shield can be regenerated via Essence Glutton and Ghost Dance, with some investment into Evasion Rating. It has naturally a lot of resource Regeneration, allowing you to comfortably spam your Skills without worrying about running out of Mana. It can reach around 7k of combined Life and ES, and with Corrupted Soul, it's actually one of the best hybrid builds. You will have a lot of Armour and Maximum Elemental Resistances, up to 85%. It is needed as the build requires you to go into the crowd first, make direct contact, and then make the explosions. It results in creating one of the tankiest builds that there is out of necessity. As for damage - you can deal a lot of it. Scale up your Minon's Life, Ignite, and Chaos Damage. Find Spectres with a lot of Life, and spawn them via Desecrate in large quantities to make sure your Ignites will be at their best. Don't hesitate to create a big pile of corpses before detonating them during boss fights - if the game detects that you caused a more powerful Ignite, it will replace the existing one with it resetting its duration. It's useful, as you will have only a 15% chance of spawning the desirable high-life Spectral Corpse of your choice.
You can also check our other Path of Exile builds right over here Odealo's Crafty Guides - Full List
1. Gameplay
To consistently deal damage, you need an equally consistent source of corpses. Corpsewalker Unique Boots are just what you need as these create corpses with each step, allowing you to just walk into a pack of enemies. If you prefer a ranged playstyle you will have to often use Desecrate. The build performs especially well within maps of high mob density. the corpses created by your enemies are your ammo after all, and you can use them to initiate a chain reaction lasting for some time. The Auras which you're using are Discipline, Determination, Defiance Banner, and Malevolence. Use Spectres with a lot of Life and boost them with Support Gems to be even more sturdy. As for the Offering we recommend Bone Offering for a high Block Chance. For a Curse use Despair, your movement Skill - Flame Dash, Guard Spell - Molten Shell.
|
 
Odealo is a secure trading platform for MMO gamers. Here you can buy, sell, and trade PoE Currency for real cash.
|
2. Build's PROS & CONS
| PROS |
- Deals a moderate amount of damage, it mostly relies on the good Spectres more than your gear
- great defenses, it's easily one of the tankiest builds with a great regeneration of Life and ES
- can be played on a shoestring budget
|
| CONS |
- very clunky, and quite slow when compared to other builds
- weak against mobile targets with unpredictable movement patterns
|
3. Leveling tips
As a necromancer dealing Fire Damage, via corpses explosions we can recommend Raging Spirits with Minion Instability Keystone for a Start. With some investment into Minion Life, you will easily stroll through the acts. After some time you will have to switch to Detonate Dead, and here's an important difference - Detonade Dead is your Spell and you deal the damage now (but Spell Damage won't affect it), not your Minions. You will be able to start investing in your own damage (mostly Burning Damage), which is only based on Minion's Maximum Life. First, ensure that your Ignite Chance is high, then allocate some passives granting you Fire, and Ignite Damage, equip Blackflame, and start sculpting your final form.
Suggested leveling Gem setups:
| Detonate Dead setup |
 |
Summon Raging Spirit - Use it at first, by casting multiple Raging Spirits you can progress very fast |
 |
Concentrated Effect Support - use it for more Spell Damage and less Area of Effect |
 |
Infernal Legion Support - It helps you with lowering Minion's Life to low and to deal additional damage |
 |
Controlled Destruction Support - more Spell Damage, but much less Critical Strike Chance |
| Detonate Dead setup |
 |
Detonate Dead - You can start using Detonate Dead after investing in Damage over Time and your own Spell Damage |
 |
Burning Damage Support - increased Ignite Damage you can cause |
 |
Efficacy Support - more Damage over Time, and increased Skill Effect Duration |
 |
Unbound Ailments Support - more Damage with Ignite, and increased Ignite Duration |
| Specters setup |
 |
Raise Spectre - As you started using Detonate Dead you should already have some good specters to pick from |
 |
Minion Life Support - increases Minion's Maximum Life and decreases Damage |
| various gems |
 |
Flammability - the Curse that significantly lowers Fire Resistance |
 |
Malevolence - an Aura for you to use to deal increased Damage over Time |
 |
Desecrate - spawns Corpses to Detonate or to use as an Offering |
Bandits:
Kill all three bandits for two additional Skill Points
Leveling Skill Trees:
35 Points Passive Tree (Raging Spirits)
Take Minion Instability, increase your Minions and your own Maximum Life
33 Points Passive Tree
Head for the Fire Damage Cluster in such a way as to pick some Maximum Life and other useful stats
67 Points Passive Tree
Get Searing Heat, Acrimony, Holy Fire, and Divine Judgment for Damage. Purity of Flesh and Devotion are used to increase your Maximum Life.
Recommended leveling items:
 Le Heup of All - Grants more Damage, Attributes, and Elemental Resistances, it is all useful. Le Heup of All - Grants more Damage, Attributes, and Elemental Resistances, it is all useful. |
Adds 1 to 4 Physical Damage to Attacks
+(10-30) to all Attributes
(10-30)% increased Damage
(10-30)% increased Rarity of Items found
+(10-30)% to all Elemental Resistances |
 Goldrim - This Helmet grants you tons of Elemental Resistances. Goldrim - This Helmet grants you tons of Elemental Resistances. |
+(30-50) to Evasion Rating
10% increased Rarity of Items found
+(30-40)% to all Elemental Resistances
Reflects 4 Physical Damage to Melee Attackers
Level Requirement reduced by 100 (Hidden) |
 Tabula Rasa - Allows you to six-link a setup from the start. Tabula Rasa - Allows you to six-link a setup from the start. |
Item has no level requirement and Energy Shield (Hidden)
Item has 6 White Sockets and is fully linked (Hidden) |
 Berek's Respite - Useful Ring to enhance your Clear Speed by inflicting Ignite more efficiently, use with Detonate Dead only. Berek's Respite - Useful Ring to enhance your Clear Speed by inflicting Ignite more efficiently, use with Detonate Dead only. |
+(12-16)% to Fire and Lightning Resistances
Adds (20-25) to (30-50) Fire Damage to Spells and Attacks
(25-30)% increased Lightning Damage
+(30-40) to maximum Mana
When you Kill a Shocked Enemy, inflict an equivalent Shock on each nearby Enemy
When you Kill an Ignited Enemy, inflict an equivalent Ignite on each nearby Enemy |
 Ashcaller - Although Spell Damage won't affect Detonate Dead Damage, it's great with Summon Raging Spirits, and increases your burning damage anyways. Ashcaller - Although Spell Damage won't affect Detonate Dead Damage, it's great with Summon Raging Spirits, and increases your burning damage anyways. |
(18-22)% increased Spell Damage
10% chance to Trigger Level 8 Summon Raging Spirit on Kill
+(15-25)% to Fire Damage over Time Multiplier
Adds (4-6) to (7-9) Fire Damage to Spells
(20-30)% increased Burning Damage
(16-22)% chance to Ignite |
4. Final Skill Tree, Ascendancy Points, and Pantheon
Final Skill Tree:
120 Points Final Passive Tree (doesn't include Cluster Jewels)
121 Points Path of Building (PoB) link
Ascendancy points:
Preferably in that order:
- Essence Glutton
- Plaguebringer
- Corpse Pact
- Mistress of Sacrifice
Pantheon:
Major God: Soul of Lunaris: 1% increased Movement Speed for each nearby Enemy, up to 8%; 1% additional Physical Damage Reduction for each nearby Enemy, up to 8%
Minor God: Soul of Gruthkul: 1% additional Physical Damage Reduction for each Hit you've taken Recently up to a maximum of 5%
5. Final Gems links
| [DPS] Detonate Dead setup |
|
Vaal Detonate Dead - The source of all your Damage. Ignites you're causing are converted to Chaos Damage. It scales up with Minion's Maximum Life. |
 |
Swift Affliction Support - more Damage over Time, but less Ignite Duration |
|
Burning Damage Support - the best way to increase your Burning Damage |
 |
Inspiration Support - Used mostly to cope with the high Mana Cost of Detonate Dead but it also increases your Elemental Damage. Can be swapped for  Deadly Ailments Support or Deadly Ailments Support or  Cruelty Support if you can withstand the Mana Cost of this setup. Cruelty Support if you can withstand the Mana Cost of this setup. |
|
Efficacy Support - Efficacy extends the duration of DoT effects and increases its Damage of it. can be swapped for  Ignite Proliferation Support for comparable damage and much better clear speed Ignite Proliferation Support for comparable damage and much better clear speed |
|
Unbound Ailments Support - more Damage and Duration for Ignite, and increased Shock Effect |
| [UTILITY] Desecrate setup |
|
Desecrate - Creates Corpses - some of which can be the Specters that you can later detonate |
 |
Cast when Damage Taken - casts linked Spells, it's optional |
 |
Withering Step - applies Withered Debuff on enemies increasing Chaos Damage they receive, and makes you Elusive |
 |
Despair - a Curse that reduces Chaos Resistance and makes Damage over Time more potent |
| [UTILITY] Offering and Mobility setup |
 |
Bone Offering - Block Chance for you and your Minions with some Life Regeneration after Block |
 |
Arcane Surge Support - Arcane Surge increases your Mana Regeneration, keep it at a low level |
 |
Flame Dash - Teleports you over a short distance leaving a trail of Burning Ground |
| [UTILITY] Auras setup |
|
Malevolence - you deal more Damage over Time and your Skill Effects last longer |
 |
Determination - you have increased and additional Armour |
 |
Discipline - Grants Additional ES and Recharge Rate. It's a Hybrid build os  Tempest Shield can be an Alternative to it, used for more Spell Block Chance. Tempest Shield can be an Alternative to it, used for more Spell Block Chance. |
 |
Enlighten Support - lowers Mana Reservation Cost for Linked Skills |
| [UTILITY] Defiance Banner setup |
 |
Defiance Banner - increased Armour and Evasion Rating, it reduces enemies' Crit Chance as well |
| [UTILITY] Molten Shell |
 |
Molten Shell - mitigates a portion of incoming Hit damage, it scales up with your Armour |
|
On Odealo dozens of sellers compete for your attention. Buying PoE Currency here guarantees the best prices, prompt delivery, and the best quality of service.
|
6. Gear Setup
The Unique Items which are mandatory are Corpsewalker and Blackflame. We've also used Aegis Aurora with The Brass Dome and Melding of the Flesh for the impenetrable Elemental Resistances and Armour. Remember that your character must be very resilient. Glorious Vanity shall give you the Corrupted Soul for more Energy Shield. You won't need any Spell Damage - it has no effect on Detonate Dead's Damage. To increase your damage invest in Burning Damage and Chaos Damage alongside Minion's Maximum Life. The "Ignite deals Damage faster" mods are particularly useful. Your Maximum Life and Energy Shield will also be very important, especially the ES sourced from Life, as is the case with Corrupted Soul. Cast Speed is not particularly useful as one enemy can be affected by only one Ignite. The build requires a lot of Strength (for The Brass Dome and Determination) and Dexterity (for Swift Affliction).
Our recommended items will:
- Cap your resistances at 75%
- Provide you with enough DPS and Life to start mapping
|
Stat priorities on items:
- to cap your Elemental Resistances
- Maximum Life
- Ignite deals Damage faster
- Minion Maximum Life
- Ignite, Burning, Fire, Chaos, Elemental Damage
- Maximum Cold Resistance (if using Melding of the Flesh)
- Dexterity
- Strength
- Energy Shield
- Armour
|
 (Helmet) Rare Helmet - there's not much here to look for, except a lot of Maximum Life and Resistances. Depending on the base type it can also get you the important Attributes. (Helmet) Rare Helmet - there's not much here to look for, except a lot of Maximum Life and Resistances. Depending on the base type it can also get you the important Attributes. |
Min. requirements:
+60 to maximum Life
+80% to Elemental Resistances
Optional affixes:
Dexterity/Strength
Armour
Ignites you inflict deal Damage faster
Nearby Enemies have -#% to Chaos Resistance |
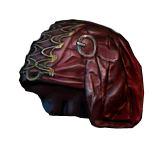
 (Helmet) Crown of the Inward Eye - As you really need Armour and Energy Shield, this Helmet will fit you nicely - it grants both. (Helmet) Crown of the Inward Eye - As you really need Armour and Energy Shield, this Helmet will fit you nicely - it grants both. |
333% increased Armour and Energy Shield
(9-21)% increased maximum Life, Mana and Global Energy Shield
Transfiguration of Soul
Transfiguration of Body
Transfiguration of Mind |
Helmet enchantments:
40% increased Detonate Dead Damage |
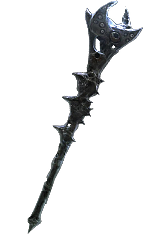 (Weapon) Rare Wand or Sceptre - a weapon that increases your Burning Damage by at least 100% and has some of the additional Damage over Time Multiplier mods is sufficient (Weapon) Rare Wand or Sceptre - a weapon that increases your Burning Damage by at least 100% and has some of the additional Damage over Time Multiplier mods is sufficient |
Min. requirements:
+1 to Level of all Fire Spell Skill Gems
Recommended affixes:
+1 to Level of all Spell Skill Gems
Fire Damage over Time Multiplier
Chaos Damage over Time Multiplier
increased Damage over Time
increased Burning Damage
increased Fire Damage
increased Elemental Damage |
 (Off-hand) Aegis Aurora - Grants you a lot of Maximum Cold Resistance, Energy Shield on Block, Armour, Energy Shield, and Elemental Resistances. Definitely use with Melding of the Flesh. (Off-hand) Aegis Aurora - Grants you a lot of Maximum Cold Resistance, Energy Shield on Block, Armour, Energy Shield, and Elemental Resistances. Definitely use with Melding of the Flesh. |
(300-400)% increased Armour and Energy Shield
+10% to all Elemental Resistances
+5% to maximum Cold Resistance
+6% Chance to Block
Replenishes Energy Shield by 2% of Armour when you Block
(10-20)% increased Elemental Damage with Attack Skills |
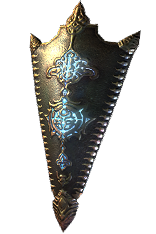
 (Off-hand) Rare Shield - Rare Shield is good for when you need more Maximum Life, Elemental Resistances, and other utility bonuses such as Mana Reservation Efficiency. (Off-hand) Rare Shield - Rare Shield is good for when you need more Maximum Life, Elemental Resistances, and other utility bonuses such as Mana Reservation Efficiency. |
Min. requirements:
+80 to maximum Life
+60% to Elemental Resistances
Optional affixes:
Socketed Gems have 30% increased Reservation Efficiency
Attributes
increased maximum Life |
 (Body Armour) The Brass Dome - It provides you with a lot of Armour, Maximum Elemental Resistances, and you take no Extra Damage from Critical Strikes. (Body Armour) The Brass Dome - It provides you with a lot of Armour, Maximum Elemental Resistances, and you take no Extra Damage from Critical Strikes. |
(350-400)% increased Armour
+(1-5)% to all maximum Elemental Resistances
Strength provides no bonus to Maximum Life
Take no Extra Damage from Critical Strikes |
 (Body Armour) Incandescent Heart - Use it for Extra Damage. It also grants Maximum Life, but besides these stats, there's not much in there. (Body Armour) Incandescent Heart - Use it for Extra Damage. It also grants Maximum Life, but besides these stats, there's not much in there. |
(220-240)% increased Armour and Energy Shield
+(80-90) to maximum Life
(0.8-1)% of Attack Damage Leeched as Life
Gain (10-20)% of Elemental Damage as Extra Chaos Damage
25% of Elemental Damage from Hits taken as Chaos Damage
(20-30)% increased Light Radius
Light Radius is based on Energy Shield instead of Life |
 (Body Armour) Rare Body Armour - Seek the most regular modifiers - a bunch of Maximum Life ane Resistances of all kinds. (Body Armour) Rare Body Armour - Seek the most regular modifiers - a bunch of Maximum Life ane Resistances of all kinds. |
Min. requirements:
+100 to maximum Life
+80% to Elemental Resistances
Optional affixes:
Armour
Attributes
Chaos Resistance
increased maximum Life |
 (Boots) Corpsewalker - It constantly creates Corpses, these can be your Specters - the chance of spawning them is 15%, the same as with Desecrate. It also regenerates your Life and Movement Speed. (Boots) Corpsewalker - It constantly creates Corpses, these can be your Specters - the chance of spawning them is 15%, the same as with Desecrate. It also regenerates your Life and Movement Speed. |
Triggers Level 20 Corpse Walk when Equipped
(80-120)% increased Evasion and Energy Shield
25% increased Movement Speed
(20-40)% increased Damage if you have Consumed a corpse Recently
For each nearby corpse, Regenerate 0.25% Life per second, up to 3% |
 (Gloves) Rare Gloves - Gloves are good for Life and Resistances. The only other mods are Attributes and Damage over Time Multiplier. (Gloves) Rare Gloves - Gloves are good for Life and Resistances. The only other mods are Attributes and Damage over Time Multiplier. |
Min. requirements:
+80 to maximum Life
+70% to Elemental Resistances
Optional affixes:
Fire Damage over Time Multiplier
Dexterity
Armour |
 (Belt) Rare Belt - As most rare items in this build are there only to grant more Life and Resistances, the same goes for a Belt. Additionally, seek Strength as it's a very common affix. (Belt) Rare Belt - As most rare items in this build are there only to grant more Life and Resistances, the same goes for a Belt. Additionally, seek Strength as it's a very common affix. |
Min. requirements:
+100 to maximum Life
+70% to Elemental Resistances
Strength
Optional affixes:
Armour
increased Attributes
increased Maximum Life |
 (Amulet) Rare Amulet - Increasing the Gem Level of Detonate Deat is your best option for more DPS, that's why you can also use Ashes of the Stars if you have one. Life, Resistances, and some other minor affixes should also be present. (Amulet) Rare Amulet - Increasing the Gem Level of Detonate Deat is your best option for more DPS, that's why you can also use Ashes of the Stars if you have one. Life, Resistances, and some other minor affixes should also be present. |
Min. requirements:
+60 to maximum Life
+70% to Elemental Resistances
+1 to Level of all Dexterity/Fire Skill Gems
Optional affixes:
Dexterity
Strength
Damage over Time Multiplier
Non-Channelling Skills have -7 to Total Mana Cost (crafted) |
Recommended Anointments:
Searing Heat
Dirty Techniques
Prismatic Skin |
 (Ring) Blackflame - You need one Blackflame Ring to "convert" your Ignite Damage to Chaos, it also makes your Withered debuff non-expirable. It's the core element of the build. (Ring) Blackflame - You need one Blackflame Ring to "convert" your Ignite Damage to Chaos, it also makes your Withered debuff non-expirable. It's the core element of the build. |
+(17-23)% to Chaos Resistance
+(8–12)% to Fire Damage over Time Multiplier
50% reduced Ignite Duration on Enemies
(10–15)% chance to Ignite
Enemies Ignited by you take Chaos Damage instead of Fire Damage from Ignite
Withered does not expire on Enemies Ignited by you
+(20–25)% to Fire and Chaos Resistances |
 (Ring) Rare Ring - If you can't bother with casting Despair manually get the "Despair on Hit", otherwise get the Life and Resistances. Other mods are not very useful, but Recouping damage might be good since you take damage quite often. (Ring) Rare Ring - If you can't bother with casting Despair manually get the "Despair on Hit", otherwise get the Life and Resistances. Other mods are not very useful, but Recouping damage might be good since you take damage quite often. |
Min. requirements:
+60 to maximum Life
+60% to Elemental Resistances
Optional affixes:
Strength
Dexterity
Damage taken Recouped as Life
Curse Enemies with Despair on Hit
increased Fire Damage
Non-Channelling Skills have -7 to Total Mana Cost (crafted) |
 (Jewel) Rare Jewels - Prioritize the "Damaging Ailments deal damage faster", otherwise seek Life, Resistances, and Attributes. (Jewel) Rare Jewels - Prioritize the "Damaging Ailments deal damage faster", otherwise seek Life, Resistances, and Attributes. |
|
Recommended affixes:
increased maximum Life
Attributes
Fire Damage over Time Multiplier
Damaging Ailments deal damage faster
increased Chaos Damage
|
 (Jewel) Transcendent Mind - You can socket one near Instability, it will increase your Damage over Time Multiplier. (Jewel) Transcendent Mind - You can socket one near Instability, it will increase your Damage over Time Multiplier. |
-1 Intelligence per 1 Intelligence on Allocated Passives in Radius
+3% to Damage over Time Multiplier per 10 Intelligence on Unallocated Passives in Radius
3% increased Mana Recovery Rate per 10 Intelligence on Allocated Passives in Radius
2% reduced Mana Recovery Rate per 10 Intelligence on Unallocated Passives in Radius |
 (Jewel) Glorious Vanity - A Doryani variant can transform your Divine Shield or Mind over Matter Keystone into a Corrupted Soul granting you ES sourced from your Maximum Life. (Jewel) Glorious Vanity - A Doryani variant can transform your Divine Shield or Mind over Matter Keystone into a Corrupted Soul granting you ES sourced from your Maximum Life. |
Bathed in the blood of (100-8000) sacrificed in the name of Doryani
Passives in radius are Conquered by the Vaal
Historic |
  (Jewel) Forbidden Flame & Forbidden Flesh - The best Keystone which you can get is Shaper of Flames from Elementalists' Skill Tree. It can increase your total damage by around 40%. (Jewel) Forbidden Flame & Forbidden Flesh - The best Keystone which you can get is Shaper of Flames from Elementalists' Skill Tree. It can increase your total damage by around 40%. |
Allocates <<Random Ascendancy Notable>> if you have the matching modifiers on Forbidden Flame
Allocates <<Random Ascendancy Notable>> if you have the matching modifiers on Forbidden Flesh |
 (Jewel) Watcher's Eye - "Damaging Ailments you inflict deal Damage faster while affected by Malevolence" and "Damage over Time Multiplier while affected by Malevolence" are the two best mods to look for on Watcher's Eye. (Jewel) Watcher's Eye - "Damaging Ailments you inflict deal Damage faster while affected by Malevolence" and "Damage over Time Multiplier while affected by Malevolence" are the two best mods to look for on Watcher's Eye. |
(4-6)% increased maximum Energy Shield
(4-6)% increased maximum Life
(4-6)% increased maximum Mana
<Two or Three random aura modifiers> |
 (Jewel) Small Cluster Jewels - Enduring Composure increases your Armour and is a source of Endurance Charges, Uncomproisming is for increased Mana Reservation Efficiency for Determination. (Jewel) Small Cluster Jewels - Enduring Composure increases your Armour and is a source of Endurance Charges, Uncomproisming is for increased Mana Reservation Efficiency for Determination. |
Recommended affixes:
1 Added Passive Skill is Enduring Composure
1 Added Passive Skill is Uncompromising |
 (Flask) Atziri's Promise - It grants you extra Chaos Damage, Chaos Resistance, and Life Leech. (Flask) Atziri's Promise - It grants you extra Chaos Damage, Chaos Resistance, and Life Leech. |
+35% to Chaos Resistance
2% of Chaos Damage Leeched as Life during Flask effect
Gain (5-8)% of Physical Damage as Extra Chaos Damage during effect
Gain (5-8)% of Elemental Damage as Extra Chaos Damage during effect |
|
Suggested Flasks:
- Mana Flask with Bleeding immunity/removal
- Life Flask with random ailment removal
- Quicksilver Flask with random ailment removal
- Basalt Flask with random ailment removal
- Jade Flask with random ailment removal (when you don't meet the requirements for Ghost Dance)
|
    |
|
Odealo is one of the biggest Path of Exile marketplaces. It allows regular players to buy, sell, and trade PoE Currency with the use of real cash
|
If you have any other build requests please leave that in the comments below. We are always open to suggestions and constructive feedback.
Pictures used in this article are the intellectual property of Grinding Gear Games.

 Elemental Army Support instead.
