Holy Flame Totem of Ire
Berserker Build
Created for Patch 3.24
The Best Crafty Guides by Odealo
| Guide notes |
May 24, 2024
-Build created |
| Build overview |
| Tags: [CRIT] [LIFE] [ELEMENTAL] [TOTEM] |
|
Budget:
Defenses:
|


|
Boss DPS:
AoE:
|


|
The Ravenous Passion is a new Unique Helmet that shifts Rage bonuses toward Spells instead of Attacks and grants you Rage when you spend enough Mana. It opens up many possibilities to create completely new Builds or enhance existing ones. The first thing that comes to mind clearly is the Berserker, as the Rage is the core identity of this Ascendency. It raises your maximum Rage limit by 10, and triples its inherit bonuses. As a result, you will increase your Cast Speed by 90%, and your Spell Damage by 180% when you are at full Rage. Unfortunately, it also makes sustaining Mana very hard, and you can't use the Eldritch Battery or Blood Magic Keystones since it would disable Rage generation. The best solution is to use Spell Totems instead, which benefit from your Rage, but you only need to Cast them once every few seconds.
The Flame Totem of Ire is a very good candidate for that. It deals noticeably more Damage and has better Projectile Speed than the original version, but it can fire only one Projectile. Thanks to your very fast Cast Speed it doesn't hinder the Clear Speed in most cases, and thanks to the long range you don't need to relocate it as often. You can boost it further with the additional Quality, but it is optional. It converts half of its Physical Damage to Fire, so you should Convert the remaining part using modifiers on your Gloves or allocating the Avatar of Fire Keystone.
Your Movement Speed will be rather slow, but it is not a problem at all. With your amazing Cast Speed, you can simply use the Frostblink of Wintry Blast together with the regular version to very quickly traverse Maps and dodge incoming threats. It also ensures your Rage won't ever fall off, as you will be constantly spending Mana.
The Berserk is not very famous for its tankiness, especially when compared to other Marauder's Ascendancies. You will have a high Block Chance with the Glancing Blows Keystone, a bit of Physical Damage Reduction from the Endurance Charges and Enduring Warcry, and Evade some of the Attacks, but your main defense is proper positioning and avoiding taking Damage at all.
You can also check our other Path of Exile builds right over here Odealo's Crafty Guides - Full List
1. Gameplay
Summon Totems to kill nearby Enemies. Use the Assassin's Mark and Frost Shield when fighting particularly tough opponents. To Move around you should use both Frostblink variants. Your Steelskin and Enduring Cry will be used automatically. Your Auras of choice are Zealotry, Clarity, Herald of Ash, and Tempest Shield, which can be replaced by Herald of Purity for even more Damage.
|
 
Odealo is a secure trading platform for MMO gamers. Here you can buy, sell, and trade PoE Currency for real cash.
|
2. Build's PROS & CONS
| PROS |
- Insanely fast Travel Speed with Frostblink of Wintry Blast
- Very high Single-target Damage
- Decent Clear Speed
- Easy Gearing process
|
| CONS |
- Poor defense
- Slow Totem Placement Speed
|
3. Leveling tips
The leveling process is very easy, you can start using your Flame Totem at the very beginning of the campaign, at level 4. It doesn't need to be the Transfigured version either, the regular one is good enough for the campaign, although the Single-target Damage will be slightly lower. As a Marauder, you will run into Mana problems very often, so consider using Mana Flask or Lifetap Support. For more tips, check out our Templar Leveling Guide using Totems in PoE, which shares many similarities with the Marauder.
Bandits:
Killing all Bandits for 2 bonus Skill Points is the best option, but you can help Alira for an easier start.
Leveling Skill Trees:
35 Points Passive Tree
On your way to the Ancestral Bond Keystone, you can pick up nearby Life, Totem, and Spell Damage Notables.
69 Points Passive Tree
Before you can equip the Power-stacking Setup you should grab additional Damage Notables to make your progression smoother. You should refund them later.
4. Final Skill Tree, Ascendancy Points, and Pantheon
Final Skill Tree:
116 Points Final Skill Tree (doesn't include Unique or Cluster Jewels)
120 Points Path of Building(PoB) link
Ascendancy points:
Preferably in the order:
- Aspect of Carnage
- Crave the Slaughter
- Rite of Ruin
- Flawless Savagery
Pantheon:
Major God: Soul of the Brine King: You cannot be Stunned if you've been Stunned or Blocked a Stunning Hit in the past 2 seconds; 100% chance to Avoid being Frozen
Minor God: Soul of Ralakesh: 25% reduced Physical Damage over Time taken while moving; Moving while Bleeding doesn't cause you to take extra Damage
5. Final Gems links
| [DPS] Holy Flame Totem of Ire setup |
 |
Holy Flame Totem of Ire - summons a Totem that fires a single Projectile, but at a very fast rate. It deals mainly Fire Damage and automatically Pierces all Enemies. |
 |
Added Fire Damage Support - adds Fire Damage based on the initial Physical Damage of your Totem. |
 |
Multiple Totems Support - allows you to Summon more Totems, but lowers their individual Damage. |
 |
Fire Penetration Support - your Totems Penetrate Fire Resistance of your Enemies. The Awakened version also grants a chance to inflict Fire Exposure. |
 |
Elemental Focus Support - disables Ignites, but greatly improves your Elemental Damage. |
 |
Power Charge on Critical Support - grants More Damage for every Power Charge you have. |
| [UTILITY] Auras setup |
 |
Zealotry - greatly improves your Spell Damage and Critical Strike Chance. You can also use a defensive Aura instead, such as Purity of Elements or Grace. |
 |
Herald of Ash - grants you Extra Fire Damage and improves it further. |
 |
Tempest Shield - makes you Immune to Shock and increases your Spell Block Chance. You can also use the Herald of Purity instead. |
 |
Enlighten Support - lowers the Reservation Cost of your most demanding Auras. |
 |
Clarity - a necessary Aura, it grants you Mana Regeneration. You can keep it on a lower level to reduce the Reservation Cost. |
| [UTILITY] Mobility setup |
 |
Frostblink - an instant Movement Spell that teleports you in short range and leaves Chilling Ground in both locations. |
 |
Frostblink of Wintry Blast - a Transfigured variant of the previous Spell, it has a short Cast Time but can be used without Cooldown. |
 |
Faster Casting Support - significantly improves the Cast Time of your Transifgured Frostblink. |
 |
Arcane Surge Support - spending Mana grants you a Buff that improves your Damage and Mana Regeneration. Keep it on the low level to activate it with a single cast. |
| [UTILITY] Warcry setup |
 |
Enduring Cry - a Warcry that grants you Life Regeneration and defensive buff for a short moment, based on your Endurance Charges. |
 |
Call to Arms - automatically Triggers your Warcry every few seconds. |
 |
Enhance Support - increasing the Quality of those Gems will significantly reduce the Cooldown of your Warcry. |
 |
Increased Duration Support - makes the defensive buff from the Enduring Cry last longer. |
| [UTILITY] Guard setup |
 |
Steelskin - forms a protective barrier that absorbs a portion of incoming Damage and removes Bleeding Effects from you. |
 |
Cast When Damage Taken Support - automatically Triggers your Guard Skill when you start taking serious Damage. You can also use the Automation instead. |
 |
Stone Golem - summons a Golem that grants you a decent amount of Life Regeneration. It will die very easily, using it manually is not worth it. |
| [UTILITY] Other Utility Gems |
 |
Assassin's Mark - a Curse that greatly improves your Damage and Critical Strike Chance against a singular Enemy. |
 |
Frost Shield - creates a dome that improves your Critical Strike Chance while you are inside of it. It also reduces incoming Damage but consumes your Energy Shield to build up. |
|
On Odealo dozens of sellers compete for your attention. Buying PoE Currency here guarantees the best prices, prompt delivery, and the best quality of service.
|
5. Gear Setup
You will use a lot of Unique Items in this Setup, but most of them are not important for the functionality. The only requirement is the Ravenous Passion Helmet, which is the core identity of the Rage Spell Caster Berserker. The Power-stacking Setup grants you tons of Spell Damage and Cast Speed via Power, Brutal, and Frenzy Charges, while the Endurance Charges grant you survivability. At first, you can use basic Rare Items, but reaching similar power would be needlessly expensive.
|
Stat priorities on items:
- Maximum Life
- Elemental Resistances
- Power Charge
- Cast Speed
- Critical Strike Multiplier
- Chaos Resistance
- Spell Damage
|
 (Helmet) Ravenous Passion - grants you Rage after you spend a total of 200 Mana, and shifts your Rage bonuses to apply to Spells instead. (Helmet) Ravenous Passion - grants you Rage after you spend a total of 200 Mana, and shifts your Rage bonuses to apply to Spells instead. |
+(30-50) to Strength
(80-120)% increased Armour and Energy Shield
Gain (10-15) Rage after Spending a total of 200 Mana
Rage grants Cast Speed instead of Attack Speed
Rage grants Spell Damage instead of Attack Damage |
 (Helmet) Ralakesh's Impatience - with those Boots you will always get maximum benefits from your Charges, even if you don't have them, or convert them to other types. The only downside here is the lack of Movement Speed and maximum Life. (Helmet) Ralakesh's Impatience - with those Boots you will always get maximum benefits from your Charges, even if you don't have them, or convert them to other types. The only downside here is the lack of Movement Speed and maximum Life. |
+(15-25)% to Cold Resistance
+(15-25)% to Chaos Resistance
Count as having maximum number of Endurance Charges
Count as having maximum number of Frenzy Charges
Count as having maximum number of Power Charges |
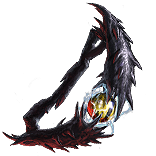
 (Weapon) Void Battery - this Wand grants you tons of Spell Damage and a bit of Cast Speed. It also raises your maximum Power Charge limit by 1. (Weapon) Void Battery - this Wand grants you tons of Spell Damage and a bit of Cast Speed. It also raises your maximum Power Charge limit by 1. |
(36-40)% increased Spell Damage
80% reduced Spell Damage
(10-20)% increased Cast Speed
(50-65)% increased Global Critical Strike Chance
+(40-50) to maximum Mana
+1 to Maximum Power Charges
25% increased Spell Damage per Power Charge |
 (Weapon) Malachai's Loop - this Shield grants you even more Power Charges, and improves your Spell Damage based on them. You won't gain Power Charges, so you get Shocked. (Weapon) Malachai's Loop - this Shield grants you even more Power Charges, and improves your Spell Damage based on them. You won't gain Power Charges, so you get Shocked. |
(10-15)% increased Spell Damage
(210-250)% increased Energy Shield
+2 to Maximum Power Charges
20% chance to gain a Power Charge on Hit
(12-16)% increased Spell Damage per Power Charge
Lose all Power Charges on reaching Maximum Power Charges
Shocks you when you reach Maximum Power Charges |
 (Body Armour) The Restless Ward - grants you an enormous amount of Life Regeneration and improves your Movement Speed. You should get a Corrupted version that improves the Gem Levels of your Spell Totem, which will also make it easier to get proper Sockets, as Tainted Chromatics ignore Attribute Requirements. (Body Armour) The Restless Ward - grants you an enormous amount of Life Regeneration and improves your Movement Speed. You should get a Corrupted version that improves the Gem Levels of your Spell Totem, which will also make it easier to get proper Sockets, as Tainted Chromatics ignore Attribute Requirements. |
(220-250)% increased Evasion and Energy Shield
+(60-80) to maximum Life
4% increased Movement Speed per Frenzy Charge
Regenerate 75 Life per second per Endurance Charge
(100-200)% increased Endurance, Frenzy and Power Charge Duration |
 (Amulet) Badge of the Brotherhood - applies all your Power Charge limits to the Frenzy Charges as well. It also lowers the Cooldown of your Frostblink. You should anoint the Infused Notable to get even more Power Charges. (Amulet) Badge of the Brotherhood - applies all your Power Charge limits to the Frenzy Charges as well. It also lowers the Cooldown of your Frostblink. You should anoint the Infused Notable to get even more Power Charges. |
+(16-24) to Dexterity and Intelligence
(7-10)% increased Cooldown Recovery Rate of Travel Skills per Frenzy Charge
(7-10)% increased Effect of Elusive on you per Power Charge
(20-25)% chance to lose a Frenzy Charge when you use a Travel Skill
(20-25)% chance to lose a Power Charge when you gain Elusive
Your Maximum Frenzy Charges is equal to your Maximum Power Charges |
 (Gloves) Rare Gloves - focus on maximum Life, lacking Resistances and Attributes, and add proper Eldritch Implicits. You can also use the Essence of Insanity to make your Frostblink of Wintry Blast even faster. (Gloves) Rare Gloves - focus on maximum Life, lacking Resistances and Attributes, and add proper Eldritch Implicits. You can also use the Essence of Insanity to make your Frostblink of Wintry Blast even faster. |
Min. requirements:
+40 to Dexterity
+80 to maximum Life
+40 to Elemental Resistance
Optional affixes:
Chaos Resistance
Socketed Gems have 16% more Attack and Cast Speed
Life Regeneration Rate |
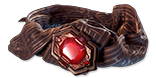 (Belt) Arn's Anguish - grants you a lot of maximum Life and Fire Resistance. It also raises your Endurance Charge limit by 1 and converts them into Brutal Charges, which grant you a chance to deal Double Damage. Thanks to the Ralakesh' Impatience you will benefit from both Charge types. (Belt) Arn's Anguish - grants you a lot of maximum Life and Fire Resistance. It also raises your Endurance Charge limit by 1 and converts them into Brutal Charges, which grant you a chance to deal Double Damage. Thanks to the Ralakesh' Impatience you will benefit from both Charge types. |
(15-25)% increased Stun and Block Recovery
+(600-700) to Armour
(12-15)% increased maximum Life
+(40-60)% to Fire Resistance
+1 to Maximum Endurance Charges
Modifiers to Minimum Endurance Charges instead apply to Minimum Brutal Charges
Maximum Brutal Charges is equal to Maximum Endurance Charges
Gain Brutal Charges instead of Endurance Charges |
 (Ring) Rare Ring - here you should look for maximum Life and lacking Attributes or Resistances. To improve your Damage you should include the Cast Speed or Critical Strike modifiers. You can also opt for the Mana Regeneration Rate or Mana Cost Reduction. (Ring) Rare Ring - here you should look for maximum Life and lacking Attributes or Resistances. To improve your Damage you should include the Cast Speed or Critical Strike modifiers. You can also opt for the Mana Regeneration Rate or Mana Cost Reduction. |
Min. requirements:
+50 to maximum Life
+40 to Elemental Resistance
Optional affixes:
Chaos Resistance
% increased Cast Speed
% increased Mana Regeneration Rate
Critical Strike Multiplier
Non-Channelling Skills have -7 to Total Mana Cost
Attributes |
 (Ring) Circle of Anguish - this Ring can greatly improve your Damage with its Herald-related modifiers. It also comes with random Synthesised Implicits. At higher budget, you can use the Circle of Ambition, which offers 3 random Herald modifiers instead. (Ring) Circle of Anguish - this Ring can greatly improve your Damage with its Herald-related modifiers. It also comes with random Synthesised Implicits. At higher budget, you can use the Circle of Ambition, which offers 3 random Herald modifiers instead. |
+(20-30) to Strength
Adds (20-25) to (26-35) Fire Damage
+(20-30)% to Fire Resistance
Recommended Herald modifiers:
Herald of Ash has (40-60)% increased Buff Effect
(40-60)% increased Fire Damage while affected by Herald of Ash |
 (Jewel) Militant Faith - grants you the Inner Conviction Keystone, which grants you More Damage per Power Charge, but disables Frenzy Charges generation, which you bypass with your Boots. (Jewel) Militant Faith - grants you the Inner Conviction Keystone, which grants you More Damage per Power Charge, but disables Frenzy Charges generation, which you bypass with your Boots. |
Carved to glorify (2000-10000) new faithful converted by High Templar Dominus
Passives in radius are Conquered by the Templars
Historic
<two random mods of devotion> |
 (Jewel) Rare Jewels - on your Rare Jewel you should aim to get a bonus to maximum Life and Critical Strike Multiplier. You can also use it to cover lacking Resistance or Attributes. (Jewel) Rare Jewels - on your Rare Jewel you should aim to get a bonus to maximum Life and Critical Strike Multiplier. You can also use it to cover lacking Resistance or Attributes. |
Recommended affixes:
Global Critical Strike Multiplier
Critical Strike Multiplier with Spells
Critical Strike Multiplier with Fire Skills
% increased maximum Life
Elemental Resistances
Attributes |
 (Jewel) Watcher's Eye - there are only 2 Auras applicable here, the Zealotry and Clarity. It can grant you tons of Damage, or help a bit with Mana Sustain. (Jewel) Watcher's Eye - there are only 2 Auras applicable here, the Zealotry and Clarity. It can grant you tons of Damage, or help a bit with Mana Sustain. |
(4-6)% increased maximum Energy Shield
(4-6)% increased maximum Life
(4-6)% increased maximum Mana
<Two or Three random aura modifiers>
Recommended modifiers:
Consecrated Ground you create while affected by Zealotry causes enemies to take (8-10)% increased Damage
(100-120)% increased Critical Strike Chance against Enemies on Consecrated Ground while affected by Zealotry
Critical Strikes Penetrate (8-10)% of Enemy Elemental Resistances while affected by Zealotry |
 (Jewel) Medium Cluster Jewel - thanks to the Totem-related Notables you will have a nearly permanent Onslaught Buff which significantly improves your Clear Speed and Damage. The second Notable is less impactful, but the Ancestral Ech is preferred for the Totem Placement Speed and extra Cast Speed. (Jewel) Medium Cluster Jewel - thanks to the Totem-related Notables you will have a nearly permanent Onslaught Buff which significantly improves your Clear Speed and Damage. The second Notable is less impactful, but the Ancestral Ech is preferred for the Totem Placement Speed and extra Cast Speed. |
Recommended affixes:
1 Added Passive Skill is Ancestral Echo
1 Added Passive Skill is Sleepless Sentries |
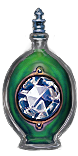
 (Flask) Bottled Faith - a very powerful offensive Flask that improves your Critical Strike Chance and Damage against Enemies standing on the Consecrated Ground. You will also create the Consecrated Ground via your Totems or Zealotry Aura, so you don't need to worry about proper positioning. (Flask) Bottled Faith - a very powerful offensive Flask that improves your Critical Strike Chance and Damage against Enemies standing on the Consecrated Ground. You will also create the Consecrated Ground via your Totems or Zealotry Aura, so you don't need to worry about proper positioning. |
(30-15)% reduced Duration
Consecrated Ground created by this Flask has Tripled Radius
Consecrated Ground created during Effect applies (7-10)% increased Damage taken to Enemies
(100-150)% increased Critical Strike Chance against Enemies on Consecrated Ground during Effect |
 (Flask) Taste of Hate - on the other hand, this Flask offers a great defensive bonus, as it improves your maximum Cold Resistance and shifts a portion of the Physical Damage to be Taken as Cold. It also slightly improves your Damage. (Flask) Taste of Hate - on the other hand, this Flask offers a great defensive bonus, as it improves your maximum Cold Resistance and shifts a portion of the Physical Damage to be Taken as Cold. It also slightly improves your Damage. |
(10-15)% of Physical Damage from Hits taken as Cold Damage during Effect
Gain (10-15)% of Physical Damage as Extra Cold Damage during effect
30% chance to Avoid being Chilled during Effect
30% chance to Avoid being Frozen during Effect |
|
Other suggested Flasks:
- Life Flask with Bleeding Removal
- Jade Flask with Evasion Rating bonus
- Diamond Flask with Critical Strike Chance bonus
|
   |
|
Odealo is one of the biggest Path of Exile marketplaces. It allows regular players to buy, sell, and trade PoE Currency with the use of real cash.
|
If you have any other build requests please leave that in the comments below. We are always open to suggestions and constructive feedback.
Pictures used in this article are the intellectual property of Grinding Gear Games.