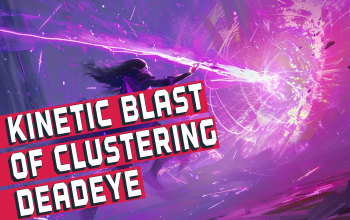
Kinetic Blast of Clustering
Deadeye Build
Created for Patch 3.24
The Best Crafty Guides by Odealo
| Guide notes |
April 24, 2024
-Build created |
| Build overview |
| Tags: [CRIT] [CHAOS] [LIFE] [WANDER] |
|
Budget:
Defenses:
|


|
Boss DPS:
AoE:
|


|
The Kinetic Blast of Clustering is a very interesting Transfigured Skill, as it has 2 distinguishing features compared to the regular version. Firstly, it can fire only 1 Projectile and additional sources of Projectiles get converted to additional explosions. It also cannot Split, but you can still make it Fork, Pierce, or Return, causing them all to create additional explosions upon contact. You can take advantage of the Tornado Skill to overlap your explosions against a single Enemy, leading to a quite powerful burst of Damage.
The second advantage of this Skill is the additional Physical Damage based on your maximum Mana. Physical Damage is very universal, as you can convert it to any other type you prefer, specialize in Impale, or focus on Ailments such as Bleed or Poison. In this case, we convert it to Chaos Damage via the Unholy Might Buff. This simple Buff granted by one Cluster Jewel's Notable converts 100% of your Physical Damage and grants a Chance to apply Wither in Hit, which makes Enemies take 90% increased Damage. You can also greatly benefit from modifiers that grant a portion of your Physical Damage as Extra Chaos Damage.
As opposed to the popular Archmage Builds, you can Reserve all your Mana with powerful Auras to bolster your defenses. The Memory Vault is a particularly useful Helmet that lowers your Mana Reservation Efficiency, but greatly improves your Armour for each 50 Mana Reserved. You may use one less Aura than usual, but your Determination will be twice as effective, allowing you to get high amounts of Armour. To deal with other Damage types you will use the Loreweave and Eternal Damnation Combo. As a Ranger, you will also have easy access to Spell Suppression, instant Life Leech, and a bit of Evasion.
You can also check our other Path of Exile builds right over here Odealo's Crafty Guides - Full List
1. Gameplay
Use Kinetic Blast of Clustering as your main DPS. You will automatically Mark Enemies with Assassin's Mark. Against Bosses, use Arcanist Brand to simultaneously cast Tornado, Despair Curse, and optionally Hydrosphere, to create additional targets for your explosions. For Movement, we recommend using the Shield Charge.
|
 
Odealo is a secure trading platform for MMO gamers. Here you can buy, sell, and trade PoE Currency for real cash.
|
2. Build's PROS & CONS
| PROS |
- Great Clear Speed
- Immune to Reflect
- Unconventional scaling options
- Cheap to get started
|
| CONS |
- Poor Single-target Damage, as most Wanders do
- Only one Projectile
|
3. Leveling tips
You can use Wands to level up, starting with the Kinetic Bolt at level 1 and transitioning to Kinetic Blast at level 28, although the Bows are more suited for fast leveling thanks to a bigger array of Unique Bows and better scaling at very low levels. For more tips, you can visit our Ranger Leveling with Bows Guide for PoE.
Bandits:
Killing all Bandits for 2 bonus Skill Points is the best option, although you can help Alira to get Resistance and Critical Strike Multiplier boost in the early game.
Leveling Skill Trees:
36 Points Passive Tree
Take Projectile, Elemental, and Critical Strike Notables at the start of Ranger Tree. Maximum Life will also be very useful. If you use Bow to level up, pick the Bow Notables too.
72 Points Passive Tree
Pick Spell Suppression, Leech, and Mark Clusters. You can transition to Wands after you pick up the Wand Cluster.
4. Final Skill Tree, Ascendancy Points, and Pantheon
Final Skill Tree:
101 Points Final Skill Tree (doesn't include Unique or Cluster Jewels)
123 Points Path of Building(PoB) link
Ascendancy points:
Preferably in the order:
- Far Shot
- Endless Munitions
- Gathering Winds
- Focal Point
Pantheon:
Major God: Soul of the Brine King: You cannot be Stunned if you've been Stunned or Blocked a Stunning Hit in the past 2 seconds; 100% chance to Avoid being Frozen
Minor God: Soul of Ralakesh: 25% reduced Physical Damage over Time taken while moving; Moving while Bleeding doesn't cause you to take extra Damage
5. Final Gems links
| [DPS] Kinetic Blast of Clustering setup |
 |
Kinetic Blast of Clustering - fires a single Projectile that creates explosions around the target it Hits. Sources of additional Projectiles provide more explosions instead. It also gains added Physical Damage based on your Maximum Mana. |
 |
Vicious Projectiles Support - improves the Physical Damage of your Projectiles. You will convert it to Chaos Damage, but the bonus still applies. |
 |
Returning Projectiles Support - causes your Projectiles to Return, creating the explosions again. |
 |
Fork Support - Your projectile will fork into more Projectiles, each Returning and creating even more Explosions. It is not the same as the Split mechanic, which is disabled for this Skill. |
 |
Increased Critical Damage Support - improves the Damage of your Critical Strikes. |
 |
Sacred Wisps Support - attacking with Wand may summon Wisps that Attack alongside you for half of the Damage each. |
| [UTILITY] Auras setup |
 |
Determination - grants a lot of Armour and provides an Armour Multiplier. It is your main defensive Aura. |
 |
Precision - an offensive Aura that grants you a lot of Accuracy and Critical Strike Chance. |
 |
Herald of Purity - this Herald improves your Physical Damage and summons helpful Minions. |
 |
Defiance Banner - a Banner that improves your Armour and Evasion Rating, as well as lower the Critical Strikes of nearby Enemies. |
| [UTILITY] Mark setup |
 |
Assassin's Mark - a very powerful Mark, it increases your Critical Strike Chance and Damage against a single Enemy. It will also generate your Power and Frenzy Charges. |
 |
Mark on Hit Support - you will automatically apply this Mark upon Hitting a Rare or Unique Enemy. |
| [UTILITY] Arcanist Brand setup |
 |
Tornado - summons a Tornado that interacts with your Projectiles, causing them to explode upon contact. It will also Reflect 10% of your Damage to your Enemies. |
 |
Despair - a Curse that lowers the Enemy's Chaos Resistance. You can use it after you anoint Whispers of Doom on your Amulet. |
 |
Arcanist Brand - creates a Brand that Casts all linked Spells for you. |
 |
Faster Casting Support - improves the Cast time of your Brand. You can also use the  Hydrosphere to create additional targets for your explosions instead. Hydrosphere to create additional targets for your explosions instead. |
| [UTILITY] Movement setup |
 |
Shield Charge - performs a fast Charge towards the targeted location. It scales with your Attack and Movement Speed. |
 |
Faster Attacks Support - improves your Attack Speed with the Shield Charge. |
 |
Momentum Support - further improves your Attack Speed with Shield Charge via Momentum stacks. You can also use the  Frostblink instead. Frostblink instead. |
| [UTILITY] Various Utility Skills |
 |
Blood Rage - a Buff that continuously deals Physical Damage to you, but improves your Attack Speed. |
 |
Enduring Cry - a Warcry that regenerates a big portion of your Life and generates you Endurance Charges. Link it with the Call to Arms Support to cast it automatically. |
 |
Molten Shell - creates a temporary shield that improves your Armour and absorbs part of the incoming Damage. You can automate it with the Automation or Cast When Damage Taken Support. |
| [UTILITY] Optional Ballista setup |
|
Kinetic Blast of Clustering - all your Damage comes from your Mana, so this is the only Skill you can use to deal meaningful Damage. |
 |
Ballista Totem Support - creates up to 3 Totems that automatically Attack nearby Enemies. You can source it from Shaper-influenced Boosts for a pseudo-5-link setup. |
 |
Void Manipulation Support - improves the Chaos Damage you or your Totems deal. |
|
Vicious Projectiles Support - boosts the Damage of your Projectiles. |
|
Increased Critical Damage Support - grants a lot of Critical Strike Multiplier. |
|
On Odealo dozens of sellers compete for your attention. Buying PoE Currency here guarantees the best prices, prompt delivery, and the best quality of service.
|
5. Gear Setup
The Gearing choices are very easy and straightforward. All your flat Damage comes from the Mana, and you can boost it with increased Attack Speed, Critical Strikes, or Attack and Spell Damage. You will also need maximum Life, Chaos and Elemental Resistances, and a bit of Spell Suppression. Most of your Armour comes from your Unique Items and Determination Aura, so you don't need to worry about correct Bases for your Rare Items. You will also need a bit of Strength to meet your Gem Requirements.
|
Stat priorities on items:
- Maximum Life
- Maximum Mana
- Elemental and Chaos Resistances
- Attack Speed
- Accuracy Rating
- Critical Strike Multiplier
- Spell Suppression
- Attributes
|
 (Helmet) Memory Vault - this Helmet grants you a lot of Mana, and insane amounts of increased Armour Rating, you can easily double your total Armour with just this piece. It reduces your Reservation Efficiency, but there are not many useful offensive Auras for your Chaos Damage anyway. (Helmet) Memory Vault - this Helmet grants you a lot of Mana, and insane amounts of increased Armour Rating, you can easily double your total Armour with just this piece. It reduces your Reservation Efficiency, but there are not many useful offensive Auras for your Chaos Damage anyway. |
+(130-160) to maximum Energy Shield
+(150-200) to maximum Mana
(30-40)% increased Mana Regeneration Rate
+(20-30)% to Fire Resistance
20% reduced Reservation Efficiency of Skills
1% increased Armour per 50 Reserved Mana |
 (Weapon) Rare Weapon - on your Wand you should seek Attack Speed, Critical Strike Chance, and lots of Spell Damage and Mana. You can also craft the Chaos Penetration via Crafting Bench. Ideally, it should be an Imbued Wand, it is the best Base for Attack Wands. (Weapon) Rare Weapon - on your Wand you should seek Attack Speed, Critical Strike Chance, and lots of Spell Damage and Mana. You can also craft the Chaos Penetration via Crafting Bench. Ideally, it should be an Imbued Wand, it is the best Base for Attack Wands. |
Min. requirements:
8% Critical Strike Chance
1.7 Attacks per Second
+100 to maximum Mana
Optional affixes:
% increased Spell Damage
Attacks with this Weapon Penetrate #% Chaos Resistance
% to Global Critical Strike Multiplier
% chance to deal Double Damage |
 (Weapon) Rare Shield - on your Shield you should seek maximum Life, maximum Mana, and Attack Speed. It can also provide some Resistances or Spell Suppression Chance. (Weapon) Rare Shield - on your Shield you should seek maximum Life, maximum Mana, and Attack Speed. It can also provide some Resistances or Spell Suppression Chance. |
Min. requirements:
10% chance to Suppress Spell Damage
+70 to maximum Life
+50 to maximum Mana
+10% increased Attack Speed
Optional affixes:
% increased Spell Damage
% to all Elemental Resistances |
 (Body Armour) Loreweave - this Armour grants a little bit of everything, such as maximum Life, Mana, and Critical Strike Chance. The important feature is that it locks your Maximum Resistances at a fixed Value, which cannot be lowered by other sources. (Body Armour) Loreweave - this Armour grants a little bit of everything, such as maximum Life, Mana, and Critical Strike Chance. The important feature is that it locks your Maximum Resistances at a fixed Value, which cannot be lowered by other sources. |
+(8-24) to all Attributes
Adds (4-10) to (14-36) Physical Damage to Attacks
(20-60)% increased Global Critical Strike Chance
+(15-50) to maximum Energy Shield
+(20-60) to maximum Life
+(20-50) to maximum Mana
(6-30)% increased Rarity of Items found
(15-50)% increased Elemental Damage
Your Maximum Resistances are (76-78)% |
 (Amulet) Eternal Damnation - the downside of this Amulet is negated by your Body Armour. It grants tons of Elemental Damage mitigation based on the Chaos Resistance you have. It also grants a little bit of Mana. (Amulet) Eternal Damnation - the downside of this Amulet is negated by your Body Armour. It grants tons of Elemental Damage mitigation based on the Chaos Resistance you have. It also grants a little bit of Mana. |
+(16-24) to Strength and Intelligence
+(40-70) to maximum Mana
+(-13-13)% to Chaos Resistance
-5% to all maximum Resistances
Gain additional Elemental Damage Reduction equal to half your Chaos Resistance |
Recommended anoint:
Whispers of Doom |
 (Boots) Rare Boots - on your Boots you should try to obtain high maximum Life, Mana, and Movement Speed. You can also get plenty of Resistances, Attributes, or Spell Suppression here. Optionally, you can use Shaper-influenced Boots to obtain built-in Ballista Totem Support for a secondary Setup. (Boots) Rare Boots - on your Boots you should try to obtain high maximum Life, Mana, and Movement Speed. You can also get plenty of Resistances, Attributes, or Spell Suppression here. Optionally, you can use Shaper-influenced Boots to obtain built-in Ballista Totem Support for a secondary Setup. |
Min. requirements:
30% Movement Speed
+70 to maximum Life
+50 to maximum Mana
+50% total Resistance
Optional affixes:
% chance to Suppress Spell Damage
% chance to gain Onslaught for 4 seconds on Kill
Attributes
Socketed Gems are Supported by Level # Ballista Totem |
 (Gloves) Rare Gloves - your Gloves are an excellent place to improve your Accuracy Rating or Attack Speed, but they should also provide maximum Life, Mana, and lacking Resistances or Attributes. Use Eldritch Implicits to get Intimidation Debuff and a bit of Spell Suppression. (Gloves) Rare Gloves - your Gloves are an excellent place to improve your Accuracy Rating or Attack Speed, but they should also provide maximum Life, Mana, and lacking Resistances or Attributes. Use Eldritch Implicits to get Intimidation Debuff and a bit of Spell Suppression. |
Min. requirements:
+70 to maximum Life
+50 to maximum Mana
60% total Elemental Resistance
Optional affixes:
% chance to Suppress Spell Damage
% increased Attack Speed
Accuracy Rating
% chance to Intimidate Enemies on Hit
Attributes |
 (Belt) Rare Belt - try to obtain a lot of Strength and Flask Charge modifiers here. You will also need your usual Life, Mana, and Resistances too. Ideally, it should be a Stygian Vise so you can use an additional Jewel. (Belt) Rare Belt - try to obtain a lot of Strength and Flask Charge modifiers here. You will also need your usual Life, Mana, and Resistances too. Ideally, it should be a Stygian Vise so you can use an additional Jewel. |
Min. requirements:
+70 to maximum Life
+50 to maximum Mana
+40 to Strength
60% total Resistance
Optional affixes:
% increased Flask Charges gained
% reduced Flask Charged used |
 (Ring) Ming's Heart - this Ring grants you absurd amounts of Damage and Chaos Resistances, but it also lowers your maximum Life, which is quite low even without it. You can improve the Extra Damage modifier with Noxious Catalysts. (Ring) Ming's Heart - this Ring grants you absurd amounts of Damage and Chaos Resistances, but it also lowers your maximum Life, which is quite low even without it. You can improve the Extra Damage modifier with Noxious Catalysts. |
+(17-23)% to Chaos Resistance
25% reduced maximum Energy Shield
25% reduced maximum Life
+(40-50)% to Chaos Resistance
Gain (40-60)% of Physical Damage as Extra Chaos Damage |
 (Ring) Rare Ring - on your regular Rare Rings you should mainly focus on Life, Mana, and Chaos Resistances. Elemental Resistances and Attributes can also be useful. (Ring) Rare Ring - on your regular Rare Rings you should mainly focus on Life, Mana, and Chaos Resistances. Elemental Resistances and Attributes can also be useful. |
Min. requirements:
+50 to Maximum Life
+40 to Maximum Mana
70% total Resistance
Optional affixes:
Attributes
Critical Strike Multiplier |
 (Jewel) Brutal Restraint - you can use this Jewel to improve your Life, get Onslaught on Kill, or improve your Flask Sustain considerably. You can also use the Lethal Pride to get a chance to deal Double Damage and improve Physical Damage mitigation. (Jewel) Brutal Restraint - you can use this Jewel to improve your Life, get Onslaught on Kill, or improve your Flask Sustain considerably. You can also use the Lethal Pride to get a chance to deal Double Damage and improve Physical Damage mitigation. |
Denoted service of (500-8000) dekhara in the akhara of (Asenath-Balbala-Nasima)
Passives in radius are Conquered by the Maraketh
Historic |
 (Jewel) Healthy Mind - with this Jewel you can considerably improve your maximum Mana, but you will lose a bit of Life in return. You can socket it near the Instability or the Infused Notables, but it is limited to only 1 at a time. (Jewel) Healthy Mind - with this Jewel you can considerably improve your maximum Mana, but you will lose a bit of Life in return. You can socket it near the Instability or the Infused Notables, but it is limited to only 1 at a time. |
(15-20)% increased maximum Mana
Increases and Reductions to Life in Radius are Transformed to apply to Mana at 200% of their value |
 (Jewel) Abyss Jewel - use the Abyss Jewel to improve your Life, Mana, and get lacking Resistances or Attributes. You can also get a chance to gain Phasing, Blind Enemies, and improve Critical Strike Multiplier or Attack Speed. (Jewel) Abyss Jewel - use the Abyss Jewel to improve your Life, Mana, and get lacking Resistances or Attributes. You can also get a chance to gain Phasing, Blind Enemies, and improve Critical Strike Multiplier or Attack Speed. |
Min. requirements:
+30 to maximum Life
+20 to maximum Mana
Optional affixes:
% chance to Blind Enemies on Hit with Attacks
% chance to gain Phasing for 4 seconds on Kill
Global Critical Strike Multiplier
Elemental and Chaos Resistance
Attributes |
 (Jewel) Rare Jewels - you will use plenty of Rare Jewels, use them to improve your maximum Life, Mana, cover lacking Resistances or Attributes, and improve your Attack Speed and Critical Strike Multiplier. (Jewel) Rare Jewels - you will use plenty of Rare Jewels, use them to improve your maximum Life, Mana, cover lacking Resistances or Attributes, and improve your Attack Speed and Critical Strike Multiplier. |
Recommended affixes:
Global Critical Strike Multiplier
% increased Attack Speed
% increased maximum Life
% increased maximum Mana
Elemental Resistances
Attributes |
 (Jewel) Large Cluster Jewel - there are two distinctive Large Cluster Jewels you should aim to use. Use the Chaos Jewel with the Overwhelming Malice Notable to get Unholy Might when you deal Critical Strike and any two other Notables. Your other Jewel should grant bonuses to Wand Attacks, ideally with the Explosive Force Notable that grants you a lot of Damage and additional explosions at the same time. (Jewel) Large Cluster Jewel - there are two distinctive Large Cluster Jewels you should aim to use. Use the Chaos Jewel with the Overwhelming Malice Notable to get Unholy Might when you deal Critical Strike and any two other Notables. Your other Jewel should grant bonuses to Wand Attacks, ideally with the Explosive Force Notable that grants you a lot of Damage and additional explosions at the same time. |
Recommended affixes:
1 Added Passive Skill is Dark Ideation
1 Added Passive Skill is Grim Oath
1 Added Passive Skill is Overwhelming Malice
1 Added Passive Skill is Explosive Force
1 Added Passive Skill is Martial Prowess
1 Added Passive Skill is Opportunistic Fusilade |
 (Jewel) Medium Cluster Jewel - the Projectile Modifiers available here are very powerful, especially the Repeater and Eye to Eye Notables. It might be more beneficial than Mana Notables on your Passive Tree, but it depends on your Gear. (Jewel) Medium Cluster Jewel - the Projectile Modifiers available here are very powerful, especially the Repeater and Eye to Eye Notables. It might be more beneficial than Mana Notables on your Passive Tree, but it depends on your Gear. |
Recommended affixes:
1 Added Passive Skill is Repeater
1 Added Passive Skill is Eye to Eye |
 (Jewel) Watcher's Eye - you can get a very powerful modifier for Precision and Determination Auras here. The Precision can also grant you Flask Charges. You can optionally include Vitality Aura to benefit from the Life on Hit modifier. (Jewel) Watcher's Eye - you can get a very powerful modifier for Precision and Determination Auras here. The Precision can also grant you Flask Charges. You can optionally include Vitality Aura to benefit from the Life on Hit modifier. |
(4-6)% increased maximum Energy Shield
(4-6)% increased maximum Life
(4-6)% increased maximum Mana
<Two or Three random aura modifiers>
Recommended modifiers:
Gain (20-30) Life per Enemy Hit while affected by Vitality
+(600-1000) to Armour while affected by Determination
Gain a Flask Charge when you deal a Critical Strike while affected by Precision |
 (Flask) Bottled Faith - an insanely powerful Flask, it greatly improves your Critical Strike Chance and Damage against Enemies standing in the Consecrated Ground. (Flask) Bottled Faith - an insanely powerful Flask, it greatly improves your Critical Strike Chance and Damage against Enemies standing in the Consecrated Ground. |
(30-15)% reduced Duration
Consecrated Ground created by this Flask has Tripled Radius
Consecrated Ground created during Effect applies (7-10)% increased Damage taken to Enemies
(100-150)% increased Critical Strike Chance against Enemies on Consecrated Ground during Effect |
|
Other suggested Flasks:
- Life Flask with Bleeding Removal
- Quicksilver Flask with Critical Strike Chance bonus
- Granite Flask with Armour Rating bonus
- Jade Flask with Evasion Rating bonus
|
    |
|
Odealo is one of the biggest Path of Exile marketplaces. It allows regular players to buy, sell, and trade PoE Currency with the use of real cash.
|
If you have any other build requests please leave that in the comments below. We are always open to suggestions and constructive feedback.
Pictures used in this article are the intellectual property of Grinding Gear Games.