 (Helmet) Mind of the Council - Most of its stats are beneficial. Maximum Mana, ES, a portion of incoming Lightning Damage taken from Mana, and added Lightning Damage from Mana are good. Try to reduce the effect of Shock on you with Jewels or Pantheon. Placing Totems won't drain a lot of your Mana. (Helmet) Mind of the Council - Most of its stats are beneficial. Maximum Mana, ES, a portion of incoming Lightning Damage taken from Mana, and added Lightning Damage from Mana are good. Try to reduce the effect of Shock on you with Jewels or Pantheon. Placing Totems won't drain a lot of your Mana. |
(230-260)% increased Evasion and Energy Shield
+(15-20) to maximum Energy Shield
(20-30)% increased maximum Mana
10% chance to Shock
+20% chance to be Shocked
30% of Lightning Damage is taken from Mana before Life
Attack Skills have Added Lightning Damage equal to 6% of maximum Mana
Lose 3% of Mana when you use an Attack Skill |
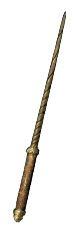 (Weapon) Rare Wand - Only the best of Rare Wands can compete with Piscator's Vigil. Look here for Maximum Mana, Attack Speed, Critical Strike mods, and Spell Damage. (Weapon) Rare Wand - Only the best of Rare Wands can compete with Piscator's Vigil. Look here for Maximum Mana, Attack Speed, Critical Strike mods, and Spell Damage. |
12% increased Attack Speed
25% increased Critical Strike Chance
60% increased Spell Damage
+80 to Maximum Mana
Optional affixes:
Global Critical Strike Multiplier
increased Elemental Damage with Attack Skills
Attacks with this Weapon Penetrate #% Elemental/Lightning Resistance
increased Spell Damage per Intelligence (Synthesised Implicit) |
 (Weapon) Piscator's Vigil - It's an excellent weapon, all of its stats are useful, even if they're not particularly powerful. (Weapon) Piscator's Vigil - It's an excellent weapon, all of its stats are useful, even if they're not particularly powerful. |
(33-37)% increased Spell Damage
No Physical Damage
(10-18)% increased Attack Speed
(20-30)% increased Critical Strike Chance
+(340-400) to Accuracy Rating
Attacks with this Weapon have (100-115)% increased Elemental Damage
Damage with Weapons Penetrates 5% Elemental Resistances |
 (Off-hand) Rare Shield - Here we would recommend getting Maximum Mana, Resistances, Energy Shield, Intelligence, and of course the extra Maximum Totem. (Off-hand) Rare Shield - Here we would recommend getting Maximum Mana, Resistances, Energy Shield, Intelligence, and of course the extra Maximum Totem. |
Min. requirements:
+60 to maximum Mana
Intelligence
+1 to Maximum number of Summoned Totems (Shaper's Prefix)
+80% to Elemental Resistances
Optional affixes:
increased Spell Damage
increased Attack Speed
Maximum Energy Shield |
 (Off-hand) Atziri's Reflection - It would be a great choice, but a Rare Shield with its extra Totem is probably still a superior option. It grants tons of Intelligence, Evasion, ES, increases the effect of Curses, and provides you with invaluable Curse "immunity". (Off-hand) Atziri's Reflection - It would be a great choice, but a Rare Shield with its extra Totem is probably still a superior option. It grants tons of Intelligence, Evasion, ES, increases the effect of Curses, and provides you with invaluable Curse "immunity". |
6% increased Movement Speed
+(40-60) to Intelligence
(180-200)% increased Evasion Rating
+(180-200) to maximum Energy Shield
+(20-30)% to all Elemental Resistances
Hex Reflection
Unaffected by Curses
(15-20)% increased Effect of your Curses |
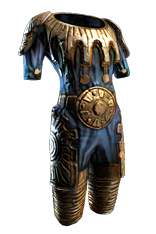 (Body Armour) Rare Body Armour - Get a Body Armour with suitable and basic defences and Maximum Mana/Intelligence, or go for a Hunter's Armour with bonus Crit Chance and extra Curse. Armour with no influence can be improved with Eldritch Implicits like the increased effect of Curses/Auras, Maximum Resistances, Frenzy/Power/Endurance Charges, and increased Armour/ES, increased Wrath Aura Effect, or even Mana/ES Recovery Rate. (Body Armour) Rare Body Armour - Get a Body Armour with suitable and basic defences and Maximum Mana/Intelligence, or go for a Hunter's Armour with bonus Crit Chance and extra Curse. Armour with no influence can be improved with Eldritch Implicits like the increased effect of Curses/Auras, Maximum Resistances, Frenzy/Power/Endurance Charges, and increased Armour/ES, increased Wrath Aura Effect, or even Mana/ES Recovery Rate. |
Min. requirements:
around 600 Energy Shield
+80 to Maximum Mana
Elemental Resistances
Optional affixes:
You can apply an additional Curse (Hunter's Prefix)
increased Intelligence
Intelligence
+# to Spell Critical Strike Chance (Hunter's Suffix) |
 (Body Armour) Incandescent Heart - The defensive option. With Chaos Inoculation it makes you take 25% less Elemental Damage. Its other boons are not that significant. Use it if your Armour or Physical Damage Reduction is high, it can bottleneck your survivability - a lot of damage in this game is of Physical type. (Body Armour) Incandescent Heart - The defensive option. With Chaos Inoculation it makes you take 25% less Elemental Damage. Its other boons are not that significant. Use it if your Armour or Physical Damage Reduction is high, it can bottleneck your survivability - a lot of damage in this game is of Physical type. |
(220-240)% increased Armour and Energy Shield
+(80-90) to maximum Life
(0.8-1)% of Attack Damage Leeched as Life
Gain (10-20)% of Elemental Damage as Extra Chaos Damage
25% of Elemental Damage from Hits taken as Chaos Damage
(20-30)% increased Light Radius
Light Radius is based on Energy Shield instead of Life |
 (Boots) Rare Boots - Here focus on Energy Shield, Mana, Intelligence, and Movement Speed. For Eldritch mods get Action Speed, Resistances, Chance to avoid being Shocked, or chance to avoid any Elemental Ailments. (Boots) Rare Boots - Here focus on Energy Shield, Mana, Intelligence, and Movement Speed. For Eldritch mods get Action Speed, Resistances, Chance to avoid being Shocked, or chance to avoid any Elemental Ailments. |
Min. requirements:
+60 to Maximum Mana
25% increased Movement Speed
Elemental Resistances
Optional affixes:
Intelligence
increased Energy Shield |
 (Gloves) Rare Gloves - The most basic defences with Maximum Mana are the most important. Any Gloves can get you Dexterity so it's a good idea to get it here. For Eldritch mods, get increased Attack Speed, Crit Chance for Attacks, and extra Pierce for Projectiles, or increased effect of Marks. (Gloves) Rare Gloves - The most basic defences with Maximum Mana are the most important. Any Gloves can get you Dexterity so it's a good idea to get it here. For Eldritch mods, get increased Attack Speed, Crit Chance for Attacks, and extra Pierce for Projectiles, or increased effect of Marks. |
Min. requirements:
+60 to maximum Mana
+80% to Elemental Resistances
increased Energy Shield
Optional affixes:
Attributes
Armour
increased Attack Speed
Intelligence |
 (Gloves) Breathstealer - These may seem like a weak option at first glance, but we believe that the additional Anoint and a good Corrupted Implicit (like Attacks have +#% to Critical Strike Chance, Curse Enemies with Elemental Weakness on Hit, increased Attack Speed, or increased maximum Energy Shield) can make it an excellent addition. (Gloves) Breathstealer - These may seem like a weak option at first glance, but we believe that the additional Anoint and a good Corrupted Implicit (like Attacks have +#% to Critical Strike Chance, Curse Enemies with Elemental Weakness on Hit, increased Attack Speed, or increased maximum Energy Shield) can make it an excellent addition. |
(100-150)% increased Armour and Evasion
+(30-50) to maximum Mana
+(10-16)% to all Elemental Resistances
(5-10)% increased Attack and Cast Speed
Create a Blighted Spore when your Skills or Minions Kill a Rare Monster |
 (Belt) Rare Belt - Belts can easily roll Strength so get it here. Maximum Mana, Energy Shield, and increased Elemental Damage with Attack are your other priorities. Armour and Life Regeneration can be gained here as well. (Belt) Rare Belt - Belts can easily roll Strength so get it here. Maximum Mana, Energy Shield, and increased Elemental Damage with Attack are your other priorities. Armour and Life Regeneration can be gained here as well. |
Min. requirements:
+50 to Maximum Mana
+50 to Strength
Optional affixes:
Armour
Elemental Resistances
Life Regeneration
increased Elemental Damage with Attacks |
 (Amulet) Atziri's Foible - This Amulet is used for its Mana, Mana Regeneration, and reduced Attribute Requirements - all of these are very useful in this build. Heavily recommended. (Amulet) Atziri's Foible - This Amulet is used for its Mana, Mana Regeneration, and reduced Attribute Requirements - all of these are very useful in this build. Heavily recommended. |
(20-30)% increased Mana Regeneration Rate
+100 to maximum Mana
(16-24)% increased maximum Mana
(80-100)% increased Mana Regeneration Rate
Items and Gems have 25% reduced Attribute Requirements |
 (Amulet) The Eternal Struggle - This Amulet has a lot of Attributes, and it increases your ES & Armour. Try to get one with a stronger Eater mod - you already have Culling Strike. (Amulet) The Eternal Struggle - This Amulet has a lot of Attributes, and it increases your ES & Armour. Try to get one with a stronger Eater mod - you already have Culling Strike. |
<<Random Searing Exarch implicit>>
<<Random Eater of Worlds implicit>>
+(20-50) to Strength
+(20-50) to Dexterity
+(20-50) to Intelligence
(10-15)% increased Global Defences
Critical Strikes inflict Malignant Madness if The Eater of Worlds is dominant
Kill Enemies that have 15% or lower Life on Hit if The Searing Exarch is dominant |
 (Amulet) Stranglegasp - There are a lot of extremely powerful notables on a tree that you simply cannot access. Use Stranglegasp to get them. It's a good option if you don't struggle with Mana Regeneration or Attributes. (Amulet) Stranglegasp - There are a lot of extremely powerful notables on a tree that you simply cannot access. Use Stranglegasp to get them. It's a good option if you don't struggle with Mana Regeneration or Attributes. |
+(10-16) to all Attributes
Can have 3 additional Enchantment Modifiers |
Recommended Anointments:
Surveillance
Watchtowers
Ironwood
Panopticon
Arcing Blows |
 (Ring) Rare Ring - Rings should be a source of mostly Attributes. Resistances, Maximum Mana, and other stats which are listed here, are great and can resolve a lot of issues you may have encountered. (Ring) Rare Ring - Rings should be a source of mostly Attributes. Resistances, Maximum Mana, and other stats which are listed here, are great and can resolve a lot of issues you may have encountered. |
Min. requirements:
+50 to maximum Mana
Attributes
20% increased Elemental Damage with Attack Skills
Optional affixes:
maximum Energy Shield
increased Attack Speed
increased Mana Regeneration Rate
Life Regeneration
Non-Channelling Skills have -7 to Total Mana Cost (crafted Prefix) |
 (Ring) Anathema - You should be able to apply 3 Curses. Anathema lets you apply even 4 if you have a convenient way of casting them. It shouldn't be needed if you allocated Whispers of Doom, and have a specific mod on a Rare Body Armour. (Ring) Anathema - You should be able to apply 3 Curses. Anathema lets you apply even 4 if you have a convenient way of casting them. It shouldn't be needed if you allocated Whispers of Doom, and have a specific mod on a Rare Body Armour. |
+(15-25) to maximum Energy Shield
+(30-40) to Intelligence
(10-15)% increased Cast Speed
(10-20)% chance to gain a Power Charge when you Cast a Curse Spell
Your Curse Limit is equal to your maximum Power Charges |
 (Jewel) Rare Jewels - Maximum Mana, ES, and Critical Strike mods are the most valuable, but if you lack any other necessary stats you can easily get them here too. (Jewel) Rare Jewels - Maximum Mana, ES, and Critical Strike mods are the most valuable, but if you lack any other necessary stats you can easily get them here too. |
Recommended affixes:
increased Maximum Mana
increased Maximum Energy Shield
increased Attack Speed
Critical Strike mods
Attributes
Resistances |
 (Jewel) Large Cluster Jewel - You can get one or two of these Lightning Damage Large Cluster Jewels, mostly because of the immense power of Scintillating Idea notable. (Jewel) Large Cluster Jewel - You can get one or two of these Lightning Damage Large Cluster Jewels, mostly because of the immense power of Scintillating Idea notable. |
Recommended affixes:
1 Added Passive Skill is Scintillating Idea
1 Added Passive Skill is Widespread Destruction
1 Added Passive Skill is Prismatic Heart
1 Added Passive Skill is Storm Drinker |
 (Jewel) Medium Cluster Jewel - Totem or Critical Strike-themed Medium Cluster Jewels should be fine. Get one Sleepless Sentries for sure - it grants you Onslaught. (Jewel) Medium Cluster Jewel - Totem or Critical Strike-themed Medium Cluster Jewels should be fine. Get one Sleepless Sentries for sure - it grants you Onslaught. |
Recommended affixes:
1 Added Passive Skill is Sleepless Sentries
1 Added Passive Skill is Ancestral Echo
1 Added Passive Skill is Snaring Spirits
1 Added Passive Skill is Basics of Pain
1 Added Passive Skill is Pressure Points |
 (Jewel) Small Cluster Jewel - Scintillating Idea is so good that you can invest in Small Cluster Jewels to get more of them. You can also save some Skill Points if you happen to have it on a good Megalomaniac. (Jewel) Small Cluster Jewel - Scintillating Idea is so good that you can invest in Small Cluster Jewels to get more of them. You can also save some Skill Points if you happen to have it on a good Megalomaniac. |
Recommended affixes:
1 Added Passive Skill is Scintillating Idea |
 (Jewel) Healthy Mind - This one can be socketed near Cruel Preparation or Quick Recovery to gain a lot of extra Mana. (Jewel) Healthy Mind - This one can be socketed near Cruel Preparation or Quick Recovery to gain a lot of extra Mana. |
(15-20)% increased maximum Mana
Increases and Reductions to Life in Radius are Transformed to apply to Mana at 200% of their value
Corrupted |
 (Jewel) Lethal Pride - Use it only if you struggle with Strength - it can be socketed near Instability. It's a very efficient way of gaining this Attribute. (Jewel) Lethal Pride - Use it only if you struggle with Strength - it can be socketed near Instability. It's a very efficient way of gaining this Attribute. |
Commanded leadership over (10000-18000) warriors under Rakiata
Passives in radius are Conquered by the Karui
Historic |
 (Jewel) Watcher's Eye - Wrath's Lightning Penetration and Extra Energy Shield sourced from Mana as Clarity mod are the best. Your other Autas are Determination, Precision, and Vitality. (Jewel) Watcher's Eye - Wrath's Lightning Penetration and Extra Energy Shield sourced from Mana as Clarity mod are the best. Your other Autas are Determination, Precision, and Vitality. |
(4-6)% increased maximum Energy Shield
(4-6)% increased maximum Life
(4-6)% increased maximum Mana
<Two or Three random aura modifiers> |
 (Flask) Bottled Faith - You may need an extra Critical Strike Chance from this Flask. It also increases your overall damage during boss fights. (Flask) Bottled Faith - You may need an extra Critical Strike Chance from this Flask. It also increases your overall damage during boss fights. |
40% increased Damage
Creates Consecrated Ground on Use
(30-15)% reduced Duration
Consecrated Ground created by this Flask has Tripled Radius
Consecrated Ground created during Effect applies (7-10)% increased Damage taken to Enemies
(100-150)% increased Critical Strike Chance against Enemies on Consecrated Ground during Effect |
|
Other suggested Flasks:
- Basalt Flask with reduced Curse Effect on you
- Quicksilver Flask with reduced Curse Effect on you
- Diamond Flask with increased Critical Strike Chance
- Granite Flask with increased Armour
- Silver Flask (not needed with Sleepless Sentries) with increased Attack Speed
|
    |


 Pierce Support for mapping.


 PCoC if you have a chance.


