Hollow Palm
Invoker Build
Updated for Path of Exile 2 Early Access
The Best Crafty Guides by Odealo
| Guide notes |
September 7, 2025
- Created for Early Access. |
| Build Overview |
| Tags: [ATTACK] [ELEMENTAL] [HYBRID] |
|
Budget:
Defenses:
|


|
Boss DPS:
AoE:
|
|
The Hollow Palm Technique Keystone allows you to use Quarterstaff Skills with no Weapon Equipped. You will gain flat Physical Damage depending on the Skill Gem Level, Attack Speed per Evasion, and base Critical Strike Chance per Energy Shield on all your Armour pieces. This Setup can work with any Skill. In this Guide, we will focus on the Ice Strike and Shattering Palm combo, but it is very easy to adjust for more Lightning or Physical-themed Skills. Both Ice Strike and Shattering Palm teleports you to your target when striking, providing excellent mobility and fast-paced combat. The Shattering Palm also releases an expanding ring of cold that attaches crystals to nearby Enemies, which can be shattered to deal AoE Damage. It will be your main Clearing ability. For tougher Enemies, you will use the Ice Strike combo, further supplemented by the usual Tempest Bell and Charged Staff Skills.
This Keystone can be combined with multiple Ascendencies. We have chosen the Invoker for the massive amount of Spirit, ignoring the Elemental Resistances with Critical Strikes, and one unique Skill depending on your preferences: Meditate to quickly refill your Energy Shield or Unbound Avatar for a short but powerful Buff that greatly amplifies your Damage.
The biggest advantages of this Keystone are the elimination of the need for a weapon, which is often expensive, and the ability to scale your offensive stats through your defensive stats. You can comfortably get enough damage to take down end-game bosses this way. It also allows for much higher base Critical Strike Chance than a regular Weapon, which is one of the most effective ways of improving your Damage currently. Scaling Gem Levels comes with a disadvantage of high Mana Costs, but it can now be very simply solved with the Walker of the Wilds Keystone, which allows you to Leech Mana with Elemental Damage.
You can also check our other Path of Exile 2 builds right over here Odealo's Crafty Guides - Full List
1. Gameplay
Ice Strike is your primary damaging ability. If you spot a pack of enemies, you may dash into them with Shattering Palm to slay them much faster. Charge up your weapon with Charged Staff and place down the Tempest Bell for a big damage boost. Herald of Ice, Wind Dancer, Ghost Dance, and Combat Frenzy are your passive skills. With enough Spirit, you may upgrade them with Support Gems that cost Spirit, or include Herald of Thunder.
|
 
Odealo is a secure trading platform for MMO gamers. Here you can buy, sell, and trade PoE 2 Currency for real cash.
|
2. Build's PROS & CONS
| PROS |
- Good damage with high defences from gear
- Excellent clear speed with enough Freeze buildup
- Can be assembled only from rare items and doesn't need a weapon
|
| CONS |
- short range
- requires good items to do substantial damage
|
3. Leveling tips
Allocate Hollow Palm Technique as soon as possible; it grants much higher Damage than the vast majority of Rare Weapons you will find on your way, but you have to remember to upgrade your Skill Gem Levels. At first, you should skip Critical Strike Notables - it scales very poorly with low-level Items. Instead, pick the simple Notables that boost your generic Attack or Elemental Damage.
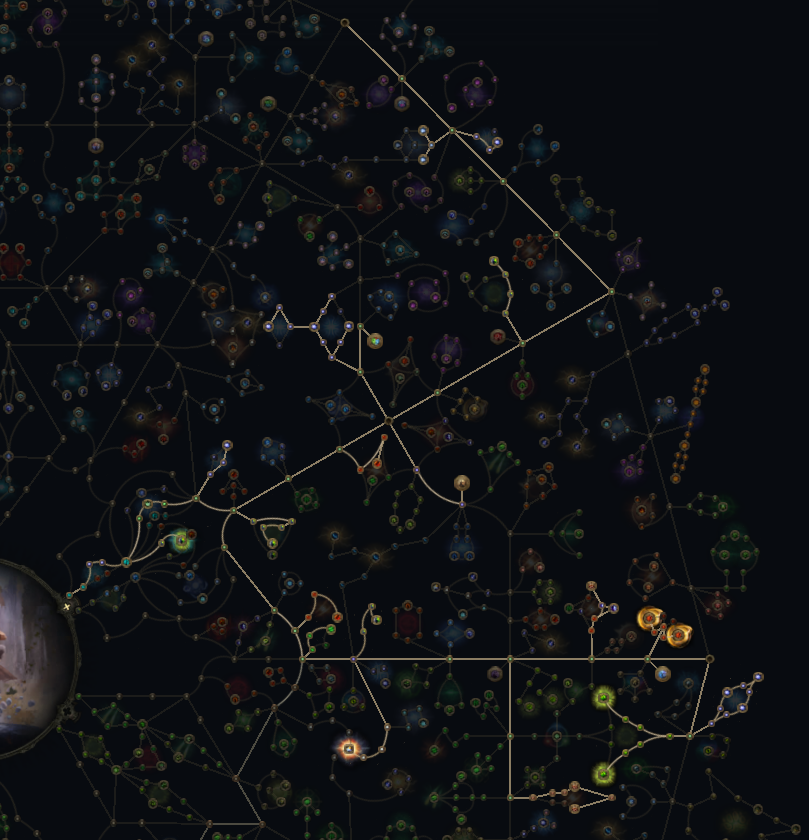
4. Final Skill Tree, Ascendancy Points, and Pantheon
Final Skill Tree:
|
|
Click on the image to open the Passive Tree preview in a new window
Or import the build into PoB:
Path of Building 2 code
|
Ascendancy points:
Preferably in this order:
- I am the Thunder
- Lead me through Grace
- Sunder my Enemies
- ...And I Shall Rage/Faith is a Choice
5. Final Gems links
| [DPS] Ice Strike setup |
 |
Ice Strike - Your primary damaging ability. Deals Converted Cold Damage with an ability to perform a powerful third strike. |
 |
Rapid Attacks II - later replaced by Blindside. |
 |
Elemental Armament II |
 |
Close Combat II |
 |
Rage III |
 |
Crescendo II |
| [UTILITY] Tempest Bell setup |
 |
Tempest Bell - You can Hit it to create a shockwave. It deals partially converted Elemental Damage. Free DPS on bosses and rares, but requires Combo to use. |
 |
Close Combat II |
 |
Heavy Swing |
 |
Rageforged II |
 |
Overabundance II |
 |
Magnified Area I |
| [UTILITY] Herald of Ice setup |
 |
Herald of Ice - Shattered enemies explode on kill. That improves your clear speed. |
|
Elemental Armament II |
 |
Overreach |
 |
Cold Mastery |
 |
Ambush |
 |
Deadly Herald |
| [UTILITY] Herald of Thunder setup |
 |
Herald of Thunder - killing Shocked Enemies causes your next few Attacks to trigger a Lightning Bolt, further improving your Clear Speed. |
|
Elemental Armament II |
|
Overreach |
 |
Lightning Mastery |
|
Ambush |
|
Deadly Herald |
| [UTILITY] Charged Staff setup |
 |
Charged Staff - Additional Lightning Damage and powerful Shockwaves for all your Attacks. It adds more damage and lasts longer the more Power Charges it has consumed. |
 |
Prolonged Duration II |
 |
Perpetual Charge II |
 |
Innervate |
 |
Shock/Blind |
|
Elemental Armament II |
| [UTILITY] Shattering Palm setup |
 |
Shattering Palm - Dash into a pack of enemies with this skill to attach Shards to them. These shards will explode, initiating a chain reaction with Herald of Ice. |
|
Elemental Armament II |
|
Magnified Area I |
|
Ambush |
 |
Ice Bite |
 |
Ancestral Call II |
| [UTILITY] Combat Frenzy setup |
 |
Combat Frenzy - Will grant you a Power Charge (after allocating the Resonance Keystone) when you Freeze or Shock. |
 |
Charge Profusion II |
| [UTILITY] Wind Dancer setup |
 |
Wind Dancer - More Evasion Rating until you get Hit; it then creates a shockwave around you. |
 |
Blind II |
|
Magnified Area I |
|
Heavy Swing |
 |
Life Leech III |
| [UTILITY] Ghost Dance setup |
 |
Ghost Dance - generates Ghost Shrouds over time. Upon getting Hit, you will consume them to recover ES based on your Evasion. |
 |
Compressed Duration II |
 |
Warm Blooded |
 |
Cannibalism I |
|
On Odealo dozens of sellers compete for your attention. Buying PoE Currency here guarantees the best prices, prompt delivery, and the best quality of service.
|
6. Gear Setup
Most of your gear pieces should have high Evasion and Energy Shield since that's how you scale up the damage. It's a hybrid build; Maximum Life is somewhat important, although not as much as ES. You should include it on pieces where it doesn't compete with ES, such as Rings or Belt. For offence, seek added Elemental Damage, Attack Speed, and Critical Strike modifiers. The more ES you have on your Gear, the more the Critical Damage Bonus becomes powerful. Gem Levels are also crucial. Remember to cap your Resistances. You can try including some Deflection Rate as well, but such pieces can be insanely expensive. You will also need one Gear piece with Mana Leech.
|
Stat priorities on items:
- Gem Level of relevant Gems
- ES and Evasion
- Resistances
- Added Elemental Damage to Attacks
- Critical Hit Chance or Critical Damage
- Maximum Life
|
 (Helmet) Rare Helmet - a pure Energy Shield Helmet is the best here, it will still grant you tons of Evasion thanks to the Subterfuge Mask Notable. It will require a lot of extra Intelligence to wear, so you might still choose the hybrid piece at first. (Helmet) Rare Helmet - a pure Energy Shield Helmet is the best here, it will still grant you tons of Evasion thanks to the Subterfuge Mask Notable. It will require a lot of extra Intelligence to wear, so you might still choose the hybrid piece at first. |
Min. requirements:
+400 to Maximum Energy Shield
+40% total Elemental and Chaos Resistance
Optional affixes:
% increased Critical Hit Chance
Attributes |
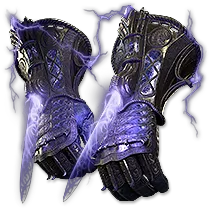
 (Gloves) Rare Gloves - Gloves can grant you tons of Damage via Gem Levels, Attack Speed, Critical Damage Bonus, and Added Elemental Damage. They can also provide Mana Leech. (Gloves) Rare Gloves - Gloves can grant you tons of Damage via Gem Levels, Attack Speed, Critical Damage Bonus, and Added Elemental Damage. They can also provide Mana Leech. |
Min. requirements:
+2 to Level of all Melee Skills
Optional affixes:
Evasion and Energy Shield
Elemental and Chaos Resistance
+% increased Attack Speed
% increased Critical Damage Bonus
Adds # Elemental Damage to Attacks
Leech #% of Physical Attack Damage as Mana |
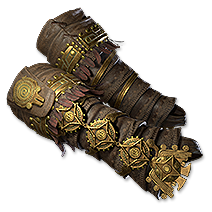
 (Gloves) Thunderfist - Crackling Palm is an automatic Skill that Triggers on Unarmed Melee Attack. It adds a lot of Damage, but requires good rolls on its modifiers. (Gloves) Thunderfist - Crackling Palm is an automatic Skill that Triggers on Unarmed Melee Attack. It adds a lot of Damage, but requires good rolls on its modifiers. |
Grants Skill: Crackling Palm
(1–111)% increased Evasion and Energy Shield
(1–11)% increased Attack Speed
+(1–33)% to Lightning Resistance
Adds 1 to (77–111) Lightning Damage to Unarmed Melee Hits
+(0.1–1.1)% to Unarmed Melee Attack Critical Hit Chance |
 (Boots) Rare Boots - Here, again, get Evasion, Energy Shield, and Movement Speed since mobility is important. Remember that Energy Shield and Evasion contribute to Damage, too. (Boots) Rare Boots - Here, again, get Evasion, Energy Shield, and Movement Speed since mobility is important. Remember that Energy Shield and Evasion contribute to Damage, too. |
Min. requirements:
30% increased Movement Speed
+70% total Elemental and Chaos Resistance
Optional affixes:
Evasion and Energy Shield
Maximum Life
Deflection Rating |
 (Amulet) Rare Amulet - provides additional Gem Levels, Critical Strikes, but also a lot of defense via Energy Shield, maximum Life, and Resistances. (Amulet) Rare Amulet - provides additional Gem Levels, Critical Strikes, but also a lot of defense via Energy Shield, maximum Life, and Resistances. |
Min. requirements:
+2 to Level of all Melee Skills
Optional affixes:
Attributes
% increased Critical Hit Chance
% increased Critical Damage Bonus
Maximum Energy Shield
Elemental and Chaos Resistance
Maximum Life |
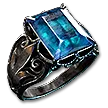 (Ring) Rare Ring - Rings can add a lot of flat Elemental Damage to your Attacks. Try to get at least one modifier that grants Fire Damage. It should also boost your Maximum Life, Attributes, and Resistances. (Ring) Rare Ring - Rings can add a lot of flat Elemental Damage to your Attacks. Try to get at least one modifier that grants Fire Damage. It should also boost your Maximum Life, Attributes, and Resistances. |
Min. requirements:
+50% total Elemental and Chaos Resistance
Adds 30 Elemental Damage to Attacks
+60 to Maximum Life
Optional affixes:
Attributes
Leech #% of Physical Attack Damage as Mana |
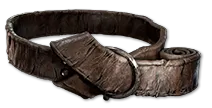 (Belt) Rare Belt - Belt can be a great source of Strength, Maximum Life, and Resistances. Try to get a lot of these modifiers. (Belt) Rare Belt - Belt can be a great source of Strength, Maximum Life, and Resistances. Try to get a lot of these modifiers. |
Min. requirements:
+150 to Maximum Life
+80% total Elemental and Chaos Resistance
Optional affixes:
Charm or Flask modifiers
Maximum Mana
Strength |
 (Body Armour) Rare Body Armour - It's the most potent source of Evasion and Energy Shield. In addition to that, Resistances, Maximum Life, or Deflection can be obtained here too, but it raises the prices accordingly. (Body Armour) Rare Body Armour - It's the most potent source of Evasion and Energy Shield. In addition to that, Resistances, Maximum Life, or Deflection can be obtained here too, but it raises the prices accordingly. |
Min. requirements:
+450 to Maximum Energy Shield
+1000 to Evasion Rating
Optional affixes:
Elemental and Chaos Resistance
Maximum Life
Deflection Rating |
 (Jewel) Rare Jewels - aim for Jewels that improve your Energy Shield and Critical Strikes or Attack Speed. Recovering Life and Mana on Kill is also useful. (Jewel) Rare Jewels - aim for Jewels that improve your Energy Shield and Critical Strikes or Attack Speed. Recovering Life and Mana on Kill is also useful. |
Optional affixes:
% increased Elemental/Attack Damage
% increased maximum Energy Shield
% increased Critical Hit Chance
% increased Critical Damage Bonus
% faster start of Energy Shield Recharge
Life or Mana Recovery on Kill |
 (Jewel) Prism of Belief - Extra Levels for Ice Strike from Prims of Belief will improve your damage by a lot. (Jewel) Prism of Belief - Extra Levels for Ice Strike from Prims of Belief will improve your damage by a lot. |
| +(1-3) to Level of all <Random skill> Skills |
 (Jewel) Against the Darkness - this Jewel can grant you tons of Extra Cold or Lightning Damage. It can also greatly reduce the Duration of dangerous Ailments on you. (Jewel) Against the Darkness - this Jewel can grant you tons of Extra Cold or Lightning Damage. It can also greatly reduce the Duration of dangerous Ailments on you. |
<2 Random Jewel Modifiers>
Recommended modifiers:
Notable Passive Skills in Radius also grant Gain (2-4)% of Damage as Extra Cold Damage
Small Passive Skills in Radius also grant (4-6)% reduced Freeze Duration on you |
|
Odealo is one of the biggest Path of Exile marketplaces. It allows regular players to buy, sell, and trade PoE Currency with the use of real cash
|
If you have any other build requests please leave that in the comments below. We are always open to suggestions and constructive feedback.
Pictures used in this article are the intellectual property of Grinding Gear Games.