
Wilt Youga Shadow Swamp Torchlight Infinite Build
Versatile Youga build oriented on quickly stacking Erosion for massive DPSWilt Youga Shadow Swamp Build
Last Updated: 09 December 2022
Build Overview
Wilt is an Ailment, that deals high Erosion Damage per second, which can be stacked indefinitely. It is exceptionally powerful when combined with Reap effects as Reap allows you to deal a portion of DoT's damage instantly. The following Youga build uses the above-described mechanics to its full advantage by focusing on applying as many Wilt stacks as possible and Reaping them to achieve astronomic levels of DPS. It does that by combining Shadow Shot with Shadow Swamp as these two skills are perfect for Wilt-based builds. Reap comes mainly from gear.
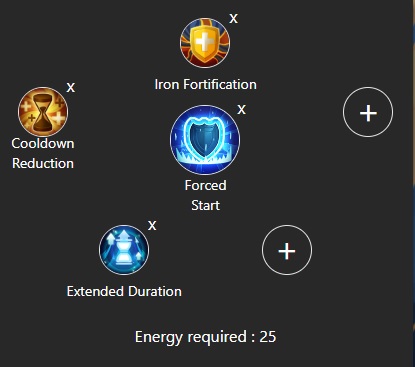
For Defenses, this build relies on a powerful Energy Shield supported by the Forced Start Skill. When coupled with reasonable levels of Resistances, the featured setup offers a comfortable level of survivability that should be enough to farm Tier 8s relatively easily. Mobility needs are taken care of by Spiral Strike upgraded with Quick Mobility.
You can also check our other Torchlight Infinite builds at The Best Torchlight Infinite character Builds
 Pros Pros |
| Great DPS, and solid AoE |
| Good Defenses with powerful Energy Shields |
| Decent Mobility |
 Cons Cons |
| Expensive to Build - requires many Legendaries and high-cost crafts |
| Not viable as a starter build |
Talents
|
GODDESS OF DARKNESS |
|
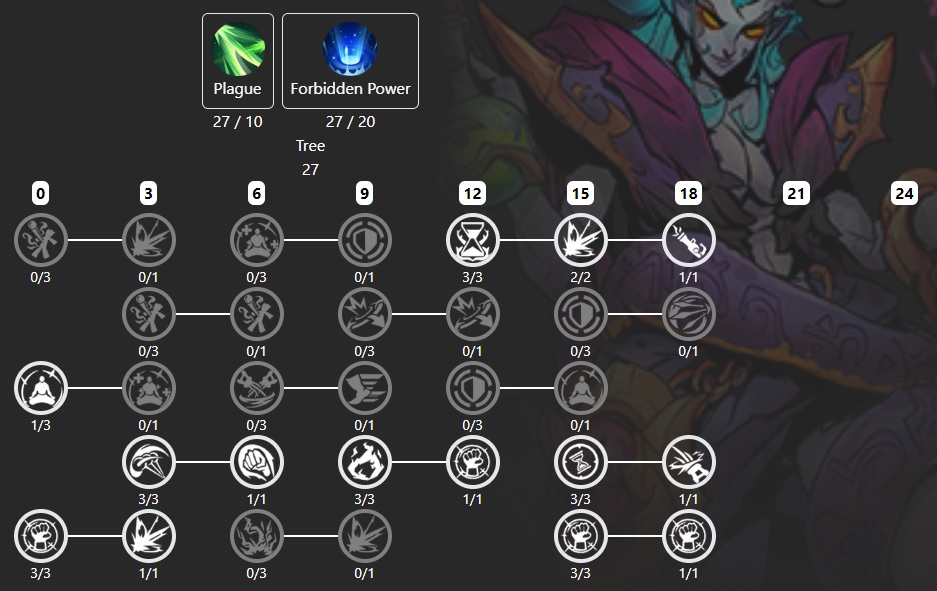
We choose Goddess of Darkness Tree because of the Plague Talent that it offers. With it, the build becomes much stronger against packs of enemies and thus its overall clear speed becomes even better. We also take full advantage of the Wilt Damage and Erosion Damage bonuses offered by it. Core Passives: 20% extra Wilt Damage and 96% extra Erosion Damage are too hard to pass up as they complement our build very nicely. Gaining Blur per 5 stacks of Wilt Inflicted is also a great addition to our build. Attack and Cast Speed is always good and an Injury Buffer is a nice addition to our defenses. Main Talents: Plague: 40% Chance for DoTs to Spread to Nearby Targets. +80% Persistent Damage Duration. This makes our DoTs spread like a disease and makes them last 80% longer, which is amazing. Thanks to this Talent, hitting a pack of mobs once is enough to apply DoTs to all enemies within that pack. Forbidden Power: +35% Additional Erosion Damage. Cannot Regenerate Life. If you have Forbidden Power on your Infinity, pick Subtle Impact instead. |
|
SOULBENDER |
|
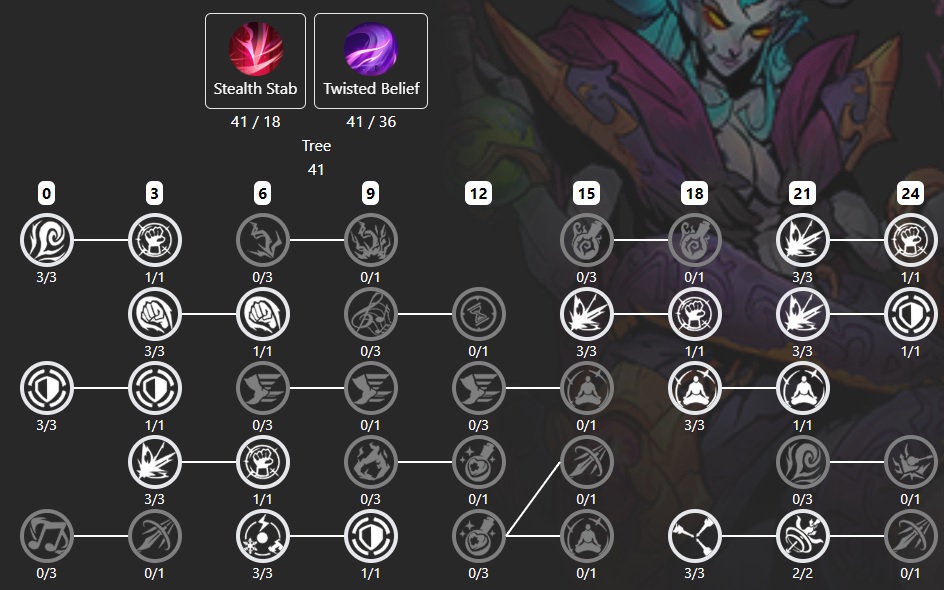
This Passive Tree is great for increasing our DPS and it also offers some extra Defenses, which makes it a great all-around pick. Stealth Stab works exceptionally well in this build and +3 Skill Levels are simply amazing. As for passive effects offered by Soulbender, they are almost ideal as we can get tons of Erosion Damage from them. Core Passives: We get +150% Erosion Damage from here, which is amazing. When we combine that with the +60% Damage, +36% Wilt Damage, and a conversion effect that turns 50% of our Physical Damage into Erosion Damage, we simply fall in love with this Passive Tree. Oh, and our Erosion Damage will be increased by yet another 50% when we're on Low Health. Main Talents: Stealth Stab: -20% Additional Damage Taken While Blur is Active. +20% Additional Damage for 3 Seconds after Blur Ends. This is amazing when combined with the Talent that gives us Blur which we've taken from the Goddess of Darkness tree. Twisted Belief: +3 Erosion Skill Level. -3 Elemental Skill Level. This basically offers +3 Skill Levels for free! |
|
PSYCHIC |
|
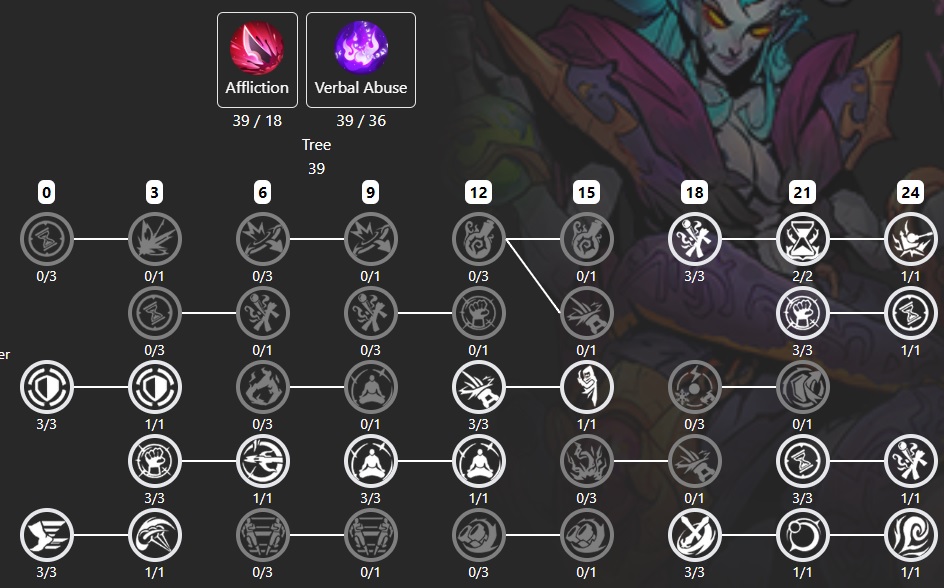
Psychic Tree is great for increasing the build's DPS, as the Affliction Talent synergizes extremely well with our toolkit. Verbal Abuse is also very powerful as the ability to cast an extra curse is a real game-changer. Core Passives: Ailment Duration and Damage are both very good to have on this build, and thus we take +36% and +36% respectively (Ailment Duration is especially good as it turns into a Damage Multiplier when combined with Reap effects we stack on our gear). Reap Duration also fits the build very nicely and the increased Curse Effect is a must-have, really. Other than that, Maximum Energy Shield is great for increasing our defenses, and Attack and Cast Speed is an auto-pick for every build pretty much. Main Talents: Affliction: +10 Affliction Inflicted Per Second. +75% Affliction Effect. This is great for increasing our Damage as we rely on Affliction (and thus increasing it, especially with percentage-based modifiers like this one, is a good idea). Verbal Abuse: You can cast an extra Curse. +15% Curse Effect. This is a very powerful effect for this build. |
|
HERO TRAITS |
|
SKILLS
| ACTIVE SKILLS |
|
Fire a Projectile that travels forward and explodes on Hit, with a 10% chance to pull enemies in. The projectile moves the existing Shadow Swamp to the target hit. Each move refreshes the Shadow Swamp's Duration and increases its Radius and Damage. This is our main offensive Skill. We've optimized it for dealing as much damage as possible. You can move your Shadow Swamps with it. Support Skills:
|
|
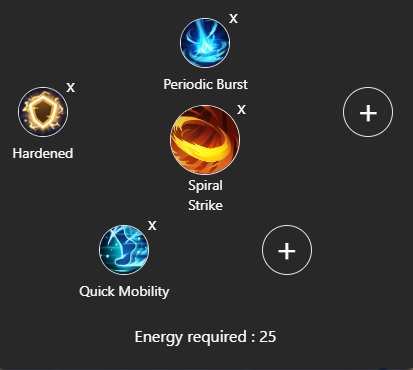
Dash Forward and deal Damage to multiple enemies. The higher your Attack Speed, the more times this Skill Hits enemies. This is our mobility Skill, but it also deals quite solid Erosion Damage and has an increased chance to Wilt our enemies. Support Skills:
|
|
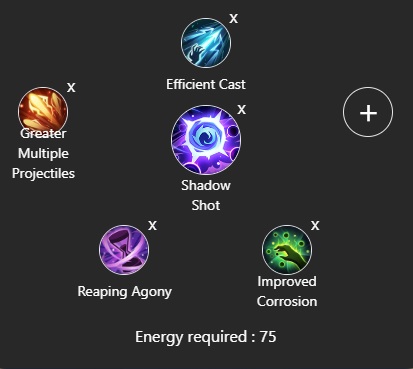
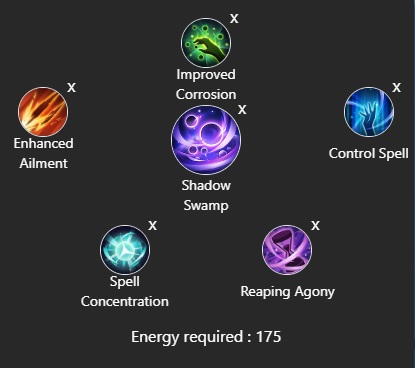
Conjure a Shadow Swamp, that deals Damage over Time and Weakens enemies, at the Target Location. Shadow Swamp can be moved with Shadow Shot. Moving Shadow Swamp increases its Damage and Radius. Shadow Swamp will also cause an Explosion when Used or Moved. If Terra Charge is present when Shadow Swamp is used, it will be consumed to increase the upper limit of Shadow Swamp's bonuses. This is our second offensive Skill. With it, we can apply a lot of Wilt Stacks. Just keep in mind that it has an internal Cooldown for applying Wilt Stacks, so you will want to Spam it to apply Wilt quicker. Support Skills:
|
|
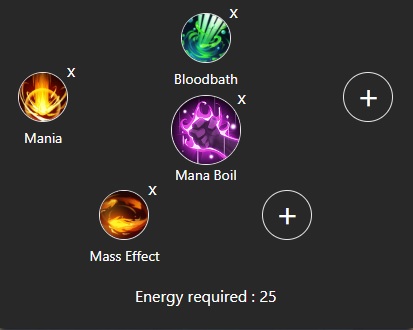
When Activated, this Skill consumes a large amount of Mana over Time (5%) to increase your Spell Damage. It deactivates automatically when you run out of Mana. This is a solid support skill that allows us to trade our Mana for DPS. If you can't manage to keep going with this active, you can switch it to Secret Origin Unleash or Aim. Support Skills:
|
|
Immediately start Charging Energy Shield. Shield Charging Speed is increased in the Skill Duration. We rely on our Energy Shield for defenses, so this is a mandatory defensive pick. Support Skills:
|
| AURAS & PASSIVE SKILLS |
|
Increases Mana Restoration for you and your nearby Allies. This is great for keeping the damage up when you have Mana Boil active. Support Skills:
|
|
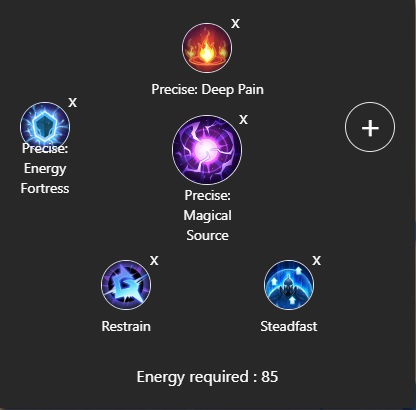
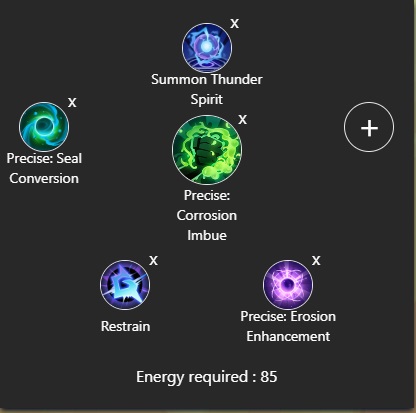
Under this Imbue, Attacks and Spells gain more Erosion Damage with a higher chance to Wilt Enemies. Hitting a Wilt enemy has a chance to create a spore at its feet. The Spore breaks after a short period of time and damages enemies within a certain range, reducing their Erosion Resistance. This is a perfect Aura for this build as it improves our Erosion Damage and Wilt effects. Support Skills:
|
|
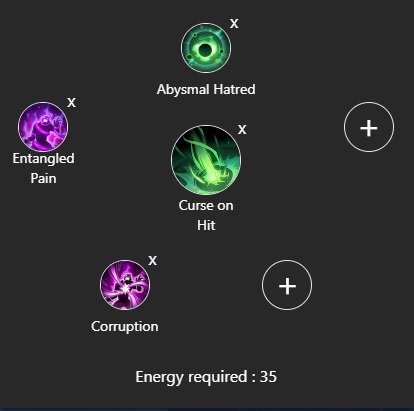
Casts 1 linked Curse on Enemies hit by the Main Skill. Curses applied this way have greatly decreased effects and duration, but increased radius. This is a staple of Erosion Damage builds. Support Skills:
|
EQUIPMENT
| STAT PRIORITY | ||||||||||
|
With this build, you want to focus on some very specific stats. These include "Reaps X seconds of DoT on Hit", and "Adds x% of the Skill's Damage to Base Wilt Damage" which are available on Gloves and Sacrificial Blades respectively. Reaps X seconds of DoT on Hit is also found on some Legendary Items (see Legendary Recommendations for those). As for Defenses, you want to focus on Energy Shield as it's your primary mean of survival. Taking care of Resistances is also extremely important, as always.
|
||||||||||
| CORE MODS | ||||||||||
|
||||||||||
| LEGENDARY ITEMS | ||||||||||
Infinity with "Reaps X s of DoT on Hit", Erosion Resistance, Affliction Effect, and Subtle Impact is a perfect Belt for this build.
Twilight Vestment is the optimal choice for this build as it offers the "When Reaping, Energy Shield starts charging immediately" effect which ensures that our Energy Shield is refilling constantly. It also makes our Shields much stronger all around and increases our persistent skill levels by 1.
We pick King's Boon because of the "Reaps 1 s of the DoT when dealing DoT" effect that has a considerable effect on our DPS. 40% extra DoT is also great and up to +400% Gear Energy Shield is a solid defensive mod.
This amazing Legendary Necklace offers a very high boost to Wilt and Erosion damage, which is perfect for our build. Ideally, you want this to be corroded with "Reaps 1 s of DoT when hitting Weakened enemies".
This amazing Sacrificial Blade is a staple of any Wilt-based build and some come as far as using two at once. In our case, a single Memory is enough. It adds tons of Base Wilt Damage and makes Wilt Targets explode on death. |


|
END NOTE This is the beta version of our Wilt Youga Build for Torchlight Infinite. It is one of the most powerful builds in the entire game but requires some expensive items. If you're looking for a highly capable build to spend your currency on, it's exactly what you need. As the game gets new content updates, we will be updating this guide regularly, though it may be impossible to be done after each Patch. |
Pictures used in this article are the intellectual property of XD Inc.