Death Aura Occultist
Death Aura Occultist spreads Chaos DoT and explosions, with Decay scaling for strong single-target and smooth map clearingDeath Aura
Occultist build
Updated for Patch 3.28
The Best Crafty Guides by Odealo
| Guide notes |
| April 2, 2026 -Build Updated for Patch 3.28 - added support for the Sundered Will Rings and Decay setup for a significant damage boost; drastically increased the build's AoE |
| Build overview | |||
| Tags: [CHAOS] [DOT] [LIFE] | |||
|
Budget: Defenses: |
|
Boss DPS: AoE: |
|
Death Aura from Death's Oath Unique Armour is a very unique ability - an Aura that deals damage, and we can scale up its damage with the Aura Effect stat directly. The Sundered Will will be the most important tool to increase the damage of this Gemless Skill. We're using the Foulborn variant of the chest for the increased Effect of Withered. Death Aura is a skill very similar to Righteous Fire; it creates a damaging field around your character that deals DoT to surrounding enemies. It makes you take quite a lot of Chaos Damage as you kill enemies, so naturally, you will need to invest in Chaos Resistance heavily. The simple way is to take Chaos Inoculation, but it's inefficient. The more common approach is to accumulate a lot of Chaos Resistance and Maximum Chaos Resistance from items and the Skill Tree. Your Final Chaos Resistance should be between 80% and 90%.
It's a Life build with a high Chance to Block and some Armour. Your Life in the later stage of the game reaches 5k. Withering Step, Curses, Cluster Jewels, Life Regeneration, and high Chaos Resistance provide you with a lot of survivability. Occultist Ascendancy is undoubtedly the most preferable: Void Beacon and Withering Presence are practically made for this build, Profane Bloom will immensely help with clearing maps, and combined with Unholy Authority, it leaves little room for counterplay for the enemies. If you played Toxic Rain or a similar build previously, you will have no problems getting used to this one; you can even reuse a lot of items, especially Cluster Jewels, which are really important. The most important offensive stats are Chaos Damage over Time.
In the latest update, we have included a high-level Decay Support with Stormburst to greatly improve single-target damage, but that's an optional and aspirational addition. We have expanded the selection of items and updated the build as a whole.
You can also check our other Path of Exile builds right over here Odealo's Crafty Guides - Full List
1. Gameplay
The gameplay consists mostly of running into a pack of monsters and killing them instantly via Death Aura, combined with Profane Bloom, which causes an explosive chain reaction. Stormburst will inflict Decay to boost single-target damage. Whitening Step is one of the mandatory Skills as well - it not only grants Phasing and Elusiveness but also applies a few stacks of a debuff that makes opponents take more Chaos Damage. Dash or Flame Dash are used as a mobility skill to quickly dodge attacks. All the Curses will be cast as Auras via Blasphemy Support. The passive skills are Malevolence, Tempest Shield, and Herald of Ash. Immortal Call is automated.
|
|
|
|

2. Build's PROS & CONS
| PROS |
|
| CONS |
|
3. Leveling tips
Levelling might be tricky since you obviously can't use Death's Oath until you start mapping. Combine Spellslinger Support with a Chaos DoT Spell such as Bane, Despair, and Efficacy. Invest your Passive Skill Points in Maximum Life and Chaos Damage or Damage over Time. Switch to Caustic Arrow and Death Aura only after your Chaos Resistance is around 80%. Add Stormburst only if you have a good Forbidden Shako.
Suggested leveling Gem setups:
| Spellslinger setup | |
 |
Bane - one of the best Chaos DoT Spells, it has a unique property of applying linked Hex Curse without Hextouch Support |
 |
Despair - the Curse that lowers Chaos Resistance of your Opponents |
 |
Efficacy Support - increases your Spell Damage and Damage over time for linked Skills |
 |
Spellslinger Support - It Reserves your Mana but allows you to cast Linked Spells with each Wand Attack, it's extremely Mana efficient |
| Flame Dash setup | |
 |
Flame Dash - use Flame Dash or a regular Dash for better mobility |
 |
Lifetap Support - spend Life instead of Mana on your Flame Dash |
| Utility Gems | |
 |
Malevolence - the Aura that's going to be used in this build, it increases the DoT you're dealing |
Bandits:
You should kill all the Bandits and take two more Passive Skill Points
4. Final Skill Tree, Ascendancy Points, and Pantheon
Final Skill Tree:
82 Points Final Skill Tree (doesn't include Cluster or Unique Jewels)
119 Points Path of Building (PoB) link
Ascendancy points:
Preferably in that order:
- Void Beacon
- Withering presence
- Profane Bloom
- Unholy Authority
Pantheon:
Major God: Soul of the Brine King: You cannot be Stunned if you've been Stunned or Blocked a Stunning Hit in the past 2 seconds
Minor God: Soul of Abberath: 60% less Duration of Ignite on You; 10% increased Movement Speed while on Burning Ground; Unaffected by Burning Ground
5. Final Gems links
| [DPS] Death Aura setup These gems don't have to be linked - Death's Oath |
|
 |
Concentrated Effect Support - Reduces your AoE, but in return increases the Death's Aura damage. For a greater Area of Effect, use  increased Area of Effect Support instead. increased Area of Effect Support instead. |
|
Efficacy Support - Your Damage over Time is now much deadlier. |
|
Lifetap Support - Death Aura itself won't be able to give you Lifetap Buff, but to fix that, you should use Lifetap Support on another skill as well - a mobility Spell such as Dash is the best candidate since you're naturally using it to move all the time. The Lifetap Buff stays on and affects your Character, even if it comes from a source that's not linked to your Death Aura. |
 |
Less Duration Support - Since Death Aura has a Duration tag, you can use this Support Gem, which reduces the Duration but boosts the Damage. Of course, the duration won't be reduced; the Aura stays on at all times, no matter what. |
 |
Swift Affliction Support - It gives you more Damage over Time, which is exactly the statistics you rely on. |
 |
Void Manipulation Support - Increases your Chaos Damage and reduces Elemental Damage, it's fine since you don't deal any Elemental Damage. |
| [DPS] Decay setup socketed in Forbidden Shako |
|
 |
Storm Burst - The best way to inflict Decay because of its unique interaction with it. The Orbs will deal some of Decay's Damage when you stop Channelling, which scales with Duration. It's used against tough enemies. |
|
Efficacy Support - Increased Skill Effect Duration and more Damage over Time. |
|
Void Manipulation Support - More Chaos Damage; no Elemental Damage. |
 |
More Duration Support - More Duration for the DoT Effect of Decay. |
 |
Decay Support from Forbidden Shako - High-level Decay has great base Chaos DoT, which is the exact same thing as Death Aura, and so we can scale them both at the same time. It does not stack. |
| [UTILITY] Aura setup | |
|
Malevolence - With Malevolence as your Aura, you will deal more Damage over Time. |
 |
Tempest Shield - Shock immunity and additional Block Chance. |
 |
Herald of Ash - Enemies explode on death, dealing Fire Damage to improve clear speed. |
 |
Enlighten Support - Reduces the Mana Reservation cost of linked Mana-Reserving Skills. |
| [UTILITY] Aspect of the Spider | |
 |
Aspect of the Spider - Causes nearby enemies to take increased damage and move more slowly. It can be crafted onto one of your rare items. |
| [UTILITY] Blasphemous Curses setup | |
|
Despair - Cursed enemies have significantly lowered Chaos Resistance and take more Damage over Time |
 |
Arrogance Support - Since both Auras are free (with Impresence), all it does is increase the effect of Curse-Auras. |
 |
Punishment - with this Curse, enemies surrounding you will take more damage as they are low on life. Also, when hit, they'll deal less damage and move more slowly via Debilitation. |
 |
Eldritch Blasphemy Support - Turns Auras into Curses. They will not Reserve Mana with a proper Impresence Amulet. |
| [UTILITY] Automation setup | |
 |
Immortal Call - A Guard Spell that reduces the damage you take from Hits for a short time. |
 |
Withering Step - Grants Phasing and Elusive Buff. Phasing allows you to move through enemies. The Skill additionally applies Withered Debuff on enemies. |
 |
Automation - Triggers linked Instant Spells for you. |
| [MOBILTIY] Shield Charge setup | |
 |
Shield Charge - A mobility Skill to move around faster. |
 |
Faster Attacks Support - Use it to Shield Charge faster. |
|
Lifetap Support |
|
|
5. Gear Setup
The build is similar to other Chaos DoT builds, except you put much more emphasis on Maximum Chaos Resistance - with Death's Oath, you take a lot of self-inflicted Chaos Damage. Some of the recommended unique items are very expensive, and in such cases, we'll propose alternatives. 180 Strength is required to put on the Death's Oath, and 126 or more Dexterity for Gems. Look for Chaos Damage, Damage over Time, DoT Multiplier, and, of course, Maximum Life. Spell and Attack Block Chance should be capped.
Our recommended items will:
- Cap your resistances
- Give you enough DPS/Life to start mapping successfully
|
Stat priorities on items:
|
 (Helmet) Forbidden Shako - Aim for level 35 Decay here. It will support the Stormburst setup, thusly improving your single-target damage. (Helmet) Forbidden Shako - Aim for level 35 Decay here. It will support the Stormburst setup, thusly improving your single-target damage. |
|
| Socketed Gems are Supported by Level (1-10) <random Support Gem> Socketed Gems are Supported by Level (25-35) <random Support Gem> +(25-30) to all Attributes |
|
 (Helmet) Foulborn Doedre's Scorn - If you can't afford Shako, get the Foulborn Doedre's Scorn for Level 30 Impending Doom. Here, you will socket Temporal Chains with Void Manipulation, Unbound Ailments, and Greater Spell Cascade. (Helmet) Foulborn Doedre's Scorn - If you can't afford Shako, get the Foulborn Doedre's Scorn for Level 30 Impending Doom. Here, you will socket Temporal Chains with Void Manipulation, Unbound Ailments, and Greater Spell Cascade. |
|
| Socketed Gems are Supported by Level 30 Impending Doom +(20-30) to Intelligence +(100-120) to maximum Energy Shield Adds 37 to 71 Chaos Damage for each Curse on the Enemy Curse Skills have (30-50)% increased Skill Effect Duration |
|
 (Weapon) Rare Wand - DoT Multiplier, Chaos DoT Multiplier, and increased Chaos Damage are all explicit mods you want. Other mods are mostly irrelevant. (Weapon) Rare Wand - DoT Multiplier, Chaos DoT Multiplier, and increased Chaos Damage are all explicit mods you want. Other mods are mostly irrelevant. |
|
| Min. requirements: +#% to Damage over Time Multiplier +#% to Chaos Damage over Time Multiplier increased Chaos Damage & Chaos Skills have #% increased Skill Effect Duration (crafted or Veiled Prefix) Optional affixes: increased Damage over Time (crafted Prefix) |
|
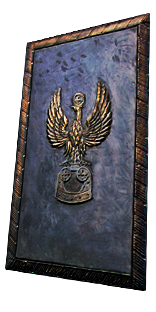
 (Off-hand) Svalinn - Svalinn is the best Shield once your Attack and Spell Block Chance are capped. It Blocks lots of Hits. (Off-hand) Svalinn - Svalinn is the best Shield once your Attack and Spell Block Chance are capped. It Blocks lots of Hits. |
|
| +(10-20) to maximum Life (10-15)% Chance to Block Spell Damage +(100-150) to Ward -10% to maximum Chance to Block Attack Damage -10% to maximum Chance to Block Spell Damage Chance to Block is Lucky Trigger a Socketed Elemental Spell on Block, with a 0.25 second Cooldown |
|
 (Off-hand) The Surrender - Surrender or Foulborn Surrender instantly recovers Life on Block, making it a great addition to boost your Life Recovery, given your Block Chance is high. (Off-hand) The Surrender - Surrender or Foulborn Surrender instantly recovers Life on Block, making it a great addition to boost your Life Recovery, given your Block Chance is high. |
|
| +(30-40) to maximum Life (165-205)% increased Armour +(65-80) to maximum Life Recover (250-500) Life when you Block +6% Chance to Block |
|
 (Off-hand) Rare Shield - Shaper Shield with Reservation Efficiency for socketed Gems will spare you a socket for Enlightened. It should have Maximum Life, Life Recovery, high Block Chance, and Resistances or Attributes. (Off-hand) Rare Shield - Shaper Shield with Reservation Efficiency for socketed Gems will spare you a socket for Enlightened. It should have Maximum Life, Life Recovery, high Block Chance, and Resistances or Attributes. |
|
| Min. requirements: high Block Chance 100 maximum Life 40% Total Resistances Socketed Gems have #% increased Reservation Efficiency (Shaper Suffix) Optional affixes: Life Regeneration Attributes |
|
 (Body Armour) Foulborn Death's Oath - The core piece of equipment. It grants the Death Aura - it's an embedded skill that is activated as you equip the Armour, and all the sockets are "connected" to it already, so you don't have to link them. Use the Foulborn variant for more DPS. (Body Armour) Foulborn Death's Oath - The core piece of equipment. It grants the Death Aura - it's an embedded skill that is activated as you equip the Armour, and all the sockets are "connected" to it already, so you don't have to link them. Use the Foulborn variant for more DPS. |
|
| +(8-12)% to all Elemental Resistances Grants Level 20 Death Aura Skill +(40-50) to all Attributes (20-40)% increased Effect of Withered (180-220)% increased Armour +(60-70) to maximum Life 1% of Attack Damage Leeched as Life You take 450 Chaos Damage per second for 3 seconds on Kill Gore Footprints |
|
 (Boots) Rare Boots - Movement Speed, Maximum Life, and Elemental Resistances are the most important mods; you don't have to worry about other stats as much. (Boots) Rare Boots - Movement Speed, Maximum Life, and Elemental Resistances are the most important mods; you don't have to worry about other stats as much. |
|
| Min. requirements: 25% Movement Speed 80 maximum Life 80% Total Resistances Optional affixes: Chaos Resistance Elemental Avoidance Life Regeneration |
|
 (Gloves) Rare Gloves - You should get a respectable amount of Maximum Life and Elemental Resistances on your Gloves. For the Eldritch mods, get a slower Withered expiration and Chaos Damage over Time Multiplier. (Gloves) Rare Gloves - You should get a respectable amount of Maximum Life and Elemental Resistances on your Gloves. For the Eldritch mods, get a slower Withered expiration and Chaos Damage over Time Multiplier. |
|
| Min. requirements: 80 maximum Life 80% Total Resistances Optional affixes: Chaos Damage over Time Multiplier Dexterity |
|
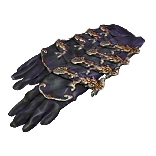 (Gloves) Foulborn Asenath's Gentle Touch - If you can apply an additional Curse, definitely go for Foulborn Asenath's Gentle Touch. You won't need Herald of Ash with these explosions on kill. (Gloves) Foulborn Asenath's Gentle Touch - If you can apply an additional Curse, definitely go for Foulborn Asenath's Gentle Touch. You won't need Herald of Ash with these explosions on kill. |
|
| +(20-30) to Intelligence +(60-80) to maximum Life +(60-80) to maximum Mana Curse Enemies with Punishment on Hit Non-Aura Curses you inflict are not removed from Dying Enemies Enemies near corpses affected by your Curses are Blinded Enemies Killed near corpses affected by your Curses explode, dealing 3% of their Life as Physical Damage |
|
 (Belt) Rare Belt - Hunter's influence allows you to have even more Maximum Life and increased Chaos Damage, but it's also one of the best places to look for Resistances. (Belt) Rare Belt - Hunter's influence allows you to have even more Maximum Life and increased Chaos Damage, but it's also one of the best places to look for Resistances. |
|
| Min. requirements: 90 maximum Life 80% Total Resistances Optional affixes: Strength increased Chaos Damage (Hunter Prefix) increased maximum Life (Hunter Prefix) |
|
 (Amulet) Impresence (Chaos) - It grants a lot of DoT, Chaos Resistance, and Maximum Life, it removes the cost of your Despair Curse-Aura, and provides you with Maddening Presence - enemies near you deal less damage and move more slowly. Look for the Uber version so that you can have Punishment or Enfeeble off-charge as well. Adjust your Gloves and Blasphemy setup accordingly. (Amulet) Impresence (Chaos) - It grants a lot of DoT, Chaos Resistance, and Maximum Life, it removes the cost of your Despair Curse-Aura, and provides you with Maddening Presence - enemies near you deal less damage and move more slowly. Look for the Uber version so that you can have Punishment or Enfeeble off-charge as well. Adjust your Gloves and Blasphemy setup accordingly. |
|
| +(10-16) to all Attributes (30-40)% increased Damage over Time Adds (17-19) to (23-29) Chaos Damage +(50-70) to maximum Life +(17-23)% to Chaos Resistance Despair has no Reservation if Cast as an Aura Gain Maddening Presence for 10 seconds when you Kill a Rare or Unique Enemy <Secondary Curse> has no Reservation if Cast as an Aura |
|
| Recommended Anointments: Beacon of Hope |
|
 (Ring) The Sundered Will - We've used two Sundered Wills. Each increases the effect of Death Aura (its damage), but it requires a lot of increases (specifically) to Chaos Damage, most of which comes from Cluster Jewels, The Light of Meaning, and the Wand. It's reasonable to assume that your Chaos Damage is increased by around 900%. (Ring) The Sundered Will - We've used two Sundered Wills. Each increases the effect of Death Aura (its damage), but it requires a lot of increases (specifically) to Chaos Damage, most of which comes from Cluster Jewels, The Light of Meaning, and the Wand. It's reasonable to assume that your Chaos Damage is increased by around 900%. |
|
| Cannot roll Modifiers of Non-Chaos Damage Types +2% to maximum Chaos Resistance +(7-13) to all Attributes Adds (7-11) to (17-23) Chaos Damage +(13-29)% to Chaos Resistance (20-30)% increased Area of Effect of Aura Skills (35-20)% reduced Reservation Efficiency of Skills Increases and Reductions to Chaos Damage also apply to Effect of Auras from Chaos Skills at (10-15)% of their value, up to a maximum of 150% |
|
 (Ring) Rare Ring - Use a Fugitive Ring if you don't need Elemental Resistances on it. Chaos Damage, Attributes, Maximum Life, Life Regeneration, and Life per Enemy Hit with Spells are the most useful affixes to look for. (Ring) Rare Ring - Use a Fugitive Ring if you don't need Elemental Resistances on it. Chaos Damage, Attributes, Maximum Life, Life Regeneration, and Life per Enemy Hit with Spells are the most useful affixes to look for. |
|
| Min. requirements: 90 to Maximum Life Optional affixes: increased Chaos Damage Gain # Life per Enemy Hit with Spells Damage over Time Multiplier Life Regeneration Attributes Chaos Resistance |
|
 (Jewel) Rare Jewels - Getting 7% increased Maximum Life is crucial. Keep an eye out for Block Chance and several mods for Chaos DoT. (Jewel) Rare Jewels - Getting 7% increased Maximum Life is crucial. Keep an eye out for Block Chance and several mods for Chaos DoT. |
|
| Recommended affixes: increased Maximum Life increased Chaos Damage increased Area Damage Damage over Time Chaos Damage over Time Multiplier Damage over Time Multiplier Spall and Attack Block Chance |
|
 (Jewel) Glorious Vanity - Choose Xibaqua variant and transform your Mind Over Matter Keystone into Divine Flesh - it grants you more Maximum Chaos Resistance, half of Elemental taken as Chaos Damage, and renders your ES useless. It's exceptionally good for builds with really high Chaos Resistances and little to no Energy Shield. (Jewel) Glorious Vanity - Choose Xibaqua variant and transform your Mind Over Matter Keystone into Divine Flesh - it grants you more Maximum Chaos Resistance, half of Elemental taken as Chaos Damage, and renders your ES useless. It's exceptionally good for builds with really high Chaos Resistances and little to no Energy Shield. |
|
| Bathed in the blood of (100-8000) sacrificed in the name of Xibaqua Passives in radius are Conquered by the Vaal Historic |
|
 (Jewel) Transcendent Mind - It will increase your DPS if socketed near travel nodes with unallocated Intelligence on them. The best place for it is near Mind over Matter. (Jewel) Transcendent Mind - It will increase your DPS if socketed near travel nodes with unallocated Intelligence on them. The best place for it is near Mind over Matter. |
|
| -1 Intelligence per 1 Intelligence on Allocated Passives in Radius +3% to Damage over Time Multiplier per 10 Intelligence on Unallocated Passives in Radius 3% increased Mana Recovery Rate per 10 Intelligence on Allocated Passives in Radius 2% reduced Mana Recovery Rate per 10 Intelligence on Unallocated Passives in Radius |
|
 (Jewel) The Light of Meaning - Seek a copy with "Passive Skills in Radius also grant 6% increased Chaos Damage" and socket it near the Sentinel notable, so that its radius overlaps with Unnatural Instinct's. (Jewel) The Light of Meaning - Seek a copy with "Passive Skills in Radius also grant 6% increased Chaos Damage" and socket it near the Sentinel notable, so that its radius overlaps with Unnatural Instinct's. |
|
| Passive Skills in Radius also grant <random stat> | |
 (Jewel) Unnatural Instinct - Socket it near the Shaper notable, near the Light of Meaning. (Jewel) Unnatural Instinct - Socket it near the Shaper notable, near the Light of Meaning. |
|
| Allocated Small Passive Skills in Radius grant nothing Grants all bonuses of Unallocated Small Passive Skills in Radius |
|
 (Jewel) Replica Reckless Defence - The build has to have high Block Chance, so using these Jewels may be a necessity. (Jewel) Replica Reckless Defence - The build has to have high Block Chance, so using these Jewels may be a necessity. |
|
| +(2-6)% Chance to Block Spell Damage +(2-6)% Chance to Block Attack Damage +10% chance to be Frozen, Shocked and Ignited |
|
 (Jewel) Stormshroud - If you have Boots with a high Chance to avoid being Shocked, you can make plans to reach 100% of this stat and make use of Stormshroud to never be Frozen, Chilled, Sapped, Scorched, Brittle, or Ignited ever again. (Jewel) Stormshroud - If you have Boots with a high Chance to avoid being Shocked, you can make plans to reach 100% of this stat and make use of Stormshroud to never be Frozen, Chilled, Sapped, Scorched, Brittle, or Ignited ever again. |
|
| +(10-15)% to Lightning Resistance Modifiers to Chance to Avoid being Shocked apply to all Elemental Ailments |
|
 (Jewel) Impossible Escape - We have used a Precise Technique variant of the Impossible Escape to allocate Leader of the Pack and Thick Skin notables. You could also go for MoM variant and allocate Hasty Demise, Quick Recovery, Asylum, and Anointed Flesh. (Jewel) Impossible Escape - We have used a Precise Technique variant of the Impossible Escape to allocate Leader of the Pack and Thick Skin notables. You could also go for MoM variant and allocate Hasty Demise, Quick Recovery, Asylum, and Anointed Flesh. |
|
| Passives in Radius of <random Keystone> can be Allocated without being connected to your tree Passage |
|
 (Jewel) Watcher's Eye - The only important mod is the one that grants your Malevolence increased Damage over Time Multiplier. (Jewel) Watcher's Eye - The only important mod is the one that grants your Malevolence increased Damage over Time Multiplier. |
|
| (4-6)% increased maximum Energy Shield (4-6)% increased maximum Life (4-6)% increased maximum Mana <Two or Three random aura modifiers> |
|
 (Jewel) Large Cluster Jewel - You need two or three Large Cluster Jewels with 8 nodes and the Notables: Unwaveringly Evil, Unholy Grace, and Wicked Pall. You can also go for the 12-passive ones, where each node has increased its effect by 35%. (Jewel) Large Cluster Jewel - You need two or three Large Cluster Jewels with 8 nodes and the Notables: Unwaveringly Evil, Unholy Grace, and Wicked Pall. You can also go for the 12-passive ones, where each node has increased its effect by 35%. |
|
| Recommended affixes: 1 Added Passive Skill is Unwaveringly Evil 1 Added Passive Skill is Unholy Grace 1 Added Passive Skill is Wicked Pall Added Small Passive Skills have 35% increased Effect |
|
 (Jewel) Medium Cluster Jewel - To further upgrade this build, put on some more of these Cluster Jewels, which increase your survivability and DoT. (Jewel) Medium Cluster Jewel - To further upgrade this build, put on some more of these Cluster Jewels, which increase your survivability and DoT. |
|
| Recommended affixes: 1 Added Passive Skill is Brush with Death 1 Added Passive Skill is Flow of Life 1 Added Passive Skill is Student of Decay 1 Added Passive Skill is Unholy Grace 1 Added Passive Skill is Wicked Pall 1 Added Passive Skill is Brewed for Potency |
|
 (Jewel) Small Cluster Jewel - Born of Chaos is a Notable that increases your Maximum Chaos Resistance by 3%, but we would rather search for them on good Megalomaniac Jewels instead. (Jewel) Small Cluster Jewel - Born of Chaos is a Notable that increases your Maximum Chaos Resistance by 3%, but we would rather search for them on good Megalomaniac Jewels instead. |
|
| Recommended affixes: 1 Added Passive Skill is Born of Chaos |
|
 (Flask) Forbidden Taste - The downside of this Flask that regenerates all of your Life on use, grants you Chance Suppress Spell Damage, and Phasing is negligible. (Flask) Forbidden Taste - The downside of this Flask that regenerates all of your Life on use, grants you Chance Suppress Spell Damage, and Phasing is negligible. |
|
| Phasing +10% chance to Suppress Spell Damage Recover (75-100)% of Life on use 25% of Maximum Life taken as Chaos Damage per second |
|
|
Other suggested Flasks:
|
|
    |
|
|
If you have any other build requests please leave that in the comments below. We are always open to suggestions and constructive feedback.
Pictures used in this article are the intellectual property of Grinding Gear Games.
