
Divine Blast Slayer Build
A very easy-to-assemble Divine Blast build for the Slayer class that excels at mappingDivine Blast
Slayer Build
Updated for Patch 3.28
The Best Crafty Guides by Odealo
| Guide notes |
| March 6, 2026 -Build created |
| Build overview | |||
| Tags: [ATTACK] [ELEMENTAL] [LIFE] [STARTER] | |||
|
Budget: Defenses: |
|
Boss DPS: AoE: |
|
Divine Blast is a new Skill that's quite similar to the Shield Crush, which has been in the game for some time now. These types of Attacks are very unique as they do not use a Weapon to swing, but the Shield instead; flat damage is usually scaled with the Shield's Armour, as is the case here; Divine Blast also increases base Crit Chance alongside the Shield's ES, thus making it very easy to reach the 100% cap. The damage is comparable to that of Shield Crush, but since the Divine Blast is more nuanced (it takes more time to deliver all the damage), and it forces you to Convert the Physical Damage to Fire (not all of it, mind you) by already imposing 50% baked-in Conversion, these two Skills require a different approach. The choice of Shield, the most important piece of gear here, is much less complex; you go for the Emperor's Vigilance since it offers the highest combined Armour and ES. Any other Shield is worse.
We've selected Slayer since this Ascendancy is good with Attacks. Brutal Fervour grants overleech; that takes care of the recovery aspect of defensive layering. Impact has Accuracy, Damage, and AoE (especially effective while mapping). Bane of Legends grants 20% more damage against rares and bosses, or after a kill. Masterful Form grants one extra Maximum Frenzy Charge and projects that limit onto Maximum Endurance Charges to make the character more durable. Slayer is a jack-of-all-trades type of choice for such builds, so you may as well try Juggernaut, Berserker, Gladiator, or Warder (Tinctures won't work with Shield Attacks). Its damage is increased via global modifiers, especially ones that enhance Critical Strike Multiplier or Attack Speed. Despite the weapon not participating in the attack, the dominant-hand slot is still very useful - we have prepared many choices for it down in the gear section. The durability of the build stems from Maximum Life, Resistances, high Recovery, capped (with Glancing Blows) Block Chance, Armour, some ES, and Spell Suppression in the high-end versions. It makes it very good for mapping, a bit less so for pinnacle bosses.
You can also check our other Path of Exile builds: Odealo's Crafty Guides - Full List
1. Gameplay
The build uses Divine Blast to deal all the damage. It consists of the initial impact, which deals low damage, and the following big impact, which deals high damage. Most foes will die instantly. Stand close to the enemy to deal more and take less damage. Your other button-bound Skills are Shield Charge to move, and Enduring Cry to generate Charges if that's even needed. Assassin's Mark is triggered on Hit. Molten Shell, Blood Rage, and Phase Run are automated. Your passive skills are Determination, Herald of Ash, Precision, and Flesh and Stone. You can include a second Curse, Flammability, if you extended the Curse Limit.
|
|

2. Build's PROS & CONS
| PROS |
|
| CONS |
|
3. Levelling tips
Start with something normal. This build requires Emperor's Vigilance, which has the level 46 restriction. Besides, it would not be the most optimal way to level up as a Duelist. Follow our Retaliation Gladiator guide. Retaliation builds are much better to level up, since the Bleed is quite strong early on, and after you get the Eviscerate Gem, your damage skyrockets. Not to mention Block Chance, which keeps your character alive. Swap to this build after you have the Shield and before you start investing heavily in the makeshift Retaliator.
Bandits:
We recommend killing all the Bandits for the extra Passive Point
4. Final Skill Tree, Ascendancy Points, and Pantheon
Final Skill Tree:
100 Points Final Skill Tree (does not include Jewels)
117 Points Path of Building (PoB) link
Ascendancy points:
Preferably in that order:
- Brutal Fervour
- Impact
- Bane of Legends
- Masterful Form
Pantheon:
Major God: Soul of Lunaris 1% additional Physical Damage Reduction for each nearby Enemy, up to 8%; 1% increased Movement Speed for each nearby Enemy, up to 8%
Minor God: Soul of Gruthkul 1% additional Physical Damage Reduction for each Hit you've taken Recently up to a maximum of 5%
5. Final Gems links
| [DPS] Divine Blast setup | |
 |
Divine Blast - Deals Damage in an Area twice, the second blast being stronger. Its damage is sourced from Shield's Armour, and its Crit Chance from Shield's Energy Shield. It Converts half of its Physical Damage to Fire. |
 |
Added Fire Damage Support - Adds Fire Damage sourced from the original Physical Damage of the Divine Blast. |
 |
Inspiration Support - Lowers Mana Cost of Skills, increases Elemental Damage, and Critical Strike Chance. |
 |
Less Duration Support - Lowers the duration between the blasts and grants more damage. |
 |
Fire Penetration Support - Penetrates more Fire Resistance. |
 |
Elemental Damage with Attacks Support - More Elemental Damage with Attacks. |
| [UTILITY] Reservation setup | |
 |
Determination - An Aura that boosts Armour, which reduces Physical Damage taken. |
 |
Flesh and Stone - Stay in the Sand Stance to take reduced Physical Damage. |
 |
Precision - Adds Accuracy and increases Critical Strike Chance. |
 |
Enlighten Support - Linked Skills Reserve less Mana. |
| [UTILITY] Herald of Ash | |
 |
Herald of Ash - Adds Fire Damage similarly to Added Fire Damage Support. It also improves clear speed. |
| [UTILITY] Curse setup | |
 |
Assassin's Mark - Marked enemy is more likely to receive Critical Hit and takes more damage from such strikes. |
 |
Mark on Hit Support - Assassin's Mark is applied on Hit against Rare and Unique enemies. |
 |
Lifetap Support - Linked Skills cost Life instead of mana. |
| [MOBILITY] Shield Charge setup | |
 |
Shield Charge - A mobility Skill for shield-wielding characters. |
 |
Faster Attacks Support - Increases Movement Speed with Shield Charge. |
|
Lifetap Support |
| [UTILITY] Automation setup | |
 |
Automation - Linked Instant Cooldown Spells are triggered automatically. |
 |
Molten Shell - Creates a protective barrier that absorbs a portion of incoming Hit Damage. It can take more damage the more Armour the character has. |
 |
Blood Rage - A Duration buff that resets on kill and drains your Life, which is not a big issue with Overleech. In turn, it increases Attack Speed and grants Frenzy Charges on Kill. |
 |
Phase Run - Movement Speed with Phasing, turning into a damage-granting Buff upon using any other Skill. |
| [UTILITY] Enduring Cry setup | |
 |
Enduring Cry - Grants Endurance Charges and Regenerates Life. Use when enemies are nearby. |
 |
Urgent Orders Support - Greatly increased Warcry Speed. |
 |
Cooldown Recovery Support - Allows you to use Enduring Cry more often. |
|
|
5. Gear Setup
In the core, it's an Attack build dealing Elemental (mostly Fire) damage on a Slayer, so most players will be familiar with it. It benefits from Fire Penetration, Accuracy, and Attack Speed. Its uniqueness is derived from the fact that it uses Shield to deal damage, not the Weapon. Stats local to the Weapon will do nothing; instead, look for the Global modifiers here. On a Weapon, Global modifiers are always classified as Global to make it less confusing. Off-hand and more general modifiers, like "increased Damage with Attacks", will apply. It will also be important not to Convert all the remaining 50% of Physical Damage to Fire. We still need to deal some Physical Damage to inflict Bleeding and benefit from the Cornered Prey notable and its Mastery for Crit Chance. It's a Critical Strike build (reaching 100% Crit Chance is easy), so Critical Strike Multiplier is very important. You will need Mana Leech on a Ring or Gloves; Life Leech is sourced from the Skill Tree. You will need a bit of additional Intelligence. It uses many Unique Items, most notably the Emperor's Vigilance Shield. It makes the gearing process a whole lot easier. All other Uniques are optional, where some are better than Rares. Mana Reservation Efficiency is needed only on a Helmet as an Eldritch Implicit if you have Enlightened at level 3 and Replica Dragonfang's Flight. Spell Suppression Chance is hard to cap, but you can try with a bunch of good Rare Items and notables like Inveterate and Entrench. Remember to use the Runegraft of the Sinistral for 10% more Attack speed with Offhand.
Our recommended items will:
- Cap your resistances
- Give you enough DPS/Life to start mapping
|
Stat priorities on items:
|
 (Helmet) Rare Helmet - Get a Rare Helmet with Life, Resistances, and maybe Suppression, Accuracy, and Intelligence if needed. For the Eldritch mods, seek Reduced Mana Cost of Skills or increased AoE, and Reservation Efficiency or Physical-taken-as. (Helmet) Rare Helmet - Get a Rare Helmet with Life, Resistances, and maybe Suppression, Accuracy, and Intelligence if needed. For the Eldritch mods, seek Reduced Mana Cost of Skills or increased AoE, and Reservation Efficiency or Physical-taken-as. |
|
| Min. requirements: 90 Maximum Life 60% Total Elemental Resistances increased Mana Reservation Efficiency of Skills Optional affixes: Intelligence Spell Suppression Accuracy Rating |
|
 (Weapon) Obliteration - It has explosions on Kill, which definitely help during mapping. You may want to equip it on the second set; there are better options to tackle bosses with. (Weapon) Obliteration - It has explosions on Kill, which definitely help during mapping. You may want to equip it on the second set; there are better options to tackle bosses with. |
|
| (27-31)% increased Spell Damage Gain (30-40)% of Physical Damage as Extra Chaos Damage Enemies you Kill have a 20% chance to Explode, dealing a quarter of their maximum Life as Chaos Damage |
|
 (Weapon) Grace of the Goddess - If you happen to have a copy of this Wand with good rolls on all three gain-as mods, consider it. It should be one of the strongest picks. It also requires tons of Intelligence. (Weapon) Grace of the Goddess - If you happen to have a copy of this Wand with good rolls on all three gain-as mods, consider it. It should be one of the strongest picks. It also requires tons of Intelligence. |
|
| (36-40)% increased Spell Damage (300-350)% increased Physical Damage Gain (10-50)% of Physical Damage as Extra Fire Damage Gain (10-50)% of Physical Damage as Extra Cold Damage Gain (10-50)% of Physical Damage as Extra Lightning Damage +1 to maximum number of Sacred Wisps +1 to number of Sacred Wisps Summoned |
|
 (Weapon) Prismatic Eclipse - It's quite good. Look for three Green Sockets on it, and alter your Gem setups accordingly. Attack Speed is hard to get otherwise. (Weapon) Prismatic Eclipse - It's quite good. Look for three Green Sockets on it, and alter your Gem setups accordingly. Attack Speed is hard to get otherwise. |
|
| +8% Chance to Block Attack Damage while Dual Wielding Adds (60-70) to (71-80) Physical Damage 25% increased Global Physical Damage with Weapons per Red Socket 12% increased Global Attack Speed per Green Socket 0.4% of Physical Attack Damage Leeched as Mana per Blue Socket +2 to Melee Strike Range per White Socket |
|
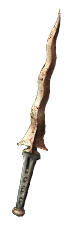
 (Weapon) The Tempestuous Steel - It grants 30% of the original damage as some other type of damage, and the inability to miss, which is good. This weapon is also dirt cheap. (Weapon) The Tempestuous Steel - It grants 30% of the original damage as some other type of damage, and the inability to miss, which is good. This weapon is also dirt cheap. |
|
| 40% increased Global Accuracy Rating Adds (5-8) to (15-20) Physical Damage (8-14)% increased Attack Speed Hits can't be Evaded Attacks with this Weapon Penetrate 30% Elemental Resistances Gain 15% of Physical Attack Damage as Extra Fire Damage Gain 15% of Physical Attack Damage as Extra Lightning Damage |
|
 (Weapon) Wand or Dagger - Kris Dagger for an increased Global Critical Strike Chance, or an experimented Wand (Assembler, Congregator, Accumulator) for Charges every six seconds are good bases for a weapon. Most explicit mods are pointless, not counting the ones listed here. (Weapon) Wand or Dagger - Kris Dagger for an increased Global Critical Strike Chance, or an experimented Wand (Assembler, Congregator, Accumulator) for Charges every six seconds are good bases for a weapon. Most explicit mods are pointless, not counting the ones listed here. |
|
| Min. requirements: 50% increased Global Critical Strike Chance (Kris Dagger) Intelligence Accuracy Rating Fire Penetration (Essence of Rage) Optional affixes: Global Critical Strike Multiplier increased Critical Strike Multiplier if you have Killed Recently (Warlord Suffix) chance to gain a Power Charge on Kill (Redeemer Prefix) increased Elemental Damage with Attacks Gain an Endurance, Frenzy or Power Charge every 6 seconds (Experimented Wand) |
|
 (Shield) Emperor's Vigilance - The best Shield. It has more Armour and ES than most Rare Shields do. You can later look for Corrupted copies with some kind of useful Implicit mod. (Shield) Emperor's Vigilance - The best Shield. It has more Armour and ES than most Rare Shields do. You can later look for Corrupted copies with some kind of useful Implicit mod. |
|
| (16-22)% Chance to Block Spell Damage 1000% increased Armour and Energy Shield Damage taken from Blocked Hits cannot bypass Energy Shield Damage taken from Unblocked hits always bypasses Energy Shield Glancing Blows |
|
 (Body Armour) Rare Body Armour - If you can comfortably generate Charges, go for a Rare Armour high in defences like Armour or Energy Shield. Suppression is found on Evasion bases. For the Eldritch mods, get the Frenzy Charge every 15 seconds and Physical-taken-as. (Body Armour) Rare Body Armour - If you can comfortably generate Charges, go for a Rare Armour high in defences like Armour or Energy Shield. Suppression is found on Evasion bases. For the Eldritch mods, get the Frenzy Charge every 15 seconds and Physical-taken-as. |
|
| Min. requirements: 120 Maximum Life 80% Total Elemental Resistances Optional affixes: high Defences Chance to Suppress Spell Damage |
|
 (Body Armour) Farrul's Fur - This, or the replica version if you struggle with Endurance Charges (which you shouldn't), makes the Charge management much more bearable, especially during prolonged fights. Be sure you have the Aspect of the Cat Suffix on one of your Rare Items. (Body Armour) Farrul's Fur - This, or the replica version if you struggle with Endurance Charges (which you shouldn't), makes the Charge management much more bearable, especially during prolonged fights. Be sure you have the Aspect of the Cat Suffix on one of your Rare Items. |
|
| (100-150)% increased Armour and Evasion +(80-100) to maximum Life Aspect of the Cat has no Reservation +2 seconds to Cat's Stealth Duration Gain up to your maximum number of Frenzy and Power Charges when you gain Cat's Stealth You have Phasing while you have Cat's Stealth |
|
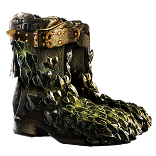
 (Boots) Rare Boots - Aim for the Onslaught/Tailwind/Elusive Rare Boots if you can afford them. Otherwise, it's just the regular Maximum Life, Movement Speed, and Resistances. For the Eldritch mods: Action Speed and Physical Damage as Extra Fire Damage or Enduring Cry Effect. (Boots) Rare Boots - Aim for the Onslaught/Tailwind/Elusive Rare Boots if you can afford them. Otherwise, it's just the regular Maximum Life, Movement Speed, and Resistances. For the Eldritch mods: Action Speed and Physical Damage as Extra Fire Damage or Enduring Cry Effect. |
|
| Min. requirements: 90 Maximum Life 40% Total Elemental Resistances 30% increased Movement Speed Optional affixes: chance to gain Onslaught for 4 seconds on Kill (Redeemer Suffix) chance to gain Elusive on Critical Strike (Redeemer Prefix) You have Tailwind if you have dealt a Critical Strike Recently (Hunter SUffix) chance to Suppress Spell Damage |
|
 (Boots) Darkray Vectors - Darkray Vectors offer an Extra Frenzy Charge, lots of Movement Speed with Lightning Resistance, and other minor boons. There's no Maximum Life, so they may not be the best choice. (Boots) Darkray Vectors - Darkray Vectors offer an Extra Frenzy Charge, lots of Movement Speed with Lightning Resistance, and other minor boons. There's no Maximum Life, so they may not be the best choice. |
|
| (40-70)% increased Armour and Evasion +(20-40)% to Lightning Resistance 5% increased Movement Speed per Frenzy Charge +1 to Maximum Frenzy Charges 40% reduced Frenzy Charge Duration 25% reduced Light Radius 10% increased Evasion Rating per Frenzy Charge |
|
 (Boots) Ralakesh's Impatience - You can use them to always have Endurance Charges or Power Charges, depending on your willingness to use Enduring Cry and the version of Farrul's Fur. (Boots) Ralakesh's Impatience - You can use them to always have Endurance Charges or Power Charges, depending on your willingness to use Enduring Cry and the version of Farrul's Fur. |
|
| +(15-25)% to Cold Resistance +(15-25)% to Chaos Resistance (15-25)% increased Movement Speed Corrupted Blood cannot be inflicted on you <Random charge modifier> Count as having maximum number of Endurance Charges |
|
 (Gloves) Rare Gloves - Rare Gloves are very versatile. They can offer Life, Resistances, Dexterity, Accuracy, Add Damage, increase Attack Speed, or Leech Mana. For the Eldritch mods, aim for Rage and Exposure on Hit. (Gloves) Rare Gloves - Rare Gloves are very versatile. They can offer Life, Resistances, Dexterity, Accuracy, Add Damage, increase Attack Speed, or Leech Mana. For the Eldritch mods, aim for Rage and Exposure on Hit. |
|
| Min. requirements: 90 Maximum Life 40% Total Elemental Resistances increased Attack Speed Optional affixes: Accuracy Added Fire or Physical Damage Physical Damage Leeched as Mana Dexterity increased Damage while Leeching |
|
 (Gloves) Abhorrent Interrogation - We haven't invested much in Penetration, so Abhorrent Interrogation can be good, especially with high Attack Speed. These will make Flammability, Exposure, and Penetration obsolete. Unique Gloves should be Corrupted for a chance for +1 Max Frenzy. (Gloves) Abhorrent Interrogation - We haven't invested much in Penetration, so Abhorrent Interrogation can be good, especially with high Attack Speed. These will make Flammability, Exposure, and Penetration obsolete. Unique Gloves should be Corrupted for a chance for +1 Max Frenzy. |
|
| (100-150)% increased Evasion and Energy Shield (5-7)% increased Attack and Cast Speed (20-25)% chance to inflict Withered for 2 seconds on Hit Enemies take 4% increased Elemental Damage from your Hits for each Withered you have inflicted on them Your Hits cannot Penetrate or ignore Elemental Resistances |
|
 (Belt) Ryslatha's Coil - The modifiers to Physical Damage will increase your DPS substantially. It's comparable to a good Rare Belt, but has no Resistances and a useless Implicit. (Belt) Ryslatha's Coil - The modifiers to Physical Damage will increase your DPS substantially. It's comparable to a good Rare Belt, but has no Resistances and a useless Implicit. |
|
| (20-30)% increased Stun Duration on Enemies +(20-40) to Strength (30-40)% more Maximum Physical Attack Damage (40-30)% less Minimum Physical Attack Damage Adds 1 to (15-20) Physical Damage to Attacks +(80-100) to maximum Life Gain 50 Life when you Stun an Enemy |
|
 (Belt) Rare Belt - On a Rare Belt, seek Maximum Life, Resistances, increased Elemental Damage with Attacks, and Strength. We recommend a Hunter's Belt with increased Maximum Life. (Belt) Rare Belt - On a Rare Belt, seek Maximum Life, Resistances, increased Elemental Damage with Attacks, and Strength. We recommend a Hunter's Belt with increased Maximum Life. |
|
| Min. requirements: 90 maximum Life 40% Total Elemental Resistances increased Elemental Damage with Attacks Strength Optional affixes: increased Maximum Life (Hunter Prefix) Life Regeneration |
|
 (Amulet) Rare Amulet - A Rare Amulet is seldom the best choice. It can increase the Level of the Divine Blast by up to two and grant some great bonuses, but such an Amulet would be very expensive. (Amulet) Rare Amulet - A Rare Amulet is seldom the best choice. It can increase the Level of the Divine Blast by up to two and grant some great bonuses, but such an Amulet would be very expensive. |
|
| Min. requirements: +1 to Level of all/Physical/Fire Skill Gems 80 maximum Life Global Critical Strike Multiplier increased Elemental Damage with Attacks Optional affixes: Elemental Resistances Added Fire or Physical Damage Mana Leech |
|
 (Amulet) Uul-Netol's Vow - The build will benefit greatly from one additional Support Gem for the Divine Blast; it could increase the overall damage by a quarter or so. (Amulet) Uul-Netol's Vow - The build will benefit greatly from one additional Support Gem for the Divine Blast; it could increase the overall damage by a quarter or so. |
|
| Has 1 Socket Socketed Support Gems can also Support Skills from Equipped Body Armour +(-30-30)% to Fire Resistance +(-30-30)% to Cold Resistance +(-30-30)% to Lightning Resistance +(-23-23)% to Chaos Resistance |
|
 (Amulet) Replica Dragonfang's Flight - The Divine Blast version of Dragonfang's Flight is excellent. All its modifiers are extremely useful. (Amulet) Replica Dragonfang's Flight - The Divine Blast version of Dragonfang's Flight is excellent. All its modifiers are extremely useful. |
|
| +(10-16) to all Attributes +3 to Level of all <Random Skill> Gems +(5-10)% to all Elemental Resistances (5-10)% increased Reservation Efficiency of Skills Items and Gems have (10-5)% reduced Attribute Requirements |
|
| Recommended Anointments: Frenetic Disemboweling Nomadic Teachings |
|
 (Ring) Rare Ring - Rings offer many good mods. We recommend Maximum Life with Resistances and required Attributes, maybe Mana Leech or Accuracy if that what's needed. Craft the Prefix that lowers the Mana Cost of Skills. (Ring) Rare Ring - Rings offer many good mods. We recommend Maximum Life with Resistances and required Attributes, maybe Mana Leech or Accuracy if that what's needed. Craft the Prefix that lowers the Mana Cost of Skills. |
|
| Min. requirements: 90 maximum Life 60% Total Elemental Resistances Optional affixes: Adds Physical/Fire Damage to Attacks Mana Leech increased Elemental Damage with Attack Skills increased Attack Speed Accuracy Rating Attributes Non-Channelling Skills have -# to Total Mana Cost |
|
 (Ring) Polaric Devastation - Polaric Devastation, if socketed in the Left Ring Slot, covers enemies in Ash, which causes them to take 20% increased Fire Damage. It's very good, plus has tons of Fire and Cold Resistances. (Ring) Polaric Devastation - Polaric Devastation, if socketed in the Left Ring Slot, covers enemies in Ash, which causes them to take 20% increased Fire Damage. It's very good, plus has tons of Fire and Cold Resistances. |
|
| (15-25)% increased Elemental Damage (15-25)% increased Global Critical Strike Chance +(20-40)% to Fire Resistance +(20-40)% to Cold Resistance (10-20)% increased Duration of Ailments on Enemies Left Ring slot: Cover Enemies in Ash for 5 seconds when you Ignite them Right Ring slot: Cover Enemies in Frost for 5 seconds when you Freeze them |
|
 (Ring) Circle of Anguish - If it has a useful Implicit and Herald of Ash modifiers, you may find Circle of Anguish better than a Rare Ring, especially if you struggle with Reservation Efficiency. If you also use Herald of Purity, you can try Circle of Ambition. (Ring) Circle of Anguish - If it has a useful Implicit and Herald of Ash modifiers, you may find Circle of Anguish better than a Rare Ring, especially if you struggle with Reservation Efficiency. If you also use Herald of Purity, you can try Circle of Ambition. |
|
| <One to three random Synthesis implicit modifiers> +(20-30) to Strength Adds (20-25) to (26-35) Fire Damage +(20-30)% to Fire Resistance <Two Random Herald of Ash modifier> |
|
 (Ring) Enmity's Embrace - Our variant of this build does not use Enmity's Embrace because building around it is very costly, difficult, and suited more for a Chieftain. It could get you tons of Fire Penetration, making it the final upgrade. (Ring) Enmity's Embrace - Our variant of this build does not use Enmity's Embrace because building around it is very costly, difficult, and suited more for a Chieftain. It could get you tons of Fire Penetration, making it the final upgrade. |
|
| (5-7)% increased maximum Life +(30-50) to Strength (10-20)% increased Fire Damage (75-65)% reduced Fire Resistance Take (300-500) Fire Damage when you Use a Skill Damage Penetrates Fire Resistance equal to your Overcapped Fire Resistance, up to a maximum of 200% |
|
 (Jewels) Rare Jewels - On Jewels, Critical Strike Multiplier is the most prized mod. On top of that, it should possess Maximum Life and Resistances or Attributes if they're needed. (Jewels) Rare Jewels - On Jewels, Critical Strike Multiplier is the most prized mod. On top of that, it should possess Maximum Life and Resistances or Attributes if they're needed. |
|
| Recommended affixes: increased maximum Life Critical Strike Multiplier Optional affixes: Elemental Resistances increased Attack Speed Attributes Mana Reservation Efficiency Chance to Block Spell Damage |
|
 (Jewels) Seething Fury - With 500 ES on a Shield (doable), it grants 7.5% base Crit Chance and 200% Crit Multiplier. With Divine Blast itself, that could mean 17.5% base Crit Chance, which is stupid high. (Jewels) Seething Fury - With 500 ES on a Shield (doable), it grants 7.5% base Crit Chance and 200% Crit Multiplier. With Divine Blast itself, that could mean 17.5% base Crit Chance, which is stupid high. |
|
| (10-15)% increased Attack Damage while holding a Shield +0.15% to Off Hand Critical Strike Chance per 10 Maximum Energy Shield on Shield +4% to Off Hand Critical Strike Multiplier per 10 Maximum Energy Shield on Shield Corrupted |
|
 (Jewels) Lethal Pride - You should have tons of passives allocated around the Savagery Notable. Put Lethal Pride there, and look for Physical Damage as Extra Fire Damage, or Rage on Hit. (Jewels) Lethal Pride - You should have tons of passives allocated around the Savagery Notable. Put Lethal Pride there, and look for Physical Damage as Extra Fire Damage, or Rage on Hit. |
|
| Commanded leadership over (10000-18000) warriors under Akoya Passives in radius are Conquered by the Karui Historic |
|
 (Jewels) Watcher's Eye - You're using Determination and Precision. Look for Reduced Physical Damage taken and Critical Strike Multiplier on this Jewel. (Jewels) Watcher's Eye - You're using Determination and Precision. Look for Reduced Physical Damage taken and Critical Strike Multiplier on this Jewel. |
|
| (4-6)% increased maximum Energy Shield (4-6)% increased maximum Life (4-6)% increased maximum Mana <Two or Three random aura modifiers> |
|
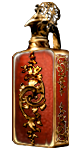
 (Flask) Bottled Faith - The Consecrated Ground is good for reducing Curses' Effect, but Bottled Faith also increases damage and Crit Chance. (Flask) Bottled Faith - The Consecrated Ground is good for reducing Curses' Effect, but Bottled Faith also increases damage and Crit Chance. |
|
| 40% increased Damage Creates Consecrated Ground on Use (30-15)% reduced Duration Consecrated Ground created by this Flask has Tripled Radius Consecrated Ground created during Effect applies (7-10)% increased Damage taken to Enemies (100-150)% increased Critical Strike Chance against Enemies on Consecrated Ground during Effect |
|
Other suggested Flasks:
|
|
    |
|
|
If you have any other build requests please leave that in the comments below.
Pictures used in this article are the intellectual property of Grinding Gear Games.
