Doomfletch's Prism Tornado Shot Deadeye Build
Tornado Shot build that deals Elemental Damage with Tornado Shot, enhanced by Trinity and Bloodthirst SupportTornado Shot
Deadeye Build
Updated for Patch 3.16
The Best Crafty Guides by Odealo
Estimated budget: low to medium

| Guide notes |
| September 17, 2021 -Build created September 22, 2021 -Added gameplay video November 30, 2021 -Updated for Patch 3.16 |
Tornado Shot is one of the most popular Skills for Deadeye Ascendancy. It's an attack that can be performed only with a Bow that fires three arrows which upon reaching their targeted location, explodes into yet another three projectiles - multiplying your number of fired projectiles will affect the number of arrows in both phases making it a particularly desirable statistics. It's a great idea to allocate Far Shot, it makes your Projectiles deal more damage the further they travel from your location, and given the fact that by firing with Tornado Shot your Arrows travel not in a straight line, but making a tilt at the place of the explosion it guarantees the maximum damage output. It's a build that uses all the Elemental types of Damage in a balanced manner to gain Resononance with Trinity Support.
The big part of the build is Tornado Shot having Anomalous Quality - at 20% it Converts 60% of the Physical Damage to a Random Element: Cold, Fire, or Lightning. The randomness of the output combined with high Attack Speed makes it practically impossible to not constantly be at maximum Resonance. Combined with Doomfletch's Prism Unique Bow your DPS can grow to astounding sizes - this Bow grants you bonus Damage of each Element based on 100% of its Physical Damage. Another huge part of the build is the Bloodthirst Support Gem that increases the Physical Damage of Weapon based on your Reserved Life, meaning the Doomfletch's Physical Damage grows substantially.
The build is Life-based with around 6k Life, but a huge chunk of it is reserved with Petrified Blood and Aura Skills linked With Arrogance because Bloodthirst Support grants other damage bonuses when the character is low on life (below 50%). The Effective Life Pool as a result of that shrinks to 3 to 4k + Petrified Blood. Build posses low Armour, Evasion, Spell Suppression Chance and Life Leech. The overall damage is great, shooting from a far distance is what will keep you safe in most fights. Opponents forcing Melee combat with for example Flicker Strike or bosses that outmatch you in a ranged duel are especially dangerous. The build is cheap with a lot of generic Rare Items, the Uniques are one of the cheapest as well.
You can also check our other Path of Exile builds right over here Odealo's Crafty Guides - Full List
1. Gameplay
It doesn't differ much from any other Tornado Shot build, you kill opponents while trying to avoid getting into their melee range. Dash is the Main Movement SKill, but it could be easily replaced with Blink Arrow. Be sure to have Blood Rage active at all times. For Boss fights, it is recommended to use Arcanist's Brand with Sniper's Mark and Hydrosphere. You are also going to benefit from the Chain mechanic that will allow your projectiles to chain between enemies and Hydrosphere, greatly boosting your DPS.
|
|
|
|

2. Build's PROS & CONS
| PROS |
|
| CONS |
|
3. Leveling tips
Start with any Bow Attack Skill, at level 28 you'll be able to switch to Tornado Shot. Before that use Ice Shot and Barrage. Start with Cold Damage only, switch to Trinity Support later, after you acquire Doomfletch's Prism. Use Essence of Hatred for more Cold Damage or Essence of Woe on Quiver for increased Elemental Damage. Use Heralds, Auras, and Curses accordingly to your Damage. Take Ricochet after your First Lab, after that you can use it combined with Hydrosphere. Look for the items with added Cold or Physical Damage.
Suggested leveling Gem setups:
| Ice Shot setup | |
 |
Ice Shot - Ice Shot is a great Attack as you start leveling, it's available right from the start and, and your Passive Skill Tree offers a Notables that suits Cold Damage |
 |
Mirage Archer Support - as you shot an apparition will follow you repeating the same attack |
 |
Added Cold Damage Support - adds Cold Damage to your Ice Shot |
 |
Inspiration Support - lowers Mana Cost, increases Elemental Damage, and increases Critical Strike Chance |
| Dash, Hydrosphere, and Curse setup | |
 |
Dash - Dash allows you to quickly move from one place to another |
 |
Hydrosphere - Hydrosphere lowers Elemental Resistances of your opponents as you hit it with your Attacks and deals damage to them |
 |
Sniper's Mark - Sniper's Mark is a great Curse for all build using Projectiles, it splits Projectiles and recharges your Life and Mana Flasks |
| Blood Rage, Auras, and Heralds setup | |
 |
Herald of Ice - shattering enemies deals AoE damage, it also adds bonus Cold Damage to your Attacks |
 |
Hatred - increases your Cold Damage and adds Cold Damage based on your Physical Damage to Attacks |
 |
Precision - grants you more Accuracy Rating and Critical Strike Chance |
 |
Blood Rage - Blood Rage makes you Attack much faster with increased Life Leech, but it drains slowly your Life |
Bandits:
KIlling all three Bandits for two Passive Skill Points is the best option, but you can also Help Alira for more Mana Regen, Crit Multiplier, and Elemental Resistances
Leveling Skill Trees:
35 Points Skill Tree
Allocate Finesse, Heart of Oak, Ballistic Mastery, Aspect of the Eagle, then go for Winter Spirit, Flash Freeze, and the large Bow Cluster on the Right
72 Points Skill Tree
Look for Maximum Life, Damage with Bows, Projectiles, or Elemental Hits and Critical Strikes
Recommended leveling items:
 Goldrim - one of the best ways to increase your Elemental Resistances early on Goldrim - one of the best ways to increase your Elemental Resistances early on |
|
| +(30-50) to Evasion Rating 10% increased Rarity of Items found +(30-40)% to all Elemental Resistances Reflects 4 Physical Damage to Melee Attackers Level Requirement reduced by 100 (Hidden) |
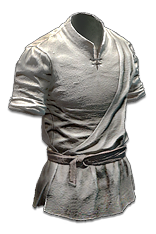 Tabula Rasa - this Body Armour grants you six, linked, white sockets Tabula Rasa - this Body Armour grants you six, linked, white sockets |
|
| Item has no level requirement and Energy Shield (Hidden) Item has 6 White Sockets and is fully linked (Hidden) |
 Quill Rain - great starting Bow with a lot of stats beneficial for this build that should be more than enough to reach level 40 Quill Rain - great starting Bow with a lot of stats beneficial for this build that should be more than enough to reach level 40 |
|
| +(10-20) to Dexterity 100% increased Physical Damage 100% increased Attack Speed +2 Mana gained for each Enemy hit by Attacks (50-100)% increased Projectile Speed +(25-50) to Accuracy Rating 30% less Damage |
|
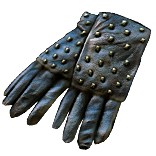 Hrimburn - a pair of Gloves for builds that need their Physical damage converted to Cold, such as this one at the start Hrimburn - a pair of Gloves for builds that need their Physical damage converted to Cold, such as this one at the start |
|
| +(20-30) to Strength Adds (5-7) to (13-15) Cold Damage to Spells and Attacks +(40-50) to Evasion Rating +(20-30)% to Cold Resistance 50% of Physical Damage Converted to Cold Damage Reflects 10 Cold Damage to Melee Attackers Your Cold Damage can Ignite |
4. Final Skill Tree, Ascendancy Points, and Pantheon
Final Skill Tree:
105 Points Final Skill Tree (doesn't include Cluster Jewels nor Cold Steel)
123 Points Path of Building(PoB) link
Ascendancy points:
Preferably in that order:
- Ricochet
- Endless Munitions
- Gathering Winds
- Focal Point
Pantheon:
Major God: Soul of Lunaris 1% additional Physical Damage Reduction for each nearby Enemy, up to 8%; 1% increased Movement Speed for each nearby Enemy, up to 8%
Minor God: Soul of Ryslatha Life Flasks gain 3 Charges every 3 seconds if you haven't used a Life Flask Recently
5. Final Gems links
| [DPS] Tornado Shot setup | |
 |
Tornado Shot - Fires Arrows that split into more Arrows resulting in a lot of Projectiles flying all across the screen shredding all the enemies in your field of view. Use one with Anomalous Quality. |
 |
Bloodthirst Support - increases your Damage based on how much of your Life is reserved, when it's more than 50%, additional damage is granted |
|
Inspiration Support - increases your Critical Strike Chance, Elemental Damage, and lowers Mana Cost of Linked Skills |
|
Mirage Archer Support - creates a Mirage that copies your Attack and follows you automatically shooting at enemies, for more damage use  Elemental Damage with Attacks Support Elemental Damage with Attacks Support |
 |
Trinity Support - as you Hit enemies with various Elemental Damage types it creates a Resonance, it increases your Elemental Damage and Elemental Penetration |
 |
Greater Multiple Projectiles Support - additional Projectiles works really well with Tornado Shot |
| [UTILITY] Life Reservation and Guard Spell setup | |
 |
Steelskin - the Guard Spell that Blocks a portion of incoming damage, use it constantly as you move, it doesn't have to be linked with the rest of this setup |
 |
Herald of Purity - increases your Physical Damage and creates Sentinels of Purity which can attack enemies |
 |
Arrogance Support - Herald of Purity and Precision will reserve Life instead of Mana |
|
Precision - increases your Critical Strike Chance and Accuracy Rating, both stats are extremely helpful with increasing your DPS |
 |
Enlighten Support - lowers the Reservation cost of linked skills |
 |
Empower Support - increases the level of all linked Active Skill Gems |
| [UTILITY] Hydrosphere, Sniper's Mark, and Arcanist's Brand setup | |
|
Hydrosphere - Hydrosphere lowers Elemental Resistance of nearby enemies, it pulsates dealing Cold or Lightning Damage, your Projectiles can Chain off of it |
 |
Arcanist's Brand - Hydrosphere and Sniper's Mark will be cast by this Brand that attaches to an enemy and activates the linked Spells every second |
|
Sniper's Mark - Cursed enemies take more damage from Projectiles which splits towards 4 more targets. you gain Life and Mana Flask Charges as you Hit Cursed enemies |
 |
Tornado - Tornado works similar to Hydrosphere, you can attack it, and it will later deal damage to enemies depending on the damage it has received, it additionally Hinders enemies |
| [UTILITY] Mana Reservation and Petrified Blood setup | |
 |
Summon Skitterbots - Skitterbots can Chill and Shock enemies, these Minions are invincible but to have them, a portion of your mana Polls needs to be Reserved |
 |
Herald of Ash - grants you a Portion of your Physical Damage as additional Fire Damage, it's really useful since your Weapon's Base Physical Damage is really high |
|
Enlighten Support - lowers the cost of all linked Spells that reserves Mana |
 |
Petrified Blood - Reserves a percentage of your Life Pool, the Damage from hits you receive will be now split - a portion of it you will receive instantly, as it always is, and a smaller portion of it will be dealt as DoT |
| [UTILITY] Blood Rage and Dash setup | |
|
Blood Rage - Blood Rage increases your Attack Speed, grand you Life Leechm and generates Frenzy Charges at a cost of your Life which is drained as Physical DoT |
|
Dash - your character instantly dashes to the chosen location |
 |
Enhance Support |
 |
Second Wind Support - allows you to store an additional charge for linked skills |
|
|
5. Gear Setup
It's an Elemental Attack Bow build, The combination of Doomfletch's Prism and Bloodthirst Support is the core element of the build. The Fledgling Unique Helmet is one of the best offensive choices and it's heavily recommended as the rest of your build consist of Rare Items. It's a Life build and the most valued stat should be Maximum Life and Elemental Resistance until capped at 75%. To increase your DPS look for increased and Added Elemental or Physical Damage, Physical Damage will be converted later via an Anomalous Tornado Shot. Critical Strike Chance and Multiplier are other great stats. 98 Intelligence and 155 Strength and Dexterity will be required, you will need to look for the first two on your Gear or Craft it.
Our recommended items will:
- Cap your resistances at 75%
- Provide you with enough DPS, Life, and ES to start mapping
|
Stat priorities on items:
|
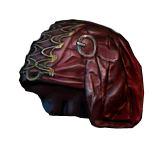
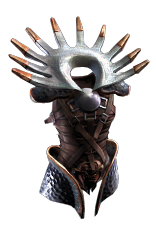
 (Helmet) The Fledgling - It's a heavily offense-oriented Helmet that's the best option for this build, especially given that majority of your gear are Rare Items. Be sure to stand away from your opponents while Attacking (Helmet) The Fledgling - It's a heavily offense-oriented Helmet that's the best option for this build, especially given that majority of your gear are Rare Items. Be sure to stand away from your opponents while Attacking |
|
| (150-200)% increased Armour and Evasion (30-50)% increased Projectile Speed (30-50)% increased Projectile Damage Projectiles cannot collide with Enemies at Close Range Far Shot |
|
 (Helmet) Asenath's Chant - another poplar Helmet, it can be used to trigger socketed Spells with each Attack - it's recommended to put Hydrosphere and Tornado here (Helmet) Asenath's Chant - another poplar Helmet, it can be used to trigger socketed Spells with each Attack - it's recommended to put Hydrosphere and Tornado here |
|
| Trigger a Socketed Spell when you Attack with a Bow, with a 0.3 second Cooldown (10-15)% increased Attack Speed (10-15)% increased Cast Speed +(100-120) to maximum Energy Shield (30-40)% increased Stun and Block Recovery 30% increased Mana Regeneration Rate 5% increased Movement Speed |
|
| Helmet enchantments: Tornado Shot enchantments |
|
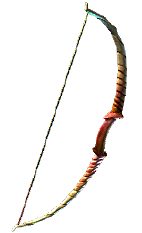
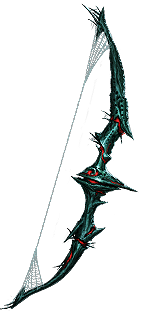 (Weapon) Doomfletch's Prism - It's an obligatory Bow for this build as it grants you all the stats that you need the most, and on top of that - 100% of the weapon's Physical Damage as Extra Damage of each Element (Weapon) Doomfletch's Prism - It's an obligatory Bow for this build as it grants you all the stats that you need the most, and on top of that - 100% of the weapon's Physical Damage as Extra Damage of each Element |
|
| (20-24)% increased Elemental Damage with Attack Skills Adds (12-16) to (20-24) Physical Damage (10-14)% increased Attack Speed 60% increased Mana Regeneration Rate Gain 100% of Weapon Physical Damage as Extra Damage of each Element |
|
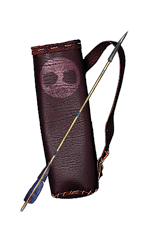 (Quiver) Rare Quiver - Shaper-influenced Spike-Point Arrow Quiver is probably the best option for a base. Look for Maximum Life, Elemental Resistances, and Shaper's Prefix - an additional Arrow (Quiver) Rare Quiver - Shaper-influenced Spike-Point Arrow Quiver is probably the best option for a base. Look for Maximum Life, Elemental Resistances, and Shaper's Prefix - an additional Arrow |
|
| Min. requirements: 70 Maximum Life 30% Total Elemental Resistances Bow Attacks fire an additional Arrow Optional affixes: Critical Strike Multiplier Adds Elemental Damage to Attacks Physical Damage as Extra Cold, Lighting, or Fire Damage Physical Damage Converted to Cold, Lightning, or Fire Damage |
|
 (Body Armour) Rare Body Armour - it's one of the best places to look for Maximum Life and Elemental Resistances. You should have no problem finding a cheap Body Armour with just these stats, seek additional Critical Strike Chance (Body Armour) Rare Body Armour - it's one of the best places to look for Maximum Life and Elemental Resistances. You should have no problem finding a cheap Body Armour with just these stats, seek additional Critical Strike Chance |
|
| Min. requirements: 100 Maximum Life 30% Total Elemental Resistances Attacks Have +1% to Critical Strike Chance Optional affixes: you can apply an additional Curse increased Maximum Life Socketed Attacks have -15 to Total Mana Cost |
|
 (Boots) Rare Boots - Maximum Life, a decent Movement Speed bonus, and Elemental Resistances are the mods you should prioritize. Consider Crafting an additional Intelligence or Strength (Boots) Rare Boots - Maximum Life, a decent Movement Speed bonus, and Elemental Resistances are the mods you should prioritize. Consider Crafting an additional Intelligence or Strength |
|
| Min. requirements: 70 Maximum Life 25% Increased Movement Speed 60% Total Elemental Resistances Optional affixes: Chaos Resistances chance to gain Onslaught for 4 seconds on Kill chance to gain Elusive on Critical Strike Intelligence/Strenght (crafted) |
|
| Boot enchantment: 16% increased Attack and Cast Speed if you've Killed Recently |
|
 (Gloves) Rare Gloves - Gripped Gloves with Crusader or Redeemer influence should be the best option for a base, but the only stats you need can be found on a regular pair of high-level Gloves (Gloves) Rare Gloves - Gripped Gloves with Crusader or Redeemer influence should be the best option for a base, but the only stats you need can be found on a regular pair of high-level Gloves |
|
| Min. requirements: 80 Maximum Life 60% Total Elemental Resistances 13% increased Attack Speed Optional affixes: Increased Damage with Hits against Chilled enemies increased Critical Strike Chance against Shocked enemies Adds # to # Cold Damage Physical Damage Converted to Cold Damage Intelligence/Strenght (crafted) |
|
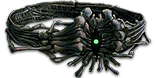 (Belt) Rare Belt - a regular Stygian Vise with high Maximum Life, Elemental Resistances, and increased Elemental Damage with Attacks should be sufficient (Belt) Rare Belt - a regular Stygian Vise with high Maximum Life, Elemental Resistances, and increased Elemental Damage with Attacks should be sufficient |
|
| Min. requirements: 90 Maximum Life 80% Total Elemental Resistances 30% increased Elemental Damage with Attack Skills Optional affixes: #% increased maximum Life Strength and Intelligence (crafted) increased Damage with Hits against Chilled Enemies |
|
 (Amulet) Rare Amulet - Seek the defensive-oriented Amulet with affixes for Maximum Life, Elemental Resistances, and Critical Strike-related stats. Additionally look for added Fire, Cold, Lightning, or Physical Damage (Amulet) Rare Amulet - Seek the defensive-oriented Amulet with affixes for Maximum Life, Elemental Resistances, and Critical Strike-related stats. Additionally look for added Fire, Cold, Lightning, or Physical Damage |
|
| Min. requirements: 90 Maximum Life 80% Total Elemental Resistances 20% increased Global Critical Strike Multiplier Optional affixes: Global Critical Strike Chance Strength and Intelligence adds Damage to Attacks |
|
| Recommended Anointments: Constitution Market for Death Tenacity Throatseeker True Strike |
|
 (Ring) Rare Ring - Diamond or Vermilion Rings are the most popular choices. You won't need Curse on Hit unless you can apply an additional Curse via Annoimtnemnt or Body Armour mod. Maximum Life is undoubtedly the most valued mod (Ring) Rare Ring - Diamond or Vermilion Rings are the most popular choices. You won't need Curse on Hit unless you can apply an additional Curse via Annoimtnemnt or Body Armour mod. Maximum Life is undoubtedly the most valued mod |
|
| Min. requirements: 80 Maximum Life 80% Total Elemental Resistances Optional affixes: increased Global Critical Strike Chance Adds # to # Elemental Damage to Spells and Attacks increased Cold Damage increased Attack Speed Intelligence and Strength |
|
 (Jewel) Abyss Jewels - you can put one Searching Eye Jewel in your Stygian Vise if you're using it, focus on Maximum Life (Jewel) Abyss Jewels - you can put one Searching Eye Jewel in your Stygian Vise if you're using it, focus on Maximum Life |
|
| Recommended affixes: Maximum Life Optional affixes: chance to gain Phasing on Kill Critical Strike Multiplier added Cold Damage with Bow Attacks added Attack/Elemental/Cold Damage |
|
 (Jewel) Rare Jewels - Maximum Life increased by 7% is a really valuable mod to increase your Maximum Life, additionally, look for Elemental Resistances or Critical Strike mods (Jewel) Rare Jewels - Maximum Life increased by 7% is a really valuable mod to increase your Maximum Life, additionally, look for Elemental Resistances or Critical Strike mods |
|
|
Recommended affixes: |
|
 (Jewel) Large Cluster Jewel - You can take a Bow-based Large Cluster Jewel with 8 Passive Skills and some generic Notables (Jewel) Large Cluster Jewel - You can take a Bow-based Large Cluster Jewel with 8 Passive Skills and some generic Notables |
|
| Recommended Notables: 1 Added Passive Skill is Fuel the Fight 1 Added Passive Skill is Smite the Weak 1 Added Passive Skill is Martial Prowess 1 Added Passive Skill is Feed the Fury |
|
 (Jewel) Medium Cluster Jewel - Critical Strike and Projectile Damage are what you should look for (Jewel) Medium Cluster Jewel - Critical Strike and Projectile Damage are what you should look for |
|
| Recommended Notables: 1 Added Passive Skill is Repeater 1 Added Passive Skill is Streamlined 1 Added Passive Skill is Pressure Points 1 Added Passive Skill is Basics of Pain |
|
 (Jewel) Replica Conqueror's Efficiency - you will be able to reduce your Tornado Shot Mana Cost to almost zero Mana (Jewel) Replica Conqueror's Efficiency - you will be able to reduce your Tornado Shot Mana Cost to almost zero Mana |
|
| 4% increased Skill Effect Duration +5 to Maximum Rage Non-Channelling Skills have -9 to Total Mana Cost |
|
 (Jewel) Watcher's Eye - Your only Aura is Precision and you should strive for a Watcher's Eye with at least one mod associated with this Aura (Jewel) Watcher's Eye - Your only Aura is Precision and you should strive for a Watcher's Eye with at least one mod associated with this Aura |
|
| (4-6)% increased maximum Energy Shield (4-6)% increased maximum Life (4-6)% increased maximum Mana <Two or Three random aura modifiers> Recommended Aura modifiers: +(20-30)% to Critical Strike Multiplier while affected by Precision (10-15)% increased Attack Speed while affected by Precision (40-60)% increased Attack Damage while affected by Precision |
|
 (Jewel) The Interrogation - a Cluster Jewel that adds just one Keystone - Secrets of Suffering, which allows you to Sap, Scorch, and Brittle the enemies instead of Shock, Chill, or Ignite. (Jewel) The Interrogation - a Cluster Jewel that adds just one Keystone - Secrets of Suffering, which allows you to Sap, Scorch, and Brittle the enemies instead of Shock, Chill, or Ignite. |
|
| Adds Secrets of Suffering | |
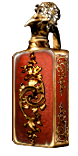
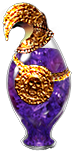 (Flask) Atziri's Promise - the extra Chaos Damage is a substantial boost to your damage not to mention the Chaos Resistance (Flask) Atziri's Promise - the extra Chaos Damage is a substantial boost to your damage not to mention the Chaos Resistance |
|
| +35% to Chaos Resistance 2% of Chaos Damage Leeched as Life during Flask effect Gain (5-8)% of Physical Damage as Extra Chaos Damage during effect Gain (5-8)% of Elemental Damage as Extra Chaos Damage during effect |
|
|
Other suggested Flasks:
|
|
    |
|
|
If you have any other build requests please leave that in the comments below. We are always open to suggestions and constructive feedback.
Pictures used in this article are the intellectual property of Grinding Gear Games.
