Elemental Seismic Trap/Exsanguinate Sabouteour Build
An offshoot of the Physical Trapper build which deals purely Elemental Damage using ConversionConversion Seismic Trap
Saboteur build
Updated for Patch 3.18
The Best Crafty Guides by Odealo
| Guide notes |
| June 12, 2022 - Build created |
| Build overview | |||
| Tags: [TRAP] [ELEMENTAL] [CHOAS] [LIFE] [STARTER] | |||
|
Budget: Defenses: |
|
Boss DPS: AoE: |
|
This version of Seismic Trap Saboteur is very similar to the vastly more popular purely Physical one. If you're familiar with it, then you'll have no problems with adapting or switching to this one. Converting damage has its virtues - there are more damage sources in both - gear and skill tree, it has the ability to apply Elemental Ailments, it's arguably cheaper, and you can use more Skills to further boost damage. The downsides are, that you won't be able to use Brutality Support, and it requires you to convert the damage first. The build deals mixed Elemental Damage, it's more focused on forcing an extra layer of it from the Base Physical Damage, and on increasing Critical Strike Chance and its Multiplier. Conversion is granted by Cold Mastery, which you can then again convert to multiple other damage types, including Chaos Damage.
Seismic Trap and Exsanguinate are Spells that are widely used at the start of a new league, due to their accessibility and overall performance. Seismic Trap activates upon triggering and lasts for some time, dealing periodically damage to the enemies in its radius. Exsanguinate is a Spell that can be made into a Trap and it's used mostly for clearing, as the Tendrils are very fast and aim automatically for opponents. The build utilizes defenses such as Magebane, Pyromaniac, and Born in the Shadows Keystones for Spell Suppression Chance, Immunity to Blind, Shock, and Ignite, Life Regeneration, and reducing damage from nearby, Blinded enemies. The character has a lot of Armour and around 4k of Maximum Life. The damage is great, it can reach a few million DPS with little to no investment.
You can also check our other Path of Exile builds right over here Odealo's Crafty Guides - Full List
1. Gameplay
Use the Exsanguinate Traps to deal with packs of enemies, it's a very efficient way of killing multiple enemies. For boss fights, place a few Seismic Traps so that they can deal consistent damage. Bear Trap with Culling Strike is a useful tool to enhance your other traps' damage, especially when fighting bosses. Use Molten Shell as your Guard Spell, For a Curse use Assassin's Mark, and as a mobility skill - Flame Dash. The Auras which we recommend using are Determination Zealotry, Hatred, Herald of Purity, and Skitterbots
|
|
|
|

2. Build's PROS & CONS
| PROS |
|
| CONS |
|
3. Leveling tips
Start with Explosive Trap, it's available since level 1 and ticks all the boxes to make it a solid Skill to start with. You could even use it in the final version of the build if not for the fact that Exsanguinate/Seismic Trap is better suited for clearing and for boss-killing. You can transition into the later version very late into the game after you have already acquired a good pair of gloves and other gear, and after you start noticing your build could use some upgrade. At first, prioritize added damage and damage increase, and later seek more Critical Strike Chance stats.
Suggested leveling Gem setups:
| Explosive Trap setup | |
 |
Explosive Trap - It's a simple Trap that deals Physical Damage, half of which is converted to Fire, the other half you should convert by other means |
 |
Added Fire Damage Support - adds Fire Damage sourced from Physical Damage |
 |
Trap and Mine Damage Support - increases Trap damage, decreases Throwing Speed |
 |
Multiple Traps Support - allows you to place and throw more traps at once |
| Whirling Blades setup | |
 |
Whirling Blades - Your movement skill, can be different depending on your weapon.  Flame Dash is a great substitute for non-claw users. Flame Dash is a great substitute for non-claw users. |
 |
Lifetap Support - spend Life instead of Mana on the Skill |
| Utility Gems | |
 |
Herald of Ash - It's a great Herald for the Physical-to-Fire type Skills, such as this one |
 |
Herald of Purity - Grants you more Physical Damage, later converted |
 |
Steelskin - a very basic Guard Spell that you can use early on |
Bandits:
When dealing with the bandits you can either help Alira, or kill all of them. Alira grants resistances, mana regeneration, and critical strike multiplier - it's all useful.
Leveling Skill Trees:
35 Points Skill Tree
head for the great Trap Cluster Jewel and take the useful nodes on your way there
72 Points Skill Tree
allocate Cold Mastery for Conversion, get the nearby Jewel Sockets, go for Charisma, Maximum Life, and the Trap Clusters
Recommended leveling items:
 Le Heup of All - good Ring for leveling, it grants Attributes and Resistances which are especially needed Le Heup of All - good Ring for leveling, it grants Attributes and Resistances which are especially needed |
|
| (10-30)% increased Damage +(10-30) to all Attributes (10-30)% increased Rarity of Items found +(10-30)% to all Elemental Resistances |
 Goldrim - a Helmet that grants a lot of Elemental Resistances Goldrim - a Helmet that grants a lot of Elemental Resistances |
|
| +(30-50) to Evasion Rating 10% increased Rarity of Items found +(30-40)% to all Elemental Resistances Reflects 4 Physical Damage to Melee Attackers Level Requirement reduced by 100 (Hidden) |
 Tabula Rasa - has six, linked, white sockets Tabula Rasa - has six, linked, white sockets |
|
| Item has no level requirement and Energy Shield (Hidden) Item has 6 White Sockets and is fully linked (Hidden) |
 Deerstalker - These are great for a build with two trap setups, or one without Tabula, it can accommodate your primary or secondary Trap Setup. Deerstalker - These are great for a build with two trap setups, or one without Tabula, it can accommodate your primary or secondary Trap Setup. |
|
| Socketed Gems are Supported by Level 11 Trap (160-200)% increased Evasion Rating +(35-45) to maximum Life 15% increased Movement Speed (14-18)% increased Trap Throwing Speed 15% increased Movement Speed for 9 seconds on Throwing a Trap |
4. Final Skill Tree, Ascendancy Points, and Pantheon
Final Skill Tree:
98 Points Final Skill Tree (doesn't include Unique nor Cluster Jewels)
116 Points Path of Building (PoB) link
Ascendancy points:
Preferably in that order:
- Perfect Crime
- Pyromaniac
- Chain Reaction
- Born in the Shadows
Pantheon:
Major God: Soul of Solaris: 6% additional Physical Damage Reduction while there; is only one nearby Enemy; 20% chance to take 50% less Area Damage from Hits
Minor God: Soul of Shakari: You cannot be Poisoned while there are at least 3 Poisons on you; 50% less Duration of Poisons on You
5. Final Gems links
| [DPS] Seismic Trap setup | |
 |
Seismic Trap - That's the skill used to kill bosses, so we're making it a six-link. It's a trap that upon activation damages the opponent by dealing AoE Physical Damage multiple times. |
|
Added Fire Damage Support - adds Fire Damage which is sourced from Physical Damage, we recommend awaked version for extra Gem Level for Seismic Trap. |
|
Trap and Mine Damage Support - more Trap Damage, but less Trap Throwing Speed |
| Advanced Traps Support - increased Trap Duration, Trap Throwing Speed, and massively increased Cooldown Recovery Rate | |
 |
Cold to Fire Support - Half of the Cold Damage is converted to Fire, and you gain more Cold Damage based on the original Fire Damage. It's a rarely used Gem, and we recommend fully converting the Physical Damage to Fire to make the most of it. |
 |
Increased Critical Damage Support - Critical Strikes deal more Damage by increasing the Critical Stike Multiplier. |
| [UTILITY] Aura setup | |
 |
Hatred - more Cold Damage and extra Physical Damage as Cold Damage, great Aura for converted Cold Damage builds |
 |
Zealotry - use it for more Spell Damage and increased Critical Strike Chance |
 |
Determination - adds and increases the Armour of your character |
 |
Enlighten Support - linked Skills that reserve Mana reserve less of it |
| [UTILITY] Mana-reserving setup | |
 |
Summon Skitterbots - Skitterbots are Minions that Chill and Shock enemies around them, they cannot die |
|
Herald of Purity - grants you more Physical Damage and spawns Minions which can keep the enemies away from you |
|
Enlighten Support |
| [UTILITY] Bear Trap setup | |
|
Bear Trap - Bear Trap immobilizes the target and makes it receive increased damage from other Traps |
 |
Culling Strike Support - Bear Trap will kill enemies that are below 10% of their Maximum Life |
| [UTILITY] Assassin's Mark | |
 |
Assassin's Mark - this Mark increases the target likeness to be Critically struck and makes it receive more damage from Critical Strikes |
| [MOBILITY] Flame Dash | |
|
Flame Dash - a basic mobility Spell that allows you to teleport |
| [UTILITY] Molten Shell | |
 |
Molten Shell - this Guard Spell will keep you safe by mitigating all incoming Hit Damage for some time |
| [DPS] Exsanguinate setup (can be socketed in Shaper Gloves or Deerstalker Boots for extra Support Gems) |
|
 |
Exsanguinate - A very useful Physical Spell, you will use it for killing off the small game as it works very similar to Arc. The Tendrils are explicitly stated to not be Projectiles, but can still Chain. |
 |
Chain Support - Tendrils will Chain after a Hit massively boosting your clear speed |
 |
Cluster Traps Support - throwing more Traps will increase your clear speed, even if the Traps are dealing less damage |
| Support Gems that can be found as Shaper's Suffixes on Gloves: | |
|
Trap and Mine Damage Support |
| Advanced Traps Support | |
 |
Trap Support - it transforms any Spell into a Trap, and it's an obligatory Support Gem in this setup. |
|
|
6. Gear Setup
We recommend using mostly Rare Items witch some Uniques sprinkled here and there. The most important will be adding more Elemental Damage sourced from your Physical Damage, and gaining more Critical Strike Chance and Multiplier. You won't have to convert your damage to Fire fully, it's of course useful, but don't focus too much on it - the added as Fire, or simply added Fire Damage is fine. Our setup deals mostly Cold Damage. Fire and Chaos Damage are equal, and the other types are more or less insignificant. We managed to convert almost all Physical Damage to Cold (with one Mastery and a craftable Gloves Prefix), but Cold Damage has priority, the game will try to convert your Physical Damage to Cold first, then to Fire, and then to Chaos. The Gem Level of Seismic Trap is also immensely important. for Defense, try to get Life, Evasion, Spell Suppression, and Armour. You might also go out of your way to gain more Strength.
Our recommended items will:
- Cap your resistances
- Give you enough DPS/Life to start mapping successfully
|
Stat priorities on items:
|
 (Helmet) The Devouring Diadem - It's a good choice, it recovers tons of Life, Mana, and Energy Shield every five seconds. The best part of it is Eldritch Battery, your Energy Shield will protect Mana instead of Life, and that's a very fitting Keystone for this build. (Helmet) The Devouring Diadem - It's a good choice, it recovers tons of Life, Mana, and Energy Shield every five seconds. The best part of it is Eldritch Battery, your Energy Shield will protect Mana instead of Life, and that's a very fitting Keystone for this build. |
|
| +1 to Level of Socketed Gems Socketed Gems have 20% reduced Mana Reservation Trigger Level 15 Feast of Flesh every 5 seconds (180-220)% increased Energy Shield 10% chance for Energy Shield Recharge to start when you use a Skill Eldritch Battery Veiled Suffix |
|
 (Helmet) Rare Helmet - It's an equally good choice, but you might easily run into mana issues. It should grant you more Life, Resistances, and Attributes. (Helmet) Rare Helmet - It's an equally good choice, but you might easily run into mana issues. It should grant you more Life, Resistances, and Attributes. |
|
| Min. requirements: +80 to Maximum Life 40% Total Elemental Resistances Strength/Intelligence Optional affixes: Adds Damage to Spells Spell Suppression Chance Global Critical Strike Multiplier |
|
| Helmet enchantments: Seismic Trap Enchantment |
|
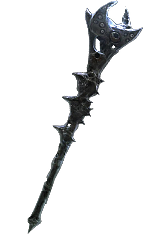 (Weapon) Rare Dagger/Wand/Scepter - we recommend dual-wielding weapons with a lot of increased Spell Damage, Critical Strike mods, and up to two mods to increase the level of your Seismic Trap (Weapon) Rare Dagger/Wand/Scepter - we recommend dual-wielding weapons with a lot of increased Spell Damage, Critical Strike mods, and up to two mods to increase the level of your Seismic Trap |
|
| Min. requirements: +1 to Level of all Physical Spell/Spell Skill Gems 90% increased Spell/Elemental Damage Optional affixes: Adds Damage to Spells Global Critical Strike Multiplier increased Critical Strike Chance for Spells |
|
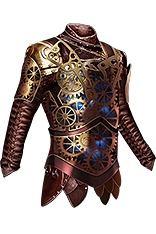 (Body Armour) Tinkerskin - Tinkerskin is the best body armour for this build, it has tons of useful affixes and utilities such as Life Recovery, chance to gain Charges, and Phasing (Body Armour) Tinkerskin - Tinkerskin is the best body armour for this build, it has tons of useful affixes and utilities such as Life Recovery, chance to gain Charges, and Phasing |
|
| (140-170)% increased Evasion and Energy Shield +(60-90) to maximum Life (10-15)% increased Cooldown Recovery Rate for throwing Traps 15% chance to gain a Frenzy Charge when your Trap is triggered by an Enemy 30% chance to gain Phasing for 4 seconds when your Trap is triggered by an Enemy Recover 100 Life when your Trap is triggered by an Enemy Recover 50 Energy Shield when your Trap is triggered by an Enemy |
|
 (Boots) Rare Boots - Rare Boots with high Maximum Life, Elemental Resistances, and Movement Speed are enough for this build, but for further upgrades search the more high-end mods (Boots) Rare Boots - Rare Boots with high Maximum Life, Elemental Resistances, and Movement Speed are enough for this build, but for further upgrades search the more high-end mods |
|
| Min. requirements: 25% Movement Speed +60 to Maximum Life 60% Total Elemental Resistances Optional affixes: chance to gain Onslaught for 4 seconds on Kill chance to gain Elusive on Critical Strike you have Tailwind if you have dealt a Critical Strike Recently Strength |
|
| Min. requirements: +50 to Maximum Life 40% Total Elemental Resistances 20% increased Trap Damage Socketed Gems are Supported by Trap % of Physical Damage Converted Optional affixes: increased Trap Throwing Speed Socketed Gems are Supported by Advanced Traps increased Trap Damage Socketed Gems are Supported by Trap And Mine Damage |
|
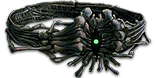 (Belt) Rare Belt - Life, Resistance, and Strength are the most important affixes. Trap Throwing Speed can be crafted. (Belt) Rare Belt - Life, Resistance, and Strength are the most important affixes. Trap Throwing Speed can be crafted. |
|
| Min. requirements: +90 to Maximum Life 90% Total Elemental Resistances Optional affixes: increased Maximum Life Strength Chaos Resistance increased Trap Throwing Speed (crafted) |
|
 (Amulet) Rare Amulet - if you won't be able to find an Amulet granting two levels to your Seismic Trap, focus more on Life, Strength, and Resistances. You can also use Ashes of the Stars if you have one. (Amulet) Rare Amulet - if you won't be able to find an Amulet granting two levels to your Seismic Trap, focus more on Life, Strength, and Resistances. You can also use Ashes of the Stars if you have one. |
|
| Min. requirements: +1 to Level of all Dexterity Skill Gems +1 to Level of all Physical Skill Gems Optional affixes: Maximum Life Strength Global Critical Strike Chance Elemental Resistances |
|
| Recommended Anointments: Heart of Ice Divine Fury |
|
 (Ring) Circle of Guilt - It's the Ring that can upgrade your Herald of Purity. Try to increase its Effect, or to increase your Physical Damage. (Ring) Circle of Guilt - It's the Ring that can upgrade your Herald of Purity. Try to increase its Effect, or to increase your Physical Damage. |
|
| One to three random Synthesis implicit modifiers> +(10-20) to all Attributes Adds (8-10) to (13-15) Physical Damage +(350-400) to Armour <Two Random Herald of Purity modifiers> |
|
 (Ring) Rare Ring - Rings are a great source of Attributes, Resistances, and Maximum Life. Focus just on these stats. (Ring) Rare Ring - Rings are a great source of Attributes, Resistances, and Maximum Life. Focus just on these stats. |
|
| Min. requirements: +80 to Maximum Life 80% Total Elemental Resistances Optional affixes: added Spell/Elemental Damage Attributes Global Critical Strike Multiplier Critical Strike Chance |
|
 (Jewel) Rare Jewels - you can often gain a lot of various stats from these Jewels. Look for the required stats or enhance your damage (Jewel) Rare Jewels - you can often gain a lot of various stats from these Jewels. Look for the required stats or enhance your damage |
|
| Recommended affixes: Critical Strike Multiplier for Spells Trap Damage Global Critical Strike Multiplier Elemental Resistances Strength Maximum Life |
|
 (Jewel) Large Cluster Jewel - Large Cluster Jewels should increase your Physical Damage via very powerful Notables which you can find there. (Jewel) Large Cluster Jewel - Large Cluster Jewels should increase your Physical Damage via very powerful Notables which you can find there. |
|
| Recommended affixes: 1 Added Passive Skill is Furious Assault 1 Added Passive Skill is Iron Breaker 1 Added Passive Skill is Force Multiplier 1 Added Passive Skill is Exploit Weakness 1 Added Passive Skill is Iron Breaker |
|
 (Jewel) Medium Cluster Jewel - Medium Cluster Jewels offers a huge variety of useful Notables, you should be interested in Critical Strikes, and Trap Jewels. (Jewel) Medium Cluster Jewel - Medium Cluster Jewels offers a huge variety of useful Notables, you should be interested in Critical Strikes, and Trap Jewels. |
|
| Recommended affixes: 1 Added Passive Skill is Basics of Pain 1 Added Passive Skill is Pressure Points 1 Added Passive Skill is Guerilla Tactics 1 Added Passive Skill is Set and Forget 1 Added Passive Skill is Magnifier 1 Added Passive Skill is Towering Threat |
|
 (Jewel) Brutal Restraint - Socket it near Fervour to gain some additional Dexterity, and to enhance all Notables in radius. (Jewel) Brutal Restraint - Socket it near Fervour to gain some additional Dexterity, and to enhance all Notables in radius. |
|
| Denoted service of (500-8000) dekhara in the akhara of (Asenath-Balbala-Nasima) Passives in radius are Conquered by the Maraketh Historic |
|
  (Jewel) Forbidden Flesh & Forbidden Flame - Assassin's Opportunistic or Trickster's Harness the Void are great Keystones you can allocate via these two Jewels (Jewel) Forbidden Flesh & Forbidden Flame - Assassin's Opportunistic or Trickster's Harness the Void are great Keystones you can allocate via these two Jewels |
|
| llocates <<Random Ascendancy Notable>> if you have the matching modifiers on Forbidden Flesh llocates <<Random Ascendancy Notable>> if you have the matching modifiers on Forbidden Flame |
|
 (Jewel) Watcher's Eye - You're using Zealotry, Hatred, and Determination. Try to find a Watcher's Eye with modifiers matching these Auras. (Jewel) Watcher's Eye - You're using Zealotry, Hatred, and Determination. Try to find a Watcher's Eye with modifiers matching these Auras. |
|
| (4-6)% increased maximum Energy Shield (4-6)% increased maximum Life (4-6)% increased maximum Mana <Two or Three random aura modifiers> |
|
 (Flask) Atziri's Promise - A massive damage boost to your damage and Chaos Resistance. It's cheap and powerful. (Flask) Atziri's Promise - A massive damage boost to your damage and Chaos Resistance. It's cheap and powerful. |
|
| +35% to Chaos Resistance 2% of Chaos Damage Leeched as Life during Flask effect Gain (5-8)% of Physical Damage as Extra Chaos Damage during effect Gain (5-8)% of Elemental Damage as Extra Chaos Damage during effect |
|
 (Flask) Taste of Hate - Extra Physical Damage as Cold Damage is great, it also increases your defenses. (Flask) Taste of Hate - Extra Physical Damage as Cold Damage is great, it also increases your defenses. |
|
| +50% to Cold Resistance 20% less Cold Damage taken (10-15)% of Physical Damage from Hits taken as Cold Damage during Flask effect Gain (10-15)% of Physical Damage as Extra Cold Damage during effect 30% chance to Avoid being Chilled during Flask effect 30% chance to Avoid being Frozen during Flask effect |
|
|
Other suggested Flasks:
|
|
    |
|
|
If you have any other build requests please leave that in the comments below. We are always open to suggestions and constructive feedback.
Pictures used in this article are the intellectual property of Grinding Gear Games.
