Holy Hammers Inquisitor Build
A cheap and easy-to-follow build capable of reaching 50mil DPS. Great for a starter.Holy Hammers
Inquisitor Build
Updated for Patch 3.28
The Best Crafty Guides by Odealo
| Guide notes | |||
| May 20, 2026 -Build created |
|||
| Build overview | |||
| Tags: [ATTACK] [ELEMENTAL] [HYBRID] [STARTER] | |||
|
Budget: Defenses: |
|
Boss DPS: AoE: |
|
Holy Hammers is a slow Slam Attack with a base Physical Damage, partially converted to Lightning. It has a unique ability to consume one Power Charge to vastly increase its AoE by calling down additional Hammers and grant more Damage. We've decided to improve it with many Exertions from the automated Warcry setup and the Echoes of Creation Helmet since we're bound by the sluggishness of the skill anyway. All this should narrow our ascendancy Choice to Inquisitor with Inevitable Judgement, to ignore all Elemental Resistances with Critical Strikes. Reaching 100% Critical Strike Chance will be easy with Righteous Providence and a bit of extra help from items and passives. All requirements to get this build up and running are to find a good source of Power Charges and Convert the 50% of Physical Damage to Lightning, which is not a difficult task at all. Inquisitor also has the powerful Sanctuary and Pious Path passives to enhance the character with an ever-present Consecrated Ground that Regenerates Energy Shield. This ground effect can be improved with the Shining Justice notable or Bottled Faith Flask. That renders the character nearly immune to Curses and Critical Strike. Energy Shield is also regained with the Divine Shield keystone. All these factors put you in a great position to allocate the Corrupted Soul Keystone from Glorious Vanity. This high Life Pool and uniquely good passive regeneration will be enhanced by Block Chance, Armour, additional Physical Damage Reduction, and Fortify to make one of the sturdiest characters for its price. The build is also not expensive at all. It uses very few, very cheap Unique Items and Rares with no particularities to them. Jewels and Gems are also dirt-cheap, making it a fine starter or an SSF build.
Overall, the build has extremely high damage, durability, and cost. It's a late-league project that requires many specific items. Not recommended for new players.
1. Gameplay
Holy Hammers consume Power Charges and Exertions on Hit, so use it sparingly. Almost all the other skills are automated: Assassin's Mark, Warcries, and Molten Shell. Be sure your Blood Rage is always on, and activate Rallying Cry when in need of more damage. Leap Slam or other such skill is for mobility. Your other passive skills are Herald of Purity, Precision, and Blood and Sand.
|
|
|
|

2. Build's PROS & CONS
| PROS |
|
| CONS |
|
3. Leveling tips
The build is perfectly good if you wish to start with it right away. Holy Hammer requires Level 28, but before that, you probably won't be able to manage your power charges, so it doesn't matter. You can start with Glacial Hammer, Smite, or Molten Strike to make it easier; however, we recommend using Spell Totems. The difference between Spells and Attacks is not build-defining during the campaign, as you can keep allocating passives that benefit both, such as Elemental Damage or Critical Strike nodes. You can follow our levelling guide here. Switch to this build at any point, but we recommend getting a good weapon first. That should be around level 70 onward, so that you won't have to keep upgrading it many times.
Bandits:
An additional Passive Skill Point seems like the best option.
4. Final Skill Tree, Ascendancy Points, and Pantheon
Final Skill Tree:
104 Points Final Skill Tree (doesn't include Cluster or Unique Jewels)
123 Points Path of Building (PoB) link
Ascendancy points:
Preferably in that order:
- Righteous Providence
- Inevitable Judgement
- Sanctuary
- Pious Path
Pantheon:
Major God: Soul of the Brine King: You cannot be Stunned if you've been Stunned or Blocked a Stunning Hit in the past 2 seconds; 100% chance to Avoid being Frozen
Minor God: Soul of Garukhan: 60% reduced Effect of Shock on you
5. Final Gems links
| [DPS] Holy Hammers setup | |
 |
Holy Hammers - Holy Hammers is a Slam with half-converted Lightning Damage, being much stronger if it can consume a Power Charge. |
 |
Overexertion Support - You're using many Automated Warcries, and Overexertion boosts damage for each. |
 |
Fist of War Support - Once every 2 seconds, the Attack deals significantly more damage with a larger AoE. |
 |
Melee Physical Damage Support - More Melee Physical Damage. |
 |
Physical to Lightning Support - You have to convert the remaining 50% of Physical damage to Elemental, and this Support Gem is the easiest way to do so. Pulverise is an alternative. |
 |
Inspiration Support - Critical Strike Chance, Elemental Damage, and reduced Cost. It can be swapped for Power Charge on Critical if you struggle with generating Power Charges. |
| [UTILITY] Autoexertion setup | |
 |
Autoexertion - Linked Warcries are cast whenever they're off-cooldown, but they grant no buffs, only exert Attacks, and they reserve Mana. |
 |
Seismic Cry - 6 Exerted Attacks have increased Area of Effect. |
 |
Infernal Cry - 6 Exerted Attacks Trigger Combust on Hit, which Fire deals damage. |
 |
Intimidating Cry - 2 Exerted Attacks deal Double Damage. |
 |
Battlemage's Cry - 5 Exerted Attacks trigger a linked Spell on Hit, which is Purifying Flame. |
 |
Purifying Flame - Consecreated Ground are exceptionally good in this build, and this Spell creates them. |
| [UTILITY] Reservation setup | |
 |
Herald of Purity - Grants more Physical Damage and creates Minions, which are irrelevant. |
 |
Blood and Sand - You can choose between concentrated damage in Blood Stance or a more spread-out mode in Sand Stance. |
 |
Enlighten Support - Linked Spells Reserve less Mana. |
| [UTILITY] Assassin's Mark setup | |
 |
Assassin's Mark - Hits against Marked enemies are more likely to be Critical and have increased Crit Multiplier. |
 |
Mark on Hit Support - Mark is Triggered on Hit against Rare and Unique enemies. |
| [UTILITY] Precision setup | |
 |
Precision - Accuracy Rating and Critical Strike Chance for Attacks. |
 |
Arrogance Support - Precision Reserves Life instead of Mana, which we have a lot more of to spare. |
| [UTILITY] Molten Shell setup | |
 |
Molten Shell - Prevents a portion of incoming Hit Damage until it expires or explodes. The amount scales with Armour. |
 |
Cast when Damage Taken - Cast linked Spell when enough damage has been received. |
| [UTILITY] Other skills | |
 |
Leap Slam - A basic movement ability that may seem a bit slow if you don't have Faster Attacks imbued in it. It can be replaced with Frosblink. |
 |
Blood Rage - Increases Attack Speed and grants Frenzy Charges on kill. The life drain is not an issue with high Life Regeneration. |
 |
Rallying Cry - Exerted Attacks deal more damage per Ally affected by the Buff of this same Skill, which improves the damage of your Minions. |
|
|
5. Gear Setup
The build is quite basic. First, look for a Warstaff with high Physical Damage. DPS is not as important as the flat damage on it. You should convert the remaining 50% of Physical Damage to any Element. With Inevitable Judgement and 100% Critical Strike Chance, which you should achieve with almost no investment, the type of Elemental Damage does not matter. Penetration and Exposure are also of no consequence since you ignore all Resistances. Remember to get enough Accuracy and Dexterity to make this build work. Lastly, see if you can get any extra Critical Strike Multiplier. It is also important to generate Charges of all types, which is easy to achieve with Mob Mentality cluster notable and Power Charge on Critical Strike Support Gem. Defensively, the build relies on Maximum Life, which is a source of Energy Shield via Corrupted Soul and Rare equipment. Your Attack and Spell Block Chance should be capped or nearly-capped. Passive Life Regeneration is useful since half of all damage goes through your ES. Armour plays a minor role. Your Unique Items are Ashes of the Stars and Echoes of Creation; it's pointless to look for rare counterparts.
|
Stat priorities on items:
|
 (Helmet) Echoes of Creation - The best Helmets in all builds that use many Warcries and can sustain the self-inflicted Physical Damage. It improves damage with Exerted Attacks greatly. (Helmet) Echoes of Creation - The best Helmets in all builds that use many Warcries and can sustain the self-inflicted Physical Damage. It improves damage with Exerted Attacks greatly. |
|
| Socketed Warcry Skills have +1 Cooldown Use (80-120)% increased Armour +(50-70) to maximum Life When you Attack, take (15-20)% of Life as Physical Damage for each Warcry Exerting the Attack Skills deal (10-15)% more Damage for each Warcry Exerting them |
|
 (Body Armour) Rare Body Armour - On a Body Armour focus on Armour with Energy Shield, add additional Physical Damage Reduction, and craft the mod to take reduced damage from Critical Strikes. For the Eldritch mods, get Spell Block Chance or Physical-to-Elemental Damage shift and Crit Multiplier for Attacks. (Body Armour) Rare Body Armour - On a Body Armour focus on Armour with Energy Shield, add additional Physical Damage Reduction, and craft the mod to take reduced damage from Critical Strikes. For the Eldritch mods, get Spell Block Chance or Physical-to-Elemental Damage shift and Crit Multiplier for Attacks. |
|
| Min. requirements: high Armour and Energy Shield You take 10% reduced Extra Damage from Critical Strikes per Endurance Charge (Essence of Horror Suffix) Optional affixes: Resistances Additional Physical Damage Reduction Maximum Life |
|
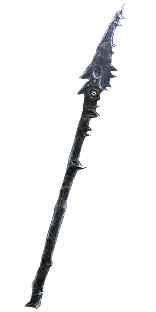 (Weapon) Rare Warstaff - A Warstaff needs high Physical Damage firstly, and Attack Speed, Critical Strike Chance, Accuracy, and increased damage per Endurance Charges secondly. Eventuality Rod can be good, but regular Warstaves grant a lot of Block Chance. Most Shaper's Suffixes are also great, so definitely look for them for a late-game upgrade. (Weapon) Rare Warstaff - A Warstaff needs high Physical Damage firstly, and Attack Speed, Critical Strike Chance, Accuracy, and increased damage per Endurance Charges secondly. Eventuality Rod can be good, but regular Warstaves grant a lot of Block Chance. Most Shaper's Suffixes are also great, so definitely look for them for a late-game upgrade. |
|
| Min. requirements: high Physical Damage Optional affixes: Increased Critical Strike Chance increased Attack Speed Added Accuracy Rating increased Damage per Endurance Charge |
|
 (Gloves) Rare Gloves - Gloves must either provide Accuracy, Dexterity, Maximum Life, and Resistances, or convert the Remaining Physical Damage to Elemental so that you'd save a Support Gem. For the Eldritch mods, get Exerted Attack Damage and Herald of Purity buff Effect. (Gloves) Rare Gloves - Gloves must either provide Accuracy, Dexterity, Maximum Life, and Resistances, or convert the Remaining Physical Damage to Elemental so that you'd save a Support Gem. For the Eldritch mods, get Exerted Attack Damage and Herald of Purity buff Effect. |
|
| Min. requirements: +90 to Maximum Life +50 Dexterity +400 to Accuracy Rating Optional affixes: Added Physical Damage to Attacks increased Attack Speed Resistances 50% Damage Conversion (optional) |
|
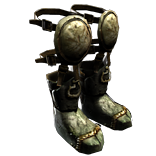 (Boots) Rare Boots - Boots are basic - Movement Speed, Maximum Life, and Resistances of all sorts. For the Eldritch mods, get Damage per Endurance Charge or Movement Speed with Extra Elemental Damage sourced from Physical Damage. (Boots) Rare Boots - Boots are basic - Movement Speed, Maximum Life, and Resistances of all sorts. For the Eldritch mods, get Damage per Endurance Charge or Movement Speed with Extra Elemental Damage sourced from Physical Damage. |
|
| Min. requirements: +90 to Maximum Life 30% increased Movement Speed 90% total Resistances Optional affixes: Resistances Life Regeneration |
|
 (Belt) Rare Belt - On a Belt, gather Maximum Life, Resistances, and increased Elemental Damage with Attacks. Life Regeneration or Dexterity is also good. (Belt) Rare Belt - On a Belt, gather Maximum Life, Resistances, and increased Elemental Damage with Attacks. Life Regeneration or Dexterity is also good. |
|
| Min. requirements: +100 to Maximum Life 90% total Resistances increased Elemental Damage with Attack Skills Optional affixes: Armour Life Regeneration Dexterity |
|
 (Amulet) Ashes of the Stars - Ashes is great because of the extra Quality it grants for all Skills. It's especially good for Holy hammers and all Warcries. (Amulet) Ashes of the Stars - Ashes is great because of the extra Quality it grants for all Skills. It's especially good for Holy hammers and all Warcries. |
|
| +(10-16) to all Attributes (5-10)% increased Experience Gain of Gems +1 to Level of all Skill Gems +(20-30)% to Quality of all Skill Gems |
|
| Recommended Anointments: Titanic Impacts Admonisher |
|
 (Ring) Rare Rings - On Rings, you will look for Dexterity, Resistances, Maximum Life, reduced Mana Cost, increased Elemental Damage, and Accuracy if need be. (Ring) Rare Rings - On Rings, you will look for Dexterity, Resistances, Maximum Life, reduced Mana Cost, increased Elemental Damage, and Accuracy if need be. |
|
| Min. requirements: +80 to Maximum Life 90% total Resistances Non-Channelling Skills have -7 to Total Mana Cost (crafted) Optional affixes: Accuracy Dexterity increased Elemental Damage with Attack Skills Added Physical Damage to Attacks |
|
 (Jewel) Intuitive Leap - Put it near Stamina notable and allocate it alongside Barbarism, Juggernaut, and Measured Fury. (Jewel) Intuitive Leap - Put it near Stamina notable and allocate it alongside Barbarism, Juggernaut, and Measured Fury. |
|
| Passive Skills in Radius can be Allocated without being connected to your tree Passage |
|
 (Jewel) Reckless Defence - A Jewel with the most Block Chance, which is a primary defensive layer. You take no extra damage from Crits, so it has no downside. (Jewel) Reckless Defence - A Jewel with the most Block Chance, which is a primary defensive layer. You take no extra damage from Crits, so it has no downside. |
|
| +(2-6)% Chance to Block Spell Damage +(2-6)% Chance to Block Attack Damage Hits have (140-200)% increased Critical Strike Chance against you |
|
  (Jewel) Forbidden Flesh & Flame - Guardian's Unwavering Crusade is the best passive you can get since it grants Elemental Auras. (Jewel) Forbidden Flesh & Flame - Guardian's Unwavering Crusade is the best passive you can get since it grants Elemental Auras. |
|
| Allocates <random Ascendancy Notable> if you have the matching modifier on Forbidden Flame Allocates <random Ascendancy Notable> if you have the matching modifier on Forbidden Flesh |
|
 (Jewel) Glorious Vanity - Doryani's Corrupted Soul is good as long as you can Regenerate ES and Life at the same time, which you do thanks to Pious Path and Divine Shield. Turning Mind over Matter into this keystone is the safest option. (Jewel) Glorious Vanity - Doryani's Corrupted Soul is good as long as you can Regenerate ES and Life at the same time, which you do thanks to Pious Path and Divine Shield. Turning Mind over Matter into this keystone is the safest option. |
|
| Bathed in the blood of (100-8000) sacrificed in the name of <Ahuana • Doryani • Xibaqua> Passives in radius are Conquered by the Vaal Historic |
|
 (Jewel) The Blue Dream - Power Charge generation is important, so using Blue Dream near notables granting Lightning Resistance is justified. (Jewel) The Blue Dream - Power Charge generation is important, so using Blue Dream near notables granting Lightning Resistance is justified. |
|
| Gain (6-10)% of Lightning Damage as Extra Chaos Damage Passives granting Lightning Resistance or all Elemental Resistances in Radius also grant an equal chance to gain a Power Charge on Kill |
|
 (Jewel) Rare Jewels - You have lots of flat ES, so increases to it on Jewels are especially beneficial. Maximum Life and Crit Multiplier are the next best things. (Jewel) Rare Jewels - You have lots of flat ES, so increases to it on Jewels are especially beneficial. Maximum Life and Crit Multiplier are the next best things. |
|
| Recommended affixes: increased Maximum Life increased Maximum Energy Shield Critical Strike Multiplier |
|
 (Jewel) Large Cluster Jewel - Get the "Staff/Mace" Cluster Jewel with Overlord for Fortify on Hit and some damage or utility notables. (Jewel) Large Cluster Jewel - Get the "Staff/Mace" Cluster Jewel with Overlord for Fortify on Hit and some damage or utility notables. |
|
| Recommended affixes: 1 Added Passive Skill is Overlord 1 Added Passive Skill is Martial Prowess 1 Added Passive Skill is Heavy Hitter 1 Added Passive Skill is Fuel the Fight |
|
| (Jewel) Medium Cluster Jewel - Exerted Attacks Medium Cluster Jewel. Lead By Example grants permanent Onslaught. Mob Mentality is also crucial - it generates Charges. Cry Wolf is the best third addition. |
|
| Recommended affixes: 1 Added Passive Skill is Cry Wolf 1 Added Passive Skill is Lead by Example 1 Added Passive Skill is Heavy Hitter |
|
|
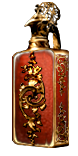
Other suggested Flasks and Tinctures:
|
|
     |
|
|
If you have any other build requests, please leave that in the comments below.
Pictures used in this article are the intellectual property of Grinding Gear Games.
