Buy/Sell
 Log in

Poison Archon Acolyte of Chayula POE 2 Build
A clever yet simple Poison build for the Acolyte of Chayula using Plague Bearer and Spearfield.Poison
Acolyte of Chayula Build
Updated for Path of Exile 2 Early Access
The Best Crafty Guides by Odealo
| Guide notes |
| July 11, 2026 - Created for Early Access. |
| Build Overview | |||
| Tags: [CHAOS] [POISON] | |||
|
Budget: Defenses: |
|
Boss DPS: AoE: |
|


The build employs Plague Bearer as its main damage source. The skill requires charging up first by Poisoning enemies, which we have to get over with as quickly as possible. To do so, use Spearfield; it creates Hazardous Spears which explode on contact. Add to that Blasphemous Repulsion, Herald of Plague, and Herald of Blood - passive Skills that greatly enhance the overall Poison Damage. To ensure that all your Hits are Poisonous - no matter the type of damage or Chance to Poison - equip Splinter of Lorrata and Original Sin. The Spear has really low damage, but fortunately Plague Bearer is not an Attack and has its own damage scaled with its Skill Level. It also removes the Poison Stack limit, which helps. Another way to boost your DPS is to find a source of Withered (Archon of Chayula and Withered Support, for example), and look for generic Chaos Damage, Poison Damage, and Ailment Damage mods. Archon of Chayula is the secret Ascendancy passive that you get after completing the Breach questline, and while it's a powerful buff, it's only half the reason to choose this Ascendancy.
Waking Dream and Choice of Power will spawn Purple Flames Remnants around you, each granting extra Chaos Damage. It boosts your damage significantly, and it's one of the very few sources of damage as extra damage. Chayula's Gift improves your Chaos Resistance so that you won't even need to allocate Chaos Inoculation. Defensively, you're still reliant on Energy Shield, but mixed with Evasion and Deflection Rating. Boost it up with Wind Dancer and Ghost Dance, and allocate Subterfuge Mask with Spectral Ward.
You can also check our other Path of Exile 2 builds right over here Odealo's Crafty Guides - Full List
1. Gameplay
Monitor Plague Bearer and use it whenever it's available and fully loaded, near the enemies. To charge it up, hit enemies with Spearfield. It's the main mapping cycle, but against bosses you have to be more deliberate. First, apply at least 8 stacks of Poison with Spearfield and Entangle, charge up the Rage meter, Break their Armour, and activate Archon of Chayula. Plague Bearer will be the most effective this way, and it's rather easy to set it all up; the build uses four active Skills. Your passive Skills are Herald of Plague, Herald of Thunder, Wind Dancer, Ghost Dance, Blasphemy-linked Repulsion, Wolf Pack, a Skill from your Sceptre, and possibly Eternal Rage.
|
|


2. Build's PROS & CONS
| PROS |
|
| CONS |
|
3. Leveling tips
There is no one way to level up such a build - the ascendancy simply offers extra Chaos Damage on top (if you start by allocating the Purple Flames passive), so anything will do; what we recommend is to start with Poison right away. Poison is based on Physical and Chaos Damage combined (or any damage for that matter if you wear Plaguefinger Gloves), so you may start with any Physical or Chaos Attack or Spell. The Plague Bearer and Herald of Plague should be implemented as soon as possible since it's free damage in Poison builds. Poisonburst Arrow with Murkshaft or Gas Grenade are good candidates, and do consider Snakebite Gloves before you switch to the final version of the build, as the Maximum Poison stacks are important until you decide to wield the Unique Spear. Remember to allocate all the Poison-related nodes on the passive skill tree first, then go for defences. The process of evolving the build to its proper version is gradual.
| [DPS] Poisonburst Arrow setup | |
 |
Poisonburst Arrow - One of the best Skills to inflict Poison with. Requires a Bow. |
 |
Escalating Poison |
 |
Deadly Poison |
 |
Bursting Plague |
| [UTILITY] other skills | |
 |
Plague Bearer |
 |
Herald of Plague |
 |
Herald of Blood |
 |
Toxic Growth - You can add Toxic Growth and Poison them; they'll explode for some additional damage. |
 |
Vine Arrow - Another Plant Skill that can be Poisoned to deal more damage, although its role is to Slow enemies down. |
4. Final Skill Tree, Ascendancy Points, and Pantheon
Final Skill Tree:
 |
|
Click on the image to open the Passive Tree preview in a new window Or import the build into PoB: |
Ascendancy points:
Preferably in this order:
- Waking Dream
- Lucid Dreaming; Choice of Power
- Chayula's Gift
- Archon of Chayula
5. Final Gems links
| [DPS] Plague Bearer setup | |
|
Plague Bearer - The main damaging ability, but with the support gems we impose heavy restrictions on its usage. It deals high Physical Damage, which excels at Poisoning. Use it only against enemies with Broken Armour and 5 or more stacks of Poison, while having a lot of Rage yourself. |
 |
Arakaali's Lust |
 |
Tacati's Ire |
|
Deadly Poison |
 |
Rageforged |
 |
Exploit Weakness |
| [UTILITY] Spearfield setup | |
 |
Spearfield - Its role is to apply many Poisons quickly, generate Rage, and Break Armour: all of it to fuel Bursting Plague. |
|
Bursting Plague or Impale |
 |
Corrosion |
 |
Rage |
 |
Rearm |
 |
Uruk's Smelting |
| [UTILITY] Entangle setup | |
 |
Entangle - You can further improve Burning Plague reuse rate with Entangle. Once placed, it will Slow and Poison Enemies, Corroding their Armour. |
|
Bursting Plague |
|
Corrosion |
 |
Poison Spores |
 |
Kaom's Madness |
 |
Bleed |
| [UTILITY] Archon of Chayula setup | |
 |
Archon of Chayula - A skill with two components. One is a Tornado triggered every 3 seconds, which damages enemies directly; the other is a Buff that grants much more Damage, and Withered on Hit. |
|
Deadly Poison |
 |
Concentrated Area |
 |
Admixture |
 |
Prolonged Duration |
 |
Withering Touch |
| [UTILITY] Blasphemy setup | |
 |
Blasphemy - Lets you transform one Curse into an Aura that affects nearby enemies constantly and costs 60 Spirit. |
 |
Repulsion - A Curse. Cursed enemies deal damage around them when Hit, knocking back what's around them. It's used to improve damage and to inflict additional Poison stacks. |
|
Deadly Poison |
|
Admixture |
|
Bleed |
 |
Poison |
| [UTILITY] Herald of Blood setup | |
|
Herald of Blood - Killing Bleeding enemies deals Physical Damage, which will inflict Poison all around them. Bleeding adds damage to all setups with Admixture Support. |
|
Bursting Plague |
 |
Heft |
|
Bleed |
 |
Blind |
 |
Execute |
| [UTILITY] Herald of Plague setup | |
|
Herald of Plague - Killing Poisoned enemies spreads the Poison around them. |
 |
Chaos Mastery |
| [UTILITY] Wind Dancer setup | |
 |
Wind Dancer - Grants more evasion with each stack that you accumulate over time. These are lost when Hit; it Hits nearby enemies, knocking them back. |
 |
Knockback |
|
Blind |
 |
Maim |
 |
Magnified Area |
| [UTILITY] Discipline setup | |
 |
Discipline - Found on Stoic Sceptres; grants flat Maximum Energy Shield. Purity Sceptre Skills are good. Support Gems are optional. |
 |
Cannibalism |
 |
Clarity |
| [UTILITY] Into the Breach setup | |
 |
Into the Breach - Ascendancy Skill which generates Purple Flames after allocating the purple node down the branch. It's a stackable Remnant granting up to 70% of damage as Chaos damage when fully stacked. |
 |
Remnant Potency |
 |
Harmonic Remnants |
 |
Khatal's Rejuvenation |
| [UTILITY] Wolf Pack setup | |
 |
Wolf Pack - Wolves' role is to inflict Withered, take some of your damage, and get you some random buff on death, which is accomplished via the Support Gems socketed in their setup. |
|
Withering Touch |
 |
Amanamu's Tithe |
 |
Romira's Requital |
|
Poison |
|
Bleed |
| [UTILITY] Eternal Rage setup | |
 |
Eternal Rage - If you have Spirit to Spare, we recommend Eternal Rage for better Rage sustain. |
| [UTILITY] Ghost Dance setup | |
 |
Ghost Dance - If you have Spirit to Spare and you prefer bolstering your defences, get Ghost Dance to recover ES on Hit, given your Evasion is high. |
|
|
6. Gear Setup
To increase the damage of Plague Bearer, you have to increase the Skill Gem Level, which is difficult. You should also search for increases to global Poison, Chaos, and Ailment Damage. If you can't sustain Rage, look for Rage on Hit. Plague Bearer is not a Spell nor is it an Attack, so these don't do much. If you want, you can invest a bit in Spearfield, but it doesn't play a big role in your DPS, relatively. Spirit is useful since you can add some great Support Gems or Spirit-reserving Skills, like two Heralds, Blasphemy, Wind Dancer, Wolf Pack, Ghost Dance, Eternal Rage, and so on. Defensively, you rely on Energy Shield, Evasion, and boons derived from them like Recharge Rate and Deflection.
|
Stat priorities on items:
|
 (Helmet) Rare Helmet - On a Helmet, get ES with an Iron Rune, as you will allocate Subterfuge Mask and get Evasion from it. Add Resistances or Attributes. (Helmet) Rare Helmet - On a Helmet, get ES with an Iron Rune, as you will allocate Subterfuge Mask and get Evasion from it. Add Resistances or Attributes. |
|
| Min. requirements: +400 to Energy Shield +60% total Resistance Optional affixes: Intelligence |
|
 (Helmet) Alpha's Howl - It may be overkill to use it here, but Alpha's Howl grants lots of flat Spirit, later increased, has Cold Resistance, and doubles the Presence Radius. (Helmet) Alpha's Howl - It may be overkill to use it here, but Alpha's Howl grants lots of flat Spirit, later increased, has Cold Resistance, and doubles the Presence Radius. |
|
| (80-100)% increased Evasion Rating +100 to Spirit +(50-75)% to Cold Resistance Presence Radius is doubled |
|
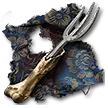
 (Weapon) Splinter of Lorrata - A Spear with infinite Poison stacking potential and 100% Chance to Poison on Hit. The downside is irrelevant to us, and so is the damage; Plague Bearer has its own damage. Perfect Storm Runes are probably the best. (Weapon) Splinter of Lorrata - A Spear with infinite Poison stacking potential and 100% Chance to Poison on Hit. The downside is irrelevant to us, and so is the damage; Plague Bearer has its own damage. Perfect Storm Runes are probably the best. |
|
| Grants Skill: Spear Throw Adds (2-3) to (6-8) Physical Damage Deal no Elemental Damage 20% increased Melee Strike Range with this weapon Any number of Poisons from this Weapon can affect a target at the same time Always Poison on Hit with this weapon |
|
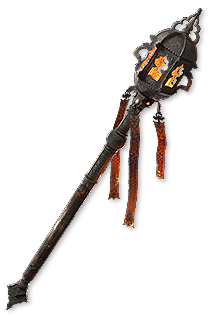 (Off-hand) Rare Sceptre - Its only purpose is to increase Spirit and grant a Persistent Skill. Socket a Rabbit idol in it. For that reason, it is worth looking into Sylvan's Effigy. (Off-hand) Rare Sceptre - Its only purpose is to increase Spirit and grant a Persistent Skill. Socket a Rabbit idol in it. For that reason, it is worth looking into Sylvan's Effigy. |
|
| Min. requirements: 60% increased Spirit Optional affixes: Attributes |
|
 (Gloves) Rare Gloves - On Gloves, you may try Added Damage, but that will work only on Spearfield. Other Prefixes offer only defences. Suffixes are mainly for Resistances and Attributes. Socket a Rune for increased effect of Damaging Ailments or a Boar Idol for Rage on Melee Hit. (Gloves) Rare Gloves - On Gloves, you may try Added Damage, but that will work only on Spearfield. Other Prefixes offer only defences. Suffixes are mainly for Resistances and Attributes. Socket a Rune for increased effect of Damaging Ailments or a Boar Idol for Rage on Melee Hit. |
|
| Min. requirements: +150 to Energy Shield +80% total Resistance Optional affixes: Attributes Added Damage Maximum Life |
|
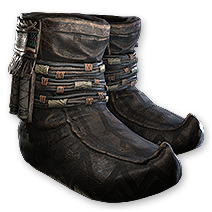 (Boots) Rare Boots - On Boots, you will seek Movement Speed with Resistances; maybe defences like Evasion or ES. (Boots) Rare Boots - On Boots, you will seek Movement Speed with Resistances; maybe defences like Evasion or ES. |
|
| Min. requirements: 30% increased Movement Speed +80% total Resistance Optional affixes: Attributes Energy Shield Maximum Life |
|
 (Amulet) Rare Amulet - You're looking for a Desecrated +1 to All Skills Amulet (Plague Bearer dodges Gem tags that would allow it to get Levels). Then shift focus to increases or added ES and Evasion, Spirit, Resistances, and Attributes. (Amulet) Rare Amulet - You're looking for a Desecrated +1 to All Skills Amulet (Plague Bearer dodges Gem tags that would allow it to get Levels). Then shift focus to increases or added ES and Evasion, Spirit, Resistances, and Attributes. |
|
| Min. requirements: +1 to Level of all Skills (Desecrated Suffix) Spirit Optional affixes: Resistances Maximum Life Maximum Mana or Maximum Energy Shield Anointment: Dominion |
|
 (Ring) Rare Ring - On a Ring you may go for Added (any) Damage, Resistances, Attributes, increased Chaos Damage, Maximum Life, or Attributes. (Ring) Rare Ring - On a Ring you may go for Added (any) Damage, Resistances, Attributes, increased Chaos Damage, Maximum Life, or Attributes. |
|
| Min. requirements: +80% total Resistance Added Damage to Attacks Optional affixes: Maximum Life Attributes increased Chaos Damage |
|
 (Ring) Original Sin - Splinter of Lorrata prevents you from dealing Elemental Damage, so if you convert it first with this Ring, you can benefit from added Elemental Damage, although you don't have a lot of it. Its Chaos Resistance is also important. (Ring) Original Sin - Splinter of Lorrata prevents you from dealing Elemental Damage, so if you convert it first with this Ring, you can benefit from added Elemental Damage, although you don't have a lot of it. Its Chaos Resistance is also important. |
|
| +(7-13)% to Chaos Resistance +(17-23)% to Chaos Resistance 100% of Elemental Damage Converted to Chaos Damage |
|
 (Belt) Darkness Enthroned - You want this item to mimic Gloves' Slot and sockets and socket Courtesan Mannan's Rune of Cruelty for 20% increased magnitude of Poison or Fenumus' Draining for Withered Effect. (Belt) Darkness Enthroned - You want this item to mimic Gloves' Slot and sockets and socket Courtesan Mannan's Rune of Cruelty for 20% increased magnitude of Poison or Fenumus' Draining for Withered Effect. |
|
| (50-100)% increased effect of Socketed Augment Items Has 2 Augment Sockets (Hidden) This item gains bonuses from Socketed Items as though it was <Random socketable equipment type> |
|
 (Belt) Rare Belt - A rare Belt offers limited boons, but the most notable ones include Strength, Resistances, Maximum Life, and Flask or Charm mods. (Belt) Rare Belt - A rare Belt offers limited boons, but the most notable ones include Strength, Resistances, Maximum Life, and Flask or Charm mods. |
|
| Min. requirements: +80% total Resistance Strength Optional affixes: Maximum Life Attributes |
|
 (Body Armour) Rare Body Armour - On a Body Armour, you usually prioritize Defences, and here, you should go for a pure Evasion base with Iron Runes to benefit from Spectral Ward. Add Deflection Rating and Spirit. (Body Armour) Rare Body Armour - On a Body Armour, you usually prioritize Defences, and here, you should go for a pure Evasion base with Iron Runes to benefit from Spectral Ward. Add Deflection Rating and Spirit. |
|
| Min. requirements: +2500 to Evasion Rating Deflection Rating +30 to Spirit Optional affixes: Resistance #% of Damage taken Recouped as Mana (Desecrated Suffix) |
|
 (Jewel) Rare Jewels - Both Sapphires and Emeralds are plentiful in various good defensive and offensive modifiers. Pick ones from the list; "Damaging Ailments deal damage faster" may be the best one. (Jewel) Rare Jewels - Both Sapphires and Emeralds are plentiful in various good defensive and offensive modifiers. Pick ones from the list; "Damaging Ailments deal damage faster" may be the best one. |
|
| Optional affixes: increased Maximum Energy Shield (Sapphire) increased Evasion Rating (Emerald) increased Magnitude of Ailments you Inflict (Sapphire, Emerald) increased Chaos Damage (Sapphire) increased Withered Magnitude (Sapphire) increased Poison Duration (Emerald) Damaging Ailments deal damage #% faster (Sapphire, Emerald) increased Magnitude of Poison you inflict (Emerald) |
|
 (Jewel) Prism of Belief - One of the very few opportunities to increase the Level of Plague Bearer. (Jewel) Prism of Belief - One of the very few opportunities to increase the Level of Plague Bearer. |
|
| +(1-3) to Level of all <Random skill> Skills |
|
|
If you have any other build requests please leave that in the comments below. We are always open to suggestions and constructive feedback.
Pictures used in this article are the intellectual property of Grinding Gear Games.