
Poison Spark Assassin
A very powerful Assassin Build that uses insanely fast Spark Projectiles to deal extreme amounts of Poison DamagePoison Spark
Assassin Build
Created for Patch 3.27
The Best Crafty Guides by Odealo
| Guide notes |
| November 08, 2025 - Build created |
| Build overview | |||
| Tags: [LIFE] [CASTER] [ELEMENTAL] [POISON] | |||
|
Budget: Defenses: |
|
Boss DPS: AoE: |
|
The newly reworked Assassin Ascendency received a very important feature: you can inflict Poison with any Damage type. While this modifier is not exactly new in the game, it was usually locked behind very specific or expensive Setups, such as applying Vines to Enemies, surrounding to Madness, or converting all Damage to Chaos. The Assassin's Notable is simple and unconditional, although keep in mind you still have to get enough Chance to Poison from other sources to actually inflict that Ailment.
Another specialty of Assassins are Critical Strikes. Your Poisons inflicted by Critical Hit will deal 20% More Damage, and you have nearly guaranteed Crits against Enemies with more than 50% of their maximum Life, even without conditional Buffs such as Diamond Flask or Assassin's Mark, thanks to the Knife in the Back Notable. It combines well with the Perfect Agony Keystone. It grants a massive amount of Damage over Time Multiplier based on your Critical Strike Multiplier, but prevents Ailments from non-Critical Strikes. You will still need plenty of Crit investments to reliably inflict Ailments against damaged targets, as you will lose the Crit Chance bonus in exchange for Culling Strike and 100% Critical Strike Multiplier.
Spark is a Lightning Spell that fires several Projectiles with limited Duration that move around randomly and bounce off the walls. The important feature is that each Cast can Hit the same target multiple times, almost twice per second. By increasing their Duration and Projectile Speed, you will greatly improve the odds of multiple Hits, but also greatly enhance your Clear Speed. The best source of Projectile Speed modifier is a Rare Quiver and a Widowhail Bow that improves the modifiers on your Quiver by up to 250%, Tattoos, and Jewels; while the Duration is mostly limited to the Passive Tree.
The Spark has interesting Transfigured options to choose from. The Spark of the Nova releases Projectiles in all directions but has a longer Cast time, Spark of Unpredictability has a longer Duration and varying Speed, while the regular Spark is cheapest to get to level 21 with 20% Quality. You can also Corrupt each of them to get the Vaal version, which releases 100 Projectiles over its Duration for a quick burst of Damage. They all perform similarly and don't require changes to the Setup, so it is a matter of preference.
The defense comes from maximum Life protected by Energy Shield, Evasion, and Spell Suppression. You will have great Recovery thanks to Instant Leech and a massive amount of Hits, but the Build lacks proper Damage Reduction against heavy Physical Hits. The Opportunistic grants massive protection against large packs of monsters, but switches to an offensive bonus against Bosses.
You can also check our other Path of Exile builds right over here Odealo's Crafty Guides - Full List
1. Gameplay
Use Spark to cover the entire battlefield with fast Projectiles. Your Curses should be applied automatically via Gloves and Focus modifiers.
|
|
|
|

2. Build's PROS & CONS
| PROS |
|
| CONS |
|
3. Leveling tips
The Perfect Agony Keystone requires high Crit investments to be worth it, but you can easily level up using regular Poison Setup. You won't be able to use Elemental Skills at first, so you should start with Physical or Chaos Setup. Our recommendation is Cobra Lash and Blade Trap, but you can also use Spells such as Blade Vortex. Attacks are usually much stronger in the early game if you can replace your Weapon often.
Bandits:
Kill all three bandits to get one additional Passive Skill Point or kill Alira to help with Gearing.
Leveling Skill Trees:
31 Points Passive Tree
Use Cobra Lash and any Claw with high Physical DPS suitable for your level. Focus on generic Damage Notables.
76 Points Passive Tree
Pick up the nearby Poison, Claw, and maximum Life Notables. You will also need some Accuracy and the Multishot Notable.
4. Final Skill Tree, Ascendancy Points, and Pantheon
Final Skill Tree:
106 Points Final Passive Tree (doesn't include Cluster or Unique Jewels)
120 Points Path of Building (PoB) link
Ascendancy points:
Preferably in that order:
- Toxic Delivery
- Infused Toxins
- Knife in the Back
- Opportunistic
Pantheon:
Major God: Soul of Arakaali: 10% reduced Damage taken from Damage Over Time, +40% Chaos Resistance against Damage Over Time
Minor God: Soul of Ryslatha: 60% increased Life Recovery from Flasks used when on Low Life, Enemies you've Hit Recently have 50% reduced Life Regeneration rate
5. Final Gems links
| [DPS] Spark Setup | |
 |
Spark - Projectiles from the same Cast can deal Damage every 0.66 seconds to the same target. Your DPS will be best in small arenas. |
 |
Inspiration Support |
 |
Spell Echo Support |
 |
Unbound Ailments Support |
 |
Efficacy Support |
 |
Elemental Focus Support |
| [UTILITY] Curse Setup Socket in the Trigger Helmet |
|
 |
Despair - lowers the Chaos Resistance of affected Enemies, increasing the Poison Damage they take. |
 |
Assassin's Mark - increases your Critical Strike Chance, which is important for Enemies that drop below 50% of their maximum Life. It also generates Power Charges. |
 |
Enfeeble - lowers the Damage dealt by your opponents. |
 |
Summon Lightning Golem - improves your Cast Speed and Mana Regeneration. |
 |
Arcanist Brand - if you can't get the Helmet with Trigger modifier, use Arcanist Brand. |
| [UTILITY] Aura Setup | |
 |
Malevolence - improves your Damage with Poisons and prolongs the Duration of your Sparks. |
 |
Herald of Agony - grants a bit of Poison Chance and empowers your Damage with Poison. It can be replaced with Poison Tattoos to save Mana. |
 |
Purity of Elements - makes you immune to Elemental Ailments and grants plenty of Elemental Resistance. |
 |
Clarity - improves your Mana Regeneration. You can use the Vaal version to disable Mana Costs during Boss fights. |
 |
Precision - use a level 1 Precision to enable Watcher's Eye modifiers. This Aura grants a bit of Critical Strike Chance at higher levels, but it is not worth the Mana Reservation. |
 |
Enlighten Support |
| [UTILITY] Movement Setup | |
 |
Frostblink - an instant teleport that Chills Enemies in its radius. |
 |
Arcane Surge Support - keep it at a low level to activate the Buff with each use. It grants Mana Regeneration and Cast Speed for all Skills. |
| [UTILITY] Guard Setup | |
 |
Steelskin - absorbs incoming Damage and disables Bleeds. |
 |
Cast when Damage Taken Support - activates the Guard Skill once you start taking Damage. |
| [UTILITY] Optional Temporary Buffs Setup | |
 |
Withering Step - applies several stacks of Wither Debuff on nearby Enemies and grants you the Elusive Buff. It shares Cooldown with other Movement Skills. |
 |
Vaal Haste - the Vaal version doesn't require you to Reserve Mana, and grants you tons of Cast Speed for the short Duration. |
 |
Frost Shield - significantly lowers the Damage you receive and improves your Critical Strike Chance. |
 |
Sigil of Power - grants you additional Damage and weakens Enemies. It is very powerful, but takes a long time to power up. |
 |
More Duration Support |
 |
Increased Area of Effect Support |
|
|
6. Gear Setup
This Setup uses plenty of Unique Items, but they are not mandatory for the functionality. The Widowhail and Rare Quiver is a great source of Projectile Speed and Damage, but a proper Rare Wand and Shield will yield similar DPS and better survivability. The Perfect Agony Keystone overwrites your Damage over Time Multiplier with Critical Strike Multiplier, and you will need a steady Critical Strike Chance against damaged Enemies, so the gearing is very similar to regular Crit Caster. You will need Projectile Speed, Critical Hits, and Cast Speed. The regular Spell Damage modifiers only affect your Hits, but the Lightning or Chaos Damage modifiers affect Poisons as well. Your defense comes from Life, Energy Shield, and Evasion.
|
Stat priorities on items:
|
 (Weapon) Widowhail - this Bow greatly enhances the bonuses gained from your Quiver, but can also be Corrupted to grant the Faster Projectiles Support for Socketed Spark. (Weapon) Widowhail - this Bow greatly enhances the bonuses gained from your Quiver, but can also be Corrupted to grant the Faster Projectiles Support for Socketed Spark. |
|
| (150-250)% increased bonuses gained from Equipped Quiver Recommended modifier: Socketed Gems are supported by Level 10 Faster Projectiles |
|
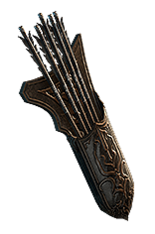 (Weapon) Rare Quiver - Most modifiers on Quivers only affect Bow Attacks. Pick the Feathered Arrow Quiver with a Fractured Projectile Speed modifier and use the Essence of Scorn to gain generic Speed and Critical Strike Multiplier modifiers. At a higher budget, you can add maximum Life, additional Pierce, or Frenzy Charge generation. (Weapon) Rare Quiver - Most modifiers on Quivers only affect Bow Attacks. Pick the Feathered Arrow Quiver with a Fractured Projectile Speed modifier and use the Essence of Scorn to gain generic Speed and Critical Strike Multiplier modifiers. At a higher budget, you can add maximum Life, additional Pierce, or Frenzy Charge generation. |
|
|
Min. requirements: |
|
 (Weapon) Rare Weapon - a proper Rare Wand provides more Damage per Hit, but lower chances to hit multiple times, worse AoE coverage, and won't generate Frenzy Charges easily, but is easier to set up and allows you to use a Shield. (Weapon) Rare Weapon - a proper Rare Wand provides more Damage per Hit, but lower chances to hit multiple times, worse AoE coverage, and won't generate Frenzy Charges easily, but is easier to set up and allows you to use a Shield. |
|
| Min. requirements: 80% increased Lightning Damage +1 to Level of all Lightning Spell Skill Gems 40% increased Projectile Speed Optional affixes: #% increased Cast Speed Adds # Lightning Damage to Spells #% increased Spell Critical Strike Chance |
|
 (Weapon) Rare Shield - it can provide a bit of Damage through Gem Levels, Lightning Damage, and Crit Chance, but also offers tons of survivability via Block Chance and Spell Suppression. (Weapon) Rare Shield - it can provide a bit of Damage through Gem Levels, Lightning Damage, and Crit Chance, but also offers tons of survivability via Block Chance and Spell Suppression. |
|
| Min. requirements: 40% Chance to Block +1 to Level of all Lightning Spell Skill Gems Optional affixes: #% increased Spell Critical Strike Chance +# to maximum Life #% chance to Suppress Spell Damage |
|
 (Helmet) Rare Helmet - a Rare Helmet is necessary to quickly use all your Curses and summon the Golem with just one button press. It should also provide the usual defensive modifiers and improve the Reservation Efficiency. (Helmet) Rare Helmet - a Rare Helmet is necessary to quickly use all your Curses and summon the Golem with just one button press. It should also provide the usual defensive modifiers and improve the Reservation Efficiency. |
|
| Min. requirements: +100 to maximum Life +100 to Energy Shield Trigger Socketed Spells when you Focus, with a 0.25 second Cooldown 40% total Elemental and Chaos Resistance Optional affixes: % increased Mana Reservation Efficiency of Skills (Eater Influence) #% increased Cast Speed (Exarch Influence) #% chance to Suppress Spell Damage |
|
 (Body Armour) Doppelgänger Guise - you can make full use of this Armour. The Sane Stance grants you tons of defense against Physical Damage, but you can toggle the Insane Stance to easily cap your Crit Chance against Bosses once they lose 50% Life. (Body Armour) Doppelgänger Guise - you can make full use of this Armour. The Sane Stance grants you tons of defense against Physical Damage, but you can toggle the Insane Stance to easily cap your Crit Chance against Bosses once they lose 50% Life. |
|
| Grants Level 20 Unhinge Skill (40-60)% more Critical Strike Chance while Insane Enemies Killed by your Hits are destroyed while Insane (40-30)% less Physical and Chaos Damage Taken while Sane Regenerate 10% Life over one second when Hit while Sane |
|
 (Body Armour) Rare Armour - a Rare Armour provides a great amount of Evasion, Energy Shield, and enables Life Mastery. It can also grant Spell Suppression, generate Flasks or Endurance Charges, and shift Physical Damage to be taken as Elemental. (Body Armour) Rare Armour - a Rare Armour provides a great amount of Evasion, Energy Shield, and enables Life Mastery. It can also grant Spell Suppression, generate Flasks or Endurance Charges, and shift Physical Damage to be taken as Elemental. |
|
| Min. requirements: +2000 to Evasion Rating +500 to Energy Shield 20% chance to Suppress Spell Damage Optional affixes: #% of Physical Damage from Hits taken as Elemental Damage (Eater Influence) Flasks gain a Charge every 3 seconds (Exarch Influence) % total Elemental and Chaos Resistance |
|
 (Belt) Rare Belt - on the Belt, you will need high amounts of maximum Life and Resistances. It should also increase the amount of Flask Charges gained. (Belt) Rare Belt - on the Belt, you will need high amounts of maximum Life and Resistances. It should also increase the amount of Flask Charges gained. |
|
| Min. requirements: +100 to maximum Life 35% increased Flask Charges gained 40% total Elemental Resistance Optional affixes: #% increased maximum Life (Hunter) Regenerate 150 Energy Shield per second while a Rare or Unique Enemy is Nearby Chaos Resistance |
|
 (Jewel) Abyss Jewel - the Abyssal Jewel can grant you a bit of Damage and Cast Speed, or grant you Phasing on Kill. It can also be used to get lacking Resistances or Attributes. (Jewel) Abyss Jewel - the Abyssal Jewel can grant you a bit of Damage and Cast Speed, or grant you Phasing on Kill. It can also be used to get lacking Resistances or Attributes. |
|
| Min. requirements: +30 to maximum Life Optional affixes: % total Elemental Resistance #% increased Damage over Time while wielding a Two Handed Weapon #% chance to gain Phasing for 4 seconds on Kill #% increased Cast Speed if you've dealt a Critical Strike Recently Attributes |
|
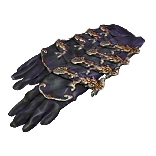 (Gloves) Asenath's Gentle Touch - a pair of Rare Gloves could grant more Damage or defense, but the automatic Curse application and explosions are extremely valuable for the Clear Speed. You can cheaply get the Corrupted modifier to improve your base Critical Strike Chance. (Gloves) Asenath's Gentle Touch - a pair of Rare Gloves could grant more Damage or defense, but the automatic Curse application and explosions are extremely valuable for the Clear Speed. You can cheaply get the Corrupted modifier to improve your base Critical Strike Chance. |
|
| +(20-30) to Intelligence +(60-80) to maximum Life +(60-80) to maximum Mana Curse Enemies with Temporal Chains on Hit Non-Aura Curses you inflict are not removed from Dying Enemies Enemies near corpses affected by your Curses are Blinded Enemies Killed near corpses affected by your Curses explode, dealing 3% of their Life as Physical Damage Recommended Corruption modifier: +(0.5-0.8)% to Spell Critical Strike Chance |
|
 (Boots) Rare Boots - the Boots are focused on defense and Speed. They can also provide Avoidance against Bleeding or Poison, or give the Onslaught Buff upon killing an Enemy. (Boots) Rare Boots - the Boots are focused on defense and Speed. They can also provide Avoidance against Bleeding or Poison, or give the Onslaught Buff upon killing an Enemy. |
|
| Min. requirements: +100 to maximum Life +100 to Energy Shield 40% total Elemental Resistance +30% increased Movement Speed Optional affixes: Chaos Resistance #% increased Action Speed (Exarch Influence) #% chance to gain Onslaught for 4 seconds on Kill Poisons you inflict deal Damage 7% faster (Eater Influence) % chance to Avoid Bleeding |
|
 (Amulet) Replica Dragonfang's Flight - the default choice for most Spells, it grants you tons of Damage, reduces the Attribute Requirements, and improves your Reservation Efficiency. (Amulet) Replica Dragonfang's Flight - the default choice for most Spells, it grants you tons of Damage, reduces the Attribute Requirements, and improves your Reservation Efficiency. |
|
| +(10-16) to all Attributes +3 to Level of all <Random Skill> Gems +(5-10)% to all Elemental Resistances (5-10)% increased Reservation Efficiency of Skills Items and Gems have (10-5)% reduced Attribute Requirements |
|
 (Amulet) Ungil's Harmony - a very good starting Amulet that helps cap your Critical Strikes against damaged Bosses, but doesn't provide any bonuses against healthy Enemies. The downside of this Amulet does not apply to the Perfect Agony Keystone. (Amulet) Ungil's Harmony - a very good starting Amulet that helps cap your Critical Strikes against damaged Bosses, but doesn't provide any bonuses against healthy Enemies. The downside of this Amulet does not apply to the Perfect Agony Keystone. |
|
| +(16-24) to Dexterity and Intelligence (250-350)% increased Global Critical Strike Chance Your Critical Strikes do not deal extra Damage +(30-50) to maximum Life +(30-50) to maximum Mana 40% increased Stun and Block Recovery |
|
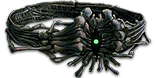
 (Ring) Anathema - this Ring grants you 3 extra Curses without any additional effort. It can also be used to stack up your Power Charges before the Boss fight. Try to get a Corrupted version, as the base Implicit is not great. (Ring) Anathema - this Ring grants you 3 extra Curses without any additional effort. It can also be used to stack up your Power Charges before the Boss fight. Try to get a Corrupted version, as the base Implicit is not great. |
|
| +(15-25) to maximum Energy Shield +(30-40) to Intelligence (10-15)% increased Cast Speed (10-20)% chance to gain a Power Charge when you Cast a Curse Spell Your Curse Limit is equal to your maximum Power Charges |
|
 (Ring) Betrayal's Sting - grants tons of Damage through extra Poisons. It will considerably speed up your ramp-up of Damage and Clear Speed, but lacks defensive value. (Ring) Betrayal's Sting - grants tons of Damage through extra Poisons. It will considerably speed up your ramp-up of Damage and Clear Speed, but lacks defensive value. |
|
| Adds (3-4) to (10-14) Physical Damage to Attacks +(20-35) to Dexterity -(30-20)% to all Elemental Resistances +(20-30)% to Chaos Resistance 5% increased Movement Speed (25-40)% chance to inflict an additional Poison on the same Target when you inflict Poison |
|
 (Ring) Rare Ring - here you can get plenty of maximum Life, Resistances, and craft a Minimum Endurance Charge. It should also grant you a bit of Crit Multiplier, Cast Speed, or improve the Mana sustain. The special Dusk Ring base can grant you Skill Effect Duration, but it will be much more expensive to Craft. (Ring) Rare Ring - here you can get plenty of maximum Life, Resistances, and craft a Minimum Endurance Charge. It should also grant you a bit of Crit Multiplier, Cast Speed, or improve the Mana sustain. The special Dusk Ring base can grant you Skill Effect Duration, but it will be much more expensive to Craft. |
|
| Min. requirements: +80 to maximum Life 40% total Elemental Resistance Optional affixes: % increased Cast Speed Right ring slot: 15% increased Skill Effect Duration (Dusk Ring) #% increased Mana Regeneration Rate #% to Global Critical Strike Multiplier +1 to Minimum Endurance Charges Non-Channelling Skills have -# to Total Mana Cost |
|
 (Jewel) Rare Jewels - can grant you plenty of Damage. Seek Critical Strike Multiplier, Damage with Poison, or Projectile Speed. They can also grant the Poison Chance if you don't have enough Mana for Herald of Agony. (Jewel) Rare Jewels - can grant you plenty of Damage. Seek Critical Strike Multiplier, Damage with Poison, or Projectile Speed. They can also grant the Poison Chance if you don't have enough Mana for Herald of Agony. |
|
| Min. requirements: 7% increased maximum Life Optional affixes: #% to Critical Strike Multiplier with Elemental Skills #% increased Mana Reservation Efficiency of Skills #% increased Damage with Poison #% chance to Poison on Hit #% to Elemental Resistance Corrupted Blood cannot be inflicted on you |
|
 (Jewel) Large Cluster Jewels - the Elemental or Lightning Damage Cluster grants you access to the Doryani's Lesson Notable, which is your only source of Life Leech. Pair it with any 2 other useful Notables, ideally Prismatic Heart (Jewel) Large Cluster Jewels - the Elemental or Lightning Damage Cluster grants you access to the Doryani's Lesson Notable, which is your only source of Life Leech. Pair it with any 2 other useful Notables, ideally Prismatic Heartand Thunderstruck. |
|
| Min. requirements: 1 Added Passive Skill is Doryani's Lesson Optional affixes: 1 Added Passive Skill is Prismatic Heart 1 Added Passive Skill is Thunderstruck 1 Added Passive Skill is Inspired Oppression 1 Added Passive Skill is Overshock 1 Added Passive Skill is Paralysis |
|
 (Jewel) Medium Cluster Jewels - the Overwhelming Malice grants you Unholy Might, which allows you to inflict Wither Debuffs passively with your Hits. The other Notable should grant the Quick Getaway for bonus Movement Speed. (Jewel) Medium Cluster Jewels - the Overwhelming Malice grants you Unholy Might, which allows you to inflict Wither Debuffs passively with your Hits. The other Notable should grant the Quick Getaway for bonus Movement Speed. |
|
| Min. requirements: 1 Added Passive Skill is Overwhelming Malice Optional affixes: 1 Added Passive Skill is Quick Getaway 1 Added Passive Skill is Basics of Pain |
|
 (Jewel) Brutal Restraint - grants a lot of Dexterity, allowing you to use Tattoos to replace Dexterity Notables. You can use the Traitor Keystone to sustain Flasks, but it is not mandatory. (Jewel) Brutal Restraint - grants a lot of Dexterity, allowing you to use Tattoos to replace Dexterity Notables. You can use the Traitor Keystone to sustain Flasks, but it is not mandatory. |
|
| Denoted service of (500-8000) dekhara in the akhara of Balbala Passives in radius are Conquered by the Maraketh Historic |
|
 (Jewel) The Light of Meaning - pick the version that improves the Lightning Damage, as it will boost your Poisons applied via Lightning Damage as well, and is considerably cheaper than the Chaos variant. (Jewel) The Light of Meaning - pick the version that improves the Lightning Damage, as it will boost your Poisons applied via Lightning Damage as well, and is considerably cheaper than the Chaos variant. |
|
| Passive Skills in Radius also grant 6% increased Lightning Damage | |
 (Jewel) Unnatural Instinct - pairs very well with the Light of Meaning to pick up the enhanced Passives, but also grants you the Duration Nodes without spending Points. (Jewel) Unnatural Instinct - pairs very well with the Light of Meaning to pick up the enhanced Passives, but also grants you the Duration Nodes without spending Points. |
|
| Allocated Small Passive Skills in Radius grant nothing Grants all bonuses of Unallocated Small Passive Skills in Radius |
|
 (Jewel) Watcher's Eye - the Malovelence modifier won't affect you if you are using Perfect Agony, but you can use the Precision modifier instead. Other than that, focus on defense or utility modifiers. (Jewel) Watcher's Eye - the Malovelence modifier won't affect you if you are using Perfect Agony, but you can use the Precision modifier instead. Other than that, focus on defense or utility modifiers. |
|
| Recommended modifiers: Gain a Flask Charge when you deal a Critical Strike while affected by Precision +(20-30)% to Critical Strike Multiplier while affected by Precision 10-15)% increased Mana Recovery Rate while affected by Clarity Non-Channelling Skills have -(10-5) to Total Mana Cost while affected by Clarity +(30-50)% to Chaos Resistance while affected by Purity of Elements (50-40)% reduced Reflected Elemental Damage taken while affected by Purity of Elements |
|
  (Jewel) Forbidden Flame&Flesh - there are a lot of valuable Notables to borrow from other Ascendencies. Notably, the Calculated Risk makes your Crit Chance Lucky, but the Unlucky Hit Damage does not apply to Poison. You can also pick many of the defensive options. (Jewel) Forbidden Flame&Flesh - there are a lot of valuable Notables to borrow from other Ascendencies. Notably, the Calculated Risk makes your Crit Chance Lucky, but the Unlucky Hit Damage does not apply to Poison. You can also pick many of the defensive options. |
|
| Allocates <random Ascendancy Notable> if you have the matching modifier on Forbidden Flesh Recommended Notables: Born in the Shadows Calculated Risk Shrapnel Specialist Spellbreaker One Step Ahead Polymath |
|
|
Suggested Flasks:
|
|
    |
|
|
If you have any other build requests please leave that in the comments below. We are always open to suggestions and constructive feedback.
Pictures used in this article are the intellectual property of Grinding Gear Games.
