Rage Vortex Berserker Build
Berserker is a Class that's great with Attacks, it synergizes with Rage to deal one of the most devastating single-attackRage Vortex
Berserker Build
Updated for Patch 3.22
The Best Crafty Guides by Odealo
| Guide notes | |||
| October 31, 2023 -Updated for Patch 3.22 |
|||
| Build overview | |||
| Tags: [MELEE] [PHYSICAL] [IMPALE] [LIFE] | |||
|
Budget: Defenses: |
|
Boss DPS: AoE: |
|
Rage Vortex is a powerful Skill that uses Rage to create Ragestorms - it's a devastating Melee Attack that's actually more similar to a ranged Spell due to the range and AoE and low Fire Rate that's possible to achieve. The best Ascendancy Class for all the Rage build is undoubtedly Berserker, it has 3 Keystones associated with Rage mechanics. War Bringer makes your Warcries generate Rage and renders your Exerted Attack more powerful. Crave the Slaughter generates Rage with Attacks and increases your Maximum Rage. Rite of Ruin drains your Life and triples the inherent Rage effects - that is increased Attack Damage, Attack Speed, and Movement Speed. With at least 25 Rage you're immune to Stuns.
The build combines the Rage buff and Exerted Attacks Mechanics - after using a Warcry your next Attack deals 20% increased damage, but this is later expanded to two or three Attacks, more damage, and extra effects. Attack Speed is not that important, just one Ragestorm can clear a screen-wide area of enemies. Ragestorm can fit through doorframes no matter its size, but it performs the best in open areas. You should focus on Maximum Life as it is your main defense mechanism - around 6k of it should be sufficient. Endurance Charges and Warcries are other aspects of this build that increase your survivability. Redblade Banner, Bear's Girdle, and a Rare Psychotic Axe are important parts of your gear, and shouldn't be too expensive.
You can also check our other Path of Exile builds right over here Odealo's Crafty Guides - Full List
1. Gameplay
As you enter a map you'll need to generate Rage first, use a Warcry, activate Blood Rage, and then start using your Rage Vortex. Use Leap Slam to move around and periodically use warcries to regenerate Life and Taunt enemies. During boss fight place your Ancestral Totems and use Berserk - it grants you a powerful Buff to almost all the stats that matter for your Character, the more Rage you have, the longer it will last. Only one Rage Vortex can be present at a time.
|
|
|
|

2. Build's PROS & CONS
| PROS |
|
| CONS |
|
3. Leveling tips
Use any Attack that suits you, the best candidates are Sweep and later Bladestorm, start using Rage Vortex after you've got to the point where your build is moderately specialized in Rage mechanics after you finish the second Lab. Look for a one-handed Axe with increased Physical Damage, most Unique Axes will do. Upgrade your gear using Vendor Recipes for increased Physical Damage or use Essences such as Essence of Contempt or Loathing. Leveling is really simple, there should be no problems with it as long as your resistances are high, especially after Act 5 and when you start mapping.
Suggested leveling Gem setups:
| Ground Slam setup | |
 |
Bladestorm - It allows you to create a blade storm that deals damage, you can switch between Blood and Sand stances for different bonuses. |
 |
Melee Physical Damage Support - Increases your Melee damage at a cost of Attack Speed. |
 |
Maim Support - You deal more damage and apply Maim Debuff on enemies reducing their Attack Speed. |
 |
Fortify Support - Enhances your character with Fortify Buff that makes you take less damage from Hits, it also increases your Damage. |
| Curse setup | |
 |
Vulnerability - One of the best Curses if you're focused on dealing Physical Damage, it causes enemies to Bleed and take more Physical Damage. |
| Aura and Banner setup | |
 |
Pride - The best Aura for a build relying on Physical Damage such as this one, enemies in your close proximity take more Physical Damage. |
 |
Dread Banner - A Banner that increases the effect of your Fortify and Impale. |
 |
Blood and Sand - More AoE or Area Damage, depending on Stance, it also allows you to switch between more Attack Speed or more Damage on your Bladestorm. |
| Warcry and Leap Slam setup | |
 |
Enduring Cry - Warcry that regenerates a big portion of your Life rapidly. |
 |
Leap Slam - The best movement Skill for such builds. |
 |
Lifetap Support - Use Lifetap so you won't spend Mana on linked Skills. |
Bandits:
Kill all the Bandits in the second Act for additional Passive Skill Points
Leveling Skill Trees:
30 Points Skill Tree
take all the Notables as shown, focus on Attacks, Maximum Life, Accuracy Rating, and Damage with Axes
67 Points Skill Tree
go for Constitution, Resolute Technique, and allocate the Warcry Clusters
Recommended leveling items:
 Redblade Banner - It's good for leveling and it will be used in your final version of the build. Redblade Banner - It's good for leveling and it will be used in your final version of the build. |
|
| +(20-30) to maximum Life (80-100)% increased Armour +(50-60) to maximum Life 20% increased Taunt Duration +5% Chance to Block 50% increased Warcry Cooldown Recovery Rate Warcries have infinite Power |
|
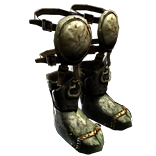
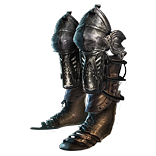 Redblade Tramplers - It's a great pair of Boots since it adds Physical Damage to your Attacks and has some other useful stats. Redblade Tramplers - It's a great pair of Boots since it adds Physical Damage to your Attacks and has some other useful stats. |
|
| Adds (2-5) to (7-10) Physical Damage to Attacks (5-10)% reduced Enemy Stun Threshold (150-200)% increased Armour +(50-70) to maximum Life +(20-30)% to Fire Resistance 25% increased Movement Speed Unaffected by Burning Ground |
|
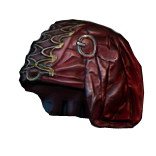
 Deidbellow - This helmet gives you no Elemental Resistances, but it has great synergy with Warcries and Physical Attacks. Deidbellow - This helmet gives you no Elemental Resistances, but it has great synergy with Warcries and Physical Attacks. |
|
| +(20-30) to Strength +(20-30) to Dexterity Adds 10 to 20 Physical Damage to Attacks +(200-300) to Armour 20% increased Melee Damage Cannot Leech when on Low Life If you've Warcried Recently, you and nearby allies have 20% increased Attack, Cast and Movement Speed |
|
 Goldrim - The standard leveling Helmet that provides a lot of Elemental Resistances. Goldrim - The standard leveling Helmet that provides a lot of Elemental Resistances. |
|
| +(30-50) to Evasion Rating 10% increased Rarity of Items found +(30-40)% to all Elemental Resistances Reflects 4 Physical Damage to Melee Attackers Level Requirement reduced by 100 (Hidden) |
|
 Tabula Rasa - It provides six, already linked, white sockets so you can link your Skill with many Support Gems. Tabula Rasa - It provides six, already linked, white sockets so you can link your Skill with many Support Gems. |
|
| Item has no level requirement and Energy Shield (Hidden) Item has 6 White Sockets and is fully linked (Hidden) |
|
4. Final Skill Tree, Ascendancy Points, and Pantheon
Final Skill Tree:
104 Points Final Skill Tree (doesn't include Cluster Jewels)
116 Points Path of Building (PoB) link
Ascendancy points:
Preferably in that order:
- War Bringer
- Crave the Slaughter
- Rite of Ruin
- Aspect of Carnage
Pantheon:
Major God: Soul of Lunaris: 1% additional Physical Damage Reduction for each nearby Enemy, up to 8%; 1% increased Movement Speed for each nearby Enemy, up to 8%
Minor God: Soul of Ryslatha: Life Flasks gain 3 Charges every 3 seconds if you haven't used a Life Flask Recently
5. Final Gems links
| [DPS] Rage Vortex setup | |
 |
Rage Vortex - Rage Vortex is a Melee Physical Attack, the more Rage you have, the more powerful it becomes while consuming a portion of it. It's your sole DPS Skill for the build |
 |
Brutality Support - You're focusing only on dealing with Physical Damage and that's the best Support Gem for such eventualities. |
|
Melee Physical Damage Support - The best Support Gem when it comes to increasing Melee Physical Damage, it lowers your Attacks Speed by a small amount - not an issue. |
 |
Pulverise Support - Use it for more Aoe and Area Damage, it again slightly lowers your Attack Speed. |
 |
Rage Support - Increases your Damage based on your current Rage, it also generates Rage on Hit, one of the most important Support Gems here. |
|
Fortify Support - Increases your Melee Damage and grants you a Fortify Buff that reduces the damage you take from Hits, you can swap it for  Impale Support, or Impale Support, or  Increased Critical Damage Support for more DPS. Increased Critical Damage Support for more DPS. |
| [UTILITY] Warcry setup | |
|
Enduring Cry - The Warcry that quickly regenerates your Life, great when you're out of charges on your Life Flask. |
 |
Intimidating Cry - A Warcry that will be used quite often to Taunt enemies and make your Hits overwhelm 30% of Physical Damage Reduction. |
|
Lifetap Support - Link it with your Warcries to change their cost to Life instead of Mana. |
 |
Second Wind Support - Warcries now store an additional Charge that can bypass Skill Cooldown. |
| [UTILITY] Auras setup | |
|
Pride - The Aura that increases Physical Damage nearby enemies take, the longer you stay in their proximity, the more efficient this Aura is. |
|
Dread Banner - Banner that provides you with Chance to Impale, increased Impale Effect, increased Fortify Effect, less Accuracy Rating, and increased AoE and Fortify when placed. |
 |
Herald of Purity - Herald Skill for more Physical Damage and Sentinels of Purity. |
|
Blood and Sand - You can choose to have more AoE and less Area Damage or more Area Damage and less AoE. |
| [UTILITY] Totems setup | |
 |
Ancestral Protector - Ancestral Totem that increases your Attack Speed. |
 |
Ancestral Warchief - Ancestral Totem that increases your Melee Damage. |
 |
Multiple Totems Support - You're able to summon both Ancestral Totems when you link them with this Support Gem. |
|
Maim Support - Totems will Maim on hit crippling the Movement Speed of your opponents. |
| [MOBILITY] Leap Slam and Guard Spell | |
|
Leap Slam - The main Movement Skill, it doesn't need to be linked with Faster Attacks Support, the Rage makes it fast enough. |
 |
Immortal Call - The Guard Spell that reduces the damage you take for a brief moment, consuming your Endurance Charge to increase its Duration, keep it at level 3. |
 |
Cast when Damage Taken - It needs to be at the lowest possible level to trigger Immortal Call more often. |
| [UTILITY] Berserk and Blood Rage | |
 |
Berserk - It's draining your Rage at increasing speed, and during its effect, it grants you Attack Speed, Movement Speed, Attack Damage, and decreases your Damage Taken. |
 |
Blood Rage - Increases your Attack Speed, provides you with Frenzy Charges on kill, and Life Leech. |
 |
Enhance Support - Quality increases the Damage provided by Berserk and the Attack Speed of Blood Rage. |
|
|
6. Gear Setup
Bear's Girdle is an Expensive Unique item, but it's not really required and you can safely clear red maps without it. Maximum Life is obviously the stat you should prioritize when looking for Rare items. It's a Crit build so Critical Strike Chance and Multiplier will be important, to further increase your damage seek Attack, Physical, and Melee Damage. 155 Dexterity is required to have Blood Rage at its maximum level. Look for bases with easy-to-get Red Sockets. The build is really cheap, it follows the standard pattern of all the other Crit Melee Physical Attack builds so there's an abundance of items on the market.
Our recommended items will:
- Cap your resistances at 75%
- Provide you with enough DPS and Life to start mapping
|
Stat priorities on items:
|
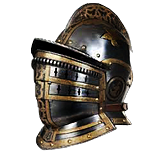 (Helmet) Rare Helmet - An Elder-influenced Helmet that makes enemies take increased Physical Damage with some additional defense stats is good enough. (Helmet) Rare Helmet - An Elder-influenced Helmet that makes enemies take increased Physical Damage with some additional defense stats is good enough. |
|
| Min. requirements: +80 to Maximum Life +70% to Elemental Resistances Nearby Enemies take 9% increased Physical Damage Optional affixes: Increased Effect of Fortify on you Chaos Resistance Dexterity |
|
 (Helmet) Echoes of Creation - Synergizes with Warcries - if you're often using two or three Warcries, get this Helmet for more Damage, but be careful, it requires a lot of Life Leech. (Helmet) Echoes of Creation - Synergizes with Warcries - if you're often using two or three Warcries, get this Helmet for more Damage, but be careful, it requires a lot of Life Leech. |
|
| Socketed Warcry Skills have +1 Cooldown Use (80-120)% increased Armour +(50-70) to maximum Life When you Attack, take (15-20)% of Life as Physical Damage for each Warcry Exerting the Attack Skills deal (10-15)% more Damage for each Warcry Exerting them |
|
| Helmet enchantments: Rage Vortex enchantment |
|
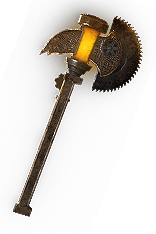 (Shield) Rare Psychotic Axe - Psychotic Axe grants you +10 to Maximum Rage, that's why it's the best choice, but if you're unable to find any that's not a huge problem. Look for basic stats like increased Physical Damage and Accuracy Rating. (Shield) Rare Psychotic Axe - Psychotic Axe grants you +10 to Maximum Rage, that's why it's the best choice, but if you're unable to find any that's not a huge problem. Look for basic stats like increased Physical Damage and Accuracy Rating. |
|
| Min. requirements: 100% increased Physical Damage adds 20 to 40 Physical Damage +450 to Accuracy Rating Optional affixes: Global Critical Strike Multiplier Quality Chance to Deal Double Damage |
|
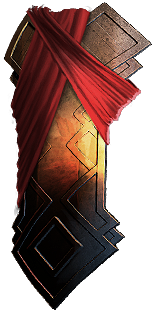
| (Shield) Redblade Banner - It can provide a lot of Maximum Life, Armour, some minor stats, and most importantly - Warcries Have Infinite Power so no matter how many enemies are nearby, Warcries will always work as there is an infinite number of enemies around. |
|
| +(20-30) to maximum Life (80-100)% increased Armour +(50-60) to maximum Life 20% increased Taunt Duration +5% Chance to Block 50% increased Warcry Cooldown Recovery Rate Warcries have infinite Power |
|
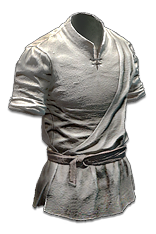
 (Body Armour) Rare Body Armour - Rare Body Armour should be one of the main sources of Maximum Life and Elemental Resistances, the best offensive mod is added Critical Stike Chance. (Body Armour) Rare Body Armour - Rare Body Armour should be one of the main sources of Maximum Life and Elemental Resistances, the best offensive mod is added Critical Stike Chance. |
|
| Min. requirements: +130 to Maximum Life +70% to Elemental Resistances Optional affixes: Attacks have +#% to Critical Strike Chance Maximum Life % You Can Apply Additional Curse Attributes |
|
 (Boots) Rare Boots - A standard pair of Boots with the usual defensive stats and Movement Speed should be enough. (Boots) Rare Boots - A standard pair of Boots with the usual defensive stats and Movement Speed should be enough. |
|
| Min. requirements: +70 to Maximum Life in total +80% to Elemental Resistances +25% increased Movement Speed Optional affixes: Increased Armour You have Tailwind if you have dealt a Critical Strike Recently Attributes |
|
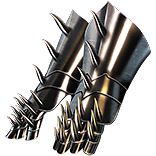 (Gloves) Rare Gloves - Spiked Gloves are a great base that increases your Physical Damage, besides Life and Resistances it is recommended to look for some offensive mods here. (Gloves) Rare Gloves - Spiked Gloves are a great base that increases your Physical Damage, besides Life and Resistances it is recommended to look for some offensive mods here. |
|
| Min. requirements: +60 to Maximum Life in total +60% to Elemental Resistances Optional affixes: Adds Physical Damage to Attacks Accuracy Rating increased Global Critical Strike Chance Adds Physical Damage if you've dealt a Critical Strike Recently |
|
 (Gloves) Kaom's Spirit - For more Rage, use these Gloves. Combine them with a source of Life Regeneration like Vitality Aura or Passives. (Gloves) Kaom's Spirit - For more Rage, use these Gloves. Combine them with a source of Life Regeneration like Vitality Aura or Passives. |
|
| +(50-70) to maximum Life +(20-30)% to Fire Resistance (0.3-0.5)% of Physical Attack Damage Leeched as Life Life Recovery from Regeneration is not applied Regenerate 1 Rage per second for every 100 Life Recovery per second from Regeneration |
|
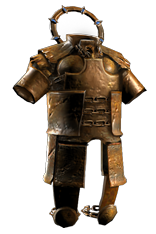
 (Belt) Bear's Girdle - Core item for the build - Maximum Life, Added Physical Damage, increased Physical Damage per Rage and more Maximum Rage are already great mods, it additionally lowers nearby enemies' Physical Damage Reduction by 15%. (Belt) Bear's Girdle - Core item for the build - Maximum Life, Added Physical Damage, increased Physical Damage per Rage and more Maximum Rage are already great mods, it additionally lowers nearby enemies' Physical Damage Reduction by 15%. |
|
| +(25-40) to maximum Life Adds (5-7) to (11-12) Physical Damage to Attacks (20-30)% increased Stun Duration on Enemies Nearby Enemies are Crushed while you have at least 25 Rage (4-6)% increased Physical Damage per 10 Rage +20 to Maximum Rage |
|
 (Amulet) Rare Amulet - The usual Maximum Life and Elemental Resistances are good for a start but if you want to upgrade the build, the Amulet is one of the most prolific gear pieces, a lot of stats can be found there that could benefit your build. (Amulet) Rare Amulet - The usual Maximum Life and Elemental Resistances are good for a start but if you want to upgrade the build, the Amulet is one of the most prolific gear pieces, a lot of stats can be found there that could benefit your build. |
|
| Min. requirements: +70 to Maximum Life in total +40% to Elemental Resistances Optional affixes: increased Global Critical Strike Chance +1 to Level of all Physical Skill Gems +1 to Level of all Strength Skill Gems increased Warcry Speed Adds Physical Damage to Attacks Global Critical Strike Multiplier increased Area of Effect Attributes |
|
| Recommended Anointments: Deep Breaths Tenacity Admonisher Panopticon |
|
 (Ring) Rare Rings - Steel, Vermilion, Two-stone, or Diamond Rings are the most promising in terms of Implicit modifiers. It's important to have a Curse on hit here - Vulnerability is the best one. Rings also offer a lot of Elemental Resistances. (Ring) Rare Rings - Steel, Vermilion, Two-stone, or Diamond Rings are the most promising in terms of Implicit modifiers. It's important to have a Curse on hit here - Vulnerability is the best one. Rings also offer a lot of Elemental Resistances. |
|
| Min. requirements: Vulnerability on Hit +80% to Elemental Resistances +60 to Maximum Life Optional affixes: Adds Physical Damage to Attacks increased Attack Speed |
|
 (Jewel) Rare Jewels - You should strive for a Jewel that adds at least 7% to your Maximum Life and some other stats such as Damage and Critical Strike Chance with one-handed Axes. (Jewel) Rare Jewels - You should strive for a Jewel that adds at least 7% to your Maximum Life and some other stats such as Damage and Critical Strike Chance with one-handed Axes. |
|
| Min. requirements: increased Maximum Life Elemental Resistances increased Global Physical Damage Dexterity increased Damage with Axes increased Attack Damage while holding a Shield increased Damage/Critical Strike Chance with One-Handed Weapons |
|
 (Jewel) Medium Cluster Jewel - Lead By Example grants you Onslaught on Warcry, and Mob Mentality generates all the Charge types. (Jewel) Medium Cluster Jewel - Lead By Example grants you Onslaught on Warcry, and Mob Mentality generates all the Charge types. |
|
| Recommended Notables: 1 Added Passive Skill is Lead By Example 1 Added Passive Skill is Mob Mentality |
|
 (Jewel) Large Cluster Jewel - It's completely optional but worth considering option, you can get Mana and Life Leech, Damage, Accuracy Rating, and many other stats from the Notables there. (Jewel) Large Cluster Jewel - It's completely optional but worth considering option, you can get Mana and Life Leech, Damage, Accuracy Rating, and many other stats from the Notables there. |
|
| Recommended Notables: 1 Added Passive Skill is Feed the Fury 1 Added Passive Skill is Fuel the Fight 1 Added Passive Skill is Martial Prowess 1 Added Passive Skill is Strike Leader 1 Added Passive Skill is Furious Assault 1 Added Passive Skill is Iron Breaker 1 Added Passive Skill is Master the Fundamentals |
|
 (Jewel) Watcher's Eye - It's an expensive addition to a build but it's worth its price, it can heavily impact your DPS. Look for Pride mods. (Jewel) Watcher's Eye - It's an expensive addition to a build but it's worth its price, it can heavily impact your DPS. Look for Pride mods. |
|
| (4-6)% increased maximum Energy Shield (4-6)% increased maximum Life (4-6)% increased maximum Mana <Two or Three random aura modifiers> Recommended Aura modifiers: Impales you inflict last 2 additional Hits while using Pride (40-60)% increased Attack Physical Damage while using Pride |
|
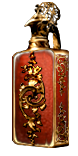
 (Flask) Lion's Roar - The most commonly used Flask in such builds, it improves Melee Physical Damage and grants Armour. (Flask) Lion's Roar - The most commonly used Flask in such builds, it improves Melee Physical Damage and grants Armour. |
|
| +1500 to Armour Adds Knockback to Melee Attacks during Flask effect Knocks Back Enemies in an Area when you use a Flask 75% chance to cause Enemies to Flee on use (7-10)% more Melee Physical Damage during effect |
|
 (Flask) Bottled Faith - The best Sulphur Flask for Crit build, it's not mandatory but a great addition to the build. (Flask) Bottled Faith - The best Sulphur Flask for Crit build, it's not mandatory but a great addition to the build. |
|
| 40% increased Damage Creates Consecrated Ground on Use (20-40)% increased Duration Consecrated Ground created by this Flask has Tripled Radius Consecrated Ground created during Effect applies (7-10)% increased Damage taken to Enemies (100-150)% increased Critical Strike Chance against Enemies on Consecrated Ground during Flask effect |
|
|
Other suggested Flasks:
|
|
   |
|
|
If you have any other build requests please leave that in the comments below. We are always open to suggestions and constructive feedback.
Pictures used in this article are the intellectual property of Grinding Gear Games.
