Buy/Sell
 Log in


Raise Zombie Summoner Lich POE2 Build
Command an undead army in PoE 2 with the Raise Zombie Lich Summoner. Powerful minions, easy mapping, and strong bossingRaise Zombies
Lich Build
Updated for Path of Exile 2 Early Access Patch 0.5
The Best Crafty Guides by Odealo
| Guide notes |
| May 31, 2026 - Created for Patch 0.5 of Early Access. |
| Build Overview | |||
| Tags: [MINION] [PHYSICAL] [ENERGY SHIELD] | |||
|
Budget: Defenses: |
|
Boss DPS: AoE: |
|

Zombies are temporary Minions that Reserve no Spirit, but instead require a Corpse to spawn. This ephemerality and dependence on Corpses make them less popular than other, more reliable Minions, but they are equally, if not more, powerful. You can spawn Empowered Zombies that take less damage, deal much more of it, and are faster. To do so, spend one Power Charge per three Zombies, with a limit of 12 Zombies (after allocating Expendable Army). The plan is to have a reliable source of Power Charges and have these Empowered Zombies ready for every boss fight. Corpses are guaranteed to always be near you with the Sacrifice Skill and some type of Skeletal Minion. It unlocks the ability to Consume your Minion-Corpses with Devour or Profane Ritual once you unlock it. You can even add other sources of Power Charges into the build, such as Breath of the Mountains, but it will not be needed. Since Zombies are bad at clearing maps, and we have spare Spirit to summon Spectres, we will add them to the army. We've settled on Vaal Guards, which throw Grenades. It is just the exact thing the build is missing.
Lich is one of the best options for this build due to the defensive and utility passives they have. Soulless Form and Eternal Life reshape your Life-Mana-ES structure to be more suited for a build with high ES and only some Maximum Life. Your Mana Regeneration is tied to Maximum Life, so you cannot ignore it. Necromantic Conduit grants Unholy Might for the Minions, which improves their damage by adding an extra 30% Chaos Damage. The type of damage here is all over the place, but it's primarily Physical and Chaos. There is no point in specializing in one damage type only, as it is an unreachable goal. The last passive can be spent on the powerful Jewel Socket. You can try other ascendancies, but this build is quite unique as it is not reliant on Spirit as much as other Minion builds, so Infernalist or Shaman are not exactly the best picks. You are welcome to experiment with more utility or defence-oriented classes that start in the upper part of the Skill Tree, like Oracle of Chonk.
You can also check our other Path of Exile 2 builds right over here Odealo's Crafty Guides - Full List
1. Gameplay
Your Spectres will deal with the fragile enemies due to their range and swiftness, but the bulk of the damage is stored in Zombies. Summon them only if you have Power Charges, and to generate them, use Profane Ritual. When mapping, there are many corpses scattered about, so there is nothing to worry about. Enclosed bosses require a Sacrifice Skill and Skeletal Minions (preferably three to five). After 2 seconds, you get a Charge for every Minion-Corpse. To improve damage further, place Pain Offering (which also generates a Power Charge every 4 seconds). That's it for the active buttons. The build also uses a Blasphemous Curse that you can adjust to your liking and Convalescence.
|
|


2. Build's PROS & CONS
| PROS |
|
| CONS |
|
3. Leveling tips
Start with a Talisman and Wyvern's Devour to generate power Charges to empower your Zombies. For most of Act One, you will be forced to use some other Minion skill as this combo is inaccessible this early. You can then gradually adjust to the playstyle while supplementing damage with Raging Spirits or Skeletal Minions. Maximum Life is the most important defensive layer during the campaign. As you begin mapping, switch to Energy Shield.
4. Final Skill Tree, Ascendancy Points, and Pantheon
Final Skill Tree:
 |
|
Click on the image to open the Passive Tree preview in a new window Or import the build into PoB: |
Ascendancy points:
Preferably in this order:
- Necromantic Conduit
- Soulless Form
- Eternal Life
- Crystalline Phylactery
5. Final Gems links
| [DPS] Raise Zombie setup | |
 |
Raise Zombie - You could raise a Corpse to summon a Zombie, but it's much better to spend a Power Charge to summon three more powerful Zombies. These are powerful Melee Physical Minions. It can be improved with a very expensive Uul-Netol's Embrace. |
 |
Heft |
 |
Heavy Swing |
 |
Feeding Frenzy |
 |
Armour Break |
 |
Uruk's Smelting |
| [UTILITY] Pain Offering setup | |
 |
Pain Offering - Sacrifice a Minion to improve your other Minions with increased Cast Speed, Attack Speed, and Damage. In this setup, it will grant a Power Charge every 4 seconds, so try to keep it alive. |
 |
Guatelitzi's Ablation |
 |
Brutus' Brain |
 |
Sacrificial Offering |
 |
Danse Macabre |
 |
Prolonged Duration |
| [UTILITY] Skeletal Cleric setup | |
 |
Skeletal Cleric - Cleric heals Minions and revives other Skeletons. One or two should be enough. |
 |
Last Gasp |
 |
Deathmarch |
 |
Meat Shield |
 |
Rapid Casting |
| [DPS] Spectre setup | |
 |
Spectre: Vaal Guard - These Minions shoot Oil Grenades. It is a main source of ranged damage that improves mapping drastically. You can find them in Act 3, Vaal Ruins |
|
Feeding Frenzy |
 |
Muster |
 |
Multishot |
 |
Magnified Area |
 |
Minion Mastery |
| [UTILITY] Curse setup | |
 |
Blasphemy - Turns Curse into Aura so they affect nearby enemies continuously, but it reserves Spirit. |
 |
Enfeeble - Enfeeble is the Curse of our choice. It reduces damage dealt by enemies. It can be replaced with Despair once you allocate Necromantic Conduit and have Uul-Netol's Embrace. |
 |
Ritualistic Curse |
|
Magnified Area |
 |
Heightened Curse |
| [UTILITY] Profane Ritual setup | |
 |
Profane Ritual - It generates Power Charges to spend on Zombies, but requires a Corpse. You can also use Devour or Wing Blast to gain these Charges. |
 |
Charge Profusion |
 |
Unleash |
 |
Rapid Casting |
| [UTILITY] Skeletal Warrior setup | |
 |
Skeletal Warrior - You can use Skeletal Warriors that come with your Sceptre to boost your other Minions. Their damage is rather insignificant, but can still break armour or be sacrificed for Offering. |
 |
Minion Instability |
 |
Infernal Legion |
 |
Amanamu's Tithe |
 |
Sacrificial Lamb |
| [UTILITY] Sacrifice setup | |
 |
Sacrifice - Your Minions revive slower, but now they can be treated as Corpses for the purpose of generating power Charges. You cannot sacrifice Zombies, only Skeletons. |
|
Minion Mastery |
| [UTILITY] Convalescence setup | |
 |
Convalescence - Use to instantly start Recharging Energy Shield, and prevent it from stopping doing so by taking damage for some time. |
 |
Cooldown Recovery |
 |
Upwelling |
 |
Second Wind |
|
Prolonged Duration |
|
|
6. Gear Setup
The build requires Spirit on a Sceptre, Body Armour, and Amulet, but the damage is not as reliant on it as in other Minion builds. Your Minions will benefit mostly from additional and increased Physical Damage, Attack Speed, and Critical Hit modifiers. They can deal very high Chaos Damage if you have Uul-Netol's Embrace and two Evergrasping Rings (that would justify switching to Despair Curse and implementing Withered skills), but your primary concern is their Physical Damage, which is the source of Chaos Damage in any case. Increase the Skill Level of Minion Skills. On your other items, seek Maximum Energy Shield, all Resistance types, and Maximum Life. Mana Regeneration does nothing, but you can get Mana on Kill or from Flasks. Some Attributes must be sourced from Rare Items. No Uniques are required, but we have some great candidates that will fit it even in the late game.
|
Stat priorities on items:
|
 (Helmet) Rare Helmet - The Helmet needs +2 to the level of all Minion Skills, Maximum Life, maximum ES, and Resistances. Socket Idol of Ralakesh in it. (Helmet) Rare Helmet - The Helmet needs +2 to the level of all Minion Skills, Maximum Life, maximum ES, and Resistances. Socket Idol of Ralakesh in it. |
|
| Min. requirements: 300 Energy Shield +2 to Level of all Minion Skills Optional affixes: Resistance increased Energy Shield Recharge Rate Maximum Life |
|
 (Weapon) Rare Sceptre - Get a Sceptre with two Prefixes for Increased Spirit and a Suffix for Levels for Minion Skills. Other mods shall increase Minions' Attack Speed, Damage, add Physical Damage, and maybe have some Crit mods. Primate Idols are the best socketables. Get a base with Skeletal Warriors. (Weapon) Rare Sceptre - Get a Sceptre with two Prefixes for Increased Spirit and a Suffix for Levels for Minion Skills. Other mods shall increase Minions' Attack Speed, Damage, add Physical Damage, and maybe have some Crit mods. Primate Idols are the best socketables. Get a base with Skeletal Warriors. |
|
| Min. requirements: +3 to Level of all Minion Skills 50% increased Spirit Allies in your Presence deal increased Damage Optional affixes: Allies in your Presence have increased Attack Speed Allies in your Presence deal Added Physical Damage Minions have increased Maximum Life |
|
 (Off-hand) Rare Focus - Focus can get you a lot of Energy Shield, which we deem better than Block Chance. Add Resistances or ES Recharge Rate. (Off-hand) Rare Focus - Focus can get you a lot of Energy Shield, which we deem better than Block Chance. Add Resistances or ES Recharge Rate. |
|
| Min. requirements: 400 Energy Shield 70% total Resistance Optional affixes: increased Energy Shield Recharge Rate Maximum Mana |
|
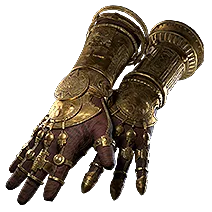 (Gloves) Rare Gloves - Maximum ES with Resistances are the most important. You can add Mana on Kill or ES Recharge Rate. (Gloves) Rare Gloves - Maximum ES with Resistances are the most important. You can add Mana on Kill or ES Recharge Rate. |
|
| Min. requirements: 200 Energy Shield +70% total Resistance Optional affixes: increased Energy Shield Recharge Rate Gain # Mana per enemy killed Maximum Life |
|
 (Boots) Rare Boots - Boots must have a Prefix with increased Movement Speed, which leaves less room for proper ES mods, so just focus on Maximum Life there, and add some Resistances. (Boots) Rare Boots - Boots must have a Prefix with increased Movement Speed, which leaves less room for proper ES mods, so just focus on Maximum Life there, and add some Resistances. |
|
| Min. requirements: +80 to Maximum Life +40% total Resistance 30% increased Movement Speed Optional affixes: Maximum Energy Shield Resistances |
|
 (Amulet) Rare Amulet - Amulet needs Level of all Minion Skills and Spirit. Having two of these mods in high quantities will be costly, so leave the burden of Resistances and Attributes for other items. (Amulet) Rare Amulet - Amulet needs Level of all Minion Skills and Spirit. Having two of these mods in high quantities will be costly, so leave the burden of Resistances and Attributes for other items. |
|
| Min. requirements: +50 Spirit +3 to Level of all Minion Skills Optional affixes: increased Maximum Energy Shield Maximum Life Attributes Resistance Anointment: Warlord Leader |
|
 (Ring) Rare Ring - On Rare Rings, you will need to get lots of Resistances and Maximum Life. There is barely anything else to look for. (Ring) Rare Ring - On Rare Rings, you will need to get lots of Resistances and Maximum Life. There is barely anything else to look for. |
|
| Min. requirements: +90% total Elemental Resistance Maximum Life Optional affixes: Gain # Mana per enemy killed |
|
 (Ring) Ventor's Gamble - Ventor's Gamble can roll Spirit, Maximum Life, and Resistance, which makes them much better than Rare Rings, but only if you manage to get a good one. (Ring) Ventor's Gamble - Ventor's Gamble can roll Spirit, Maximum Life, and Resistance, which makes them much better than Rare Rings, but only if you manage to get a good one. |
|
| (6-15)% increased Rarity of Items found +(0-80) to maximum Life +(0-20) to Spirit (-25-25)% increased Rarity of Items found +(-40-40)% to Fire Resistance +(-40-40)% to Cold Resistance +(-40-40)% to Lightning Resistance |
|
 (Ring) Evergrasping Ring - Evergrasping Rings are some of the best options damage-wise as they add even more Chaos Damage if rolled well. You have to have high Chaos Resistance or stand away from enemies to negate the downside. (Ring) Evergrasping Ring - Evergrasping Rings are some of the best options damage-wise as they add even more Chaos Damage if rolled well. You have to have high Chaos Resistance or stand away from enemies to negate the downside. |
|
| (7-10)% increased Cast Speed +(60-100) to maximum Mana Allies in your Presence Gain (15-25)% of Damage as Extra Chaos Damage Enemies in your Presence Gain (6-12)% of Damage as Extra Chaos Damage |
|
 (Belt) Rare Belt - On a Belt, look for Maximum Life, Strength, and Resistances. Armour or Charm mods are almost irrelevant in comparison. (Belt) Rare Belt - On a Belt, look for Maximum Life, Strength, and Resistances. Armour or Charm mods are almost irrelevant in comparison. |
|
| Min. requirements: +70% total Elemental Resistance Strength +80 to Maximum Life Optional affixes: Armour |
|
 (Belt) Shavronne's Satchel - Your Life level cannot move up or down if you have any Energy Shield, but this Belt allows your Life Flask to apply to Energy Shield, which can save your life if Convalescence is on Cooldown. (Belt) Shavronne's Satchel - Your Life level cannot move up or down if you have any Energy Shield, but this Belt allows your Life Flask to apply to Energy Shield, which can save your life if Convalescence is on Cooldown. |
|
| Has (1-3) Charm Slots Flasks gain 0.17 charges per Second (30-20)% reduced Flask Life Recovery rate +(20-30) to Intelligence (20-30)% increased Flask Charges gained Life Recovery from Flasks also applies to Energy Shield |
|
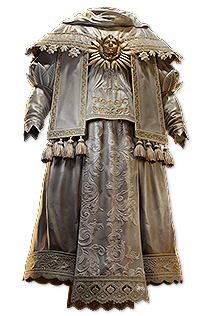 (Body Armour) Silks of Veneration - This Body Armour is surprisingly good, although not as good as a good Rare Armour, which will offer more Spirit, more Maximum ES, and maybe even Resistances. (Body Armour) Silks of Veneration - This Body Armour is surprisingly good, although not as good as a good Rare Armour, which will offer more Spirit, more Maximum ES, and maybe even Resistances. |
|
| (40-50)% increased Mana Regeneration Rate (150-200)% increased Energy Shield +(30-50) to Spirit +(20-30) to Intelligence (30-50)% increased Energy Shield Recharge Rate Current Energy Shield also grants Elemental Damage reduction |
|
 (Body Armour) Rare Body Armour - On a Body Armour, look for Maximum Energy Shield, Spirit, Maximum Life, and either Resistance or some modifier to regain ES faster. (Body Armour) Rare Body Armour - On a Body Armour, look for Maximum Energy Shield, Spirit, Maximum Life, and either Resistance or some modifier to regain ES faster. |
|
| Min. requirements: 700 Energy Shield +50 Spirit Maximum Life Optional affixes: Resistance increased Energy Shield Recharge Rate faster start of Energy Shield Resistance |
|
 (Jewel) Prism of Belief - This Jewel can increase the Skill Gem Level of your Raise Zombies by up to three, which is powerful. (Jewel) Prism of Belief - This Jewel can increase the Skill Gem Level of your Raise Zombies by up to three, which is powerful. |
|
| +(1-3) to Level of all <Random skill> Skills | |
 (Jewel) Rare Jewels - Sapphires can roll mods for increased Maximum ES, which is the most important defensive mod, plus Minion enhancements from the list. (Jewel) Rare Jewels - Sapphires can roll mods for increased Maximum ES, which is the most important defensive mod, plus Minion enhancements from the list. |
|
| Optional affixes: Minions deal increased Damage Minions have increased Attack and Cast Speed increased Maximum Energy Shield increased Presence Area of Effect |
|
|
If you have any other build requests please leave that in the comments below. We are always open to suggestions and constructive feedback.
Pictures used in this article are the intellectual property of Grinding Gear Games.