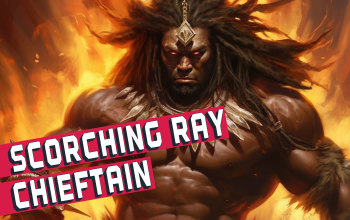
Scorching Ray/Searing Bond Chieftain
A build for Chieftain that uses Searing Bond and Scorching Ray to deal tons of Fire Damage over TimeScorching Ray
& Searing Bond Totem
Chieftain Build
Updated for Patch 3.21
The Best Crafty Guides by Odealo
| Guide notes | |||
| June 13, 2023 -Build created |
|||
| Build overview | |||
| Tags: [CASTER] [ELEMENTAL] [LIFE] [DOT] [STARTER] | |||
|
Budget: Defenses: |
|
Boss DPS: AoE: |
|
Chieftain is a class specializing in Fire Damage. It's a simple build that takes advantage of the provided Ascendancy Keystones to deal Fire Damage over Time. We're using a Staff that allows us to accommodate an additional six-link setup, so there are two major damage sources, both equal in damage output (at least the base/initial damage). Searing Bond is the Totem Spell. Placed Totems have a fiery beam linking them and the character, so if there's an enemy between you or your Totems, it will continuously receive Burning Damage. Scorching Ray is another Spell, and it too deals Burning Damage in a straight line. You can Channel it to deal ramping-up damage against tough enemies. To slay the weaker opponents you only need to rub them once with the ray while spinning, the Buring Damage will linger and continue to burn them to a crisp.
It's an extremely cheap build. There are multiple inexpensive Unique items that you can wear until you're ready to afford much better, Rare counterparts. That makes it great for a starter build or even an SSF one. For survivability, the build employs a high Life Pool, Endurance Charges, Armour, capped Block Chance for Spells and Attacks, and Life Regeneration. It's all tied together with Valako Keystone. Tasalio makes gearing up cheaper and provides yet another defensive layer. Ramako and Arohongui Keystones are used mostly for extra damage. It's overall not an exceptionally great build, but excellent for its price nonetheless. You can deal with most of the bosses in the game while saving for a better build, such as Reap Chieftain.
You can also check our other Path of Exile builds right over here Odealo's Crafty Guides - Full List
1. Gameplay
Use Scorching Ray to deal with most encounters, setting up Searing Bond Totems is too inefficient. Deploy them only during boss battles. To further enhance your damage, cast an Arcanist Brand that will activate various Spells, reducing the Fire Resistance of the targeted enemy by a lot. Use Flame Dash to move quicker, Immortal Call for a Gurad Spell, and for Auras - Malevolence, Determination, Herald of Ash, and maybe Vitality.
|
|
|
|

2. Build's PROS & CONS
| PROS |
|
| CONS |
|
3. Leveling tips
We don't have a build guide for a Spell Fire Damage Chieftain yet, but it's not a big deal. Use our Templar Leveling Guide using Totems and select the Holy Flame Totem route. The Passive Skill Tree and Items are nearly identical. You can stop using Holy Flame Totem and start using Scorching Ray after specializing in Burning Damage over Conversion Hit Damage, which is around level 50 to 80, hard to say - it depends on your preferences.
Bandits:
Kill all three bandits and be rewarded with two additional Skill Points
Leveling Skill Trees:
25 Points Passive Tree
Start pathing to Ancestral Bond by taking other useful nodes on your way there.
67 Points Passive Tree
At this point, we've switched to the proper version of the build. Dislocate Ancestral Bond, get more Burning Damage, Maximum Life, and Reservation Efficiency.
4. Final Skill Tree, Ascendancy Points, and Pantheon
Final Skill Tree:
106 Points Final Passive Tree (doesn't include Cluster or Unique Jewels)
113 Points Path of Building (PoB) link
Ascendancy points:
Preferably in that order:
- Ramako
- Tasalio
- Arohongui
- Valako
Pantheon:
Major God: Soul of Solaris: 6% additional Physical Damage Reduction while there is only one nearby Enemy; 20% chance to take 50% less Area Damage from Hits
Minor God: Soul of Ryslatha: Life Flasks gain 3 Charges every 3 seconds if you haven't used a Life Flask Recently; 60% increased Life Recovery from Flasks used when on Low Life
5. Final Gems links
| [DPS] Scorching Ray setup | |
 |
Scorching Ray - A Channeling Fire Spell that you can deal Burning Damage with. The longer you scorch an enemy, the more damage it will receive (and will also inflict Exposure). The Burning lingers for a bit. We've picked a Divergent version to rotate faster. |
 |
Burning Damage Support - Grants more Burning Damage. We recommend the Awakened version. |
 |
Efficacy Support - Grants more DoT and increases Skill Effect Duration. |
 |
Elemental Focus Support - The Burning from Scorching Ray is actually not an Elemental Ailment/Ignite, but simply Fire Damage over Time, making it suitable for Elemental Focus for more Elemental Damage. |
 |
Empower Support - Increases the Gem Level of a Spell for more Damage. |
 |
Controlled Destruction Support - Use it for much more Spell Damage. DoTs can't Strike Critically so it has no drawback. |
| [DPS] Searing Bond setup | |
 |
Searing Bond - Searing Bond, much like Scorching Ray, deals Burning Damage. It is cast via Totems that form damaging bonds between each other. |
 |
Swift Affliction Support - Reduces Totems duration, but in turn grants much more Damage over Time. |
|
Efficacy Support |
 |
Multiple Totems Support - Allows you to summon more Totems, but lowers their damage. |
 |
Lifetap Support - Skills cost Life instead of Mana. Without this Gem, your Searing Bond Totems will most likely cost more than your available Mana |
|
Elemental Focus Support |
| [UTILITY] Arcanist Brand setup | |
 |
Arcanist Brand - It sticks to the enemies and triggers all linked to its Spells each second. |
 |
Flammability - This Curse lowers the enemy's Fire Resistance. |
| Combustion Support - Hits that Ignite applies Combustion - a debuff that lowers Fire Resistance. Linked Skills also have an increased Chance to Ignite. | |
 |
Purifying Flame - Deals a bit of Physical and Fire Damage while creating Consecrated Ground. It's used to apply Combustion. We recommend a Divergent version for more overall damage. |
| [UTILITY] Mana-Reserving setup | |
 |
Herald of Ash - Here it is used for increased Burning Damage, Spell Fire Damage, and to enhance clear speed. |
 |
Determination - Adds and increases Armour Rating to reduce Physical Damage taken. |
 |
Malevolence - Increases Skill Effect Duration and grants more Damage over Time. |
 |
Enlighten Support - Linked Skills reserve less Mana.  Vitality can be used here instead if you don't need it. Vitality can be used here instead if you don't need it. |
| [UTILITY] Various Gems | |
 |
Immortal Call - It consumes your Endurance Charges (which is essential due to Valako's Keystone) and grants you a buff that reduces Physical and Elemental Hit Damage taken. Its Duration is increased per Endurance Charge consumed. |
 |
Flame Dash - Allows you to dash leaving a trail of Burning Ground behind. |
 |
Infernal Cry - Covers nearby enemies in Ash to make them take increased Fire Damage. You could use it in crowded areas too as such opponents will explode on death. |
 |
Arcane Surge Support - Arcane Surge buff is used for an increased Cast Speed and Mana Regeneration Rate. Keep this Gem at a low level. |
|
|
6. Gear Setup
Gearing up is easy. If you've played Righteous Fire build before you should be familiar with the basic principles of such build. Keep in mind you won't deal Ignite Damage or Ailment Damage - such damage would have to be sourced from a Hit, and you don't do that. Seek Burning Damage, which is called Fire Damage over Time too, they're the same thing. Skill Gem Level is also important, but that's an expensive stat to aim for. Be sure that you have a high enough Mana Regeneration Rate to continuously cast Scorching Ray. For defenses, seek Maximum Life, Resistances, Armour, Life Regeneration, and Block Chance. If your Life Regeneration is high enough, you may not need Life Flasks at all. You won't have to buy any listed unique items, but Skin of the Lords and Legacy of Fury seems like the best-in-slot items.
Our recommended items will:
- Cap your resistances at 75%
- Provide you with enough DPS and Life to start mapping
|
Stat priorities on items:
|
 (Helmet) Rare Helmet - There's not much to look for on a Helmet, just the basic Life and Resistances. If you can afford something more extravagant, get Chaos Resistance and Mana Reservation Efficiency too. (Helmet) Rare Helmet - There's not much to look for on a Helmet, just the basic Life and Resistances. If you can afford something more extravagant, get Chaos Resistance and Mana Reservation Efficiency too. |
|
| Min. requirements: +60% Total Elemental Resistances +60 to maximum Life Optional affixes: Chaos Resistance increased Mana Reservation Efficiency of Skills Armour |
|
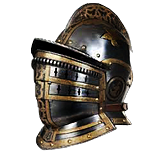
 (Helmet) Hrimnor's Resolve - This very cheap unique Helmet has relatively good stats, perfectly suited for this build. It increases Damage and grants immunity to Chill and Freeze. (Helmet) Hrimnor's Resolve - This very cheap unique Helmet has relatively good stats, perfectly suited for this build. It increases Damage and grants immunity to Chill and Freeze. |
|
| (30-40)% increased Fire Damage (100-120)% increased Armour +(50-70) to maximum Life +30% to Cold Resistance 100% chance to Avoid being Chilled or Frozen if you have used a Fire Skill Recently |
|
| Helmet enchantments: 40% increased Scorching Ray Damage 15% increased Scorching Ray beam length 40% increased Searing Bond Damage |
|
 (Weapon) Rare Staff - The most important qualities to seek in a Rare Staff are increases to Gem Levels and generic Burnign Damage bonuses. It's relatively easy to get a Staff that'd increase the Gem Level of Fire Spells by 3 or even 5. (Weapon) Rare Staff - The most important qualities to seek in a Rare Staff are increases to Gem Levels and generic Burnign Damage bonuses. It's relatively easy to get a Staff that'd increase the Gem Level of Fire Spells by 3 or even 5. |
|
| Min. requirements: +3 to Level of all Fire Spell Skill Gems 100% increased Fire/Burning/DoT Damage Optional affixes: +1 to Level of all Intelligence Spell Skill Gems Damage over Time Multiplier Fire Damage over Time Multiplier increased Burning Damage |
|
 (Weapon) The Searing Touch - One of the cheapest Staves in the game. It has all the modifiers you need - extra Gem Levels, Fire Damage, and Burning Damage. (Weapon) The Searing Touch - One of the cheapest Staves in the game. It has all the modifiers you need - extra Gem Levels, Fire Damage, and Burning Damage. |
|
| +18% Chance to Block Attack Damage while wielding a Staff +(40-60)% to Fire Damage over Time Multiplier (70-90)% increased Fire Damage 10% increased Cast Speed +2 to Level of all Fire Spell Skill Gems |
|
|
Optional Crucible Mod: This mod alone fixes all your Mana issues when Channelling Scorching Ray, but it may be unavailable after Patch 3.21 so we offered other alternative methods of dealing with those |
|
 (Body Armour) Rare Body Armour - There, we encourage gathering Maximum Life and Resistances of all kinds. Life Regeneration, Armour, and increased Effect of Auras can also be impactful. (Body Armour) Rare Body Armour - There, we encourage gathering Maximum Life and Resistances of all kinds. Life Regeneration, Armour, and increased Effect of Auras can also be impactful. |
|
| Min. requirements: +90 to maximum Life +60% to Elemental Resistances Optional affixes: increased Armour increased effect of Non-Curse Auras from your Skills increased Maximum Life Regenerate # Life per second |
|
 (Body Armour) Skin of the Lords - A much more expensive option. It has to have the right sockets as you can't change them later. It's pretty much used only for the +2 to Level of Socketed Gems and a bit of extra Armour. It adds a lot of smoothness if you pick one with Call to Arms (Body Armour) Skin of the Lords - A much more expensive option. It has to have the right sockets as you can't change them later. It's pretty much used only for the +2 to Level of Socketed Gems and a bit of extra Armour. It adds a lot of smoothness if you pick one with Call to Arms |
|
| Item has no level requirement and Energy Shield (Hidden) Sockets cannot be modified +2 to Level of Socketed Gems 100% increased Global Defences You can only Socket Corrupted Gems in this item Item has 6 Sockets and is fully linked (Hidden) <Random Keystone> |
|
 (Boots) Rare Boots - Besides Maximum Life and Elemental Resistances, get the Movement Speed Prefix. Rare Boots do not offer a lot of useful modifiers. (Boots) Rare Boots - Besides Maximum Life and Elemental Resistances, get the Movement Speed Prefix. Rare Boots do not offer a lot of useful modifiers. |
|
| Min. requirements: +50 to maximum Life +40% Total Elemental Resistances 25% increased Movement Speed Optional affixes: Spell Suppression Chance Attributes Chaos Resistance |
|
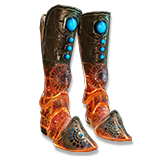 (Boots) Legacy of Fury - We recommend this footwear. Scorched enemies have lower Elemental Resistance and explode on death. The Movement Speed and Armour bonuses are great. (Boots) Legacy of Fury - We recommend this footwear. Scorched enemies have lower Elemental Resistance and explode on death. The Movement Speed and Armour bonuses are great. |
|
| (200-300)% increased Armour and Evasion 30% increased Movement Speed Nearby Enemies are Scorched (30-50)% increased Effect of Scorch (30-40)% chance when you Kill a Scorched Enemy to Burn Each surrounding Enemy for 4 seconds, dealing 8% of the Killed Enemy's Life as Fire Damage per second |
|
 (Gloves) Rare Gloves - Gloves should provide the basic Maximum Life and Resistances. Try to get a lot of Chaos Resistance here too, it's necessary to have at least positive Resistance to this type of damage. (Gloves) Rare Gloves - Gloves should provide the basic Maximum Life and Resistances. Try to get a lot of Chaos Resistance here too, it's necessary to have at least positive Resistance to this type of damage. |
|
| Min. requirements: +50 to Maximum Life +40% Total Elemental Resistances Optional affixes: Attributes increased Damage over Time Chaos Resistance |
|
 (Belt) Rare Belt - Another piece of equipment where you can find a lot of Maximum Life and Resistances. We would also recommend getting a copy with Strength, Chaos Resistance, or various Flask modifiers. Stygian Vise is the best base. (Belt) Rare Belt - Another piece of equipment where you can find a lot of Maximum Life and Resistances. We would also recommend getting a copy with Strength, Chaos Resistance, or various Flask modifiers. Stygian Vise is the best base. |
|
| Min. requirements: +70 to maximum Life +80% to Elemental Resistances Optional affixes: Strength various Flask mods Chaos Resistance increased Maximum Life |
|
 (Amulet) Rare Amulet - An Amulet may be the most expensive item on the list as its potential is nearly limitless. Aim for modifiers that would increase the Level of all Fire Skill Gems, Maximum Life, and Fire DoT Multiplier. You can also craft a mod that reduces Mana Cost of Skills. (Amulet) Rare Amulet - An Amulet may be the most expensive item on the list as its potential is nearly limitless. Aim for modifiers that would increase the Level of all Fire Skill Gems, Maximum Life, and Fire DoT Multiplier. You can also craft a mod that reduces Mana Cost of Skills. |
|
| Min. requirements: +50 to Maximum Life +1 to Level of all Fire Skill Gems Resistances Optional affixes: +#% to Fire Damage over Time Multiplier increased Mana Reservation Efficiency of Skills +1 to Level of all Skill Gems Channelling Skills have -3 to Total Mana Cost |
|
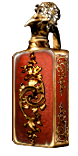
 (Amulet) Xoph's Blood - It's not particularly great, but if you can't afford a good Rare Amulet, get this one instead. Its most impactful qualities are increased maximum Life and the ability to Cover enemies in Ash. (Amulet) Xoph's Blood - It's not particularly great, but if you can't afford a good Rare Amulet, get this one instead. Its most impactful qualities are increased maximum Life and the ability to Cover enemies in Ash. |
|
| +(20-30) to Strength 10% increased maximum Life +(20-40)% to Fire Resistance 10% increased Strength Damage Penetrates 10% Fire Resistance Cover Enemies in Ash when they Hit you Avatar of Fire |
|
| Recommended Anointments: Charisma Cleansed Thoughts Divine Judgement |
|
 (Ring) Rare Ring - Rings are great sources of Resistances, try to get as much Resistances as you can afford. Extra Maximum Life is mandatory. As was the case with Amulet, you can craft the modifier that lowers the Mana Cost of Skills. Flammability on Hit is good to have, but it makes Ring much more expensive and is not really needed. (Ring) Rare Ring - Rings are great sources of Resistances, try to get as much Resistances as you can afford. Extra Maximum Life is mandatory. As was the case with Amulet, you can craft the modifier that lowers the Mana Cost of Skills. Flammability on Hit is good to have, but it makes Ring much more expensive and is not really needed. |
|
| Min. requirements: +50 to maximum Life +50% to Elemental Resistances Optional affixes: Curse Enemies with Flammability on Hit Chaos Resistance Attributes Channelling Skills have -3 to Total Mana Cost |
|
 (Ring) Mark of the Shaper - If your other Ring is Elder-influenced, we would recommend Mark of the Shaper. It massively increases Spell and Elemental Damage. It summons Volatile Anomalies and increases Maximum Life, which is good. (Ring) Mark of the Shaper - If your other Ring is Elder-influenced, we would recommend Mark of the Shaper. It massively increases Spell and Elemental Damage. It summons Volatile Anomalies and increases Maximum Life, which is good. |
|
| (15-25)% increased Elemental Damage 20% chance to Trigger Level 20 Summon Volatile Anomaly on Kill Adds (13-18) to (50-56) Lightning Damage to Spells (6-10)% increased maximum Energy Shield (6-10)% increased maximum Life (60-80)% increased Spell Damage if your other Ring is an Elder Item Cannot be Stunned by Spells if your other Ring is a Shaper Item |
|
 (Jewel) Rare Jewels - On each of these Jewels, get a bonus to Maximum Life Prefix and Burning Damage Suffix. Other modifiers are less important. (Jewel) Rare Jewels - On each of these Jewels, get a bonus to Maximum Life Prefix and Burning Damage Suffix. Other modifiers are less important. |
|
| Recommended affixes: Maximum Life Resistances Mana Reservation Efficiency increased Burning Damage |
|
 (Jewel) Large Cluster Jewel - Having one or two of such Jewels would significantly improve your damage, but keep in mind that the good ones are very pricey. Look for no more than 8 passives and up to three of the listed Notables. (Jewel) Large Cluster Jewel - Having one or two of such Jewels would significantly improve your damage, but keep in mind that the good ones are very pricey. Look for no more than 8 passives and up to three of the listed Notables. |
|
| Recommended affixes: 1 Added Passive Skill is Burning Bright 1 Added Passive Skill is Cremator 1 Added Passive Skill is Prismatic Heart 1 Added Passive Skill is Smoking Remains 1 Added Passive Skill is Widespread Destruction |
|
 (Jewel) Medium Cluster Jewel - Fire Damage over Time Medium Cluster Jewels are usually great, but avoid Notables that affect Ignite or Ailment Damage, only Burning Damage is of use. (Jewel) Medium Cluster Jewel - Fire Damage over Time Medium Cluster Jewels are usually great, but avoid Notables that affect Ignite or Ailment Damage, only Burning Damage is of use. |
|
| Recommended affixes: 1 Added Passive Skill is Burning Bright 1 Added Passive Skill is Flow of Life 1 Added Passive Skill is Student of Decay 1 Added Passive Skill is Mender's Wellspring |
|
 (Jewel) Watcher's Eye - Malevolence's extra DoT Multiplier is the best Aura mod to seek on a Watcher's Eye. Determination doesn't have any good ones. (Jewel) Watcher's Eye - Malevolence's extra DoT Multiplier is the best Aura mod to seek on a Watcher's Eye. Determination doesn't have any good ones. |
|
| (4-6)% increased maximum Energy Shield (4-6)% increased maximum Life (4-6)% increased maximum Mana <Two or Three random aura modifiers> |
|
|
Suggested Flasks:
|
|
     |
|
|
If you have any other build requests please leave that in the comments below. We are always open to suggestions and constructive feedback.
Pictures used in this article are the intellectual property of Grinding Gear Games.
