Seismic Trap/Exsanguinate Saboteur Build
One of the best Sabouterus builds that use Seismic Traps and Exsanguinate Traps to deal a lot of Physical DamageSeismic Trap
Saboteur build
Updated for Patch 3.20
The Best Crafty Guides by Odealo
| Guide notes |
| September 03, 2021 -Build created January 13, 2023 -Updated for Patch 3.20 |
| Build overview | |||
| Tags: [TRAP] [PHYSICAL] [LIFE] [STARTER] | |||
|
Budget: Defenses: |
|
Boss DPS: AoE: |
|
Seismic Trap is one of the few Duration Traps, that once placed stay active dealing damage to the surroundings. Due to its nature of being the most effective against stationary targets, it's not that great with fast map clearing - for that there is another setup with Exsanguinate. Exsanguinate as Trap shares a lot of similarities with Seismic Trap, these are both Physical Spells (Exsanguinate needs to be linked with Trap Support). Additionally, Exsanguiate is great for quickly killing weak enemies - the tendrils instantly seek the nearest enemy and chain to another. Saboteur is the obvious choice - it has great synergy with Traps and offers some great defensive layers. With Pyromaniac you're immune to Ignite and Shock and have a lot of Mana and Life Regeneration, with Born in the Shadows you're immune to Blind, nearby enemies and enemies you hit are Blinded, which makes them deal less damage.
As with many of the Physical Spells builds, this one uses two Cold Iron Point Daggers for 6 additional Levels for your Physical Spells - that really improves your DPS. There are few to no Unique Items that are mandatory - the previously mentioned Cold Iron Point is too good to not pick it, The Devouring Diadem, Tinkerskin, or Slavedriver's Hand could suit this build and are worth your consideration. The build is Life-based, cheap, and simple - it's a great League Starter. Your total Maximum Life should be oscillating around 6k with particular resistance to Hits. The dual-DPS setup makes the build good in both situations - dealing with bosses and fast map clearing. It's currently one of, if not the best Saboteurs builds out there.
Patch 3.16 introduced some new ways to increase your Maximum Life, Damage, and shifted your defensive configuration to rely more on Evasion Rating, Spell Suppression, Energy Shield, and a new Keystone available for everyone - Ghost Shroud. The build itself hasn't changed much - we removed Fortify on Whirling Blades and replaced it with Lifetap Support, Fortify has its effectiveness now scaling with the melee damage. The Passive Skill Tree is obviously different from the previous one due to the changes, but the core framework remains the same. Evasion Rating is also more valuable - try to seek items with this stat alongside Maximum Life.
In Patch 3.17, single target damage got slightly nerfed while its AoE has been improved - it won't affect the build in a major way.
Patch 3.20 introduced almost no changes, but there are now a few new Items that could be implemented.
You can also check our other Path of Exile builds right over here Odealo's Crafty Guides - Full List
1. Gameplay
Use the Exsanguinate Traps to deal with packs of enemies - it's really great even in closed spaces such as Cells Map. Seismic Trap is used to kill bosses and the Rare enemies that are more resistant to your Spells. Place the Traps ahead of you as you go to clear the rooms, these will kill enemies before you will have a chance to see them. Use your Movement Skill to move faster and Evade Attacks. Assassin's Mark is the Curse that's the most beneficial, you can use it on Arcanist Brand. Steelskin is probably the best Guard Spell, but Immortal Call linked with CwDM is a popular choice too.
|
|
|
|

2. Build's PROS & CONS
| PROS |
|
| CONS |
|
3. Leveling tips
Use Explosive Trap, it's good for a start since it can be used at level 1 and shares similarities with other Physical Spell Traps so you don't have to deviate much from your intended Passive Skill Tree. Don't use Seismic Trap without any secondary Trap Skill, it's too slow by itself, you can start using Exsanguinate linked with Trap Support early on, later the Trap Support should have a form of an Affix on your Rare Gloves. Cold Iron point Requires Level 62, before that you can use any weapon that increases your Spell Damage, you can use Vendor Recipes for that, base Attack Damage of a weapon is not important.
Suggested leveling Gem setups:
| Explosive Trap setup | |
 |
Explosive Trap - It should be enough during the early stages of the game, it's a simple Trap that explodes multiple times upon activation |
 |
Swift Assembly Support - you have now a chance to throw additional Traps |
 |
Trap and Mine Damage Support - increases Trap damage, but decreases Throwing Speed |
 |
Multiple Traps Support - allows you to place more traps on the ground and makes you throw 2 more traps at once |
| Whirling Blades setup | |
 |
Whirling Blades - your movement skill, can vary depending on your weapon, for example,  Flame Dash is a great substitute for Wand users Flame Dash is a great substitute for Wand users |
 |
Lifetap Support - spend Life instead of Mana on Skills |
| Utility Gems | |
 |
Pride - an Aura that makes enemies in your proximity take more Physical Damage |
 |
Herald of Purity - Herald Skill that increases your Physical Damage and grants some other effects |
 |
Assassin's Mark - Cursed enemies have a higher chance to be Hit with Critical Strikes with higher Multiplier, and additionally, restore Life and Mana on kill |
 |
Steelskin - a guard Spell that makes you take less damage for a short duration of time |
Bandits:
You should kill all the Bandits and take two more Passive Skill Points
Leveling Skill Trees:
32 Points Skill Tree
head for the great Trap Cluster Jewel, take some Life and Crit nodes on the way
67 Points Skill Tree
allocate Ghost Dance, more Maximum Life, Spell Damage, and Reservation nodes
Recommended leveling items:
 Le Heup of All - a common Ring for Leveling, it provides you with a lot of Elemental Resistances Le Heup of All - a common Ring for Leveling, it provides you with a lot of Elemental Resistances |
|
| (10-30)% increased Damage +(10-30) to all Attributes (10-30)% increased Rarity of Items found +(10-30)% to all Elemental Resistances |
 Goldrim - a Helmet that grants a lot of Elemental Resistances, available since level 1 Goldrim - a Helmet that grants a lot of Elemental Resistances, available since level 1 |
|
| +(30-50) to Evasion Rating 10% increased Rarity of Items found +(30-40)% to all Elemental Resistances Reflects 4 Physical Damage to Melee Attackers Level Requirement reduced by 100 (Hidden) |
 Tabula Rasa - allows you to create an elaborate gem setup right from the start Tabula Rasa - allows you to create an elaborate gem setup right from the start |
|
| Item has no level requirement and Energy Shield (Hidden) Item has 6 White Sockets and is fully linked (Hidden) |
 Deerstalker - Boots that you can put Exsanguinate into and save a Socket, these have generally good synergy with Traps Deerstalker - Boots that you can put Exsanguinate into and save a Socket, these have generally good synergy with Traps |
|
| Socketed Gems are Supported by Level 11 Trap (160-200)% increased Evasion Rating +(35-45) to maximum Life 15% increased Movement Speed (14-18)% increased Trap Throwing Speed 15% increased Movement Speed for 9 seconds on Throwing a Trap |
4. Final Skill Tree, Ascendancy Points, and Pantheon
Final Skill Tree:
108 Points Final Skill Tree (doesn't include Thread of Hope nor Cluster Jewels)
117 Points Path of Building (PoB) link
Ascendancy points:
Preferably in that order:
- Perfect Crime
- Pyromaniac
- Chain Reaction
- Born in the Shadows
Pantheon:
Major God: Soul of the Brine King: You cannot be Stunned if you've been Stunned or Blocked a Stunning Hit in the past 2 seconds
Minor God: Soul of Garukhan: 60% reduced Effect of Shock on you
5. Final Gems links
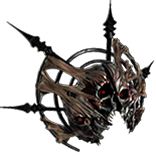
| [DPS] Seismic Trap setup | |
 |
Seismic Trap - Creates a pulsating Trap that deals Physical Spell Damage to the surrounding enemies, it's your main source of damage against bosses. you can either make it a Physical Damage Spell with Critical Stike Chance |
 |
Brutality Support - With Cold Iron Points you won't be able to deal Elemental Damage, so there is no drawback in picking Brutality and having your Physical Damage increased. |
|
Trap and Mine Damage Support - Traps deal a lot more damage, but the Throwing Speed is slightly reduced |
| Advanced Traps Support - increased Trap Throwing Speed, Trap Damage, Trap Duration, and Cooldown Recovery Rate for Traps | |
|
Lifetap Support - allows you to pay the Mana Cost in LIfe instead, which greatly helps you on lower levels where your gear isn't fully optimized yet. It also grants a decent DPS multiplier. If you can sustain the mana cost, you should use  Empower Empower |
 |
Increased Critical Strikes Support - increases your Critical Strike Chance |
| [UTILITY] Auras | |
 |
Summon Skitterbots - Sumomns invulnerable Minions that Chill and Shock enemies making them take more damage and move slower. |
|
Pride - increases your Physical Damage, it's more effective if you'll stay close to the enemy for more than four seconds. |
 |
Grace - Adds and increases Evasion Rating. |
 |
Determination - Adds and increases Armour Rating. |
 |
Defiance Banner - Banner that increases your defenses: Evasion, Armour, and reduced Critical Strike Chance for nearby enemies. |
| [MOBILITY] Whirling Blades and Steelskin setup | |
|
Whirling Blades - your main Movement Skill, it's an attack that allows you to dash through enemies |
 |
Faster Attacks Support - increases the Attack frequency, which makes you move faster |
|
Lifetap Support - with Lifetap you will be able to use linked Skills without worrying about your Mana |
|
Steelskin - a Guard Spell that decreases the damage you take during its duration. You should allocate it under your left mouse button so that it's triggered nearly automatically |
| [UTILITY] Curse | |
|
Assassin's Mark - Curse enemies to make them more vulnerable to Critical Strikes and to restore more Mana and Life on Kill |
| [DPS] Exsanguinate setup (can be socketed in Shaper Gloves or Deerstalker Boots for extra Support Gems) |
|
 |
Exsanguinate - it's a Spell that releases tendrils that can Chain, but do not count as Projectiles. Tendrils will seek the enemies and instantly kill smaller foes. |
 |
Chain Support - use Chain for a far better Clear Speed |
 |
Cluster Traps Support - with Cluster Traps, more of these Traps will be Thrown which is necessary to deal with large groups |
|
Lifetap Support - again, without Lifetap you will be unable to freely spam that Skill |
| Other Support Gems that can be found on Items: | |
|
Trap and Mine Damage Support - direct Boost to Trap Damage. You can find this on Rare Gloves |
| Advanced Traps Support - another Trap-related Support Gem that can be found on Gloves | |
 |
Trap Support - allows you to throw Traps that will cast Exsanguinate. It should be used as a regular Support Gem when in Gloves, or granted by the Deerstalker Boots |
| [UTILITY] Bear Trap | |
 |
Bear Trap - immobilizes the enemy and applies a debuff with reduces his Movement Speed and increases the damage they take from Traps |
|
|
6. Gear Setup
The gear consists mostly of Rare Items making it flexible in terms of its price. As a Shadow, a lot of your defenses will rely on Dodge and Evasion, but the most important stat here is Maximum Life and Elemental Resistances. Pay close attention to your Strength, 155 of it will be required and it's scarce on your side of the Passive Skill Tree. Gloves will be the most important Rare gear piece since Shaper's influence allows you to have additional Support Gem links there for faster clear speed. It is recommended to use two Large Cluster Jewels - it will increase your damage. Look for stats that would increase your Trap, Spell, or Physical Damage, but only for Spells, you won't use any Attacks to deal damage.
Our recommended items will:
- Cap your resistances
- Give you enough DPS/Life to start mapping successfully
|
Stat priorities on items:
|
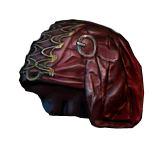
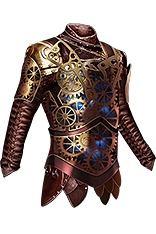
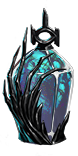
 (Helmet) The Devouring Diadem - A great choice for a Helmet, Eldritch Battery will help you with Mana immensely, you have less Mana Reserved, a Higher Level of Socketed Gems, and a Veiled Suffix of your choice. (Helmet) The Devouring Diadem - A great choice for a Helmet, Eldritch Battery will help you with Mana immensely, you have less Mana Reserved, a Higher Level of Socketed Gems, and a Veiled Suffix of your choice. |
|
| +1 to Level of Socketed Gems Socketed Gems have 20% reduced Mana Reservation Trigger Level 15 Feast of Flesh every 5 seconds (180-220)% increased Energy Shield 10% chance for Energy Shield Recharge to start when you use a Skill Eldritch Battery Veiled Suffix |
|
 (Helmet) Rare Helmet - Use Rare Helmet for more Physical Damage, Maximum Life, and Elemental Resistances - it's what The Devouring Diadem lacks. It might cause Mana Issues if you won't allocate Eldritch Battery. (Helmet) Rare Helmet - Use Rare Helmet for more Physical Damage, Maximum Life, and Elemental Resistances - it's what The Devouring Diadem lacks. It might cause Mana Issues if you won't allocate Eldritch Battery. |
|
| Min. requirements: +80 to Maximum Life 40% Total Elemental Resistances Nearby enemies take 9% increased Physical/Chaos Damage Optional affixes: Adds Physical Damage to Spells Global Critical Strike Multiplier Attributes Spell Suppression Chance |
|
| Helmet enchantments: Seismic Trap Enchantment |
|
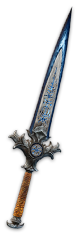 (Weapon) Cold Iron Point - Two of these will increase the Level of all Physical Spell Skill Gems by 6. This item looks poor at the first glance but it's one of the most powerful daggers for Physical Spell builds. (Weapon) Cold Iron Point - Two of these will increase the Level of all Physical Spell Skill Gems by 6. This item looks poor at the first glance but it's one of the most powerful daggers for Physical Spell builds. |
|
| 30% increased Global Critical Strike Chance +3 to Level of all Physical Spell Skill Gems Deal no Elemental Damage |
|
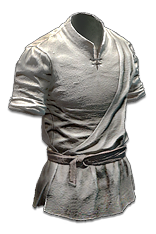
 (Shield) Rare Body Armour - Rare Body Armour is a great choice for characters lacking Elemental Resistances and Spell Suppression Chance. Additionally, it can grant you more Maximum Life than Tinkerskin. (Shield) Rare Body Armour - Rare Body Armour is a great choice for characters lacking Elemental Resistances and Spell Suppression Chance. Additionally, it can grant you more Maximum Life than Tinkerskin. |
|
| Min. requirements: +100 to Maximum Life 80% Total Elemental Resistances Optional affixes: You can apply an additional Curse Spell Suppression Chance +#% to Critical Strike Chance |
|
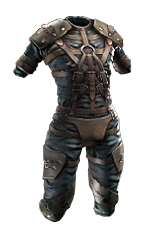
 (Body Armour) Tinkerskin - It grants a decent amount of Maximum Life, Evasion Rating, and Energy Shield, generates Frenzy Charges, grants Phasing, and recovers a lot of Life and ES. It provides no Elemental Resistances, but it's still one of the best Body Armours. (Body Armour) Tinkerskin - It grants a decent amount of Maximum Life, Evasion Rating, and Energy Shield, generates Frenzy Charges, grants Phasing, and recovers a lot of Life and ES. It provides no Elemental Resistances, but it's still one of the best Body Armours. |
|
| (140-170)% increased Evasion and Energy Shield +(60-90) to maximum Life (10-15)% increased Cooldown Recovery Rate for throwing Traps 15% chance to gain a Frenzy Charge when your Trap is triggered by an Enemy 30% chance to gain Phasing for 4 seconds when your Trap is triggered by an Enemy Recover 100 Life when your Trap is triggered by an Enemy Recover 50 Energy Shield when your Trap is triggered by an Enemy |
|
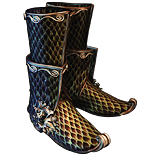
 (Boots) Rare Boots - Rare Boots with high Maximum Life, Elemental Resistances, and Movement Speed are the best option. (Boots) Rare Boots - Rare Boots with high Maximum Life, Elemental Resistances, and Movement Speed are the best option. |
|
| Min. requirements: 30% Movement Speed +60 to Maximum Life 60% Total Elemental Resistances Optional affixes: chance to gain Onslaught for 4 seconds on Kill Spell Suppression Chance Chaos Resistance |
|
| Min. requirements: +60 to Maximum Life 60% Total Elemental Resistances (20–25)% increased Trap Damage Socketed Gems are Supported by Level 18 Trap Optional affixes: increased Trap Throwing Speed Socketed Gems are Supported by Advanced Traps increased Trap Damage Socketed Gems are Supported by Trap And Mine Damage Spell Suppression Chance |
|
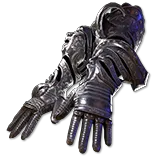 (Gloves) Entropic Devastation - It's the only way to Impale with Spells, but be sure that your Critical Strike Chance is almost at 100%. it's great with purely Physical Damage Hit-based Spell builds (Gloves) Entropic Devastation - It's the only way to Impale with Spells, but be sure that your Critical Strike Chance is almost at 100%. it's great with purely Physical Damage Hit-based Spell builds |
|
| Grants Call of Steel (100–150)% increased Evasion and Energy Shield (30–50)% increased Effect of Impales inflicted with Spells Critical Strikes with Spells inflict Impale |
|
 (Belt) Rare Belt - one of the best places to look for Maximum Life and Elemental Resistances, it's a good idea to look for open affixes so that you can craft the most suitable mods (Belt) Rare Belt - one of the best places to look for Maximum Life and Elemental Resistances, it's a good idea to look for open affixes so that you can craft the most suitable mods |
|
| Min. requirements: +80 to Maximum Life 90% Total Elemental Resistances Optional affixes: increased Maximum Life Strength Chaos Resistance 12% increased Trap Throwing Speed (crafted) |
|
 (Amulet) Rare Amulet - The two Affixes, one from Warlord's and one Hunter's influence are highly recommended, these work similarly to Cold Iron Points, increasing the Gem Level of your main DPS Skill - Seismic Trap. Maximum Life and Elemental Resistances are your secondary mods to look for. (Amulet) Rare Amulet - The two Affixes, one from Warlord's and one Hunter's influence are highly recommended, these work similarly to Cold Iron Points, increasing the Gem Level of your main DPS Skill - Seismic Trap. Maximum Life and Elemental Resistances are your secondary mods to look for. |
|
| Min. requirements: +1 to Level of all Dexterity Skill Gems +1 to Level of all Physical Skill Gems Optional affixes: Maximum Life Strength Maximum Life Elemental Resistances |
|
| Recommended Anointments: Master Sapper Sanctity |
|
 (Ring) Rare Ring - Again, look for Maximum Life and Elemental Resistances. You could also seek one Ring with a Curse on Hit but it's completely optional. (Ring) Rare Ring - Again, look for Maximum Life and Elemental Resistances. You could also seek one Ring with a Curse on Hit but it's completely optional. |
|
| Min. requirements: +70 to Maximum Life 80% Total Elemental Resistances Optional affixes: increased Spell Damage Curse on Hit Attributes Critical Strike mods |
|
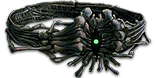
 (Ring) Ming's Heart - It reduces your Maximum Life and Energy Shield, but nearly doubles your damage with added Extra Chaos Damage, definitely one of the best items for this build. (Ring) Ming's Heart - It reduces your Maximum Life and Energy Shield, but nearly doubles your damage with added Extra Chaos Damage, definitely one of the best items for this build. |
|
| +(17-23)% to Chaos Resistance 25% reduced maximum Energy Shield 25% reduced maximum Life +(40-50)% to Chaos Resistance Gain (40-60)% of Physical Damage as Extra Chaos Damage |
|
 (Jewel) Rare Jewels - Jewels offer a huge variety of affixes, look for Maximum Life, Trap, Spell, Physical Damage, and Crit-related stats. (Jewel) Rare Jewels - Jewels offer a huge variety of affixes, look for Maximum Life, Trap, Spell, Physical Damage, and Crit-related stats. |
|
| Recommended affixes: Trap Damage Mana Reservation Efficiency Elemental Resistances Attributes Maximum Life |
|
 (Jewel) Large Cluster Jewel - Use Large Cluster Jewels to increase your Physical Damage - there are plenty of possible Passives you can add here. (Jewel) Large Cluster Jewel - Use Large Cluster Jewels to increase your Physical Damage - there are plenty of possible Passives you can add here. |
|
| Recommended affixes: 1 Added Passive Skill is Furious Assault 1 Added Passive Skill is Iron Breaker 1 Added Passive Skill is Master the Fundamentals 1 Added Passive Skill is Force Multiplier 1 Added Passive Skill is Exploit Weakness 1 Added Passive Skill is Iron Breaker |
|
 (Jewel) Medium Cluster Jewel - Medium Cluster Jewels are used to increase your Critical Strike Chance and Multiplier, and to upgrade your Trap-related stats. (Jewel) Medium Cluster Jewel - Medium Cluster Jewels are used to increase your Critical Strike Chance and Multiplier, and to upgrade your Trap-related stats. |
|
| Recommended affixes: 1 Added Passive Skill is Basics of Pain 1 Added Passive Skill is Pressure Points 1 Added Passive Skill is Savage Response 1 Added Passive Skill is Guerilla Tactics 1 Added Passive Skill is Set and Forget 1 Added Passive Skill is Magnifier 1 Added Passive Skill is Towering Threat |
|
 (Jewel) Thread of Hope - Use Thread of Hope with a Large Ring and put it near Mind Drinker, you could allocate 6 useful Notables this way (Jewel) Thread of Hope - Use Thread of Hope with a Large Ring and put it near Mind Drinker, you could allocate 6 useful Notables this way |
|
| Only affects Passives in Large Ring Passives in Radius can be Allocated without being connected to your tree -(20-10)% to all Elemental Resistances |
|
 (Jewel) Watcher's Eye - Your only Aura is Pride, a basic increased Damage while using Pride should be good enough, but Chance to Deal Double Damage is the most desired mod for this Jewel. (Jewel) Watcher's Eye - Your only Aura is Pride, a basic increased Damage while using Pride should be good enough, but Chance to Deal Double Damage is the most desired mod for this Jewel. |
|
| (4-6)% increased maximum Energy Shield (4-6)% increased maximum Life (4-6)% increased maximum Mana <Two or Three random aura modifiers> |
|
| Creates Consecrated Ground on Use (20-40)% increased Duration Consecrated Ground created by this Flask has Tripled Radius 100-150% increased Critical Strike Chance against Enemies on Consecrated Ground during Effect Consecrated Ground created during Effect applies (7-10)% increased Damage taken to Enemies |
|
 (Flask) Sin's Rebirth - A Stibnite Flask that also grants you more Chaos Damage sourced from Physical Damage. (Flask) Sin's Rebirth - A Stibnite Flask that also grants you more Chaos Damage sourced from Physical Damage. |
|
| 20% more Evasion Rating Creates a Smoke Cloud on Use Unholy Might during Effect Grants Immunity to Ignite for 4 seconds if used while Ignited Removes all Burning when used |
|
|
Other suggested Flasks:
|
|
    |
|
|
If you have any other build requests please leave that in the comments below. We are always open to suggestions and constructive feedback.
Pictures used in this article are the intellectual property of Grinding Gear Games.
