Shock Nova of Procession Hierophant
A very fast and powerful Setup for the Hierophant that uses Shock Nova of Procession to deliver insane amounts of Lightning DamageShock Nova of Procession
Hierophant Build
Updated for Patch 3.28
The Best Crafty Guides by Odealo
| Guide notes |
| March 13, 2026 -Build created |
| Build Overview | |||
| Tags: [CASTER] [ELEMENTAL] [HYBRID] | |||
|
Budget: Defenses: |
|
Boss DPS: AoE: |
|
The new Shock Nova of Procession creates 3 rings: one around you, and two repeats towards a desired direction, which usually yields at least 2 overlaps, although hitting with all 3 rings is possible too. It also has 0.25 seconds of base Cast Time, making it the fastest Spell in the game. It is more than twice as fast as the regular Shock Nova. To offset those properties, it also deals a low amount of base Damage paired with rather low effectiveness of Added Damage. By adding lots of flat Damage from other sources, such as Spellblade or Archmage, it quickly becomes the strongest Spell in the game.
The Archmage Support grants you tons of Lightning Damage based on your Unreserved Mana. In this Setup, your Mana will also absorb a portion of the incoming Damage thanks to the Mind over Matter Keystone and Hierophant Ascendency and grant you extra Energy Shield on top of that. However, it doesn't scale your Damage further; you will still have to use Spell Damage, Cast Speed, and Critical Strikes modifiers. The Mana Costs are very hard to sustain during continuous usage: you will have to use Lavianga's Spirit or Vaal Clarity to burst down Bosses. Thanks to the new Khatal's Geyser Amulet, your Mana Flask lasts for the entire duration, and the effect of Arcane Surge can be improved by Flask Effect modifiers. During regular Clearing, your Mana Regeneration and on-kill recovery are good enough for smooth sustain.
You can also check our other Path of Exile builds right over here Odealo's Crafty Guides - Full List
1. Gameplay
Proper positioning is important to Hit Enemies with the overlapping Rings - you can't be too close or too far, and the distance shrinks as you gain Intensity stacks, too. For Movement, use Frostblink of Wintry Blast - you can link it with the Archmage Support as well, making it good enough to deal with packs of weaker enemies.
|
|
|
|

2. Build's PROS & CONS
| PROS |
|
| CONS |
|
3. Leveling tips
You should start leveling as a regular Spell Caster. You can start using the Archmage Support as you acquire it at level 31. From that moment, your Campaign progression should be very smooth. You can also check out our Templar Leveling Guide for PoE using Lightning Spells.
Bandits:
You should kill all three Bandits for one additional Skill Point, but Helping Alira might be a very good idea too at start.
Leveling Skill Trees:
35 Points Skill Tree
Start with the usual Notables that benefit Spell Casters, such as Spell Damage or maximum Life.
75 Points Skill Tree
Pick up extra Mana once you unlock the Archmage Support, continue to invest into Elemental Damage, Critical Strikes, and some maximum Life.
4. Final Skill Tree, Ascendancy Points, and Pantheon
Final Skill Tree:
116 Points Final Skill Tree (doesn't include Items, Unique, or Cluster Jewels)
120 Points Path of Building (PoB) link
Ascendancy points:
Preferably in that order:
- Arcane Blessing
- Conviction of Power
- Divine Guidance
- Sanctuary of Thought
Pantheon:
Major God: Soul of the Brine King: You cannot be Stunned if you've been Stunned or Blocked a Stunning Hit in the past 2 seconds
Minor God: Soul of Abberath: 60% less Duration of Ignite on You; 10% increased Movement Speed while on Burning Ground, Unaffected by Burning Ground
5. Final Gems links
| [DPS] Shock Nova of Procession setup | |
 |
Shock Nova of Procession - creates a ring of lightning around you, which repeats 2 additional times, moving slightly towards the targeted location. |
 |
Archmage Support |
 |
Spell Echo Support |
 |
Intensify Support |
 |
Arcane Surge Support |
 |
Increased Critical Damage Support |
| [UTILITY] Guard setup | |
 |
Arcane Cloak - a Guard Skill that absorbs incoming Damage while also granting you plenty of bonus Lightning Damage depending on the Mana consumed. |
 |
Frost Shield - an icy bubble that greatly improves your Critical Strike Chance and absorbs Damage from outside sources. |
 |
Automation - triggers the Arcane Cloak whenever it is ready to be used again. It won't work for the Frost Shield. |
 |
Enhance Support |
| [UTILITY] Curse setup | |
 |
Elemental Weakness - lowers all Elemental Resistances of affected foes. |
 |
Assassin's Mark - improves your Critical Strike Chance and Multiplier, while also generating extra Power Charges. |
 |
Conductivity - lowers the Lightning Resistances even more. |
 |
Arcanist Brand - casts all linked Spells in rapid succession. |
| [UTILITY] Mobility setup | |
 |
Frostblink of Wintry Blast - a quick Spell that teleports you a short distance. It has no Cooldown. It deals enough Damage to kill weaker packs of monsters. |
 |
Faster Casting Support |
|
Archmage Support |
|
Increased Critical Damage Support |
| [UTILITY] Blessing setup | |
 |
Zealotry - improves your Critical Strike Chance and Damage with Spells. You can also use Wrath instead if you have beneficial Watcher's Eye modifiers. |
 |
Eternal Blessing Support |
| [UTILITY] Arrogance setup | |
|
Clarity - in this Setup, it barely provides any Mana. Keep it at level 1 just to enable beneficial Watcher's Eye modifiers. |
 |
Arrogance Support |
|
|
6. Gear Setup
Your priority is getting lots of Mana, but you still have to cap your Elemental and Chaos Resistance. You also can't ignore maximum Life entirely, although it is not as important as usual, thanks to large amounts of Energy Shield and Mana protecting it. You will also need a bit of extra Strength and Dexterity to fulfil the Attribute Requirements. To improve your Damage, other than stacking Mana, you should look for Critical Strikes, faster Cast Speed, and Spell Damage modifiers. There are a lot of Unique Items you can use, which impact your overall gearing, so you should decide on them first.
|
Stat priorities on items:
|
 (Helmet) Mindspiral - grants plenty of Mana, but also provides valuable Recoup and Extra Energy Shield on top of that. You can Corrupt it to gain extra Power Charges. (Helmet) Mindspiral - grants plenty of Mana, but also provides valuable Recoup and Extra Energy Shield on top of that. You can Corrupt it to gain extra Power Charges. |
|
| +(100-120) to maximum Mana Gain (10-15)% of Maximum Mana as Extra Maximum Energy Shield Enemies Cannot Leech Mana From you (10-20)% of Damage taken Recouped as Mana Cannot Leech Mana |
|
 (Helmet) Ravenous Passion - simply provides 30% More Damage for Spells, as you will generate Rage nearly instantly. The additional Strength is also quite useful. (Helmet) Ravenous Passion - simply provides 30% More Damage for Spells, as you will generate Rage nearly instantly. The additional Strength is also quite useful. |
|
| +(30-50) to Strength (80-120)% increased Armour and Energy Shield Gain (7-10) Rage after Spending a total of 200 Mana Rage grants Spell Damage instead of Attack Damage |
|
 (Helmet) Indigon - it easily doubles your Damage output, but requires pressing your Unique Mana Flask every 4 seconds to remove the Mana Costs. It can be used if you only farm Bosses. (Helmet) Indigon - it easily doubles your Damage output, but requires pressing your Unique Mana Flask every 4 seconds to remove the Mana Costs. It can be used if you only farm Bosses. |
|
| (150-180)% increased Energy Shield (6-10)% increased maximum Mana Recover (8-10)% of Life when you use a Mana Flask Non-instant Mana Recovery from Flasks is also Recovered as Life (50-60)% increased Cost of Skills for each 200 total Mana Spent Recently (20-25)% increased Spell Damage for each 200 total Mana you have Spent Recently, up to 2000% |
|
 (Weapon) Pledge of Hands - the Greater Spell Echo is insanely valuable, even at level 1. This option saves you the headache of crafting two Wands and allows you to wear the Replica Kaom's Heart. (Weapon) Pledge of Hands - the Greater Spell Echo is insanely valuable, even at level 1. This option saves you the headache of crafting two Wands and allows you to wear the Replica Kaom's Heart. |
|
| Socketed Gems are Supported by Level 1 Greater Spell Echo (120-160)% increased Spell Damage (50-100)% increased maximum Mana |
|
 (Weapon) Rare Weapon - you will need Mana, Spell Damage, Critical Strikes, and Cast Speed, all in large quantities. You can also get some Extra Damage on top of that. (Weapon) Rare Weapon - you will need Mana, Spell Damage, Critical Strikes, and Cast Speed, all in large quantities. You can also get some Extra Damage on top of that. |
|
| Min. requirements: 20% increased Cast Speed 50% increased Spell Damage 100% increased Spell Critical Strike Chance +100 to maximum Mana Optional affixes: % to Global Critical Strike Multiplier Gain (7-8)% of Lightning Damage as Extra Chaos Damage % chance to deal Double Damage |
|
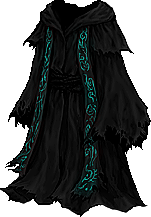 (Body Armour) Cloak of Defiance - grants plenty of Mana and tons of extra Regeneration. The 1% doesn't sound like much, but it is almost half of your base Regeneration. (Body Armour) Cloak of Defiance - grants plenty of Mana and tons of extra Regeneration. The 1% doesn't sound like much, but it is almost half of your base Regeneration. |
|
| (300-400)% increased Evasion and Energy Shield +(100-150) to maximum Mana Regenerate 1% of Mana per second Mind Over Matter |
|
 (Body Armour) Replica Kaom's Heart - if you don't need a Six-link Setup in your Body Armour, you can use this Armour instead. It provides a large amount of maximum Mana. (Body Armour) Replica Kaom's Heart - if you don't need a Six-link Setup in your Body Armour, you can use this Armour instead. It provides a large amount of maximum Mana. |
|
| Has no Sockets (30-40)% increased Lightning Damage +500 to maximum Mana |
|
 (Boots) Rare Boots - you will move a lot using the Frostblink of Wintry Blast, but plenty of Movement Speed is still useful here for more precise maneuvers. You can also get the Onslaught Buff here. (Boots) Rare Boots - you will move a lot using the Frostblink of Wintry Blast, but plenty of Movement Speed is still useful here for more precise maneuvers. You can also get the Onslaught Buff here. |
|
| Min. requirements: +100 to maximum Life +70 to maximum Mana 30% increased Movement Speed +70% to Elemental and Chaos Resistances Optional affixes: chance to gain Onslaught for 4 seconds on Kill You have Tailwind if you have dealt a Critical Strike Recently chance to gain Elusive on Critical Strike Attributes |
|
| Min. requirements: +70 to maximum Mana +100 to maximum Life +70% to Elemental and Chaos Resistances Optional affixes: Attributes increased Global Critical Strike Chance #% increased Critical Strike Chance against Shocked Enemies |
|
 (Belt) Rare Belt - a Rare Belt can provide plenty of basic modifiers. The Cord Belt is the best option, but it is also quite expensive. You will want to use the Unique Belt later on. (Belt) Rare Belt - a Rare Belt can provide plenty of basic modifiers. The Cord Belt is the best option, but it is also quite expensive. You will want to use the Unique Belt later on. |
|
| Min. requirements: +70 to Maximum Life +60 to maximum Mana +70% to Elemental and Chaos Resistances Optional affixes: Flask modifiers Attributes |
|
 (Belt) The Tides of Time - with this Belt sustaining your Flasks at all times is very easy, which is much more useful than regular modifiers on a Rare Belt. It will also boost your Arcane Surge Buff if you wear the relevant Amulet. (Belt) The Tides of Time - with this Belt sustaining your Flasks at all times is very easy, which is much more useful than regular modifiers on a Rare Belt. It will also boost your Arcane Surge Buff if you wear the relevant Amulet. |
|
| 100% increased Life Recovery from Flasks 100% increased Mana Recovery from Flasks Flasks applied to you have 25% increased Effect Life Flasks gain (0-3) Charges every 3 seconds Mana Flasks gain (0-3) Charges every 3 seconds Utility Flasks gain (0-3) Charges every 3 seconds |
|
 (Amulet) Khatal's Geyser - this Amulet improves your Arcane Surge and makes the Mana Flasks more reliable. You can even wear the Indigon Helmet if you don't mind pressing the Mana Flask very often, but it is not recommended for general gameplay. (Amulet) Khatal's Geyser - this Amulet improves your Arcane Surge and makes the Mana Flasks more reliable. You can even wear the Indigon Helmet if you don't mind pressing the Mana Flask very often, but it is not recommended for general gameplay. |
|
| +(20-30) to Intelligence Can't use Life Flasks +(55-70) to maximum Mana Increases and Reductions to Effect of Flasks applied to you also applies to Effect of Arcane Surge on you at (200-250)% of their value You have Arcane Surge during Effect of any Mana Flask Mana Flask Effects are not removed when Unreserved Mana is Filled Mana Flask Effects do not Queue |
|
 (Amulet) Atziri's Foible - this Amulet offers tons of Mana and Regeneration, while also lowering the Requirements for Attributes. Remember to use Mana Catalysts to make it even better. (Amulet) Atziri's Foible - this Amulet offers tons of Mana and Regeneration, while also lowering the Requirements for Attributes. Remember to use Mana Catalysts to make it even better. |
|
| (20-30)% increased Mana Regeneration Rate +100 to maximum Mana (16-24)% increased maximum Mana (80-100)% increased Mana Regeneration Rate Items and Gems have 25% reduced Attribute Requirements |
|
| Recommended Anointments: Mind Drinker |
|
 (Ring) Rare Rings - your Ring can grant you plenty of Cast Speed or grant you extra Minimum Frenzy or Power Charge. Other than that, look for the usual defensive modifiers. (Ring) Rare Rings - your Ring can grant you plenty of Cast Speed or grant you extra Minimum Frenzy or Power Charge. Other than that, look for the usual defensive modifiers. |
|
| Min. requirements: +60 to Maximum Life +70 to maximum Mana +70% to Elemental and Chaos Resistances Optional affixes: Attributes #% increased Cast Speed increased Mana Regeneration Rate +1 to Minimum Endurance Charges |
|
 (Ring) Anathema - an easy way to obtain additional Curses, which greatly improve your Damage. You can Corrupt it to gain more useful Implicit, such as extra Resistance or immunity against Bleeding. (Ring) Anathema - an easy way to obtain additional Curses, which greatly improve your Damage. You can Corrupt it to gain more useful Implicit, such as extra Resistance or immunity against Bleeding. |
|
| +(15-25) to maximum Energy Shield +(30-40) to Intelligence (10-15)% increased Cast Speed (10-20)% chance to gain a Power Charge when you Cast a Curse Spell Your Curse Limit is equal to your maximum Power Charges |
|
 (Jewel) Rare Jewels - the Jewels are the best source of Critical Strike Multiplier, try to mix at least 2 such modifiers in here. Pair it up with bonuses to maximum Life or Mana. (Jewel) Rare Jewels - the Jewels are the best source of Critical Strike Multiplier, try to mix at least 2 such modifiers in here. Pair it up with bonuses to maximum Life or Mana. |
|
| Recommended affixes: Elemental or Chaos Resistances Attributes Maximum Life Maximum Mana Critical Strike modifiers |
|
 (Jewel) Militant Faith - you can use the Inner Conviction to gain free Damage, as this Build has no means to generate Frenzy Charges anyway. (Jewel) Militant Faith - you can use the Inner Conviction to gain free Damage, as this Build has no means to generate Frenzy Charges anyway. |
|
| Carved to glorify (2000-10000) new faithful converted by High Templar Dominus Passives in radius are Conquered by the Templars Historic <two random mods of devotion> |
|
 (Jewel) Light of Meaning - there are plenty of good options to choose from. The Lightning Damage is the best for pure DPS, but maximum Mana also provides defense. (Jewel) Light of Meaning - there are plenty of good options to choose from. The Lightning Damage is the best for pure DPS, but maximum Mana also provides defense. |
|
| Optional modifiers: Passive Skills in Radius also grant +5 to maximum Mana Passive Skills in Radius also grant 5% increased Global Critical Strike Chance Passive Skills in Radius also grant 6% increased Lightning Damage |
|
 (Jewel) Unnatural Instinct - with this Jewel, you can amplify the effects of nearby socketed Light of Meaning, while also picking up valuable Small Passive Skills. (Jewel) Unnatural Instinct - with this Jewel, you can amplify the effects of nearby socketed Light of Meaning, while also picking up valuable Small Passive Skills. |
|
| Allocated Small Passive Skills in Radius grant nothing Grants all bonuses of Unallocated Small Passive Skills in Radius |
|
 (Jewel) Healthy Mind - it lowers your maximum Life, but grants a lot of extra Damage in return. You should Socket it near the Cruel Preparation Notable. (Jewel) Healthy Mind - it lowers your maximum Life, but grants a lot of extra Damage in return. You should Socket it near the Cruel Preparation Notable. |
|
| (15-20)% increased maximum Mana Increases and Reductions to Life in Radius are Transformed to apply to Mana at 200% of their value |
|
 (Jewel) Watcher's Eye - you can interchange Wrath and Zealotry Aura depending on the modifiers you obtain here. The Clarity modifiers are also extremely valuable. You can include level 1 Precision or Vitality on top of that to enable even more modifiers. (Jewel) Watcher's Eye - you can interchange Wrath and Zealotry Aura depending on the modifiers you obtain here. The Clarity modifiers are also extremely valuable. You can include level 1 Precision or Vitality on top of that to enable even more modifiers. |
|
| Gain (6-10)% of Maximum Mana as Extra Maximum Energy Shield while affected by Clarity (10-15)% chance to Recover 10% of Mana when you use a Skill while affected by Clarity Consecrated Ground you create while affected by Zealotry causes enemies to take (8-10)% increased Damage (100-120)% increased Critical Strike Chance against Enemies on Consecrated Ground while affected by Zealotry Critical Strikes Penetrate (8-10)% of Enemy Elemental Resistances while affected by Zealotry (70-100)% increased Critical Strike Chance while affected by Wrath (40-60)% increased Lightning Damage while affected by Wrath Damage Penetrates (10-15)% Lightning Resistance while affected by Wrath +(20-30)% to Critical Strike Multiplier while affected by Precision |
|
 (Jewel) Sublime Vision - the Clarity Aura is only worth using if you have a good Watcher's Eye modifier for it. In other cases, you should boost your Wrath or Zealotry instead. (Jewel) Sublime Vision - the Clarity Aura is only worth using if you have a good Watcher's Eye modifier for it. In other cases, you should boost your Wrath or Zealotry instead. |
|
| Always Sap while affected by Wrath Unaffected by Curses while affected by Zealotry |
|
 (Jewel) Large Cluster Jewel - the Lightning Notables are very important: Doryani's Lesson grants you Life Leech, Storm Drinker provides Energy Shield Leech, while the Scintillating Idea is the best for pure DPS. (Jewel) Large Cluster Jewel - the Lightning Notables are very important: Doryani's Lesson grants you Life Leech, Storm Drinker provides Energy Shield Leech, while the Scintillating Idea is the best for pure DPS. |
|
| Recommended affixes: 1 Added Passive Skill is Doryani's Lesson 1 Added Passive Skill is Scintillating Idea 1 Added Passive Skill is Storm Drinker |
|
 (Flask) Bottled Faith - it is the best Flask to improve your Damage and Critical Strikes. The large Consecrated Ground also provides quite valuable Life Regeneration and Curse Effect reduction on you. (Flask) Bottled Faith - it is the best Flask to improve your Damage and Critical Strikes. The large Consecrated Ground also provides quite valuable Life Regeneration and Curse Effect reduction on you. |
|
| 40% increased Damage Creates Consecrated Ground on Use (30-15)% reduced Duration Consecrated Ground created by this Flask has Tripled Radius Consecrated Ground created during Effect applies (7-10)% increased Damage taken to Enemies (100-150)% increased Critical Strike Chance against Enemies on Consecrated Ground during Flask effect |
|
 (Flask) Lavianga's Spirit - makes your Skills free to use during its short effect, which allows you to recover your Mana while bursting down Enemies. With the Khatal's Geyser, it lasts for the entire duration, potentially enabling the Indigon Helmet. (Flask) Lavianga's Spirit - makes your Skills free to use during its short effect, which allows you to recover your Mana while bursting down Enemies. With the Khatal's Geyser, it lasts for the entire duration, potentially enabling the Indigon Helmet. |
|
| (30-50)% increased Amount Recovered 100% increased Recovery rate Skills Cost no Mana during Effect |
|
 (Flask) Oriath's End - boosts your Clear Speed by exploding your Enemies. It also provides plenty of Elemental Resistances. If you use the Tides of Time Belt, it should always be active. (Flask) Oriath's End - boosts your Clear Speed by exploding your Enemies. It also provides plenty of Elemental Resistances. If you use the Tides of Time Belt, it should always be active. |
|
| (20-40)% increased Charge Recovery Enemies you Kill during Effect have a (20-30)% chance to Explode, dealing a tenth of their maximum Life as Damage of a Random Element |
|
|
Other suggested Flasks:
|
|
  |
|
|
If you have any other build requests please leave that in the comments below. We are always open to suggestions and constructive feedback.
Pictures used in this article are the intellectual property of Grinding Gear Games.
