
Tame Unique Beast Spirit Walker POE 2 Build
The best Setup for the insanely powerful Tamed Boss Beast Build available only for the Spirit Walker Ascendency.Tame Unique Beast
Spirit Walker
Updated for Path of Exile 2 Early Access
The Best Crafty Guides by Odealo
| Guide notes |
| June 04 2026 - Created for Early Access Patch 0.5.0 |
| Build Overview | |||
| Tags: [COMPANION] [MINION] [HYBRID] | |||
|
Budget: Defenses: |
|
Boss DPS: AoE: |
|
The newly introduced Spirit Walker Ascendancy allows you to Tame Unique Beasts, which enable an entirely new archetype of Minion Build. The Companion is a special type of Minion that is much more limited in numbers, as by default you can have only one such Companion at the same time, but they are usually much stronger to compensate, and there are some ways to raise that limit. The Tamed Unique Bosses are significantly stronger, but you can only ever have one Boss Companion at the same time.
You can Tame any Unique Beast to your liking, and each of them has distinctive behaviours and special modifiers attached. Currently, the Mighty Silverfist found in Act 3 Jungle Ruins is absurdly overpowered in terms of Damage, so it is hard to justify Taming any other Boss Beast. As a Companion, the Silverfist starts with 25% base Critical Strike Chance and 250% Critical Damage Bonus. By hunting in the Riverside or Rupture Maps, you can encounter the Zekoa, the Headcrusher, which is an endgame version of the Mighty Silverfist and possesses the same insane Critical Hit Chance. Tamed Companions preserve any special Modifiers they possess while Tamed. You can utilise the Cruel Hegemony Tablet to enhance Map Bosses with extra modifiers. Look for the "Extra Critis" Modifier, which adds 300% increased Critical Hit Chance to your Companion, raising the base 25% Crit Chance up to 100%. You can intentionally die in the combat to reset the encounter and reroll new Modifiers, but be mindful of the limited amount of Revives in the Map. The newly acquired apex predator will carry you through every aspect of the game with ease.
Your Unique Companion solves any problems with your Damage against other Bosses, but it struggles with clearing hordes of weaker enemies. His attacks can cover an entire area, but they are rather slow and often poorly aimed. To help with that, you should raise an army of more agile Companions. The obvious choice is the Wild Protector, a bear Companion provided by your Ascendancy. The Trusted Kindship Keystone allows you to Tame one additional Companion and also boosts their Spirit Reservation Efficiency. You can pick any Rare Beast to your liking. Ideally, hunt for a Companion with the Haste Aura to speed up all nearby Allies. The easiest way is to find the Troubled Camp in the Infested Barrens in the Campaign and reset at the checkpoint there until the ideal Beast appears. This will be your default starting Setup, available from Act 3 all the way to the Endgame.
At this point, you will have to make a decision. You can greatly boost the DPS of your existing Companions with a Rare Sceptre or add even more Companions to boost your Clear Speed and survivability with the Unique Sylvan's Effigy Sceptre, which allows for any amount of Companions, limited only by your Spirit. With it, you will be able to add 2 or 3 Rare Companions to your roster. The final Ally comes from the Forgotten Warden Unique Armor, which creates a Shapeshifting Companion that can use any of the Talisman Skills provided by you. The big army has much greater area coverage, and you can support each Companion with the Loyalty Support Gem, which transfers 10% of the damage taken by you to them. The Loyalty can stack across multiple Companions, allowing you to mitigate over half of the incoming Damage. Your monkey will deal an insane amount of Damage either way, so pick the version that suits your playstyle more. In the future, you should be able to use two Weapon Sets to alternate between those playstyles easily. Currently, swapping Weapons often breaks your setups, so you will have to pick only one variant for now.
You can also check our other Path of Exile 2 builds right over here Odealo's Crafty Guides - Full List
1. Gameplay
It is a very passive playstyle. You only need to run between the packs and avoid taking Damage while your Companions do all the work. You can use Temporal Chains to slow down Bosses, Mark them with Freezing Mark, and Command your Azmerian Wolf for the Hunt.
|
|

2. Build's PROS & CONS
| PROS |
|
| CONS |
|
3. Leveling tips
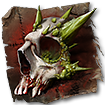
You will need to complete the first Ascendancy Trial to Tame Unique Bosses. The best Boss in the early game is the Crowbell found in Act 1. After reaching Act 3, you can capture the Mighty Silverfist, which will completely trivialise the rest of the progression. The easiest method to reach that stage is to use Twisters. Check out our Twister Amazon POE 2 Build Guide for easy leveling progression.
4. Final Skill Tree, Ascendancy Points, and Pantheon
Final Skill Tree:
 |
|
Click on the image to open the Passive Tree preview in a new window, or use the Path of Building (PoB) tool, |
Ascendancy points:
Preferably in this order:
- Natural Order
- Wild Protector
- Catha's Balance
- Idolatry
5. Final Gems links
| [DPS] Tame Boss Beast setup | |
 |
Tame Beast - you can Tame Unique Beasts using the regular Tame Beast Skill Gem, which follows the usual rules for Socketing, Leveling, and upgrading Quality. Tamed Companions are bound to your account and can't be traded. |
 |
Hulking Minions |
 |
Muster |
 |
Feeding Frenzy II |
 |
Rage III |
 |
Rapid Attacks II |
| [DPS] Wild Protector setup | |
 |
Wild Protector - this Companion is granted by your Ascendancy, thus gaining additional Gem Sockets as you level up. It deals plenty of Damage and provides useful utility, such as Maim and Intimidate Debuffs. |
 |
Romira's Requital - an upgraded version of the Loyalty Gem, but you can use it only once. |
|
Muster |
|
Feeding Frenzy II |
|
Rage III |
|
Hulking Minions |
| [DPS] Tame Rare Beast setup | |
|
Tame Beast - you can Tame additional Rare Beasts. Additional modifiers and base types make them stronger, but also increase the Spirit Reservation. |
 |
Loyalty - transfer 10% of Damage taken by you to your Companion. You can stack it across your Beasts to improve your survivability. |
|
Muster |
|
Feeding Frenzy II |
|
Rage III |
 |
Minion Splash II |
| [DPS] Azmerian Wolf setup | |
 |
Hollow Focus - a Companion granted by the Sylvan's Effigy Sceptre. You can command this Wolf to summon lunging wolves and inspire allies. |
|
Muster |
|
Feeding Frenzy II |
|
Loyalty |
 |
Bidding II |
 |
Kurgal's Leash - the final Socket is quite expensive to obtain, and doesn't provide that much Damage, so you can skip it. |
| [Utility] Spirit Vessel setup | |
 |
Spirit Vessel - a Companion granted by the Forgotten Warden Armour. It can perform any Talisman Skills, but unfortunately, many of them do not work correctly. The Bear's abilities are the most reliable. |
|
Loyalty |
|
Rage III |
 |
Fury of the Mountain |
 |
Furious Slam |
 |
Walking Calamity |
| [Utility] Freezing Mark setup | |
 |
Freezing Mark - increases the Freeze Build-up on Enemies, but its primary role is to enable certain modifiers against Marked Enemies while it lasts. |
 |
Mark for Death II |
 |
Eternal Mark |
 |
Charged Mark |
 |
Prolonged Duration II |
| [Utility] Temporal Chain setup | |
 |
Temporal Chain - you won't need an offensive Curse. Use the Temporal Chains to slow down your opponents instead. |
 |
Doedre's Undoing - creates up to 2 Cursed Grounds, allowing you to easily place them before the encounter begins. |
 |
Heightened Curse |
 |
Ritualistic Curse |
 |
Efficiency II |
 |
Slow Potency |
| [Utility] Pain Offering setup | |
 |
Pain Offering - sacrifices a Skeleton Minion to greatly boost nearby Allies. Use it against Bosses. You might be short on Sockets or Spirit to use this Setup. |
 |
Brutus' Brain |
 |
Danse Macabre |
 |
Sacrificial Offering |
 |
Magnified Area II |
|
Prolonged Duration II |
| [UTILITY] Skeletal Cleric setup | |
 |
Skeletal Cleric - you will need a Skeletal Minion to use your Offering. The Cleric is the most useful and costs the least amount of Spirit. |
 |
Last Gasp |
 |
Meat Shield II |
 |
Amanamu's Tithe |
| [UTILITY] Refutation setup | |
 |
Refutation - a defensive Ward Skill that provides Block and Parry during its effect. You can try Parrying Enemies to increase their Damage Taken, but be mindful of the lowered Stun Threshold. |
 |
Cooldown Recovery II |
|
Prolonged Duration II |
 |
Rapid Casting II |
|
Efficiency II |
|
|
6. Gear Setup
There are only a handful of ways to improve the Damage of your Companions. The Sceptre is the most important in that aspect, but your Helmet, Rings, and Jewels can contribute a lot too. The primary method is to raise their Gem Levels. The Attack Speed provides only a mild bonus for the DPS, but it makes your Clear Speed significantly better. For Defences, you will have maximum Life, Evasion, Energy Shield, and shift portion of the incoming Damage to your Companions. You will need a lot of Attributes for Gear and Gem requirements, even the Strength for Support Gem limits. The Idolatry Notable grants very strong bonuses for each Idol you have, but also penalises Rune usage. At a lower budget, you should skip it and opt for regular Runes to cap your Resistances more easily.
|
Stat priorities on items:
|
 (Tablet) Cruel Hegemony - Capturing a Riverside or Rupture Map Boss affected by Extra Crit modifiers is the biggest upgrade you can make for this Build. The Cruel Hegemony and Magic or Rare Tablets can add extra modifiers to your Maps. You can employ Doryani to gain additional Revival or Jado to double the effect of your Tablets sometimes. Regular Map modifiers do not affect Tamed Beasts. (Tablet) Cruel Hegemony - Capturing a Riverside or Rupture Map Boss affected by Extra Crit modifiers is the biggest upgrade you can make for this Build. The Cruel Hegemony and Magic or Rare Tablets can add extra modifiers to your Maps. You can employ Doryani to gain additional Revival or Jado to double the effect of your Tablets sometimes. Regular Map modifiers do not affect Tamed Beasts. |
|
| Empowers the Map Boss of a Map 5 use remaining Map Bosses have 1 additional Modifier Regular Tablet modifier: Unique Monsters have 1 additional Rare Modifier |
|
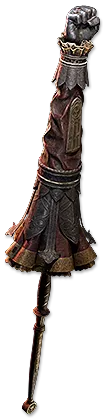 (Weapon) Tyranny's Grip - with the Catha's Balance, you will grant 60% of your main hand Weapon Damage to your Minions. The Tyranny's Grip can be Runeforged twice, making it the best Weapon for this case. Use the Rune of Leadership so your Minions can apply Shock. (Weapon) Tyranny's Grip - with the Catha's Balance, you will grant 60% of your main hand Weapon Damage to your Minions. The Tyranny's Grip can be Runeforged twice, making it the best Weapon for this case. Use the Rune of Leadership so your Minions can apply Shock. |
|
| (150—200)% increased Physical Damage (10—15)% reduced Attack Speed +(15—30) to Strength Strikes deal Splash Damage Knocks Back Enemies on Hit Cannot use Projectile Attacks |
|
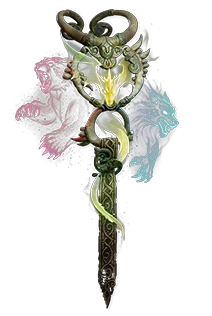
 (Weapon) Sylvan's Effigy - this Sceptre allows you to use multiple Companions, as long as you have enough Spirit to Reserve. It is a great option for better Clear Speed and survivability, but doesn't provide as much Damage as a good Rare Sceptre. (Weapon) Sylvan's Effigy - this Sceptre allows you to use multiple Companions, as long as you have enough Spirit to Reserve. It is a great option for better Clear Speed and survivability, but doesn't provide as much Damage as a good Rare Sceptre. |
|
| Grants Skill: Level (14-20) Azmerian Wolf (50—75)% increased Spirit Allies in your Presence Regenerate (50—100) Life per second +(6—12) to all Attributes Companions deal (50—100)% increased damage to your Marked targets You can have any number of Companions of different types |
|
 (Weapon) Rare Sceptre - a proper Rare Sceptre can double your Damage output. The most important modifier is the Minion Gem Level, but increased Damage, Attack Speed, or Crit Damage for Allies in your Presence are also important. You can use Sceptre with an additional Minion for extra Damage from Muster Gem and Offering, any Purity Aura to get Resistances, or Malice Aura to inflict Critical Weakness Debuff if you didn't find a Beast with Extra Crits modifier yet. (Weapon) Rare Sceptre - a proper Rare Sceptre can double your Damage output. The most important modifier is the Minion Gem Level, but increased Damage, Attack Speed, or Crit Damage for Allies in your Presence are also important. You can use Sceptre with an additional Minion for extra Damage from Muster Gem and Offering, any Purity Aura to get Resistances, or Malice Aura to inflict Critical Weakness Debuff if you didn't find a Beast with Extra Crits modifier yet. |
|
| Min. requirements: +3 to Level of all Minion Skills Optional affixes: Allies in your Presence deal #% increased Damage Allies in your Presence have #% increased Attack Speed Allies in your Presence have #% increased Critical Damage Bonus % increased Presence Area of Effect |
|
 (Amulet) Rare Amulet - look primarily for the Minion Gem Levels, but it is also a potent source of Attributes, Spirit, Rarity, or the usual defensive modifiers. Instil the Growing Swarm to reduce the Cooldowns of your Companion's most important Skills. (Amulet) Rare Amulet - look primarily for the Minion Gem Levels, but it is also a potent source of Attributes, Spirit, Rarity, or the usual defensive modifiers. Instil the Growing Swarm to reduce the Cooldowns of your Companion's most important Skills. |
|
| Min. requirements: +80 to maximum Life +2 to Level of all Minion Skills Optional affixes: +# to Attributes +#% total Elemental and Chaos Resistance |
|
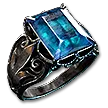 (Ring) Rare Ring - at first, you should use regular Rings with tons of maximum Life, Resistance, and Attributes. Later on, you can use Breach Wombgifts to Craft Rings with special Minion modifiers. You might need the Unset Ring to use all your Skills. (Ring) Rare Ring - at first, you should use regular Rings with tons of maximum Life, Resistance, and Attributes. Later on, you can use Breach Wombgifts to Craft Rings with special Minion modifiers. You might need the Unset Ring to use all your Skills. |
|
| Min. requirements: +80 to maximum Life +40% total Elemental and Chaos Resistance Optional affixes: % increased Rarity of Items found +# to Attributes Minions have #% increased Attack and Cast Speed Minions have #% increased Critical Damage Bonus |
|
 (Belt) Rare Belt - you will need lots of Life, Resistances, and Strength here. Life Flask Recovery Rate is also useful to have, as it is your only way to recover Life. (Belt) Rare Belt - you will need lots of Life, Resistances, and Strength here. Life Flask Recovery Rate is also useful to have, as it is your only way to recover Life. |
|
| Min. requirements: +130 to maximum Life +40% total Elemental and Chaos Resistance Optional affixes: +# to Strength % increased Flask Life Recovery rate |
|
 (Helmet) Rare Helmet - the Helmet is the final piece of equipment that can grant you extra Minion Levels. The remaining modifiers should be focused on your personal defense. Use the Idol of Ralakesh to improve the Reservation Efficiency of your Minions. (Helmet) Rare Helmet - the Helmet is the final piece of equipment that can grant you extra Minion Levels. The remaining modifiers should be focused on your personal defense. Use the Idol of Ralakesh to improve the Reservation Efficiency of your Minions. |
|
| Min. requirements: +100 to maximum Life +2 to Level of all Minion Skills +40% total Elemental and Chaos Resistance Optional affixes: % increased Rarity of Items found +# to Attributes % increased Evasion and Energy Shield |
|
 (Body Armour) Forgotten Warden - its primary function is the special Spirit Vessel Companion, but it also provides plenty of unique defensive modifiers, such as extra Deflection Rating or shifting Damage to Companion. (Body Armour) Forgotten Warden - its primary function is the special Spirit Vessel Companion, but it also provides plenty of unique defensive modifiers, such as extra Deflection Rating or shifting Damage to Companion. |
|
| Grants Skill: Level (14-20) Spirit Vessel +(70—100) to Deflection Rating per 50 missing Energy Shield (200—300)% increased Evasion and Energy Shield +(20—30) to Dexterity Companions have (30—50)% increased maximum Life (10—15)% of Damage from Deflected Hits is taken from Damageable Companion's Life before you |
|
 (Body Armour) Rare Armour - if you use a Rare Sceptre, you will need a Rare Chest. Look for a high amount of maximum Life, Evasion, and Energy Shield. You can also include Deflection Chance or raise your Spirit. The Fox Idol grants Bonded modifiers for your Idols and 5% Quality to all Skills. Pair it up with the Hawk Idol for Deflection and Cold Resistance. (Body Armour) Rare Armour - if you use a Rare Sceptre, you will need a Rare Chest. Look for a high amount of maximum Life, Evasion, and Energy Shield. You can also include Deflection Chance or raise your Spirit. The Fox Idol grants Bonded modifiers for your Idols and 5% Quality to all Skills. Pair it up with the Hawk Idol for Deflection and Cold Resistance. |
|
| Min. requirements: +200 to maximum Life +300 to Energy Shield +500 to Evasion Rating +40% total Elemental and Chaos Resistance Optional affixes: #% reduced effect of Curses on you (Desecrate) Gain Deflection Rating equal to #% of Evasion Rating +# to Attributes % reduced Ignite Duration on you |
|
|
|
|
| Min. requirements: +100 to maximum Life +40% total Elemental and Chaos Resistance Optional affixes: Gain Deflection Rating equal to #% of Evasion Rating % increased Rarity of Items found +# to Attributes % increased Evasion and Energy Shield |
|
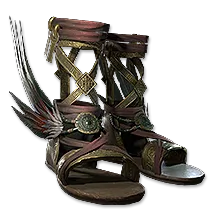 (Boots) Rare Boots - your Boots should grant you tons of Movement Speed. You should even use the Rune of the Chase for even more Speed, even if it costs you some Resistances due to Idolatry Notable. (Boots) Rare Boots - your Boots should grant you tons of Movement Speed. You should even use the Rune of the Chase for even more Speed, even if it costs you some Resistances due to Idolatry Notable. |
|
| Min. requirements: 30% increased Movement Speed +100 to maximum Life +40% total Elemental and Chaos Resistance Optional affixes: % increased Rarity of Items found (20-30)% reduced Slowing Potency of Debuffs on You (Corrupt/Desecrate) Gain Deflection Rating equal to #% of Evasion Rating +# to Attributes % increased Evasion and Energy Shield |
|
 (Jewel) Rare Jewel - use Rare Jewels to speed up your Minions and improve their Critical Strikes. You will also need at least one Jewel that grants them Elemental Resistances. Try to improve your Energy Shield and Recharge Rate for personal defense. (Jewel) Rare Jewel - use Rare Jewels to speed up your Minions and improve their Critical Strikes. You will also need at least one Jewel that grants them Elemental Resistances. Try to improve your Energy Shield and Recharge Rate for personal defense. |
|
| Optional affixes: #% increased maximum Energy Shield Minions have #% increased Attack and Cast Speed Minions have #% increased Critical Damage Bonus Minions deal #% increased Damage #% faster start of Energy Shield Recharge Minions have +#% to all Elemental Resistances Minions have +#% to Chaos Resistance |
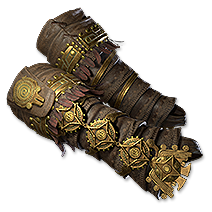 (Gloves) Rare Gloves - simply look for solid base defenses and tons of Resistances and Attributes, you will need lots of it. The Carved Majesty grants your Minions high uptime on the Onslaught Buff, but it is very expensive. At first, you can use the Snake Idol to empower your Curses.
 |
|
If you have any other build requests please leave that in the comments below. We are always open to suggestions and constructive feedback.
Pictures used in this article are the intellectual property of Grinding Gear Games.