 Buy/Sell
 Log in

Trinity Flicker Strike Slayer Build
Flicker Strike Slayer Build that uses Voidforge with Trinity SupportFlicker Strike
Slayer build
Updated for Patch 3.29
The Best Crafty Guides by Odealo
| Guide notes | |||
| July 27, 2026 -Adjusted for the changes made in Patch 3.29, making the build more accessible and powerful at lower budget levels |
|||
| Build overview | |||
| Tags: [MELEE] [ELEMENTAL] [LIFE] | |||
|
Budget: Defenses: |
|
Boss DPS: AoE: |
|


Flicker Strike is one of the fastest Attack Skills in the game. It teleports you to the nearest Enemy instantly to strike them with your Weapon. It has a 2-second cooldown, but it can be bypassed by spending a Frenzy Charge. Frenzy Charges also greatly improve your Damage through their natural bonuses, built-in Flicker modifiers, and Ice Bite Support, so you want to have as many Frenzy Charges as possible at all times. There are a few ways to generate Frenzy Charges quickly, and it is best to incorporate all of them for maximum effect. The dominant source is Farru's Fur Armour and its Replica version, but you will also gain Frenzy on Hit via Mark and Sword Masteries, Flicker Quality bonus, and Blood Rage. You can also get Runegraft of Time to ignore Cooldown sometimes.
Since you have to invest heavily into Frenzy Charges anyway, the Slayer is the obvious choice for the Ascendancy due to its Masterful Form, which makes your Endurance Charge limit equal to your Frenzy. It is a great boost for your defense against Physical and Elemental Damage, but it can also be utilized offensively by equipping Arn's Anguish Belt, which grants you a chance to deal Triple Damage for each Endurance Charge you have. To keep the defensive benefits, you will have to use Ralakesh's Impatience Boots. With the removal of Synthesis Items in Patch 3.29, stacking Frenzy Charges became more affordable, as you can now Corrupt popular Unique Rings to get additional maximum Frenzy Charges. The best candidates are the Taming and Le Heup of All Rings, but at first you can use any Ring with generic defensive and offensive modifiers. The Precursor's Emblem could grant you two Frenzy Charges this way, but it is extremely rare.
As a Slayer, you will also have access to the endless Life Leech and additional Damage reduction. You will have a lot of defense in this Build, but the randomized nature of the Flicker Strike may sometimes lead you right into your demise, especially against Bosses with heavy telegraphed attacks.
The general idea to scale your Damage is simple: you will use a high DPS Weapon and Critical Strikes. At first, you can use cheap Unique Swords like Terminus Est or Oro's Sacrifice, later upgrading them to Rakiata's Dance, which allows you to Revert Enemy Resistances, making tanky Enemies more vulnerable to your Attacks instead. Each Sword is a bit different and requires minor adjustments, but the rest of your Setup remains identical.
You can also find our other Path of Exile builds right over here Odealo's Crafty Guides - Full List
1. Gameplay
Flicker Strike creates a unique gameplay experience. The character moves very fast, and so your clear speed relies heavily on monster density - the more of it, the better. If you need a movement Skill, use Leap Slam. For a guard Spell, it is recommended to have Molten Shell or Immortal Call linked with CwDT or Automation. The Curse you should use is Assassin's Mark linked with Mark on Hit.
|
Full gameplay video: |
|
|


2. Build's PROS & CONS
| PROS |
|
| CONS |
|
3. Leveling tips
Although Flicker Strike is available since level 10, you won't be able to sustain its Frenzy Charges demands so early on, use some other Melee Attack such as Cleave, Frost Blades, or Blade Storm. If you're using Frost Blades, be sure to pick the Cold Mastery for Damage conversion. You can try switching to the Flicker Strike at level 51 by equipping the Terminus Est, which grants Frenzy Charge on Critical Hit. Be sure that your Crit chance is somewhat high - use Precision, Ice Golem, or a Sword Mastery for increased Crit Chance. You can also use the Transfigured Flicker Strike of Power, which deals less Damage but requires Power Charges to bypass the Cooldown instead, which are trivial to generate via the Romira's Banquet Ring. You can also follow our Duelist Leveling Guide with Melee/Impale.
Bandits:
We recommend killing all the Bandits for the additional Passive Point, but helping Alira is also a good option.
Leveling Skill Trees:
34 Points Skill Tree
At first, your Critical Strike Chance will be low, so it is better to pick the Precise Technique for a reliable Damage boost. Pick nearby Damage Notables for your main Weapon, usually a Two-handed Sword.
68 Points Skill Tree
Pick up Fortify, maximum Life, and some generic Damage boosts for your Attacks. You can switch to the Crit version after the 3rd Labirynth.
4. Final Skill Tree, Ascendancy Points, and Pantheon
Final Skill Tree:
115 Points Final Skill Tree (doesn't include Unique or Cluster Jewels)
121 Points Path of Building (PoB) link
Ascendancy points:
Preferably in that order:
- Bane of Legends
- Brutal Fervour
- Overwhelm
- Masterful Form
Pantheon:
Major God: Soul of Brine King: You cannot be Stunned if you've been Stunned or Blocked a Stunning Hit in the past 2 seconds; 100% chance to Avoid being Frozen
Minor God: Soul of Ralakesh: 25% reduced Physical Damage over Time taken while moving, Moving while Bleeding doesn't cause you to take extra Damage
5. Final Gems links
| [DPS] Flicker Strike setup | |
 |
Flicker Strike - It's the Attack that automatically seeks an enemy, and teleports the character to it to Strike it. If you have a Frenzy Charge, it will be consumed in order to bypass the cooldown. |
 |
Elemental Damage with Attacks Support |
 |
Trinity Support |
 |
Close Combat/Ancestral Call Support |
 |
Ice Bite Support |
 |
Multistrike Support |
| [UTILITY] Aura setup | |
 |
Grace - makes you more likely to Evade Enemy Attacks. At first, you can use Purity of Elements to ease gearing. |
 |
Herald of Ice - Adds Cold Damage to your Attacks and creates explosions when you kill the frozen enemy. |
 |
Flesh and Stone - While in the Sand Stance, you will significantly reduce the Damage dealt by nearby Enemies. |
 |
Arctic Armour - reduces the Physical and Fire Damage you take while using the Flicker Strike. |
 |
Precision - Adds Accuracy and increases Critical Strike Chance, even a low-level one is good, but increase it if you have enough Reservation Efficiency. |
 |
Enlighten Support |
| [UTILITY] Aspect of the Cat setup | |
 |
Aspect of the Cat - grants you Attack Speed or Damage Avoidance. You need it to generate Frenzy and Endurance Charges with the Replica Farrul's Fur. |
 |
Less Duration Support - the Aspect will alternate more often, which leads to faster Charge generation. Socket it in the Item that grants the Aspect. |
| [UTILITY] Assassin's Mark setup | |
 |
Assassin's Mark - this Mark increases your Critical Strike Chance, Critical Strike Multiplier, and grants Life and Mana on Kill with a small chance for a Power Charge. |
 |
Mark on Hit Support |
 |
Lifetap Support |
| [UTILITY] Automation setup | |
 |
Blood Rage - It increases your Attack Speed, Life Leech, and has a chance for a Frenzy Charge on Kill. |
 |
Automation - Linked Skills are cast for you, as long as they have a cooldown and are instant. |
 |
Immortal Call - Significantly reduces the Damage you take while the effect is active. |
 |
More Duration Support |
| [MOBLITY] Leap Slam setup | |
 |
Leap Slam - A Movement Skill, you can use to jump over the ledges and walls. |
 |
Faster Attacks Support |
|
Lifetap Support |
| [MOBLITY] Smite setup | |
 |
Vaal Smite - using Smite grants you a temporary Aura that adds plenty of Lightning Damage. The Vaal version is even stronger. |
|
More Duration Support |
|
|
5. Gear Setup
The final version of this Build is nearly all covered in Unique Items, with only Rare Items being Gloves and Jewels. Later on, you should Corrupt them to get valuable Implicit bonuses, such as Frenzy Charges. If you're using Farrul's Fur or its replica, be aware that one of your Rare items has to have an open Suffix that would allow you to craft the Aspect of the Cat via Beastcrafting on it. For the defense, you should aim for high maximum Life and Spell Suppression, ideally on bases that grant high Armour and Evasion Ratings. You will also need to cap your Elemental Resistances and Attribute Requirements.
|
Stat priorities on items:
|
 (Helmet) Rare Helmet - It's a defensive-oriented option; it should get you Maximum Life, Resistances, and other various mods such as Accuracy Rating. For Eldritch mods, get reduced Mana Cost of Skills and Mana Reservation Efficiency. (Helmet) Rare Helmet - It's a defensive-oriented option; it should get you Maximum Life, Resistances, and other various mods such as Accuracy Rating. For Eldritch mods, get reduced Mana Cost of Skills and Mana Reservation Efficiency. |
|
| Min. requirements: +90 maximum Life +80% Total Elemental Resistances +10% chance to Suppress Spell Damage Optional affixes: % increased mana reservation efficiency Accuracy Rating Intelligence |
|
 (Helmet) Heatshiver - if you can Freeze Enemies, this Helmet grants up to 60% Extra Fire Damage, which is a lot. You should Corrupt it to get additional Elemental or Chaos Resistances. (Helmet) Heatshiver - if you can Freeze Enemies, this Helmet grants up to 60% Extra Fire Damage, which is a lot. You should Corrupt it to get additional Elemental or Chaos Resistances. |
|
| (80-100)% increased Evasion Rating 60% increased Mana Regeneration Rate +(20-30)% to Fire Resistance +(20-30)% to Cold Resistance Gain 1% of Cold Damage as Extra Fire Damage per 1% Chill Effect on Enemy Gain 30% of Cold Damage as Extra Fire Damage against Frozen Enemies |
|
 (Body Armour) Farrul's Fur - At first, you can use this Armour to generate Frenzy Charges. The Power Charges are easy to generate anyway, and it lack other defensive modifiers, so you should aim to replace it later. (Body Armour) Farrul's Fur - At first, you can use this Armour to generate Frenzy Charges. The Power Charges are easy to generate anyway, and it lack other defensive modifiers, so you should aim to replace it later. |
|
| (100-150)% increased Armour and Evasion +(80-100) to maximum Life Aspect of the Cat has no Reservation +2 seconds to Cat's Stealth Duration Gain up to your maximum number of Frenzy and Power Charges when you gain Cat's Stealth You have Phasing while you have Cat's Stealth |
|
| (Body Armour) Replica Farrul's Fur - It's very similar to Farrul's Fur, but instead of Power Charges, you gain Endurance Charges, which require much more investment to acquire, usually. It also occasionally grants you the Onslaught Buff. |
|
| (100-150)% increased Armour and Evasion +(80-100) to maximum Life +2 seconds to Cat's Agility Duration Aspect of the Cat has no Reservation Gain up to your maximum number of Frenzy and Endurance Charges when you gain Cat's Agility You have Onslaught while you have Cat's Agility |
|
 (Body Armour) Bronn's Lithe - if you can solve your Charge Generation via other means, the Bronn's Lithe armour offers roughly 30% More Damage to your Flicker Strike Setup. (Body Armour) Bronn's Lithe - if you can solve your Charge Generation via other means, the Bronn's Lithe armour offers roughly 30% More Damage to your Flicker Strike Setup. |
|
| +5 to Level of Socketed Movement Gems 10% increased Attack Speed (60-100)% increased Damage with Movement Skills (200-250)% increased Evasion Rating 10% increased Movement Speed |
|
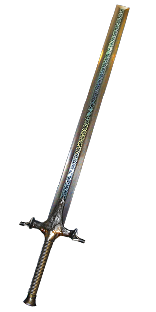 (Weapon) Terminus Est - At first, you can use this Sword to sustain your Flicker Strike. It is very good for its level, but it falls off in the higher Maps. (Weapon) Terminus Est - At first, you can use this Sword to sustain your Flicker Strike. It is very good for its level, but it falls off in the higher Maps. |
|
| +360 to Accuracy Rating (180-220)% increased Physical Damage 20% increased Attack Speed (50-75)% increased Critical Strike Chance Gain 10 Mana per Enemy Killed 10% increased Movement Speed Gain a Frenzy Charge on Critical Strike |
|
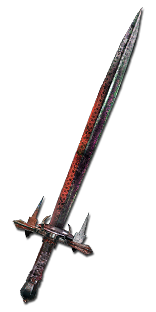 (Weapon) Oro's Sacrifice - Alternatively, you can use this Sword for the Frenzy Charges. It is even easier to sustain Frenzy Charges as you don't need to care about Critical Strikes, but it also makes it harder to scale the Damage. (Weapon) Oro's Sacrifice - Alternatively, you can use this Sword for the Frenzy Charges. It is even easier to sustain Frenzy Charges as you don't need to care about Critical Strikes, but it also makes it harder to scale the Damage. |
|
| 30% increased Elemental Damage with Attack Skills No Physical Damage Adds (425-475) to (550-600) Fire Damage (10-15)% increased Attack Speed 20% chance to Ignite 10% increased Physical Damage taken 10% increased Fire Damage taken Culling Strike against Burning Enemies Gain a Frenzy Charge if an Attack Ignites an Enemy |
|
 (Weapon) Voidforge - It's one of the two best weapons, makes it easy to create Resonances, and the Damage itself is better than that of almost any Rare Sword. Goes nicely with any additional source of Physical Damage. It is quite expensive, especially at the start of the League, but it becomes more affordable over time. (Weapon) Voidforge - It's one of the two best weapons, makes it easy to create Resonances, and the Damage itself is better than that of almost any Rare Sword. Goes nicely with any additional source of Physical Damage. It is quite expensive, especially at the start of the League, but it becomes more affordable over time. |
|
| 30% increased Elemental Damage with Attack Skills (5-8)% increased Attack Speed +(90-100) to maximum Life Your Elemental Damage can Shock Gain 700% of Weapon Physical Damage as Extra Damage of a random Element 20% increased Area of Effect for Attacks Deal no Non-Elemental Damage |
|
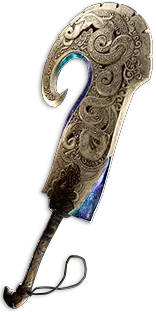 (Weapon) Rakiata's Dance - It is the best Two-handed Weapon for its price. It is especially strong against highly Resistant Enemies, which are usually the most problematic to fight. With this Sword, you should focus on increasing the Elemental Damage instead of adding the Physical Damage to your Attacks. (Weapon) Rakiata's Dance - It is the best Two-handed Weapon for its price. It is especially strong against highly Resistant Enemies, which are usually the most problematic to fight. With this Sword, you should focus on increasing the Elemental Damage instead of adding the Physical Damage to your Attacks. |
|
| 60% increased Global Accuracy Rating Adds (150-200) to (300-350) Cold Damage Adds 1 to (550-600) Lightning Damage (15-20)% increased Attack Speed Treats Enemy Monster Elemental Resistance values as inverted |
|
 (Boots) Ralakesh's Impatience - If you want to use Arn's Anguish Belt, you will need those Boots to retain the defensive bonus of your Endurance Charges. Make sure to get the proper variant with Endurance Charges. (Boots) Ralakesh's Impatience - If you want to use Arn's Anguish Belt, you will need those Boots to retain the defensive bonus of your Endurance Charges. Make sure to get the proper variant with Endurance Charges. |
|
| +(15-25)% to Cold Resistance +(15-25)% to Chaos Resistance (15-25)% increased Movement Speed Corrupted Blood cannot be inflicted on you Count as having maximum number of Endurance Charges |
|
 (Boots) Darkray Vectors - a basic pair of Gloves that simply grants one additional Frenzy Charge. You can Corrupt it to get Onslaught or increased Action Speed, but overall it should be replaced sooner rather than later. (Boots) Darkray Vectors - a basic pair of Gloves that simply grants one additional Frenzy Charge. You can Corrupt it to get Onslaught or increased Action Speed, but overall it should be replaced sooner rather than later. |
|
| (40-70)% increased Armour and Evasion 10% increased Evasion Rating per Frenzy Charge +(20-40)% to Lightning Resistance 5% increased Movement Speed per Frenzy Charge +1 to Maximum Frenzy Charges 40% reduced Frenzy Charge Duration 25% reduced Light Radius |
|
 (Belt) Rare Belt - A regular Belt with Life, Resistances, and Increased Elemental Damage for Attacks is good, but you should definitely swap it later for Arn's Anguish for the most DPS. (Belt) Rare Belt - A regular Belt with Life, Resistances, and Increased Elemental Damage for Attacks is good, but you should definitely swap it later for Arn's Anguish for the most DPS. |
|
| Min. requirements: +100 maximum Life +80% to Total Elemental Resistances 30% increased Elemental Damage with Attack Skills Optional affixes: increased Damage Armour increased Maximum Life |
|
 (Belt) Arn's Anguish - The Belt that introduces Brutal Charges to your build. Brutal Charges massively increase your Damage, but the Endurance Charges have, of course, their own merits. Use only with the Masterful Form Keystone. (Belt) Arn's Anguish - The Belt that introduces Brutal Charges to your build. Brutal Charges massively increase your Damage, but the Endurance Charges have, of course, their own merits. Use only with the Masterful Form Keystone. |
|
| (15-25)% increased Stun and Block Recovery +1 to Maximum Endurance Charges +(600-700) to Armour (12-15)% increased maximum Life +(40-60)% to Fire Resistance Modifiers to Minimum Endurance Charges instead apply to Minimum Brutal Charges Maximum Brutal Charges is equal to Maximum Endurance Charges Gain Brutal Charges instead of Endurance Charges |
|
 (Amulet) Rare Amulet - Amulets offer a huge variety of useful stats. Besides Life and Resistances, seek Accuracy, Intelligence, and some offensive mods like added Physical Damage or Critical Strike Multiplier. (Amulet) Rare Amulet - Amulets offer a huge variety of useful stats. Besides Life and Resistances, seek Accuracy, Intelligence, and some offensive mods like added Physical Damage or Critical Strike Multiplier. |
|
| Min. requirements: +90 Maximum Life +80% to Elemental Resistances Optional affixes: Adds Physical Damage to Attacks Accuracy Rating Critical Strike Chance or Multiplier Attributes |
|
 (Amulet) Yoke of Suffering - You can easily apply all 3 Elemental Ailments, which will make your Enemies take up to 30% increased Damage. You can also get a small chance to inflict Poison and Bleeding, which provide another 20% Damage against Bosses. (Amulet) Yoke of Suffering - You can easily apply all 3 Elemental Ailments, which will make your Enemies take up to 30% increased Damage. You can also get a small chance to inflict Poison and Bleeding, which provide another 20% Damage against Bosses. |
|
| +(10-16) to all Attributes +(10-20)% to Fire Resistance +(10-20)% to Cold Resistance +(20-40)% to Lightning Resistance 30% reduced Duration of Ailments on Enemies (5-10)% chance to Shock Enemies take (5-10)% increased Damage for each type of Ailment you have inflicted on them Your Elemental Damage can Shock |
|
| Recommended Anointments: Frenetic |
|
 (Ring) Rare Rings - On your Rings, you should seek added or increased Damage with Elemental Attacks, Accuracy, Critical Strike Multiplier, and maximum Life. You will also need plenty of Resistance or Attributes. (Ring) Rare Rings - On your Rings, you should seek added or increased Damage with Elemental Attacks, Accuracy, Critical Strike Multiplier, and maximum Life. You will also need plenty of Resistance or Attributes. |
|
| Min. requirements: +90 maximum Life +40% to Total Elemental Resistances Optional affixes: Accuracy Rating Increased Elemental Damage with Attacks Added Elemental Damage to Attacks Reduced Mana Costs of Non-Channeling Skills Intelligence Critical Strike Chance or Multiplier |
|
 (Ring) The Taming - this Ring grants a massive amount of Damage and plenty of Elemental Resistances, but you should aim for the additional Frenzy Charge Corruption. (Ring) The Taming - this Ring grants a massive amount of Damage and plenty of Elemental Resistances, but you should aim for the additional Frenzy Charge Corruption. |
|
| +(8-10)% to all Elemental Resistances (30-40)% increased Elemental Damage with Hits and Ailments for each type of Elemental Ailment on Enemy +(20-30)% to all Elemental Resistances 10% chance to Freeze, Shock and Ignite |
|
 (Ring) Le Heup of All - it is a rather mediocre Ring, but it is very common, making it a great target for Corruption. The Foulborn variant is much better, as it also grants lots of Critical Strike Multiplier. (Ring) Le Heup of All - it is a rather mediocre Ring, but it is very common, making it a great target for Corruption. The Foulborn variant is much better, as it also grants lots of Critical Strike Multiplier. |
|
| Adds 1 to 4 Physical Damage to Attacks +(10-30) to all Attributes (10-30)% increased Damage (10-30)% increased Rarity of Items found +(10-30)% to all Elemental Resistances +(10-30)% to Global Critical Strike Multiplier (Foulborn) |
|
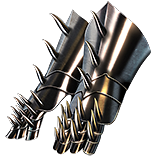 (Gloves) Rare Gloves - Look for maximum Life, Spell Suppression, and Attack Speed. You can add the Aspect of the Cat using the Bestiary. Finish it with the Damage while Leeching modifier via the Crafting Bench. (Gloves) Rare Gloves - Look for maximum Life, Spell Suppression, and Attack Speed. You can add the Aspect of the Cat using the Bestiary. Finish it with the Damage while Leeching modifier via the Crafting Bench. |
|
| Min. requirements: +90 maximum Life Aspect of the Cat +10% chance to Suppress Spell Damage 15% increased Attack Speed Optional affixes: Strike Skills target 1 additional nearby Enemy % increased Damage while Leeching % increased Damage against Chilled Enemies |
|
 (Jewel) The Light of Meaning - With this Jewel, you will easily gain tons of Chaos Resistance without any other investments. You can also opt for extra Critical Strike Chance, but it is not that important. (Jewel) The Light of Meaning - With this Jewel, you will easily gain tons of Chaos Resistance without any other investments. You can also opt for extra Critical Strike Chance, but it is not that important. |
|
| Passive Skills in Radius also grant +4% to Chaos Resistance | |
 (Jewel) Lethal Pride - Try to get one with bonuses to your Critical Strike Chance or Multiplier, and Intimidate Enemies on Hit. The Double Damage Chance is not as effective since you are using Brutal Charges. (Jewel) Lethal Pride - Try to get one with bonuses to your Critical Strike Chance or Multiplier, and Intimidate Enemies on Hit. The Double Damage Chance is not as effective since you are using Brutal Charges. |
|
| Commanded leadership over (10000-18000) warriors under (Akoya-Kaom-Rakiata) Passives in radius are Conquered by the Karui Historic |
|
  (Jewel) Forbidden Flesh Flame - this pair of Jewels is usually stronger than 2 perfect Rare Jewels. The Overwhelm is usually the cheapest option, but you should research the market before purchase, as it's very volatile. (Jewel) Forbidden Flesh Flame - this pair of Jewels is usually stronger than 2 perfect Rare Jewels. The Overwhelm is usually the cheapest option, but you should research the market before purchase, as it's very volatile. |
|
| Allocates <random Ascendancy Notable> if you have the matching modifier on Forbidden Flesh | |
 (Jewel) Rare Jewels - These should provide extra Life and various Critical Strike Multiplier bonuses for Swords or Two-Handed Weapons. You can also cover lacking Resistances or Attributes. (Jewel) Rare Jewels - These should provide extra Life and various Critical Strike Multiplier bonuses for Swords or Two-Handed Weapons. You can also cover lacking Resistances or Attributes. |
|
| Recommended affixes: increased maximum Life Critical Strike Multiplier Attributes Resistance |
|
 (Jewel) Large Cluster Jewel - There are a lot of viable options to choose from, but the Feed the Fury is by far the most effective one. You will probably skip the 3rd Notable to save Passive Points. (Jewel) Large Cluster Jewel - There are a lot of viable options to choose from, but the Feed the Fury is by far the most effective one. You will probably skip the 3rd Notable to save Passive Points. |
|
| Recommended affixes: 1 Added Passive Skill is Fuel the Fight 1 Added Passive Skill is Calamitous 1 Added Passive Skill is Feed the Fury 1 Added Passive Skill is Martial Prowess |
|
 (Flask) Bottled Faith - this Flask greatly improves your Critical Strike Chance and Damage against Enemies standing on the Consecrated Ground. Enchant it to be used upon striking an Enemy, as it's the only source of Consecrated Ground in this Build. (Flask) Bottled Faith - this Flask greatly improves your Critical Strike Chance and Damage against Enemies standing on the Consecrated Ground. Enchant it to be used upon striking an Enemy, as it's the only source of Consecrated Ground in this Build. |
|
| 40% increased Damage Creates Consecrated Ground on Use (30-15)% reduced Duration Consecrated Ground created by this Flask has Tripled Radius Consecrated Ground created during Effect applies (7-10)% increased Damage taken to Enemies (100-150)% increased Critical Strike Chance against Enemies on Consecrated Ground during Flask effect |
|
|
Other suggested Flasks:
|
|
    |
|
|
If you have any other build requests, please leave that in the comments below.
Pictures used in this article are the intellectual property of Grinding Gear Games.
