 Buy/Sell
 Log in


Venom Gyre Deadeye Build
A swift, ricocheting Venom Gyre build that shreds packs with spinning blades and relentless Lightning burst.Venom Gyre
Deadeye Build
Updated for Patch 3.29
The Best Crafty Guides by Odealo
| Guide notes |
| July 27, 2026 -Updated for patch 3.29 |
| Build overview | |||
| Tags: [RANGED] [ELEMENTAL] [LIFE] | |||
|
Budget: Defenses: |
|
Boss DPS: AoE: |
|



Venom Gyre is a fast-paced Attack Skill that throws projectiles which return to you, allowing you to hit enemies multiple times and unleash a huge amount of Damage. This version is built around Dexterity Stacking, with Hand of Thought and Motion converting your massive Dexterity investment into powerful Added Lightning Damage while also providing Attack Speed. The result is an incredibly fast and satisfying build with excellent Clear Speed and strong Single-Target potential.
Deadeye is an excellent Ascendancy for this archetype, providing powerful Projectile scaling, additional Projectiles, and excellent mobility. The build heavily invests into Dexterity, using Fractal Thoughts and Briskwrap to further scale both its offensive power and defensive stats. With enough Dexterity on your Rare Items and Jewels, every additional point of the Attribute translates into more Damage, Attack Speed, and overall performance, allowing the build to scale exceptionally well with investment.
Defensively, the build relies on its exceptional speed, Evasion, and ability to constantly move through encounters using Whirling Blades. Briskwrap further rewards the Dexterity stacking approach, while the build's high Attack Speed allows you to reposition almost instantly and avoid incoming threats. Its main weakness is that it is more dependent on active movement and positioning than tankier archetypes, so standing still for too long can be dangerous. Once properly geared, however, Dexterity Stacking Venom Gyre Deadeye offers one of the most engaging mapping experiences, combining incredible speed, satisfying returning Projectiles, and massive scaling potential.
You can also check our other Path of Exile builds right over here Odealo's Crafty Guides - Full List
1. Gameplay
Venom Gyre is an extremely fast clearing Skill fire Projectiles, while the returning Blades can hit enemies again for massive Damage. Use Whirling Blades to move rapidly between packs and maintain your Elusive effect, while your high Attack Speed and Projectile scaling allow you to clear Maps at incredible speed. Against Bosses, focus on positioning to maximise returning Projectiles and take advantage of the Skill's strong Single-Target potential. The build's defenses rely heavily on your Rare Items, where high Dexterity, Life, Resistances, and other defensive modifiers are essential for keeping the character safe.
|
|
|
|


2. Build's PROS & CONS
| PROS |
|
| CONS |
|
3. Leveling tips
The easiest way to level this character is to start with a Cobra Lash setup, taking advantage of its excellent early Clear Speed and smooth Projectile-based gameplay. Use it throughout the Campaign while investing into Dexterity, Attack Speed, and Projectile Damage, then gradually collect the Gear and Passive Tree nodes needed for the final Dexterity-stacking setup.
Once you finish the Campaign and enter Maps, you can transition into Venom Gyre as soon as you have the required Gems and enough Dexterity to make the build work properly. From there, start assembling the core Unique Items and high-Dexterity Rare Gear, gradually scaling your Damage and defenses until the build reaches its full potential.
Suggested leveling Gem setups:
| Cobra Lash setup | |
 |
Cobra Lash - a fast and reliable Leveling Skill that provides excellent Clear Speed with its chaining Projectiles and requires very little specific Gear. |
 |
Trinity - provides a strong More Elemental Damage multiplier while generating Resonances by dealing different Elemental Damage types, making it a great Support for this setup. |
 |
Added Cold Damage - adds Flat Cold Damage to Cobra Lash, providing a strong early boost to both your Clear and Single-Target Damage. |
 |
Elemental Damage with Attacks - provides a strong More Elemental Damage multiplier, significantly increasing Cobra Lash's Damage throughout the Campaign. |
| Utility setup | |
 |
Anger - provides a significant amount of Flat Fire Damage to your Attacks, required for our Trinity support. |
 |
Herald of Ice - adds Cold Damage to your Attacks and creates powerful Ice explosions when you shatter enemies, further improving your Clear Speed. |
 |
Precision - grants Accuracy and Critical Strike Chance, helping you maintain reliable Hit Chance while also improving your Critical Strike scaling. |
 |
Sniper's Mark - increases the Damage taken by the marked enemy and causes your Projectiles to deal more Damage against it, making it particularly useful against tougher enemies and Bosses. |
 |
Mark on Hit - automatically applies Sniper's Mark when you Hit a Rare or Unique enemy, removing the need to manually cast the Mark during encounters. |
Recommended leveling items:
 Le Heup of All - One of the best leveling rings due to its Elemental Resistances and Attributes Le Heup of All - One of the best leveling rings due to its Elemental Resistances and Attributes |
|
| Adds 1 to 4 Physical Damage to Attacks +(10-30) to all Attributes (10-30)% increased Damage (10-30)% increased Rarity of Items found +(10-30)% to all Elemental Resistances |
 Goldrim - Grat leveling Helmet, again thanks to its Resistances, price, and availability Goldrim - Grat leveling Helmet, again thanks to its Resistances, price, and availability |
|
| +(30-50) to Evasion Rating 10% increased Rarity of Items found +(30-40)% to all Elemental Resistances Reflects 4 Physical Damage to Melee Attackers |
 Prismweave - Adds a lot of Elemental flat Damage and all Resistances. Prismweave - Adds a lot of Elemental flat Damage and all Resistances. |
|
| Adds (14—16) to (30—32) Fire Damage to Attacks Adds (10—12) to (24—28) Cold Damage to Attacks Adds 1 to (60—68) Lightning Damage to Attacks +(6—15)% to all Elemental Resistances 30% increased Elemental Damage with Attack Skills during any Flask Effect |
Bandits:
Help Alira to get the additional Elemental Resistances - it allows you to get Dexterity on Rare Items easier.
Leveling Skill Trees:
40 Points Passive Tree
Pick Precise Technique as soon as possible and remember to keep your Accuracy Rating higher than your Maximum Life.
89 Points Passive Tree
Pick claw wheel, Leech nodes and Mana wheel. Grab Elemental Mastery as fast as possible to get 15% chance to invert Monster Elemental Resistances.
4. Final Skill Tree, Ascendancy Points, and Pantheon
Final Skill Tree:
102 Points Final Skill Tree (doesn't include Cluster Jewels nor Timeless Jewels)
119 Points Path of Building (PoB) link (full uniques power charge version with 1 cluster)
Ascendancy points:
Preferably in that order:
- Gathering Winds
- Ricochet
- Endless Munitions
- Sinner Saint - Lycia Bloodline
Pantheon:
Major God: Soul of the Brine King: You cannot be Stunned if you've been Stunned or Blocked a Stunning Hit in the past 2 seconds; 100% chance to Avoid being Frozen
Minor God: Soul of Abberath: 60% less Duration of Ignite on You, Unaffected by Burning Grounds
5. Final Gems links
| [DPS] Winter Orb setup | |
 |
Vaal Venom Gyre - main Damage Skill of the build, firing Projectiles that return to you and can hit enemies multiple times. The Vaal version provides a powerful burst of Damage, making it especially valuable against Bosses and tougher enemies. |
 |
Nightblade - provides a strong boost to Critical Strike Chance and Multiplier while granting Elusive and scaling its effect, improving both your Damage and survivability. |
 |
Greater Fork - causes your Projectiles to Fork, significantly increasing the number of Blades hitting enemies and greatly improving your Clear Speed. |
 |
Lightning Penetration - allows your Lightning Damage to penetrate a portion of enemy Lightning Resistance, providing a strong Damage increase against tougher enemies with higher Resistances. |
 |
Volatility - provides a large More Damage multiplier while introducing some Damage variance, making your Hits considerably stronger when they roll towards the higher end of their Damage range. |
|
Elemental Damage with Attacks - provides a powerful More Elemental Damage multiplier, significantly increasing the Lightning Damage dealt by your Venom Gyre Projectiles. |
| [UTILITY] Sniper's Mark setup | |
|
Sniper's Mark - increases the Damage dealt to the marked enemy and provides additional Projectile scaling, making it particularly effective against Bosses and other high-health targets. |
|
Mark on Hit - utomatically applies Sniper's Mark when you Hit a Rare or Unique enemy, allowing you to maintain the Mark without manually casting it during combat. |
 |
Lifetap - allows linked Skills to be cast using Life instead of Mana, helping to solve Mana Sustain issues and making it easier to use the build's Skills consistently. |
| [UTILITY] Utility setup | |
 |
Berserk - provides a powerful temporary boost to Attack Speed, Movement Speed, and Damage while consuming Rage, making it an excellent Skill for bursting down Bosses and other tough enemies. |
 |
Blood Rage - grants Attack Speed and generates Frenzy Charges on Kill at the cost of taking 4% of your Maximum Life per second. |
 |
Lightning Golem - provides additional Attack Speed while active, improving the build's overall Damage and making the gameplay feel faster and smoother. |
 |
Frostblink - instant Movement Skill that can be used to quickly cross gaps, dodge dangerous mechanics, and reposition during combat. |
| [MOBILITY] Whirling Blades setup | |
 |
Whirling Blades - main Movement Skill, allowing us to rapidly dash between packs and reposition during combat. Its high Attack Speed scaling makes it extremely fast and responsive. |
 |
Fortify - grants Fortify when Whirling Blades hits enemies, providing valuable Damage Reduction against incoming Hits and improving our survivability while moving through dangerous encounters. |
 |
Rage - generates Rage when we hit enemies with Whirling Blades, which can later be consumed by Berserk for a powerful temporary boost to our Damage, Attack Speed, and Movement Speed. |
 |
Power Charge On Critical - enerates Power Charges when Whirling Blades scores Critical Strikes, helping us maintain our Power Charge-based bonuses while continuously moving through enemies. |
| [UTILITY] Guard skill setup | |
 |
Steelskin - provides a strong defensive Barrier that absorbs a portion of incoming Damage, giving the build additional protection against sudden Hits and dangerous encounters. |
 |
Automation - automatically triggers linked Guard Skills, allowing Steelskin to activate without requiring manual input and making the defensive setup more consistent. |
 |
More Duration - increases the Duration of Steelskin, allowing its defensive effect to remain active for longer and providing more reliable protection during combat. |
| [UTILITY] Mana-reserving setup | |
 |
Wrath - provides a significant amount of Flat Lightning Damage to your Attacks, making it one of the most important Auras for scaling the build's Dexterity-based Damage. |
 |
Flesh and Stone - provides additional defensive utility by reducing the Damage you take from nearby enemies while in Sand Stance. |
 |
Enlighten - reduces the Mana Reservation of linked Auras. |
 |
Grace - provides a large amount of Evasion Rating, significantly improving your chance to avoid incoming Attacks and making the build more resilient against regular Hits. |
|
|
5. Gear Setup
This build's power comes from stacking Dexterity to scale both its Damage and overall performance, making the right Gear essential. In this section, you'll find everything you need to know about the core Uniques, high-Dexterity Rare Items, and the most important modifiers for optimising the build. While the core Unique Items provide the foundation of the build, your Rare Gear is equally important, as stacking large amounts of Dexterity is key to reaching the build's full potential.
|
Stat priorities on items:
|
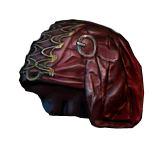
 (Helmet) Fractal Thoughts - a core Dexterity-stacking Unique that converts our massive Dexterity into increased Elemental Damage while providing additional Critical Strike Multiplier. Make sure to have slightly more Strength than Intelligence to activate the 15% increased Dexterity modifier. (Helmet) Fractal Thoughts - a core Dexterity-stacking Unique that converts our massive Dexterity into increased Elemental Damage while providing additional Critical Strike Multiplier. Make sure to have slightly more Strength than Intelligence to activate the 15% increased Dexterity modifier. |
|
| (140—180)% increased Evasion and Energy Shield +(25—40)% to Critical Strike Multiplier if Dexterity is higher than Intelligence 15% increased Dexterity if Strength is higher than Intelligence 1% increased Elemental Damage per 10 Dexterity +2 to Maximum Life per 10 Intelligence |
|
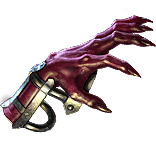 (Weapon) Hand of Thought and Motion - the core Claw of the build, providing a large amount of Flat Lightning Damage to Attacks based on our Dexterity. It also grants useful Attribute scaling, Critical Strike Chance from Intelligence, and Life Recovery on Kill. (Weapon) Hand of Thought and Motion - the core Claw of the build, providing a large amount of Flat Lightning Damage to Attacks based on our Dexterity. It also grants useful Attribute scaling, Critical Strike Chance from Intelligence, and Life Recovery on Kill. |
|
| (8—12)% increased Dexterity (8—12)% increased Intelligence (8—12)% increased Strength Recover 1% of Life on Kill Adds 1 to 12 Lightning Damage to Attacks with this Weapon per 10 Dexterity 5% increased Critical Strike Chance per 25 Intelligence |
|
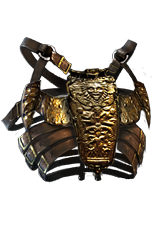 (Body Armour) Briskwrap - provides increased Dexterity and scales our Damage based on the amount of Dexterity we have. It also offers useful Cold Resistance, making it an excellent choice for the build. (Body Armour) Briskwrap - provides increased Dexterity and scales our Damage based on the amount of Dexterity we have. It also offers useful Cold Resistance, making it an excellent choice for the build. |
|
| 15% increased Dexterity +(120—180) to Evasion Rating +(30—40)% to Cold Resistance (60—100)% increased Mana Recovery from Flasks 1% increased Damage per 15 Dexterity |
|
 (Boots) Garukhan's Flight - a fantastic option for the build, providing Dexterity, massive Evasion, Movement Speed, and additional Life based on our Dexterity. However, fitting these Boots into the build can be difficult due to their lack of Resistances, so you may need to use strong Rare Boots instead to properly cap your Resistances. (Boots) Garukhan's Flight - a fantastic option for the build, providing Dexterity, massive Evasion, Movement Speed, and additional Life based on our Dexterity. However, fitting these Boots into the build can be difficult due to their lack of Resistances, so you may need to use strong Rare Boots instead to properly cap your Resistances. |
|
| +(30—40) to Dexterity (300—340)% increased Evasion Rating 30% increased Movement Speed Immune to Burning Ground, Shocked Ground and Chilled Ground Regenerate 100 Life per second while moving +2 to Maximum Life per 10 Dexterity |
|
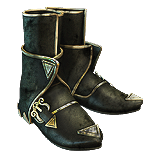 (Boots) Rare Boots - another option if you're struggling with Resistances. Focus on getting Dexterity, Resistances, Life, Movement Speed, and Evasion. (Boots) Rare Boots - another option if you're struggling with Resistances. Focus on getting Dexterity, Resistances, Life, Movement Speed, and Evasion. |
|
| Min. requirements: 50+ Dexterity 80% Total Elemental Resistances 100 Maximum Life 30% increased Movement Speed Optional affixes: Evasion |
|
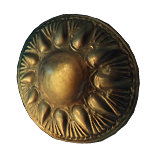 (Shield) Rare Shield - important slot for our Defenses. Get a high tier Suppress Spell Damage, Chance to Block, Evasion and your Defenses should be fine. (Shield) Rare Shield - important slot for our Defenses. Get a high tier Suppress Spell Damage, Chance to Block, Evasion and your Defenses should be fine. |
|
| Min. requirements: 50+ Dexterity 60% increased Chance to Block 100 Maximum Life 15%+ chance to Suppress Spell Damage Optional affixes: Resistances Evasion |
|
 (Gloves) Rare Gloves - focus on getting a high amount of Dexterity alongside Life and Resistances to help scale our Damage while filling out our defensive requirements. The 3% increased Damage per 100 Dexterity modifier is particularly valuable, while Flat Lightning Damage and Evasion provide additional offensive and defensive benefits. (Gloves) Rare Gloves - focus on getting a high amount of Dexterity alongside Life and Resistances to help scale our Damage while filling out our defensive requirements. The 3% increased Damage per 100 Dexterity modifier is particularly valuable, while Flat Lightning Damage and Evasion provide additional offensive and defensive benefits. |
|
| Min. requirements: 50+ Dexterity 80% Total Elemental Resistances 100 Maximum Life 3% increased Damage per 100 Dexterity Optional affixes: Flat Lightning Damage Evasion |
|
 (Belt) Rare Belt - another important source of Dexterity, Life, and Resistances, helping us reach the high Dexterity values required for the build while keeping our defenses capped. Elemental Damage with Attack Skills is a strong offensive upgrade, while increased Flask Effect can provide additional utility and improve the effectiveness of our Flask setup. (Belt) Rare Belt - another important source of Dexterity, Life, and Resistances, helping us reach the high Dexterity values required for the build while keeping our defenses capped. Elemental Damage with Attack Skills is a strong offensive upgrade, while increased Flask Effect can provide additional utility and improve the effectiveness of our Flask setup. |
|
| Min. requirements: 50+ Dexterity 80% Total Elemental Resistances 100 Maximum Life Optional affixes: Elemental Damage with Attack Skills Flask applied to you have #% increased Effect |
|
 (Amulet) Astramentis - big source of all Attributes and a cheap option for Amulet slot. (Amulet) Astramentis - big source of all Attributes and a cheap option for Amulet slot. |
|
| +(80—100) to all Attributes -4 Physical Damage taken from Attack Hits |
|
| Recommended Anointments: Agressive Bastion Arcing Blows |
|
 (Amulet) Simplex Amulet - best in slot Endgame option. Can be ridiculously expensive but rewards it with making your build few times stronger. (Amulet) Simplex Amulet - best in slot Endgame option. Can be ridiculously expensive but rewards it with making your build few times stronger. |
|
|
Recommended affixes: |
|
| Recommended Anointments: Agressive Bastion Arcing Blows |
|
 (Ring) Rare Ring - big slot for Dexterity stacking as we can apply Attribute Catalyst which further increases Attributes gained from this slot. (Ring) Rare Ring - big slot for Dexterity stacking as we can apply Attribute Catalyst which further increases Attributes gained from this slot. |
|
| Min. requirements: 50+ Dexterity 15+ to All Attributes 80% Total Elemental Resistances 100 Maximum Life Non-Channeling Skills have -7 to total Mana Cost. Optional affixes: Elemental Damage with Attack Skills |
|
 (Jewel) Brutal Restraint - search for jewels which gives as Increased Dexterity or any other useful modifiers on notable passive skills (Jewel) Brutal Restraint - search for jewels which gives as Increased Dexterity or any other useful modifiers on notable passive skills |
|
| Denoted service of (500—8000) dekhara in the akhara of # Passives in radius are Conquered by the Maraketh Historic |
|
 (Jewel) Inspired Learning - mini Headhunter, a fantastic option before you can afford an actual Headhunter. (Jewel) Inspired Learning - mini Headhunter, a fantastic option before you can afford an actual Headhunter. |
|
| With 4 Notables Allocated in Radius, When you Kill a Rare monster, you gain 1 of its Modifiers for 20 seconds | |
 (Flask) Dying Sun - for more AoE and more Projectiles, really great Flask (Flask) Dying Sun - for more AoE and more Projectiles, really great Flask |
|
| (125—150)% increased Charges per use (40—60)% less Duration (10—20)% increased Area of Effect during Effect Skills fire 2 additional Projectiles during Effect |
|
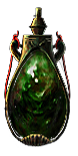 (Flask) Rotgut - gives us Onslaught alongside its Movement Speed Effect. Thanks to its 50% chance to gain a Flask Charge when you deal a Critical Strike we have 100% uptime on this flask. (Flask) Rotgut - gives us Onslaught alongside its Movement Speed Effect. Thanks to its 50% chance to gain a Flask Charge when you deal a Critical Strike we have 100% uptime on this flask. |
|
| 50% chance to gain a Flask Charge when you deal a Critical Strike (30—50)% increased Duration Consumes Frenzy Charges on use Gain Onslaught for 3 seconds per Frenzy Charge consumed on use |
|
|
Other suggested Flasks:
|
|
   |
|
|
If you have any other build requests please leave them in the comments below. We are always open to suggestions and constructive feedback.
Pictures used in this article are the intellectual property of Grinding Gear Games.
