Whirling Assault Titan POE2 Build
A Whirling Assault build for the Titan with huge AoE. A good candidate for the best melee mapping buid in the game.Whirling Assault
Titan Build
Updated for Path of Exile 2 Early Access
The Best Crafty Guides by Odealo
| Guide notes |
| January 21, 2026 - Created for Early Access. |
| Build Overview | |||
| Tags: [MELEE] [PHYSICAL] [HYBRID] | |||
|
Budget: Defenses: |
|
Boss DPS: AoE: |
|
Whirling Assault is one of the simplest abilities in the game. It's a Quarterstaff Attack with a huge range that's performed around the character several times, moving them forward. It's a Strike, letting you generate Combo to be spent on Tempest Bell, which improves single-target damage. It being a Quarterstaff Skill, it can also be improved with the Charged Staff Skill every now and then. From here, building around it is very simple. We will stick with the original Physical Damage, but extra damage from sources like Mantra of Destruction, Uul-Netol's Embrace, Charged Staff, and items will play a sizeable role. To further improve DPS, search for Critical Hit modifiers: this more expensive version of a build is significantly more capable, but also costs a lot more.
Whirling Assault doesn't have this large AoE on its own, but as a Titan, you will be capable of increasing the Area to screen-wide proportions. Your starting location on the Skill Tree is plentiful in modifiers that improve the Area of Effect for Attacks, and Titan's Hulking Form will enhance their effectiveness. Stone Skin grants 50% more Armour from Body Armour, which is also crucial, as the chest piece will be a major source of this defensive stat. It's great when combined with modifiers that increase Body Armour's Armour and The Brass Dome. The last point should be spent on Crushing Impacts for a damage bonus against Stunned enemies. The build doesn't have any special requirements, but it's very accordant with the Constricting Command Helmet, Life Leech, and Energy Shield, which we plan to integrate. ES can be increased with stats that increase Global Defences - a trait it shares with Armour. ES is also good, as our high-level Whirling Assault linked to Atalui's Bloodletting will cost lots of Life.
You can also check our other Path of Exile 2 builds right over here Odealo's Crafty Guides - Full List
1. Gameplay
It uses mainly the titular Whirling Assault. It will cost a lot of Life to use this Attack, so be sure you're always using it on an enemy to Leech this Life back. Charged Staff has a long duration, so you may as well keep it on permanently. To generate charges for it, use Mantra of Destruction and try to kill 10 enemies with the empowered Attack. Tempest Bell is for bosses. Your passive skills are Herald of Ash, Berserk, Scavenged Plating, and Charge Regulation.
|
|
|
|

2. Build's PROS & CONS
| PROS |
|
| CONS |
|
3. Leveling tips
Whirling Assault can be procured at level 1, and it requires a Quarterstaff to use, which you'll have to upgrade constantly. On the passive skill tree, immediately allocate the passives for Area of Effect that will affect this Attack. Get some Rage on Hit shortly after. By sticking to the Physical Damage, you should take advantage of Leech. Your first ascendancy point is spent on the backpack, so if you plan to re-roll it, go for the Crushing Impact first, and after the second ascension, allocate Hulking Form by backtracking. We can also recommend leveling with Pillar of the Caged God if you have items for all three Attributes. Nazir's Judgement is also somewhat good for leveling if you've invested in Stuns. For the Helmet, try Thrillsteel. Start with two Blackheart Rings if you can.
4. Final Skill Tree, Ascendancy Points, and Pantheon
Final Skill Tree:
 |
|
Click on the image to open the Passive Tree preview in a new window Or import the build into PoB: |
Ascendancy points:
Preferably in this order:
- Colossal Capacity
- Hulking Form
- Stone Skin
- Crushing Impact
5. Final Gems links
| [DPS] Whirling Assault setup | |
 |
Whirling Assault - Deals Physical Damage around the character several times and moves them forward. If you play a more damage-oriented Crit version, be sure to include Garukhan's Resolve and Overextend. |
 |
Heavy Swing |
 |
Ancestral Call |
 |
Defy - only if using Constricting Command; can be replaced with Atalui's Bloodletting. |
 |
Heft |
 |
Uul-Netol's Embrace |
| [UTILITY] Tempest Bell setup | |
 |
Tempest Bell - The Bell can be Hit with your Attacks to create powerful Shockwaves. Place it in need of more damage. In this setup, it requires Combo and Glory to use. |
|
Heavy Swing |
|
Ancestral Call |
 |
Overabundance |
|
Defy - can be replaced with Execute or Overextend. |
 |
Zerphi's Infamy - only if using Atalui's Bloodletting on Whirling Assault. |
| [UTILITY] Charged Staff setup | |
 |
Charged Staff - Adds Lightning Damage to Attacks for a duration. It also releases a Shockwave on Hit. You can spend Power Charges on it to add more damage and prolong the duration. Power charges are generated with Mantra of Destruction. |
 |
Prolonged Duration |
 |
Culling Strike |
 |
Shock |
 |
Elemental Armament |
 |
Heightened Charges |
| [UTILITY] Mantra of Destruction setup | |
 |
Mantra of Destruction - It empowers your Next Attack so that it deals over 70% of Damage as extra Chaos, and it grants Purple Flame of Chayula for the character on kill with this empowered Attack, which can add roughly the same amount of damage for the next 8 seconds if you manage to kill 10 enemies at once. |
 |
Ailith's Chimes |
 |
Charge Profusion |
|
Prolonged Duration |
 |
Delayed Gratification - Can be replaced with Empowered Sparks. |
 |
Chaos Mastery |
| [UTILITY] Herald of Ash setup | |
 |
Herald of Ash - Burns enemies you kill, so that they deal AoE damage around them. |
 |
Magnified Area |
 |
Fire Mastery |
 |
Precision |
| [UTILITY] Berserk setup | |
 |
Berserk - Improves the effect of Rage, but causes more Life loss over time, the more Rage you have. |
 |
Cannibalism |
| [UTILITY] Scavenged Plating setup | |
 |
Scavenged Plating - Upon breaking Armour, which you can do with Uul-Netol's Embrace, gain a stacking buff that improves your own Armour. |
 |
Physical Mastery |
| [UTILITY] Charge Regulation | |
 |
Charge Regulation - Grants you buffs if you have Charges, but consumes one of each every 10 seconds. Power Charges grant more Critical Hit Chance. |
|
|
6. Gear Setup
The budget version of this build is not concerned with Critical Hit Chance because specializing in it requires expensive items, like Garukhan's Resolve, From Nothing (Resonance), and a very good Staff. Besides that, your offensive capabilities are tied to the Weapon, ability to generate Rage, and Level of Melee Skills. Strive for Added Damage given a chance. You're a Physical damage dealer; other types of damage are gained as extra. Defensively, the build is extremely reliant on Armour. The majority of it comes from the chest piece, so for a Helmet and Boots, we recommend pieces with Energy Shield. Most players will put Maximum Life before Maximum Energy Shield since there is no way to get ES from the Skill Tree, but Iron Slippers notable encourages you to get at least some ES. In addition, you will spend a lot of Life on Skills and Berserk, so you can be caught off guard if relying solely on Life. You have to have some Leech on Gloves on a Ring because of Atalui's Bloodletting.
|
Stat priorities on items:
|
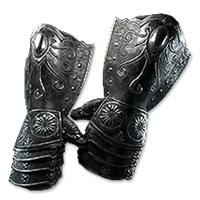
 (Helmet) Rare Helmet - Helmet should be high in Energy Shield, but if you can't afford it, Maximum Life with Armour should suffice. Additionally, look for Accuracy, Critical Strike Chance, and Armour also applies to Elemental Damage if you use the Strength base. (Helmet) Rare Helmet - Helmet should be high in Energy Shield, but if you can't afford it, Maximum Life with Armour should suffice. Additionally, look for Accuracy, Critical Strike Chance, and Armour also applies to Elemental Damage if you use the Strength base. |
|
| Min. requirements: 400 Energy Shield +40% total Elemental Resistance Optional affixes: increased Critical Hit Chance Maximum Life Accuracy Rating Armour +#% of Armour also applies to Elemental Damage |
|
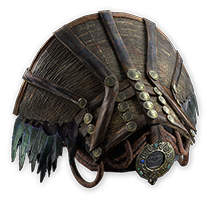
 (Helmet) Constricting Command - It's a popular option, because you can very easily allocate the powerful "Surround" nodes. Try to get the one with a "4" roll, so that the character is surrounded when only one enemy is nearby. (Helmet) Constricting Command - It's a popular option, because you can very easily allocate the powerful "Surround" nodes. Try to get the one with a "4" roll, so that the character is surrounded when only one enemy is nearby. |
|
| +(80-120) to maximum Life +(10-15) to all Attributes (8-12) Life Regeneration per second Require (4-2) fewer enemies to be Surrounded |
|
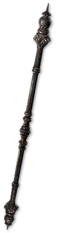 (Weapon) Rare Quarterstaff - Staff needs three things: Level of all Attack Skills, high DPS, and, if you're assembling a Crit version, high Critical Hit Chance with Crit Multiplier. Extra Damage as Physical, or any other type, will be a great addition. (Weapon) Rare Quarterstaff - Staff needs three things: Level of all Attack Skills, high DPS, and, if you're assembling a Crit version, high Critical Hit Chance with Crit Multiplier. Extra Damage as Physical, or any other type, will be a great addition. |
|
| Min. requirements: +5 to Level of all Melee Skills high Physical DPS Optional affixes: +5 to Level of all Attack Skills (Essence Suffix) Gain #% of Damage as Extra Physical Damage (Essence Prefix) #% chance to gain Onslaught on Killing Hits with this Weapon (Essence Suffix) +#% to Critical Hit Chance +#% to Critical Damage Bonus |
|
 (Gloves) Rare Gloves - Gloves must increase the Level of Melee Skills, add Physical Damage, and grant some Resistances. If you don't have Life Leech on your Ring, get it here. Critical Damage Bonus can be rolled as a Suffix. (Gloves) Rare Gloves - Gloves must increase the Level of Melee Skills, add Physical Damage, and grant some Resistances. If you don't have Life Leech on your Ring, get it here. Critical Damage Bonus can be rolled as a Suffix. |
|
| Min. requirements: +2 to Level of all Melee Skills +40% total Elemental Resistance Adds # Physical Damage to Attacks Optional affixes: Accuracy Rating Leech #% of Physical Attack Damage as Life increased Critical Damage Bonus Maximum Life |
|
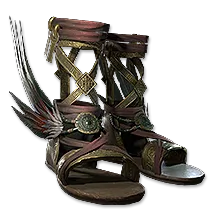 (Boots) Rare Boots - If you have Iron Slippers notable, get Boots high in ES. If not, just Armour, Maximum Life, and Armour also applies to Elemental Damage. (Boots) Rare Boots - If you have Iron Slippers notable, get Boots high in ES. If not, just Armour, Maximum Life, and Armour also applies to Elemental Damage. |
|
| Min. requirements: 200 Energy Shield or high Armour 30% increased Movement Speed Optional affixes: Armour +#% of Armour also applies to Elemental Damage Elemental Resistance |
|
 (Amulet) Rare Amulet - The Amulet must have Levels to all Melee Skills, Maximum Life, and Armour or Global Defences. If you pursue the Critical Hit gimmick, get the Critical Hit Chance and Damage Bonus. (Amulet) Rare Amulet - The Amulet must have Levels to all Melee Skills, Maximum Life, and Armour or Global Defences. If you pursue the Critical Hit gimmick, get the Critical Hit Chance and Damage Bonus. |
|
| Min. requirements: +80 to Maximum Life increased Armour +3 to Level of all Melee Skills Optional affixes: increased Global Defences (Desecrated/Essence Prefix) Accuracy Rating Spirit increased Critical Hit Chance increased Critical Damage Bonus Anointment: Dangerous Blossom Patient Barrier Martial Artistry |
|
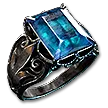 (Ring) Rare Ring - Rings need Maximum Life, Resistances, Added Physical Damage to Attacks, and Mana or Life Leech if you don't have them already. (Ring) Rare Ring - Rings need Maximum Life, Resistances, Added Physical Damage to Attacks, and Mana or Life Leech if you don't have them already. |
|
| Min. requirements: +70% total Elemental Resistance +100 to Maximum Life Adds # Physical Damage to Attacks Optional affixes: Accuracy Rating Life or Mana Leech |
|
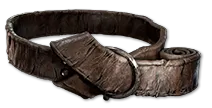 (Belt) Rare Belt - A Rare Belt can only provide you with Maximum Life, Resistances, Armour, and Charm slots. Once that becomes low priority, aim for a Unique Belt such as Soul Tether or Headhunter. (Belt) Rare Belt - A Rare Belt can only provide you with Maximum Life, Resistances, Armour, and Charm slots. Once that becomes low priority, aim for a Unique Belt such as Soul Tether or Headhunter. |
|
| Min. requirements: +100% total Elemental Resistance +100 to Maximum Life Optional affixes: Charm slots Armour |
|
 (Belt) Soul Tether - With Life Leech and a thick layer of Energy Shield, Soul Tether becomes an exceedingly viable option to keep that ES at a high level, instead of relying on Recharge. (Belt) Soul Tether - With Life Leech and a thick layer of Energy Shield, Soul Tether becomes an exceedingly viable option to keep that ES at a high level, instead of relying on Recharge. |
|
| Has (1-3) Charm Slots (15-20)% increased Charm Effect Duration +(40-60) to maximum Energy Shield +(20-30) to Intelligence You lose 5% of maximum Energy Shield per second Excess Life Recovery from Leech is applied to Energy Shield |
|
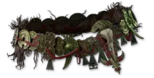
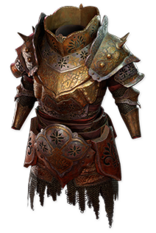 (Body Armour) The Brass Dome - Brass Dome has a lot of Armour, improved with Titan's Stone Skin and Sturdy Metal notable. You can replace it if you have a good Rare with a lot of Armour. (Body Armour) The Brass Dome - Brass Dome has a lot of Armour, improved with Titan's Stone Skin and Sturdy Metal notable. You can replace it if you have a good Rare with a lot of Armour. |
|
| (700-800)% increased Armour -(5-1)% to all Maximum Elemental Resistances +(200-300) to Stun Threshold Take no Extra Damage from Critical Hits |
|
 (Jewel) Rare Jewels - Look for Ruby Jewels with Rage on Hit, Melee Damage, Physical Damage, and Armour. (Jewel) Rare Jewels - Look for Ruby Jewels with Rage on Hit, Melee Damage, Physical Damage, and Armour. |
|
| Optional affixes: increased Melee Damage Gain 1 Rage on Melee Hit increased Armour increased Global Physical Damage |
|
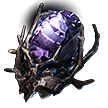 (Jewel) From Nothing - The From Nothing with Resonance allows you to allocate all the Critical nodes near the Monk's starting location, plus Stylebender and Spaghettification notables. (Jewel) From Nothing - The From Nothing with Resonance allows you to allocate all the Critical nodes near the Monk's starting location, plus Stylebender and Spaghettification notables. |
|
| Passives in Radius of <Keystone> can be Allocated without being connected to your tree | |
 (Jewel) Heart of the Well - This Jewel offers a unique "#% increased Armour from Equipped Body Armour" mod to extract more defensives from The Brass Dome. There's also increased Skill Speed, Critical Hit Bonus, Rage on Hit, and Life on Kill. (Jewel) Heart of the Well - This Jewel offers a unique "#% increased Armour from Equipped Body Armour" mod to extract more defensives from The Brass Dome. There's also increased Skill Speed, Critical Hit Bonus, Rage on Hit, and Life on Kill. |
|
| <Custom Desecrated prefix> <Custom Desecrated prefix> <Custom Desecrated suffix> <Custom Desecrated suffix> |
|
|
If you have any other build requests please leave that in the comments below. We are always open to suggestions and constructive feedback.
Pictures used in this article are the intellectual property of Grinding Gear Games.