 Buy/Sell
 Log in

Winter Orb Occultist Build
A lightning-fast Cold Caster that uses Power Charges to scale Winter Orb into an incredible Map Clearing and Bossing powerhouseWinter Orb
Occultist Build
Updated for Patch 3.29
The Best Crafty Guides by Odealo
| Guide notes |
| July 23, 2026 -Updated for patch 3.29 |
| Build overview | |||
| Tags: [CASTER] [ELEMENTAL] [HYBRID] | |||
|
Budget: Defenses: |
|
Boss DPS: AoE: |
|



Winter Orb is one of the fastest and most satisfying Cold Damage Spells in the game, and in 3.29 it received massive buffs that pushed it back into the spotlight. The Skill now fires additional Projectiles as it levels, has significantly higher base Critical Strike Chance, and deals more base Cold Damage, giving it substantially better Clear and Single-Target Damage without relying on Greater Multiple Projectiles. Winter Orb also has a unique playstyle that allows you to channel and build up its Stages before moving freely while the Orb continues firing at nearby enemies. This makes it an exceptional Skill for fast mapping, where you can charge your Orb, move through the Map, and let it clear enemies while you focus on movement and positioning.
Occultist is an excellent Ascendancy for this archetype, as the build naturally benefits from stacking Power Charges for both Damage and Area of Effect. This version focuses heavily on Power Charge stacking, using a combination of unique Items and mechanics to generate and maintain a large number of Charges while converting them into massive offensive scaling. The build also makes excellent use of Frenzy Charges, gaining both substantial Damage and Movement Speed while further improving the overall consistency of the setup. With Winter Orb now providing additional Projectiles naturally, we can dedicate more of our Links to pure Damage instead of relying on Greater Multiple Projectiles, resulting in much stronger Clear and Single-Target potential.
Defensively, the build combines a large Life pool with Energy Shield and Charge-based defensive mechanics to create a surprisingly resilient character for such a fast-paced caster. The build benefits greatly from being able to move while Winter Orb continues attacking, allowing you to avoid many incoming attacks without sacrificing Damage. The main weakness is that the build requires careful management of its Charges and can feel considerably weaker before its core Power Charge mechanics are fully established. Once the setup is complete, however, Winter Orb Occultist offers an exceptionally fast mapping experience, combining the freedom of a persistent Spell with excellent screen coverage, powerful scaling, and the ability to clear content while constantly moving.
You can also check our other Path of Exile builds right over here Odealo's Crafty Guides - Full List
1. Gameplay
One of the fastest clearing builds in the game, with Winter Orb you won't have to aim at enemies, just occasionally stop and channel the Ability for a second. Single target damage is good, the build is focused on clear speed but the damage is more than enough to deal with all types of content the game has to offer. Defensive capabilities are dependent on having good rare items - usually capping your Elemental Resistances and having much Life on them is enough, but there are few mods that are absolutely mandatory.
|
|
|
|


2. Build's PROS & CONS
| PROS |
|
| CONS |
|
3. Leveling tips
The easiest way to level this character is to start with a conventional Cold Spell setup, using Skills such as Freezing Pulse and Creeping Frost alongside Wands with increased Spell Damage. You can transition into Winter Orb once you reach the required level and have access to the necessary Gems, gradually adding the Power Charge mechanics and core items as you progress through the campaign and into Maps.
Winter Orb becomes much stronger as you acquire the core mechanics of the final build, so don't worry if the early version does not immediately feel as powerful as the finished setup. Prioritise obtaining your important Power Charge scaling and gradually transition into the final gearing setup as you progress. Once the key Unique Items and defensive layers are in place, the build will begin to feel much closer to its full potential, with excellent Clear Speed and the ability to keep moving while Winter Orb handles the enemies around you.
Suggested leveling Gem setups:
| Winter Orb setup | |
 |
Winter Orb - Use Winter Orb as soon as your previous Spell is not sufficient. There is no rush - it all depends on your items when you switch. Remember to use Cold Spell after you invest in Cold Damage on the tree. |
 |
Infused Channelling - provides a strong Damage multiplier while Channelling and grants additional Elemental Damage Reduction while you are Channelling Winter Orb. |
 |
Multiple Projectiles - provides additional Projectiles to significantly improve Winter Orb's Clear Speed while leveling. |
 |
Inspiration Support - reduces the Mana Cost of Winter Orb and provides additional Elemental Damage through Inspiration Charges, making the Skill much more comfortable to sustain while also increasing its Damage. |
| Freezing Pulse setup | |
 |
Freezing Pulse - a very good choice for progressing through the campaign. It provides reliable Damage and Clear without requiring specific gear. |
 |
Added Cold Damage - adds Flat Cold Damage to Freezing Pulse, providing a strong early boost to your Damage. |
 |
Arcane Surge - grants increased Spell Damage and Mana Regeneration after spending enough Mana, providing both Damage and useful Mana Sustain during the campaign. |
 |
Controlled Destruction - provides a strong More Spell Damage multiplier and is an excellent early-game Damage Support. |
Bandits:
An additional Passive Skill Point seems like the best option, but you may need to help Alira to get the additional Elemental Resistances.
Recommended leveling items:
 Le Heup of All - One of the best leveling rings due to its Elemental Resistances and Attributes Le Heup of All - One of the best leveling rings due to its Elemental Resistances and Attributes |
|
| Adds 1 to 4 Physical Damage to Attacks +(10-30) to all Attributes (10-30)% increased Damage (10-30)% increased Rarity of Items found +(10-30)% to all Elemental Resistances |
 Goldrim - Grat leveling Helmet, again thanks to its Resistances, price, and availability Goldrim - Grat leveling Helmet, again thanks to its Resistances, price, and availability |
|
| +(30-50) to Evasion Rating 10% increased Rarity of Items found +(30-40)% to all Elemental Resistances Reflects 4 Physical Damage to Melee Attackers |
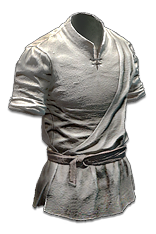 Tabula Rasa - One of the items which makes leveling much easier, it's also one of the cheapest and definitely worth its price. Tabula Rasa - One of the items which makes leveling much easier, it's also one of the cheapest and definitely worth its price. |
|
| Item has no level requirement and Energy Shield (Hidden) Item has 6 White Sockets and is fully linked (Hidden) |
 Storm Prison - Start with this Wand - it synergizes really well with Your Power Charges - the core part of this build. Storm Prison - Start with this Wand - it synergizes really well with Your Power Charges - the core part of this build. |
|
| (11-15)% increased Spell Damage (40-60)% increased Physical Damage Adds 1 to (35-45) Lightning Damage (15-25)% increased Mana Regeneration Rate +1 to Maximum Power Charges (25-35)% chance to gain a Power Charge on Kill |
4. Final Skill Tree, Ascendancy Points, and Pantheon
Final Skill Tree:
101 Points Final Skill Tree (doesn't include Cluster Jewels nor Timeless Jewels)
119 Points Path of Building (PoB) link (full uniques power charge version with 1 cluster)
Ascendancy points:
Preferably in that order:
- Void Beacon
- Frigid Wake
- Forbidden Power
- Vile Bastion
Pantheon:
Major God: Soul of the Brine King: You cannot be Stunned if you've been Stunned or Blocked a Stunning Hit in the past 2 seconds; 100% chance to Avoid being Frozen
Minor God: Soul of Gruthkul: 1% of additional Physical Damage Reduction for each Hit you've taken Recently up to a maximum of 5%
5. Final Gems links
| [DPS] Winter Orb setup | |
|
Winter Orb - main Damage Skill of the build. It creates a persistent Orb that automatically fires Projectiles at nearby enemies while you move, allowing you to clear Maps without constantly stopping to cast. |
 |
Power Charge on Critical Strike - scaling the Damage of the build per Power Charge. |
|
Inspiration - reduces the Mana Cost of Winter Orb and provides additional Elemental Damage through Inspiration Charges, making the Skill easier to sustain |
 |
Cold Penetration - causes Winter Orb's Cold Damage to penetrate a portion of the enemies' Cold Resistance, significantly increasing Damage against tougher enemies and Bosses. While mapping you can swap it for Multiple Projectiles. |
|
Infused Channeling - grants a strong Damage multiplier while Channelling Winter Orb and provides additional Elemental Damage Reduction during the Channelling phase, improving both your Damage and survivability. |
 |
Increased Critical Damage - greatly increases your Critical Strike Multiplier. |
| [DPS] Frostblink and Frost Shield setup | |
 |
Frostblink - allows you to quickly teleport through Maps and dodge incoming Attacks and Spells. Its instant nature makes it especially effective for dodging mechanics while channeling. |
 |
Bonechill - increases the effect of Chill applied by linked Skills and causes enemies to take increased Cold Damage based on the strength of their Chill. |
 |
Frostshield - provides a strong defensive layer by creating a Frostshield that reduces the Damage you take from Hits while you are inside it. It is particularly useful against Bosses and other dangerous encounters where you need additional protection. |
| [DPS] Herald of Ice setup | |
 |
Herald of Ice - creates powerful explosions when you Shatter enemies. These explosions are an important part of the build's Clear, allowing Winter Orb to chain through packs and clear large areas quickly. |
 |
Scornful Herald - excellent Endgame option that significantly increases the Damage of your Herald of Ice. Before you can afford or equip this setup, use Herald of Ice with Increased Critical Damage Support as a more accessible alternative for additional Damage. |
|
Power Charge On Critical - more damage per Power Charge. |
 |
Ice Bite - adds Cold Damage and grants a chance to gain Frenzy Charges when killing Frozen enemies. The additional Frenzy Charges provide valuable Damage and Movement Speed, making this Support particularly effective for fast mapping. |
| [MOBILITY] Shield Charge setup | |
 |
Shield Charge - main Movement Skill, allowing you to quickly travel between packs and maintain a fast mapping pace. |
 |
Faster Attacks - significantly increases the Attack Speed of Shield Charge, making it faster and smoother to use for movement. |
 |
Momentum - provides additional Movement Speed after using Shield Charge, helping you maintain high speed while mapping and move between packs more efficiently. |
| [UTILITY] CWDT and Sniper's Mark setup | |
 |
Sniper's Mark - main Bossing Curse, increasing the Damage dealt by your Projectiles and causing them to split when hitting the Marked enemy. It significantly improves Winter Orb's Single-Target Damage. |
|
Arcane Surge - grants increased Spell Damage and Mana Regeneration after spending enough Mana with the linked Skills. It provides a useful Damage boost while helping with Mana Sustain. |
 |
Cast When Damage Taken - automatically triggers linked Spells when you take enough Damage, allowing your defensive setup to activate without requiring manual casting. |
 |
Immortal Call - provides a short window of Damage Reduction when triggered by Cast when Damage Taken, helping you survive dangerous bursts of incoming Damage. It is particularly useful for mitigating Physical Damage Hits during difficult encounters. |
| [UTILITY] Mana-reserving setup | |
 |
Discipline - provides a large boost to your Energy Shield and improves your overall survivability. |
 |
Flesh and Stone - provides additional defensive utility by reducing the Damage you take from nearby enemies while in Sand Stance. |
 |
Enlighten - reduces the Mana Reservation of linked Auras. |
 |
Zealotry - provides a significant boost to Spell Damage and increases your Critical Strike Chance against enemies affected by your Consecrated Ground. It is an important offensive Aura that further improves Winter Orb's Damage. If you can't afford Enlighten level 4 play Arctic Armour Instead |
|
|
5. Gear Setup
This build's power comes largely from its carefully selected Power Charge scaling Gear, so getting the right Items is essential. In this section, you'll find everything you need to know about the core Uniques, important Rare Item modifiers, and how to optimise your Gear as you progress into the Endgame. Keep in mind that many of the Power Charge-focused Uniques can be expensive, especially early in the League. If your budget does not allow for the complete setup, you can temporarily replace them with strong Rare Items that provide Life, Energy Shield, Resistances, and Damage until you can afford the final version.
|
Stat priorities on items:
|
 (Helmet) Willclash - core Unique Helmet for the Power Charge stacking setup, providing both offensive and defensive scaling from your Charges. It grants additional Spell Block and increased Elemental Damage per Power Charge, while generating Charges automatically as long as you haven't recently lost them. (Helmet) Willclash - core Unique Helmet for the Power Charge stacking setup, providing both offensive and defensive scaling from your Charges. It grants additional Spell Block and increased Elemental Damage per Power Charge, while generating Charges automatically as long as you haven't recently lost them. |
|
| (350—400)% increased Evasion and Energy Shield +5% Chance to Block Spell Damage per Power Charge (3—5)% increased Elemental Damage per Power charge Gain a Power Charge every Second if you haven't lost Power Charges Recently Lose all Power Charges when you Block |
|
 (Weapon) Tulfall - core Weapon of the build, providing substantial Cold Damage to Spells based on your Power Charges. (Weapon) Tulfall - core Weapon of the build, providing substantial Cold Damage to Spells based on your Power Charges. |
|
| (10—20)% increased Cast Speed Gain a Power Charge on Killing a Frozen Enemy Adds 50 to 70 Cold Damage to Spells per Power Charge Lose all Power Charges on reaching Maximum Power Charges Gain a Frenzy Charge on reaching Maximum Power Charges |
|
 (Body Armour) Rare Body Armour - defensive Rare Body Armour focused on providing a large Energy Shield pool and helping cap your Elemental Resistances. The Physical Damage taken as Chaos Damage implicit provides additional mitigation, while Intelligence and faster Energy Shield Recharge are valuable upgrades. (Body Armour) Rare Body Armour - defensive Rare Body Armour focused on providing a large Energy Shield pool and helping cap your Elemental Resistances. The Physical Damage taken as Chaos Damage implicit provides additional mitigation, while Intelligence and faster Energy Shield Recharge are valuable upgrades. |
|
| Min. requirements: 80% total Elemental Resistance 700+ Energy Shield 10% of Physical Damage from hits taken as Chaos Damage (implicit) Optional affixes: +# to Intelligence Faster Energy Shield Recharge |
|
 (Boots) Ralakesh's Impatience - most important Unique Item for the Power Charge stacking setup, allowing you to count as having your maximum number of Power Charges at all times. This provides a massive boost to your Damage and other Charge-based mechanic. (Boots) Ralakesh's Impatience - most important Unique Item for the Power Charge stacking setup, allowing you to count as having your maximum number of Power Charges at all times. This provides a massive boost to your Damage and other Charge-based mechanic. |
|
| +(15—25)% to Cold Resistance +(15—25)% to Chaos Resistance (15—25)% increased Movement Speed Corrupted Blood cannot be inflicted on you Count as having maximum number of Power Charges |
|
 (Gloves) Rare Gloves - nothing too fancy, just a bunch of Resistances and Energy Shield (Gloves) Rare Gloves - nothing too fancy, just a bunch of Resistances and Energy Shield |
|
| Min. requirements: 200+ Energy Shield 80% Total Elemental Resistances Optional affixes: Dexterity Cold Exposure Implicit |
|
 (Belt) Graven's Secret - grants you Absorption Charges on top of your Power Charges thnanks to Ralakesh's Impatience, providing a powerful defensive layer while retaining the benefits of your Charge stacking setup. It also grants additional Maximum Power Charges, Energy Shield, Mana, and Lightning Resistance, making it a strong combination of offence and defence. (Belt) Graven's Secret - grants you Absorption Charges on top of your Power Charges thnanks to Ralakesh's Impatience, providing a powerful defensive layer while retaining the benefits of your Charge stacking setup. It also grants additional Maximum Power Charges, Energy Shield, Mana, and Lightning Resistance, making it a strong combination of offence and defence. |
|
| +(60—70) to maximum Energy Shield (16—20)% increased maximum Mana +(40—60)% to Lightning Resistance +1 to Maximum Power Charges Modifiers to Minimum Power Charges instead apply to Minimum Absorption Charges Maximum Absorption Charges is equal to Maximum Power Charges Gain Absorption Charges instead of Power Charges |
|
 (Amulet) Badge of the Brotherhood - Your Maximum Frenzy Charges will be now equal to your Maximum Power Charges which is great for the presented type of build. Powerful option for the build. (Amulet) Badge of the Brotherhood - Your Maximum Frenzy Charges will be now equal to your Maximum Power Charges which is great for the presented type of build. Powerful option for the build. |
|
| Your Maximum Frenzy Charges is equal to your Maximum Power Charges (7—10)% increased Cooldown Recovery Rate of Travel Skills per Frenzy Charge (7—10)% increased Effect of Elusive on you per Power Charge (20—25)% chance to lose a Frenzy Charge when you use a Travel Skill (20—25)% chance to lose a Power Charge when you gain Elusive (Elusive initially grants 15% chance to Avoid All Damage from Hits, and |
|
| Recommended Anointments: Charisma Disciple of the Slaughter Tranquility |
|
 (Amulet) Foulborn The Pandemonius - powerful Amulet that provides Cold Damage, Cold Penetration, and strong defensive utility. It heavily rewards keeping enemies Chilled, as Chilled enemies are Blinded on Hit and allow your Damage to penetrate a significant amount of their Cold Resistance. (Amulet) Foulborn The Pandemonius - powerful Amulet that provides Cold Damage, Cold Penetration, and strong defensive utility. It heavily rewards keeping enemies Chilled, as Chilled enemies are Blinded on Hit and allow your Damage to penetrate a significant amount of their Cold Resistance. |
|
| (20—30)% increased Cold Damage Chill Enemy for 1 second when Hit, reducing their Action Speed by 30% Blind Chilled Enemies on Hit Damage Penetrates 20% Cold Resistance against Chilled Enemies (5—15)% of Physical Damage from Hits taken as Cold Damage |
|
| Recommended Anointments: Charisma Disciple of the Slaughter Tranquility |
|
 (Ring) Foulborn Romira's Banquet - convenient and likely one of the cheapest ways to obtain +1 Maximum Power Charge on a Ring while also providing Critical Strike Multiplier. This Ring can be replaced by a variety of strong Rare Rings if you can't afford it get one with Cast Speed, Life, Energy Shield, Resistances, or other useful modifiers. (Ring) Foulborn Romira's Banquet - convenient and likely one of the cheapest ways to obtain +1 Maximum Power Charge on a Ring while also providing Critical Strike Multiplier. This Ring can be replaced by a variety of strong Rare Rings if you can't afford it get one with Cast Speed, Life, Energy Shield, Resistances, or other useful modifiers. |
|
| +1 to Maximum Power Charges +(15—25)% to Global Critical Strike Multiplier +(40—60) to maximum Mana 0.4% of Physical Attack Damage Leeched as Mana Gain a Power Charge on Non-Critical Strike Lose all Power Charges on Critical Strike |
|
 (Jewel) Rare Jewels - they should provide extra ES and Damage or Attributes. you can look for crit. multi with elemental or cold skills too which can roll higher numbers (Jewel) Rare Jewels - they should provide extra ES and Damage or Attributes. you can look for crit. multi with elemental or cold skills too which can roll higher numbers |
|
|
Recommended affixes: |
|
 (Jewel) Elegant Hubris - this jewel can provide us with Frenzy on Kill, Spell Damage per Power Charge or other usefull modifiers. It also solves our attributes problems - jest get one with "Caspiro" modifier. (Jewel) Elegant Hubris - this jewel can provide us with Frenzy on Kill, Spell Damage per Power Charge or other usefull modifiers. It also solves our attributes problems - jest get one with "Caspiro" modifier. |
|
| Commissioned (2000—160000) coins to commemorate Caspiro Passives in radius are Conquered by the Eternal Empire Historic |
|
 (Jewel) Large Cluster Jewels - This build can use two Cold Damage-based Large Cluster Jewels. Look for the Notables Listed Here. You'll need Doryani's Lesson for Leech and Blast-Freeze to Freeze your enemies. (Jewel) Large Cluster Jewels - This build can use two Cold Damage-based Large Cluster Jewels. Look for the Notables Listed Here. You'll need Doryani's Lesson for Leech and Blast-Freeze to Freeze your enemies. |
|
| Recommended affixes: 1 Added Passive Skill is Blanketed Snow 1 Added Passive Skill is Blast-Freeze 1 Added Passive Skill is Doryani's Lesson 1 Added Passive Skill is Disorienting Display 1 Added Passive Skill is Prismatic Heart |
|
 (Flask) Dying Sun - for more AoE and more Projectiles, really great Flask (Flask) Dying Sun - for more AoE and more Projectiles, really great Flask |
|
| (125—150)% increased Charges per use (40—60)% less Duration (10—20)% increased Area of Effect during Effect Skills fire 2 additional Projectiles during Effect |
|
 (Flask) Rumi's Concoction - provide some Block Chance which helps while mapping (Flask) Rumi's Concoction - provide some Block Chance which helps while mapping |
|
| +(8—12)% Chance to Block Attack Damage during Effect +(4—6)% Chance to Block Spell Damage during Effect |
|
|
Other suggested Flasks:
|
|
   |
|
|
If you have any other build requests please leave them in the comments below. We are always open to suggestions and constructive feedback.
Pictures used in this article are the intellectual property of Grinding Gear Games.
