Barya of Kelari Disciple of Varashta POE2 Build
A peculiar minion build for the Disciple of Varashta that commands Barya of Kelari to deal Physical and Chaos Damage.Barya of Kelari
Disciple of Varashta Build
Updated for Path of Exile 2 Early Access
The Best Crafty Guides by Odealo
| Guide notes |
| January 9, 2026 - Created for Early Access. |
| Build Overview | |||
| Tags: [MINION] [PHYSICAL] [CHAOS] [ENERGY SHIELD] | |||
|
Budget: Defenses: |
|
Boss DPS: AoE: |
|
The Disciple of Varashta is an ascendancy that can access djinn Minions, or Baryas as they're called. These Minions always stay in your Presence, cannot take damage, and can only deal damage with their Command Skills. It all makes it a very distinct type of a Minion build, where you don't have to worry about Minions' survivability, them running off or being stuck, or even their Attack or Cast Speed. This build relies only on Minion Damage (which includes Gem Level to Minion Skills and Critical Hit modifiers), especially with Command Skills or Allies-in-your-Presence type mods, and Cooldown Recovery Rate for these Command Skills.
You can choose between three Baryas, but this build uses only one, Kelari. The Ascendancy passive that unlocks it comes with a Kelari's Brutality Spell, which is the one that creates multiple ascending daggers. It stores up to 2 charges. Kelari's Deception is a Spell that we've selected as the main damage-dealing ability. It's a simple AoE Skill that will recur in the same location after using it many times. Each consecutive use deals 50% more damage, which is a lot - you should wait until you have 3 charges stored and release them all at once to benefit from it. Both of these abilities deal Physical Damage, but with Unholy Might, Uul-Netol's Embrace, Withered debuff, and Right Hand of Darkness plus Entropic Incatnation notables, you will also deal quite a lot of Chaos Damage.
A significant portion of players like to choose Navira's Fracturing as their main Barya ability (that's the one that explodes Chilled Grounds), because, admittedly, its damage is higher than any other option; unfortuately it's a part of a Combo ability that's tied to Skills that create Chilled Ground, and as of this moment, these cannot be conjured effertlessly. Besides, Kelari inflicts Critical Weakness on Hit, which is a big deal, since Critical Hit mods are hard to get on Minion builds. Navira is, however, not without merit. We heavily recommend Navira's Well Skill that instantly Recharges Energy Shield at a rapid pace.
We are left with 4 to 6 Ascendancy Points, which will be spent on The Fourth Teaching that improves ES Recharge Speed and lowers Recharge Delay, and Sacred Rituals that mitigates Physical Damage, the more ES the character has. It works just like Armour, but does not scale with any Armour mods, so these are not very useful. These choices heavily encourage specializing in Energy Shield. A Minion Sorceress can access ES passives without wasting a lot of points on travel. You will be able to reach around 10 to 20k of it. For the last ascendancy, go for the Navira's Well that we already mentioned, or Baryanic Leylines if you have two very good Time-Lost Jewels.
You can also check our other Path of Exile 2 builds right over here Odealo's Crafty Guides - Full List
1. Gameplay
The build uses two Kelari Command Skills, and most enemies will die with just one use of any of them. If you need more damage, cast Pain Offering. If fighting a boss that scary, use the Enfeeble Curse. Remember to wait for all Kelari's Deception charges to recharge before Commanding for maximum damage output. All Skeletons and Sceptre Skills are working in the background, passively.
|
|
|
|

2. Build's PROS & CONS
| PROS |
|
| CONS |
|
3. Leveling tips
After your first ascension, allocate Kelari's Deception and use the skills provided as shown in this guide. Before that, you're forced to use something else. Frost Bomb, which grants Cold Infusion, is great when combined with Ice Nova or Spark. After the first ascension, specialize in Minion Damage by allocating At your Command, Growing Swarm, Gigantic Following, Right Hand of Darkness, and Splintering Force notables. Don't forget to constantly upgrade your ES items and allocate ES on the Skill Tree.
4. Final Skill Tree, Ascendancy Points, and Pantheon
Final Skill Tree:
 |
|
Click on the image to open the Passive Tree preview in a new window Or import the build into PoB: |
Ascendancy points:
Preferably in this order:
- Barya of Kelari with Kelari's Deception
- The Fourth Teaching
- Sacred Rituals
- Barya of Navira with Navira's Well, or Baryanic Leylines
5. Final Gems links
| [DPS] Barya of Kelari setup | |
 |
Barya of Kelari - It includes Kelari's Deception. These two are your main damaging abilities and come directly from the Ascendancy Tree. It will deal base Physical with added-as-extra Chaos Damage. |
 |
Bidding |
 |
Muster |
 |
Heft |
 |
Minion Mastery - It can be replaced with Uul-Netol's Embrace once you can afford to do so. |
 |
Kurgal's Leash |
| [UTILITY] Pain Offering setup | |
 |
Pain Offering - Pain Offering increases Minions' Damage. Try to keep it alive for as long as possible. |
 |
Sacrificial Offering |
 |
Danse Macabre |
 |
Meat Shield - it can be replaced with Brutus' Brain. |
 |
Prolonged Duration |
 |
Magnified Area |
| [UTILITY] Curse setup | |
 |
Enfeeble - It's probably the best Curse. It lowers the damage dealt by afflicted enemies by 30% in the case of Unique Bosses, if you swap the Skill Tree to cast it. |
|
Prolonged Duration |
 |
Focused Curse |
 |
Efficiency |
 |
Heightened Curse |
|
Magnified Area or Spell Cascade |
| [UTILITY] Skeletal Arsonist setup | |
 |
Skeletal Arsonist - All Skeletons' primary Role is to add 7% more damage each via Muster for Kelari. It also has Withering Touch to Wither foes. |
 |
Last Gasp |
 |
Elemental Army |
|
Meat Shield |
 |
Withering Touch |
| [UTILITY] Skeletal Brute setup | |
 |
Skeletal Brute - Skeletal Brute is a tanky Melee minion. We have included Essence Harvest here to Recoup Mana when it dies, which is not that much; it can be replaced with Withering Touch. |
|
Last Gasp |
|
Elemental Army |
|
Meat Shield |
 |
Essence Harvest |
| [UTILITY] Skeletal Cleric setup | |
 |
Skeletal Cleric - Skeletal Cleric heals and revives other Skeletons. It's useful, as live Minions increase your damage via "At your Command" notable. |
|
Last Gasp |
|
Elemental Army |
|
Meat Shield |
 |
Rapid Casting |
| [UTILITY] Skeletal Sniper setup | |
 |
Skeletal Sniper - Another Skeleton that doesn't do much but stays in the back and pretends to do damage. |
|
Last Gasp |
|
Elemental Army |
|
Meat Shield |
|
Essence Harvest |
| [UTILITY] Skeletal Frost Mage setup | |
 |
Skeletal Frost Mage - The Frost Mage, like Arsotnist, also has Withering Touch to apply the Withered debuff. |
|
Last Gasp |
|
Elemental Army |
|
Meat Shield |
|
Withering Touch |
| [UTILITY] Skeletal Reaver setup | |
 |
Skeletal Reaver - Reaver is our special sacrificial lamb; it's linked with Amanamu's Tithe to grant buffs on death, since this one is the most likely to die first. If you have extra Spirit, summon two; maybe three. We had a lot of extra spirit and replaced Reaver with Wolf Pack. |
 |
Minion Instability |
 |
Infernal Legion |
|
Essence Harvest or Feeding Frenzy |
 |
Amanamu's Tithe |
| [UTILITY] Skeletal Storm Mage setup | |
 |
Skeletal Storm Mage - Skeletal Storm Mage has way different Support Gems, because of Tecrod's Revenge. It allows it to be more damage-oriented, although it won't do much anyway. We've selected Storm Mage for this Role so that it can Shock with ease. |
 |
Tecrod's Revenge |
|
Muster |
 |
Feeding Frenzy |
 |
Rapid Casting |
|
Withering Touch |
| [UTILITY] Malice setup | |
 |
Malice - Malice, or other Skill sourced from your Sceptre (we recommend Malice to increase DPS), must be linked with Upwelling, and Gems that will support either the character or the Skill itself. |
 |
Upwelling |
|
Magnified Area |
 |
Clarity |
|
Prolonged Duration |
|
|
6. Gear Setup
Your damage is sourced from Level of Minion Skills and Minion Damage, especially Critical Strike Chance and Multiplier, Physical Damage, and Command Damage. Skill Levels are found on an Amulet, Helmet, Focus, and Sceptre. Other types of damage are on the Jewels and the Sceptre. Every other gear piece shall boost your survivability, which comes down to Maximum Energy Shield and Resistances. With Chaos Inoculation, you won't need Chaos Resistance, but it's not as necessary as in PoE1, so the keystone can be omitted if you have it capped. Remember that you don't need Armour; Sacred Rituals doesn't grant you real Armour, but something similar that doesn't scale with Armour modifiers. Mana Regeneration Rate and faster start of ES Recharge are both great. Spirit will be needed, aim for over 300 of it. Your Djins are always in your presence.
|
Stat priorities on items:
|
 (Helmet) Rare Helmet - Helmet must have the "+2" minion mod and as much ES as you can afford. Resistances are not as important as the Maximum ES in this case. (Helmet) Rare Helmet - Helmet must have the "+2" minion mod and as much ES as you can afford. Resistances are not as important as the Maximum ES in this case. |
|
| Min. requirements: 300 Energy Shield +2 to Level of all Minion Skills +30% total Elemental and Chaos Resistance Optional affixes: Resistances increased Energy Shield Recharge Rate |
|
 (Weapon) Rare Sceptre - Try to get an Omen Sceptre with modifiers that would increase Minions' Damage - Gem Level is crucial. Aim for "+4" Sceptre; the "+5" ones are way too costly. Socket Xipocado's Soul Core of Dominion here. (Weapon) Rare Sceptre - Try to get an Omen Sceptre with modifiers that would increase Minions' Damage - Gem Level is crucial. Aim for "+4" Sceptre; the "+5" ones are way too costly. Socket Xipocado's Soul Core of Dominion here. |
|
| Min. requirements: +4 to Level of all Minion Skills 30% increased Spirit Allies in your presence deal #% increased Damage Optional affixes: Allies in your Presence have #% increased Critical Hit Chance Allies in your Presence have #% increased Critical Damage Bonus |
|
 (Off-hand) Rare Focus - Level of all Minion Skills is an Abyssal Suffix, and it must be present. Then, search for Maximum ES, ES mods, and Resistances. You can socket Atmohua's Soul Core of Retreat in it. (Off-hand) Rare Focus - Level of all Minion Skills is an Abyssal Suffix, and it must be present. Then, search for Maximum ES, ES mods, and Resistances. You can socket Atmohua's Soul Core of Retreat in it. |
|
| Min. requirements: 200 Energy Shield +2 to Level of all Minion Skills (Desecrated Suffix) +30% total Elemental and Chaos Resistance Optional affixes: increased Energy Shield Recharge Rate faster start of Energy Shield Recharge increased Mana Regeneration Rate |
|
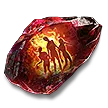
 (Gloves) Rare Gloves - On Gloves, put more focus on Resistances, besides the usual Energy Shield, because there is not much else. (Gloves) Rare Gloves - On Gloves, put more focus on Resistances, besides the usual Energy Shield, because there is not much else. |
|
| Min. requirements: 200 Energy Shield +70% total Elemental and Chaos Resistance Optional affixes: increased Energy Shield Recharge Rate Gain # Mana per enemy killed |
|
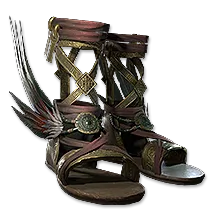 (Boots) Rare Boots - On Boots, Energy Shield is not as important as on your other gear pieces, because you need Movement Speed on them, which is a Prefix. Boots with a lot of ES and resistances are expensive. (Boots) Rare Boots - On Boots, Energy Shield is not as important as on your other gear pieces, because you need Movement Speed on them, which is a Prefix. Boots with a lot of ES and resistances are expensive. |
|
| Min. requirements: 100 Energy Shield +30% total Elemental and Chaos Resistance 30% increased Movement Speed Optional affixes: increased Energy Shield Recharge Rate |
|
 (Boots) Bones of Ullr - If you can't afford all that additional Spirit, get Bones of Ullr. They're probably even the best in their slot at a certain point. (Boots) Bones of Ullr - If you can't afford all that additional Spirit, get Bones of Ullr. They're probably even the best in their slot at a certain point. |
|
| (5-15)% increased Movement Speed (40-60)% increased Energy Shield +(20-40) to maximum Life +(20-40) to maximum Mana (20-30)% increased Reservation Efficiency of Skills which create Undead Minions |
|
 (Amulet) Rare Amulet - On the Amulet, look for +3 to Level of Minion Skills and Spirit. That would make the amulet already quite pricey, so the other listed mods are of lesser importance. (Amulet) Rare Amulet - On the Amulet, look for +3 to Level of Minion Skills and Spirit. That would make the amulet already quite pricey, so the other listed mods are of lesser importance. |
|
| Min. requirements: +30 Spirit +3 to Level of all Melee Skills Optional affixes: maximum Energy Shield Elemental and Chaos Resistance increased Mana Regeneration Rate increased Global Defences increased Energy Shield from Equipped Body Armour (Desecrated Prefix) Anointment: Growing Swarm Warlord Leader |
|
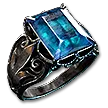 (Ring) Rare Ring - Rings are very simple: they should be plentiful in Resistances. There is no other good type of modifier worth recommending. For a Prefix, get Item Rarity or Maximum Life if applicable. (Ring) Rare Ring - Rings are very simple: they should be plentiful in Resistances. There is no other good type of modifier worth recommending. For a Prefix, get Item Rarity or Maximum Life if applicable. |
|
| Min. requirements: +100% total Elemental and Chaos Resistance Optional affixes: increased Mana Regeneration Rate increased Skill Effect Duration (Desecrated Suffix) |
|
 (Ring) Evergrasping Ring - Evergrasping Ring adds lots of extra Chaos Damage, which is further boosted with Withered from Support Gems and Right Hand of Darkness notable. Good with high Chaos Resistance or Chaos Inoculation. (Ring) Evergrasping Ring - Evergrasping Ring adds lots of extra Chaos Damage, which is further boosted with Withered from Support Gems and Right Hand of Darkness notable. Good with high Chaos Resistance or Chaos Inoculation. |
|
| (7-10)% increased Cast Speed +(60-100) to maximum Mana Allies in your Presence Gain (15-25)% of Damage as Extra Chaos Damage Enemies in your Presence Gain (6-12)% of Damage as Extra Chaos Damage |
|
 (Belt) Rare Belt - Belts, much like Rings, don't present themselves with a lot of choices. They do, however, have Flask and Charm modifiers that are better than nothing. (Belt) Rare Belt - Belts, much like Rings, don't present themselves with a lot of choices. They do, however, have Flask and Charm modifiers that are better than nothing. |
|
| Min. requirements: +100% total Elemental and Chaos Resistance Optional affixes: Charm slots increased Mana Regeneration Rate (Desecrated Suffix) Charm modifiers Flask modifiers |
|
 (Body Armour) Rare Body Armour - On a Body Armour, you can get the most flat Energy Shield, so go for that. Don't forget about Spirit. (Body Armour) Rare Body Armour - On a Body Armour, you can get the most flat Energy Shield, so go for that. Don't forget about Spirit. |
|
| Min. requirements: 600 Energy Shield +30 Spirit +20% total Elemental and Chaos Resistance Optional affixes: faster start of Energy Shield Recharge |
|
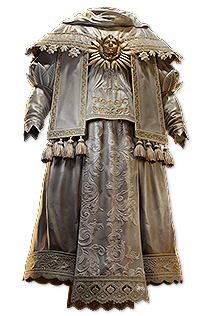 (Body Armour) Silks of Veneration - Silks of Veneration has Spirit and can get you over 600 ES, so it is good. It also uses the Armour formula to mitigate more Elemental Damage the more Maximum ES you have, making you extra durable. (Body Armour) Silks of Veneration - Silks of Veneration has Spirit and can get you over 600 ES, so it is good. It also uses the Armour formula to mitigate more Elemental Damage the more Maximum ES you have, making you extra durable. |
|
| (40-50)% increased Mana Regeneration Rate (150-200)% increased Energy Shield +(30-50) to Spirit +(20-30) to Intelligence (30-50)% increased Energy Shield Recharge Rate Current Energy Shield also grants Elemental Damage reduction |
|
 (Body Armour) Vis Mortis - The only quality of Vis Mortis is that it saves you a Support Gem (Kurgal's Leash), which is, of course, very helpful, but that's too big of a compromise for us. (Body Armour) Vis Mortis - The only quality of Vis Mortis is that it saves you a Support Gem (Kurgal's Leash), which is, of course, very helpful, but that's too big of a compromise for us. |
|
| (70-100)% increased Energy Shield +(70-100) to maximum Mana Minions have 50% reduced maximum Life Minions have Unholy Might |
|
 (Jewel) Rare Jewels - On Sapphires, try to obtain the Maximum ES and the three Minion Damage modifiers from the list. You will need one or two of these Jewels. (Jewel) Rare Jewels - On Sapphires, try to obtain the Maximum ES and the three Minion Damage modifiers from the list. You will need one or two of these Jewels. |
|
| Optional affixes: increased Maximum Energy Shield Minions deal #% increased Damage Minions have #% increased Critical Damage Bonus Minions have #% increased Critical Hit Chance faster start of Energy Shield Recharge increased Energy Shield Recharge Rate increased Mana Regeneration Rate |
|
 (Jewel) Time-Lost Jewels - The radius of Time-Lost Jewels is upgraded with Baryanic Leylines. Look for a mod that upgrades their Radius to Large, and the same type of mods as on the regular Sapphires. You will sport one or two of these. (Jewel) Time-Lost Jewels - The radius of Time-Lost Jewels is upgraded with Baryanic Leylines. Look for a mod that upgrades their Radius to Large, and the same type of mods as on the regular Sapphires. You will sport one or two of these. |
|
| Optional affixes: Upgrades Radius to Large Small Passive Skills in Radius also grant #% increased maximum Energy Shield Small Passive Skills in Radius also grant Minions deal #% increased Damage Notable Passive Skills in Radius also grant Minions have #% increased Critical Hit Chance Notable Passive Skills in Radius also grant Minions have #% increased Critical Damage Bonus Notable Passive Skills in Radius also grant #% faster start of Energy Shield Recharge |
|
 (Jewel) Undying Hate - It's one of the very few sources of Minion CDR, which reduces the Cooldown of their Command Skills. You want to get the "Ambivalent Command" notables: "Minions have 4% increased Cooldown Recovery Rate per 10 Tribute". (Jewel) Undying Hate - It's one of the very few sources of Minion CDR, which reduces the Cooldown of their Command Skills. You want to get the "Ambivalent Command" notables: "Minions have 4% increased Cooldown Recovery Rate per 10 Tribute". |
|
| Glorifying the defilement of (79-30977) souls in tribute to (Amanamu-Ulaman-Kurgal-Tecrod-Kulemak) Passives in radius are Conquered by the Abyssals Desecration makes this item Unstable Historic <Can gain 0-4 custom Desecrated Modifiers> (Hidden) |
|
|
If you have any other build requests please leave that in the comments below. We are always open to suggestions and constructive feedback.
Pictures used in this article are the intellectual property of Grinding Gear Games.