Comet Spell Totem Oracle POE 2 Build
A simple and streamlined Setup for the Oracle that deploys multiple Spell Totems to deal tons of Damage!Comet Spell Totem
Oracle Build
Updated for Path of Exile 2 Early Access
The Best Crafty Guides by Odealo
| Guide notes |
| January 04 2026 - Created for Early Access Patch 0.4.0 |
| Build Overview | |||
| Tags: [TOTEM] [CRIT] [SPELL] [HYBRID] | |||
|
Budget: Defenses: |
|
Boss DPS: AoE: |
|
The Spell Totem is a Remote Skill that uses linked Spells for you. To create a Totem, you have to spend 3 Endurance or Power Charges. You could quickly generate Endurance Charges by spending Rage as a Bear, or perform more complex combos. Instead, we recommend equipping a Redflare Conduit Armour with a Vaal Cultivated modifier that generates Power Charges each second, but consumes them if you reach the maximum amount. By converting the Power Charge generation with the Resonance Keystone, you will get lots of Endurance Charges without any downside.
The Oracle Ascendency is the best pick for this Archetype. It simply grants one additional maximum Totem and empowers your Critical Strikes. Paired with a special Desecrated modifier on your Focus, you can summon up to 5 Totems at the same time. The Harmony Within enables a hybrid approach to the defense. It turns your Mana into a Damage buffer just like the Mind over Matter Keystone, but it doesn't cut your Regeneration in half. Instead, it only applies if you have more Mana than Life, lowers both resources by 15%, and doesn't work against Damage over time effects. Its advantage is that you can use the Archmage Skill to get over 100% Extra Damage as Lightning.
The Totems can successfully use most Spells in the game. Unsurprisingly, the Comet seems to deal the most Damage, and the Clear Speed is still quite good thanks to massive AoE coverage. However, its long Cast time and the delay before hitting the ground are not ideal. You can very easily adapt this build to use popular Clear-focused Spells such as Frostbolt, Spark, or Arc.
The Second Weapon Set for Caster Archetypes is usually very valuable. By splitting your Passive Points between each Set, you can greatly boost the effectiveness of your Curse and Exposure, nearly doubling their effect and taking away roughly 60% Elemental Resistances from your Enemies. Thanks to the Effigy of Cruelty, you can also quickly apply Critical Weakness to get 10% extra Base Critical Strike Chance against powerful foes.
You can also check our other Path of Exile 2 builds right over here Odealo's Crafty Guides - Full List
1. Gameplay
Place down Totems and avoid incoming Damage. Against Bosses, you should remove their Elemental Resistance with Frost Bomb and Elemental Weaknesses, and Drench them with Thunderstorm to apply Shock and Freeze more easily.
|
|
|
|

2. Build's PROS & CONS
| PROS |
|
| CONS |
|
3. Leveling tips
You can start using this Setup at level 33 once you acquire the Cultivated Redflare Conduit Armour, and pair it with any Spell of your choice for the given level. Skip the Critical Strikes at first, and use the Controlled Destruction Support Gem.
4. Final Skill Tree, Ascendancy Points, and Pantheon
Final Skill Tree:
 |
|
Click on the image to open the Passive Tree preview in a new window, or use the Path of Building (PoB) tool. |
Ascendancy points:
Preferably in this order:
- Unnamed Heartwood
- The Lesser Harm
- Forced Outcome
- Harmony Within
5. Final Gems links
| [DPS] Spell Totem setup | |
 |
Spell Totem - consumes 3 Charges to create a Totem that automatically Cast linked Spells. You only need to pay the Mana Cost of summoning the Totem, which is very low. Totems can't consume Infusions. |
 |
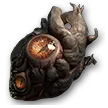
Comet - a slow but very powerful Cold Spell that deals a lot of Damage in the targeted location. You can easily adjust this Spell to your preferences. |
 |
Urgent Totems III |
 |
Zenith II |
 |
Concentrated Area |
 |
Cold Mastery |
| [Utility] Elemental Weakness setup | |
 |
Elemental Weakness - a Curse that greatly lowers the Elemental Resistance of affected Enemies. You need at least a level 18 Gem Level to apply it against powerful Bosses. |
 |
Magnified Area II |
 |
Efficiency II |
 |
Prolonged Duration II |
 |
Heightened Curse |
 |
Doedre's Undoing |
| [Utility] Frost Bomb setup | |
 |
Frost Bomb - this Spell inflicts a very potent Exposure effect, which greatly lowers Elemental Resistance of affected Enemies. |
|
Magnified Area II |
|
Efficiency II |
|
Prolonged Duration II |
 |
Potent Exposure |
|
Zenith II |
| [Utility] Thunderstorm setup | |
 |
Thunderstorm - Drenches Enemies, making it easier to Shock and Freeze. It also Hits quite often, applying the Critical Weakness Debuff. |
 |
Shock Conduction II |
|
Magnified Area II |
|
Efficiency II |
|
Prolonged Duration II |
|
Zenith II |
| [Utility] Ball Lightning setup | |
 |
Ball Lightning - optionally, you can use this Skill to instantly apply all stacks of Critical Weakness on Enemies. You can use a low-level Gem to reduce Mana Costs. |
 |
Unleash |
|
Efficiency II |
|
Prolonged Duration II |
|
Zenith II |
| [UTILITY] Archmage setup | |
 |
Archmage - adds Extra Lightning Damage based on your maximum Mana. |
| [UTILITY] Mana Remnants setup | |
 |
Mana Remnants - restores and overflows your Mana. You can bind it only to the second Weapon Set to save Spirit. |
 |
Remnant Potency III |
 |
Harmonic Remnants II |
 |
Clarity |
|
|
6. Gear Setup
The Redflare Covenant with a specific modifier is mandatory. There is no reason to use other Unique Items other than generic, powerful Jewels. To improve your Damage you will seek Gem Levels, increases to Cold Spell Damage, Critical Strikes, and Cast Speed. To improve your defense, try to get as much Mana and Life as possible. Thanks to the Eldritch Battery Keystone, the Energy Shield on your Items will be converted to Mana. It also boosts your Damage through the Archmage, but it's not effective enough to be your only target. You will also need plenty of Mana Regeneration to quickly recover it after taking a Hit.
|
Stat priorities on items:
|
 (Weapon) Wand - the Wand provides a lot of offensive power. Most of it comes from Ge Levels for your Spell, but you also need lots of increases to Spell Damage, Critical Strikes, and Cast Speed. Plenty of Extra Damage is also useful to have. (Weapon) Wand - the Wand provides a lot of offensive power. Most of it comes from Ge Levels for your Spell, but you also need lots of increases to Spell Damage, Critical Strikes, and Cast Speed. Plenty of Extra Damage is also useful to have. |
|
| Min. requirements: 100% increased Spell Damage +5 to Level of all Cold Spell Skills +20% increased Cast Speed Optional affixes: Gain #% of Damage as Extra Elemental Damage 50% increased Critical Hit Chance for Spells % increased Critical Spell Damage Bonus |
|
 (Weapon) Focus - you will want a Focus with a Desecrated modifier to increase the number of Totems you can summon. Other modifiers should stay similar to your Wand. (Weapon) Focus - you will want a Focus with a Desecrated modifier to increase the number of Totems you can summon. Other modifiers should stay similar to your Wand. |
|
| Min. requirements: Spell Skills have +1 to maximum number of Summoned Totems +2 to Level of all Spell Skills Optional affixes: % increased Spell Damage % increased Cast Speed % increased Critical Hit Chance for Spells % increased Critical Spell Damage Bonus |
|
 (Amulet) Rare Amulet - it is the last gear piece to get extra Levels for your Spells. Extra Spirit is useful, but not mandatory. It should also improve your Life, Mana, and Resistance. (Amulet) Rare Amulet - it is the last gear piece to get extra Levels for your Spells. Extra Spirit is useful, but not mandatory. It should also improve your Life, Mana, and Resistance. |
|
| Min. requirements: +3 to Level of all Spell Skills Optional affixes: % total Elemental and Chaos Resistance +# to Spirit +# to maximum Life +# to maximum Mana % increased Rarity of Items found |
|
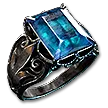 (Ring) Rare Ring - your Rings can provide a lot of Cast Speed and Mana Regeneration. You will also find flat Mana, Life, and Resistances or Rarity here. (Ring) Rare Ring - your Rings can provide a lot of Cast Speed and Mana Regeneration. You will also find flat Mana, Life, and Resistances or Rarity here. |
|
| Min. requirements: +25% increased Cast Speed +60% increased Mana Regeneration Rate +150 to maximum Mana +40% total Elemental and Chaos Resistance Optional affixes: % increased Rarity of Items found +# to maximum Life |
|
 (Belt) Rare Belt - having all 3 Charm Slots is very important to deal with Ignite and Bleeding, which bypasses your Mana unless you pick the Mind over Matter Keystone. (Belt) Rare Belt - having all 3 Charm Slots is very important to deal with Ignite and Bleeding, which bypasses your Mana unless you pick the Mind over Matter Keystone. |
|
| Min. requirements: +3 Charm slots +100 to maximum Life +150 to maximum Mana +80% total Elemental and Chaos Resistance Optional affixes: +# to Strength |
|
 (Helmet) Rare Helmet - your main goal is to get as much Mana as possible through flat Mana and Energy Shield on all your Armour pieces, but you also need Life for better protection against DoTs and Ailments. The Helmet also grants a bit of Crit Chance. (Helmet) Rare Helmet - your main goal is to get as much Mana as possible through flat Mana and Energy Shield on all your Armour pieces, but you also need Life for better protection against DoTs and Ailments. The Helmet also grants a bit of Crit Chance. |
|
| Min. requirements: +100 to maximum Life +300 to Mana + Energy Shield +40% total Elemental and Chaos Resistance Optional affixes: % increased Rarity of Items found |
|
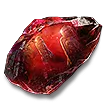
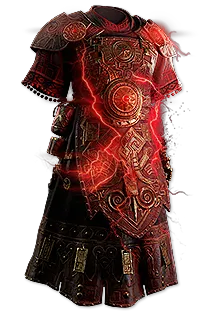 (Body Armour) Redflare Conduit - this Armour effortlessly generates tons of Endurance Charges used to summon your Totems, but you need to get the special modifier through the Vaal Cultivation Orb. (Body Armour) Redflare Conduit - this Armour effortlessly generates tons of Endurance Charges used to summon your Totems, but you need to get the special modifier through the Vaal Cultivation Orb. |
|
| +(50—70) to maximum Mana +(20—30)% to Lightning Resistance 20% chance to gain a Power Charge on Hit Lose all Power Charges on reaching maximum Power Charges Shocks you when you reach maximum Power Charges Mandatory Vaal Cultivation Orb modifier: Gain a Power Charge every Second if you haven't lost Power Charges Recently |
|
|
|
|
| Min. requirements: +100 to maximum Life +200 to Mana + Energy Shield +40% total Elemental and Chaos Resistance Optional affixes: % increased Rarity of Items found % increased Critical Damage Bonus #% chance to Gain Arcane Surge when you deal a Critical Hit |
|
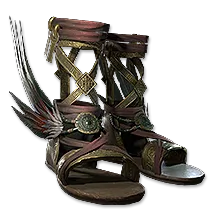 (Boots) Rare Boots - it is your main source of Movement Speed, make sure to get lots of it here. You can also reduce the Speed penalty or Duration of Bleeding on you through Desecration. (Boots) Rare Boots - it is your main source of Movement Speed, make sure to get lots of it here. You can also reduce the Speed penalty or Duration of Bleeding on you through Desecration. |
|
| Min. requirements: 30% increased Movement Speed +100 to maximum Life +200 to Mana + Energy Shield +40% total Elemental and Chaos Resistance Optional affixes: % increased Rarity of Items found % reduced Slowing Potency of Debuffs on You (20—30)% reduced Duration of Bleeding on You |
|
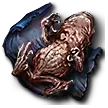
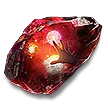
 (Jewel) Heart of the Well - a very powerful and expensive Jewel, it can grant tons of Extra Damage of various Elements. (Jewel) Heart of the Well - a very powerful and expensive Jewel, it can grant tons of Extra Damage of various Elements. |
|
| Recommended modifiers: Gain (9–15)% of Damage as Extra Cold/Fire/Lightning Damage |
|
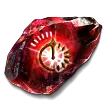
 (Jewel) Prism of Belief - the variant for Comet Skill is unbelievably expensive, but you might make use of it if you want to experiment with other Spells. (Jewel) Prism of Belief - the variant for Comet Skill is unbelievably expensive, but you might make use of it if you want to experiment with other Spells. |
|
| +(1—3) to Level of all Specific Skill Skills | |
 (Jewel) Rare Jewel - the Rare Jewels are the best source of Critical Damage Bonus. They can also improve your Spell Damage, Cast Speed, or AoE. (Jewel) Rare Jewel - the Rare Jewels are the best source of Critical Damage Bonus. They can also improve your Spell Damage, Cast Speed, or AoE. |
|
| Optional affixes: % increased Critical Hit Chance % increased Critical Damage Bonus % increased Area of Effect % increased Spell Damage % increased Cast Speed |
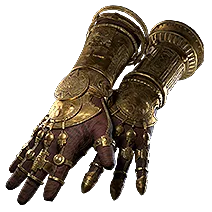 (Gloves) Rare Gloves - look for the usual defense here. You can get a bit of Critical Damage bonus here, but a Desecrated modifier to gain Arcane Surge Buff would be much better.
 |
|
If you have any other build requests please leave that in the comments below. We are always open to suggestions and constructive feedback.
Pictures used in this article are the intellectual property of Grinding Gear Games.