 Buy/Sell
 Log in


Essence Drain Occultist Build
Dominate Maps with everyone's favorite Essence Drain and Contagion on this powerful Occultist build.Essence Drain/Contagion
Occultist Build
Updated for Patch 3.29
The Best Crafty Guides by Odealo
| Guide notes |
| July 30, 2026 -Updated for patch 3.29 |
| Build overview | |||
| Tags: [CASTER] [CHAOS] [DOT] [ENERGY SHIELD] | |||
|
Budget: Defenses: |
|
Boss DPS: AoE: |
|



Essence Drain and Contagion form one of the most iconic Chaos Damage over Time combinations in Path of Exile, capable of delivering exceptional Map Clear while maintaining high Damage Uptime on Bosses. Contagion spreads Essence Drain's Damage over Time between enemies, allowing the build to clear large packs with minimal effort, while Essence Drain provides reliable Damage against tougher targets.
Occultist is an excellent Ascendancy for this archetype, providing powerful Chaos Damage scaling and making Power Charge stacking a major part of the Endgame setup. Cane of Unravelling forms the foundation of the build, offering valuable Gem Levels for Chaos Spells and scaling Cast Speed with Power Charges, while Forbidden Power further enhances our Damage and Area of Effect.
As the build progresses, we transition into a powerful Power Charge setup using Anathema, Badge of the Brotherhood, and Ralakesh's Impatience, allowing us to maximise our Charge-based scaling. This combination provides substantial offensive bonuses while giving the build excellent scaling potential as you continue upgrading your Gear and investing into additional Power Charges.
The build truly shines as a dedicated Mapper, with Contagion allowing Essence Drain to spread through dense packs and clear large sections of the screen. Combined with strong Chaos Damage over Time scaling and Occultist's natural strengths, it offers an exceptionally smooth Mapping experience with excellent Area Coverage and reliable Damage against tougher enemies.
You can also check our other Path of Exile builds right over here Odealo's Crafty Guides - Full List
1. Gameplay
Cast Contagion into enemy packs and hit an affected enemy with Essence Drain to spread the Damage over Time through the entire group. Against Bosses and tougher enemies, use your Bane of Condemntation and channel Blight of Contagion to maximise your Chaos Damage. Keep moving between packs and use your Movement Skill to reposition quickly.
|
|
|
|


2. Build's PROS & CONS
| PROS |
|
| CONS |
|
3. Leveling tips
You can level with Essence Drain and Contagion from the beginning if you want to experience the intended playstyle right away, although this approach will be somewhat slower during the Campaign. Alternatively, you can use a Wand-based setup, starting with Kinetic Bolt and later transitioning into Spellslinger for a smoother and faster leveling experience.
Once you finish the Campaign and enter yellow or red Maps, you can transition into the Essence Drain and Contagion setup as soon as you have the required Gems and a suitable Wand. From there, start assembling the core Unique Items and gradually transition into the Power Charge stacking setup with Cane of Unravelling, Anathema, Badge of the Brotherhood, and Ralakesh's Impatience, scaling your Damage and defenses as you progress.
Suggested leveling Gem setups:
| Kinetic Bolt setup | |
 |
Kinetic Bolt - a fast and reliable Wand Attack for progressing through the early Campaign, providing good Clear Speed while you build up your character and prepare to transition into the Spellslinger setup. |
 |
Prismatic Burst - adds a powerful Elemental Damage effect to your Attacks, providing a significant boost to Kinetic Bolt's Damage during the early leveling stages. |
 |
Added Lightning Damage - adds Flat Lightning Damage to your Wand Attacks, providing a strong boost to Kinetic Bolt's Damage and improving your overall Clear Speed. |
 |
Volley - adds additional Projectiles to Kinetic Bolt, significantly improving its Area Coverage and making it easier to clear packs while leveling. |
| Spellslinger setup | |
 |
Spellslinger - automatically triggers your linked Spells when you attack with your Wand, allowing you to cast Contagion and Essence Drain without manually casting them. |
 |
Contagion - spreads the Essence Drain Damage over Time between nearby enemies, allowing you to clear packs efficiently. Make sure Contagion is socketed before Essence Drain, so it triggers first and applies its effect before Essence Drain spreads the Damage further. |
 |
Essence Drain - applies a powerful Chaos Damage over Time effect to enemies, which is then spread through packs by Contagion. |
 |
Controlled Destruction - provides a strong More Spell Damage multiplier, significantly increasing the Damage dealt by Essence Drain. |
Recommended leveling items:
 Le Heup of All - One of the best leveling rings due to its Elemental Resistances and Attributes Le Heup of All - One of the best leveling rings due to its Elemental Resistances and Attributes |
|
| Adds 1 to 4 Physical Damage to Attacks +(10-30) to all Attributes (10-30)% increased Damage (10-30)% increased Rarity of Items found +(10-30)% to all Elemental Resistances |
 Goldrim - Grat leveling Helmet, again thanks to its Resistances, price, and availability Goldrim - Grat leveling Helmet, again thanks to its Resistances, price, and availability |
|
| +(30-50) to Evasion Rating 10% increased Rarity of Items found +(30-40)% to all Elemental Resistances Reflects 4 Physical Damage to Melee Attackers |
 Prismweave - Adds a lot of Elemental flat Damage and all Resistances. Prismweave - Adds a lot of Elemental flat Damage and all Resistances. |
|
| Adds (14—16) to (30—32) Fire Damage to Attacks Adds (10—12) to (24—28) Cold Damage to Attacks Adds 1 to (60—68) Lightning Damage to Attacks +(6—15)% to all Elemental Resistances 30% increased Elemental Damage with Attack Skills during any Flask Effect |
Bandits:
Help Alira to get the additional Elemental Resistances
Leveling Skill Trees:
35 Points Passive Tree
Pick Wand nodes as fast as possible.
82 Points Passive Tree
Start picking Damage over Time and Chaos nodes. Swap to this setup after 28 level when you can start using Spellslinger.
4. Final Skill Tree, Ascendancy Points, and Pantheon
Final Skill Tree:
109 Points Final Skill Tree (doesn't include Cluster Jewels nor Timeless Jewels)
118 Points Path of Building (PoB) link (full uniques Power Charge version with 1 cluster)
Ascendancy points:
Preferably in that order:
- Vile Bastion
- Void Beacon
- Withering Pressence
- Forbidden Power
Pantheon:
Major God: Soul of the Brine King: You cannot be Stunned if you've been Stunned or Blocked a Stunning Hit in the past 2 seconds; 100% chance to Avoid being Frozen
Minor God: Soul of Garukhan: 60% reduced Effect of Shock on you
5. Final Gems links
| [DPS] Essence Drain and Blight of Contagion setup | |
|
Essence Drain - used primarily for Mapping together with Contagion. Cast Contagion first, then hit an affected enemy with Essence Drain to spread its powerful Chaos Damage over Time through entire packs. |
 |
Blight of Contagion - the main Single-Target Skill of the build, used against Bosses and tougher enemies. It provides significantly stronger Damage over Time scaling, making it our primary tool for dealing with high-health targets. |
 |
Efficacy - provides a strong boost to Damage over Time while also increasing the Duration of our Damage over Time effects, improving the overall consistency of our Skills. |
|
Controlled Destruction - provides a powerful More Spell Damage multiplier, significantly increasing the Damage dealt by our Spells. |
 |
Arcane Surge - grants increased Spell Damage and Mana Regeneration after spending enough Mana, providing a useful offensive boost alongside improved Mana Sustain. |
 |
Void Manipulation - provides a strong More Chaos Damage multiplier, making it an excellent Support for scaling our Chaos Damage over Time. |
| [UTILITY] Bane of Condemnation setup | |
 |
Bane of Condemnation - the main Skill used to apply our Curses to enemies, allowing us to efficiently debuff packs and Bosses while also dealing additional Chaos Damage. |
 |
Despair - significantly lowers the Chaos Resistance of cursed enemies, greatly increasing the Damage dealt by Essence Drain and Blight of Contagion. |
|
Controlled Destruction - provides a powerful More Spell Damage multiplier, significantly increasing the Damage of Bane and our other linked Spells. |
|
Efficacy - increases our Damage over Time and improves the Duration of our Damage over Time effects, providing a strong boost to Bane's overall Damage. |
 |
Temporal Chains - slows down Cursed enemies and increases the Duration of our Damage over Time effects on them, improving both our survivability and Damage output. |
 |
Punishment - provides an additional offensive Curse that increases the Damage dealt to low-health enemies, making it particularly effective for finishing off tougher enemies and Bosses. |
| [UTILITY] Movement setup | |
 |
Frostblink of Wintry Blast - provides fast and reliable Mobility. The Transfigured version is particularly useful for quickly clearing weaker enemies while moving through Maps. |
 |
Faster Casting - increases the Cast Speed of Frostblink, making the Movement Skill faster and more responsive while allowing you to reposition more quickly. |
| [UTILITY] Mana-reserving setup | |
 |
Malevolence - provides increased Damage over Time and Skill Effect Duration, making it one of the most important Auras for scaling the Damage and Duration of Essence Drain and Blight of Contagion. |
 |
Flesh and Stone - provides additional defensive utility by reducing the Damage taken from nearby enemies while in Sand Stance, helping the build survive dangerous encounters. |
| [UTILITY] Automation setup | |
 |
Immortal Call - provides a temporary layer of Damage Reduction against incoming Hits, helping the build survive sudden bursts of Damage and dangerous encounters. |
 |
Automation - automatically triggers linked Skills, allowing them to activate without requiring manual input. |
 |
Withering Step - applies Wither to nearby enemies, increasing the Chaos Damage they take while also providing Phasing and a temporary boost to Movement Speed for smoother repositioning. |
 |
Phase Run - grants Phasing and increased Movement Speed, allowing you to move through enemies more easily and reposition quickly during Mapping. |
| [UTILITY] Contagion setup | |
|
Contagion - our main Clear Skill, spreading its Damage over Time effect between nearby enemies. Cast it on a pack before hitting an affected enemy with Essence Drain to start the chain reaction and clear large groups efficiently. |
 |
Increased Area of Effect - significantly increases Contagion's Area of Effect, allowing it to spread across larger packs and improving the build's already excellent Map Clear. |
 |
Intensify - provides a strong More Area Damage multiplier. It is useful for boosting Damage against tougher enemies while still maintaining sufficient Clear Coverage. |
| [UTILITY] Mana-Infused Staff setup | |
 |
Mana-Infused Staff - provides a powerful defensive and offensive boost by converting your Mana investment into additional Staff Block Chance and Spell Damage. |
|
|
5. Gear Setup
This build relies on a combination of Power Charge scaling, Chaos Damage over Time, and Energy Shield, making the right Gear important for reaching its full potential. The core Unique Items provide powerful interactions that define the Endgame setup, while Rare Items should be used to fill defensive gaps and provide the stats needed to support the build's offensive scaling. As you progress, focus on improving your Energy Shield and Charge-based scaling while balancing your Resistances and Attributes.
|
Stat priorities on items:
|
 (Weapon) Cane of Unravelling - the core Weapon of the build, providing +2 to Chaos Spell Gems and a powerful Chaos Damage over Time Multiplier. It also grants an additional Maximum Power Charge and scales Cast Speed and Mana Regeneration with each Power Charge, making it perfectly suited to our Charge-stacking setup. (Weapon) Cane of Unravelling - the core Weapon of the build, providing +2 to Chaos Spell Gems and a powerful Chaos Damage over Time Multiplier. It also grants an additional Maximum Power Charge and scales Cast Speed and Mana Regeneration with each Power Charge, making it perfectly suited to our Charge-stacking setup. |
|
| +(40—55)% to Chaos Damage over Time Multiplier +2 to Level of all Chaos Spell Skill Gems +1 to Maximum Power Charges 5% increased Cast Speed per Power Charge Regenerate 5 Mana per Second per Power Charge Gain a Power Charge after Spending a total of 200 Mana |
|
 (Boots) Ralakesh's Impatience - because this version counts as having Maximum Frenzy Charges rather than Power Charges, Ralakesh's Impatience is a much cheaper option while still providing an enormous amount of Cast Speed. We need this effect because Inner Conviction prevents us from generating Frenzy Charges normally, making these Boots essential for maintaining their powerful bonuses. (Boots) Ralakesh's Impatience - because this version counts as having Maximum Frenzy Charges rather than Power Charges, Ralakesh's Impatience is a much cheaper option while still providing an enormous amount of Cast Speed. We need this effect because Inner Conviction prevents us from generating Frenzy Charges normally, making these Boots essential for maintaining their powerful bonuses. |
|
| +(15—25)% to Cold Resistance +(15—25)% to Chaos Resistance (15—25)% increased Movement Speed Corrupted Blood cannot be inflicted on you Count as having maximum number of Frenzy Charges |
|
 (Amulet) Badge of Brotherhood - makes our Maximum Frenzy Charges equal to our Maximum Power Charges. Combined with Ralakesh's Impatience, this gives us access to a large number of Frenzy Charges and their powerful Cast Speed benefits. (Amulet) Badge of Brotherhood - makes our Maximum Frenzy Charges equal to our Maximum Power Charges. Combined with Ralakesh's Impatience, this gives us access to a large number of Frenzy Charges and their powerful Cast Speed benefits. |
|
| Your Maximum Frenzy Charges is equal to your Maximum Power Charges (7—10)% increased Cooldown Recovery Rate of Travel Skills per Frenzy Charge (7—10)% increased Effect of Elusive on you per Power Charge (20—25)% chance to lose a Frenzy Charge when you use a Travel Skill (20—25)% chance to lose a Power Charge when you gain Elusive |
|
| Recommended Anointments: Infused |
|
 (Ring) Anathema - allows our Curse Limit to scale with our Maximum Power Charges, letting us apply multiple powerful Curses to the same enemy. It also provides Cast Speed. (Ring) Anathema - allows our Curse Limit to scale with our Maximum Power Charges, letting us apply multiple powerful Curses to the same enemy. It also provides Cast Speed. |
|
| +(30—40) to Intelligence (10—15)% increased Cast Speed (10—20)% chance to gain a Power Charge when you Cast a Curse Spell Your Curse Limit is equal to your maximum Power Charges |
|
 (Helmet) Rare Helmet - provides Energy Shield, Resistances, and useful Attributes. Thanks to our Armour and Energy Shield Mastery, we want to use an Armour/Energy Shield base for both our Helmet and Gloves. (Helmet) Rare Helmet - provides Energy Shield, Resistances, and useful Attributes. Thanks to our Armour and Energy Shield Mastery, we want to use an Armour/Energy Shield base for both our Helmet and Gloves. |
|
| Min. requirements: 250+ Energy Shield 80% Total Elemental Resistances Optional affixes: Attributes increased Armour and Energy Shield #% of P#% of Physical Damage from hits taken as Chaos Damage implicit |
|
 (Body Armour) Rare Body Armour - our most important defensive Rare Item, providing a large amount of Energy Shield and Resistances. Unlike our Helmet and Gloves, we want to use a pure Energy Shield base here to maximise our Energy Shield pool. (Body Armour) Rare Body Armour - our most important defensive Rare Item, providing a large amount of Energy Shield and Resistances. Unlike our Helmet and Gloves, we want to use a pure Energy Shield base here to maximise our Energy Shield pool. |
|
|
Min. requirements: |
|
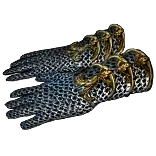 (Gloves) Rare Gloves - provide additional Energy Shield and Resistances while also benefiting from our Armour and Energy Shield Mastery, making an Armour/Energy Shield base the preferred choice. (Gloves) Rare Gloves - provide additional Energy Shield and Resistances while also benefiting from our Armour and Energy Shield Mastery, making an Armour/Energy Shield base the preferred choice. |
|
|
Min. requirements: |
|
 (Belt) Rare Belt - an important defensive slot that should provide a large amount of Energy Shield, Resistances, and Attributes. Ideally, this Belt should have Crusader Influence and roll % increased Maximum Energy Shield to further improve our ES pool. (Belt) Rare Belt - an important defensive slot that should provide a large amount of Energy Shield, Resistances, and Attributes. Ideally, this Belt should have Crusader Influence and roll % increased Maximum Energy Shield to further improve our ES pool. |
|
| Min. requirements: 50+ to Maximum Energy Shield 80% Total Elemental Resistances 12%+ increased Maximum Energy Shield Optional affixes: Attributes Flask applied to you have #% increased Effect |
|
 (Ring) Rare Ring - provides important Attributes and Energy Shield while helping fill out our Resistances. Ideally, use a Crusader-influenced Ring with % increased Maximum Energy Shield. You can also craft the Ring using Essence of Delirium to guarantee Damage over Time Multiplier, making it an excellent way to combine defensive and offensive scaling. (Ring) Rare Ring - provides important Attributes and Energy Shield while helping fill out our Resistances. Ideally, use a Crusader-influenced Ring with % increased Maximum Energy Shield. You can also craft the Ring using Essence of Delirium to guarantee Damage over Time Multiplier, making it an excellent way to combine defensive and offensive scaling. |
|
| Min. requirements: 30+ to Dexterity 30+ to Strength 12%+ increased Maximum Energy Shield Optional affixes: +#% to Damage over Time Multiplier |
|
 (Jewel) Large Cluster Jewel - get 8 passives Chaos Damage cluster and grab these three Passive Skills. (Jewel) Large Cluster Jewel - get 8 passives Chaos Damage cluster and grab these three Passive Skills. |
|
| Recommended affixes: 1 Added Passive Skill is Wicked Pall 1 Added Passive Skill is Unwaveringly Evil 1 Added Passive Skill is Unholy Grace |
|
 (Jewel) Medium Cluster Jewel - 4-5 passives Chaos Damage over Time with these two Passive skills. (Jewel) Medium Cluster Jewel - 4-5 passives Chaos Damage over Time with these two Passive skills. |
|
| Recommended affixes: 1 Added Passive Skill is Wicked Pall 1 Added Passive Skill is Unwaveringly Evil |
|
 (Jewel) Militant Faith - provides a wide variety of potentially useful Devotion modifiers, so there is no single mandatory combination to look for. There are many different mods that can benefit the build, so simply aim for a version with any useful modifiers. (Jewel) Militant Faith - provides a wide variety of potentially useful Devotion modifiers, so there is no single mandatory combination to look for. There are many different mods that can benefit the build, so simply aim for a version with any useful modifiers. |
|
| Carved to glorify (2000—10000) new faithful converted by High Templar Dominus Passives in radius are Conquered by the Templars Historic [Two random mods of devotion] |
|
 (Jewel) Rare Jewels - provide valuable offensive and defensive scaling, with Energy Shield, Damage over Time Multiplier, and Chaos Damage over Time Multiplier being the most important modifiers. Since we use a Staff, Block Chance while wielding a Staff is also highly valuable for improving our survivability. (Jewel) Rare Jewels - provide valuable offensive and defensive scaling, with Energy Shield, Damage over Time Multiplier, and Chaos Damage over Time Multiplier being the most important modifiers. Since we use a Staff, Block Chance while wielding a Staff is also highly valuable for improving our survivability. |
|
| Recommended affixes: Chance to Block Spell Damage while wielding a Staff Chance to Block Attack Damage while wielding a Staff Increased Energy Shield Damage over Time Multiplier Chaos Damage over Time Multiplier |
|
 (Flask) Rumi's Concoction - provides a significant boost to both Attack and Spell Block during its Effect, helping us reach higher Block Chance and greatly improving our defenses against incoming Hits. (Flask) Rumi's Concoction - provides a significant boost to both Attack and Spell Block during its Effect, helping us reach higher Block Chance and greatly improving our defenses against incoming Hits. |
|
| +(8—12)% Chance to Block Attack Damage during Effect +(4—6)% Chance to Block Spell Damage during Effect |
|
|
Other suggested Flasks:
|
|
    |
|
|
If you have any other build requests please leave them in the comments below. We are always open to suggestions and constructive feedback.
Pictures used in this article are the intellectual property of Grinding Gear Games.
