Oil Barrage Wyvern Oracle POE 2 Build
A simple and powerful Setup for the Oracle Ascendency that uses Oil Barrage and Rend to deal tremendous amounts of Damage!Oil Barrage Wyvern
Oracle Build
Updated for Path of Exile 2 Early Access
The Best Crafty Guides by Odealo
| Guide notes |
| December 30 2025 - Created for Early Access Patch 0.4.0 |
| Build Overview | |||
| Tags: [SHAPESHIFT] [CRIT] [ES] [ATTACK] | |||
|
Budget: Defenses: |
|
Boss DPS: AoE: |
|
The Wyvern is the easiest and most straightforward playstyle out of all Shapeshifting options. Your Skills do not have forced interactions. Instead, you will simply use Rend against hordes of weaker enemies and burst down Bosses with the empowered Oil Barrage. You can optionally use the Flame Breath for a mixed package of Damage, mobility, and AoE coverage, but it puts you at a significant risk due to lower control of your movement, so it is rarely worth it.
To empower Rend and Oil Barrage, you will need Power Charges, which are very easy to generate. The simplest solution is to use Voll's Protector Armour, which grants a Power Charge upon Critical Strike. With this Armour, you can even fire an endless stream of empowered Oil Barrages for a massive amount of Single-target Damage. However, you will rarely need that many Power Charges, so you can use a Rare Armour for better defense instead, and use the Pounce and the Ailith's Chimes Support Gem to seamlessly generate Power Charges during regular gameplay. You will want to use the Pounce anyway for its excellent mobility and Mark application, which can be used for better Leech and Breaking enemy Armour.
The Soul Tether Belt is a great addition for builds that rely on both Energy Shield and Life, especially if you have a mostly Physical Damage type. It applies excessive Life Leech to your Energy Shield, allowing you to use the Life Leech III Support for constant and rapid recovery during combat, which is usually problematic for ES archetypes. It also works with Elemental Damage if you apply any Mark with the Siphoning Mark Support. This Belt slowly drains your Energy Shield, which can be very noticeable if you don't have enough Enemies around to Leech it back. You can solve this problem with the Vaal Cultivation Orb, which can remove that modifier and replace it with something else.
The Oracle Ascendency allows you to pick several special Notables on the Passive Tree available only for this Ascendency. You will also be able to pick the Notables nearby allocated Keystones, saving you a few Passive Points. The Inevitable Critical Strikes make your Critical Strikes stronger at lower investment levels, but most importantly enable the permanent Power Charge sustain with Voll's Protector Armour. Those are very significant bonuses, but they are not fundamentally necessary for this Setup, so you can apply it to any other Class as well.
You can also check our other Path of Exile 2 builds right over here Odealo's Crafty Guides - Full List
1. Gameplay
Use Rend for packs of monsters or Leech Life and Energy Shield if needed. Against Bosses, make sure you can stay still for a few seconds and use the Empowered Oil Barrage. Use the Pounce for better mobility, to generate Power Charges, and apply Mark.
|
|
|
|

2. Build's PROS & CONS
| PROS |
|
| CONS |
|
3. Leveling tips
You can level up using the final Setup right from the start, although you will have to generate Power Charges with the Devour and Wing Blast Skills during the Campaign. Make sure to upgrade your Talisman, Rings, and Gloves regularly to ensure optimal DPS for significantly easier progression.
4. Final Skill Tree, Ascendancy Points, and Pantheon
Final Skill Tree:
 |
|
Click on the image to open the Passive Tree preview in a new window, or use the Path of Building (PoB) tool. |
Ascendancy points:
Preferably in this order:
- The Lesser Harm
- Forced Outcome
- The Unseen Path
- Entwined Realities
5. Final Gems links
| [DPS] Rend setup | |
 |
Rend - a swing with your wings, it deals primarily Physical Damage. It can consume a Power Charge to greatly enhance its Area coverage and grant you a Buff that grants Extra Lightning Damage. |
 |
Life Leech III |
 |
Rage III |
 |
Close Combat II |
 |
Magnified Area II |
 |
Rapid Attacks II |
| [DPS] Oil Barrage setup | |
 |
Oil Barrage - fires multiple Projectiles that deal Damage upon contact. Consumes Power Charges to turn into a Channeling Skill that fires more Projectiles that also deal More Damage. |
 |
Burgeon II |
 |
Concentrated Area |
|
Rapid Attacks II |
 |
Rageforged II |
 |
Garukhan's Resolve / Rakiata's Flow / Ambrosia II |
| [DPS] Flame Breath setup | |
 |
Flame Breath - a Channeling Skill that Consumes Rage and Power Charges to deal Damage in a large area while flying around. During the flight, you can't use Dodge Roll, which makes it quite risky to use. |
 |
Elemental Armament II |
|
Rapid Attacks II |
 |
Efficiency II |
|
Burgeon II |
 |
Mobility |
| [Utility] Pounce setup | |
 |
Pounce - a quick jump that also applies Mark to the strongest Enemy it hits. It can also be used to spend Combo streaks and generate Power Charges. |
 |
Culmination II |
 |
Ailith's Chimes |
 |
Cooldown Recovery II |
 |
Mark of Siphoning II |
 |
Mark for Death II |
| [Utility] Herald of Ash setup | |
 |
Herald of Ash - Ignites nearby Enemies based on the overkill Damage for extra Area Coverage. |
 |
Prolonged Duration II |
 |
Magnified Effect II |
 |
Fire Mastery |
| [UTILITY] Scavenged Plating setup | |
 |
Scavenged Plating - improves your Armour Rating when you Break Enemy Armour. |
|
Prolonged Duration II |
| [UTILITY] Savage Fury setup | |
 |
Savage Fury - gathers Fury when you Attack Enemies. Activate it to gain a temporary boost to your Damage. |
|
Prolonged Duration II |
| [UTILITY] Other Spirit setups | |
 |
Charge Regulation - if you get enough Spirit, you can use this Skill for a massive boost to your Critical Chance, Armour, and Energy Shield. The Endurance Charges can be generated by Armour Break III Gem. |
 |
Berserk - increases the effects of Rage, but drains your Life. It will be easily countered by your Leech. |
|
|
6. Gear Setup
The Soul Tether is a great boost to any Build that uses Energy Shield, but you can rely on Recharge or use Essentia Sanguis Gloves just as well. Your other Items are all of Rare Quality. For Damage, you should be primarily interested in high DPS on your Weapon, extra Gem Levels, and Attack Speed or Critical Strikes. The defensive aspect is very Affix-intensive. You will need maximum Life, Armour, Energy Shield, cap your Resistance, and apply a portion of your Armour to Elemental Damage. You will also need extra Spirit, a bit of Attributes to max out your Skills, and get plenty of Item Rarity.
|
Stat priorities on items:
|
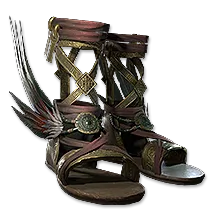
 (Weapon) Rare Talisman - you will need high Physical DPS and preferably high Critical Hit Chance. It is your major contributor to the Damage output. To boost the Oil Barrage, you will need a generic Attack Skills Gem Level modifier, which can be obtained only through Essence of Battle. (Weapon) Rare Talisman - you will need high Physical DPS and preferably high Critical Hit Chance. It is your major contributor to the Damage output. To boost the Oil Barrage, you will need a generic Attack Skills Gem Level modifier, which can be obtained only through Essence of Battle. |
|
| Min. requirements: 500+ DPS 8%+ Critical Hit Chance Optional affixes: +# to Level of all Attack Skills Gain #% of Damage as Extra Physical Damage % increased Critical Damage Bonus Leeches #% of Physical Damage as Life |
|
 (Amulet) Rare Amulet - the Amulet is the only source of Projectile Skill Levels for your Oil Barrage, which is your main Skill against Bosses. A bit of Accuracy Rating and Spirit might albo be required. (Amulet) Rare Amulet - the Amulet is the only source of Projectile Skill Levels for your Oil Barrage, which is your main Skill against Bosses. A bit of Accuracy Rating and Spirit might albo be required. |
|
| Min. requirements: +2 to Level of all Projectile Skills Optional affixes: % total Elemental and Chaos Resistance +# to Spirit +# to maximum Life % increased maximum Energy Shield +# to Attributes % increased Rarity of Items found |
|
 (Ring) Rare Ring - the Rings can add plenty of Damage to your Attacks, but you also need a lot of Resistances, maximum Life, or Item Rarity. Try to maximize your gains with Catalysts. (Ring) Rare Ring - the Rings can add plenty of Damage to your Attacks, but you also need a lot of Resistances, maximum Life, or Item Rarity. Try to maximize your gains with Catalysts. |
|
| Min. requirements: Adds 30+ Lightning/Cold/Physical/Fire Damage to Attacks +40% total Elemental and Chaos Resistance Optional affixes: % increased Rarity of Items found +# to maximum Life +# to Attributes Leeches #% of Physical Damage as Life |
|
 (Belt) Soul Tether - with this Belt you can Leech both Life and Energy Shield. You can overwrite the ES drain with the Vaal Cultivation Orb, but the base version is good enough on its own. (Belt) Soul Tether - with this Belt you can Leech both Life and Energy Shield. You can overwrite the ES drain with the Vaal Cultivation Orb, but the base version is good enough on its own. |
|
| Has (1—3) Charm Slot (15—20)% increased Charm Effect Duration +(40—60) to maximum Energy Shield +(20—30) to Intelligence You lose 5% of maximum Energy Shield per second Excess Life Recovery from Leech is applied to Energy Shield |
|
 (Helmet) Rare Helmet - on all your Armour pieces, you will look for the same defensive modifiers: high maximum Life, Energy Shield, Armour, Resistances, and Elemental Armour. The Helmets can be Desecrated to apply a portion of your Armour to Chaos Damage. (Helmet) Rare Helmet - on all your Armour pieces, you will look for the same defensive modifiers: high maximum Life, Energy Shield, Armour, Resistances, and Elemental Armour. The Helmets can be Desecrated to apply a portion of your Armour to Chaos Damage. |
|
| Min. requirements: +150 to maximum Life +600 to Armour +100 to Energy Shield +40% total Elemental and Chaos Resistance +30% of Armour also applies to Elemental Damage Optional affixes: % increased Rarity of Items found +% of Armour also applies to Chaos Damage +# to Attributes |
|
 (Body Armour) Voll's Protector - thanks to the Oracle's Inevitable Critical Hits, you don't need to worry about Charge generation ever again. However, it lacks defensive capabilities. (Body Armour) Voll's Protector - thanks to the Oracle's Inevitable Critical Hits, you don't need to worry about Charge generation ever again. However, it lacks defensive capabilities. |
|
| (150—200)% increased Armour and Energy Shield 25% reduced maximum Mana +(13—17)% to Chaos Resistance 25% chance to gain a Power Charge on Critical Hit |
|
 (Body Armour) Rare Armour - a proper Rare Armour can grant you tons of the basic defense through Armour and Resistance, but also provides Spirit. (Body Armour) Rare Armour - a proper Rare Armour can grant you tons of the basic defense through Armour and Resistance, but also provides Spirit. |
|
| Min. requirements: +200 to maximum Life +1000 to Armour +300 to Energy Shield +40% total Elemental and Chaos Resistance +40% of Armour also applies to Elemental Damage Optional affixes: +# to Spirit |
|
|
|
|
| Optional affixes: Adds # Lightning/Cold/Physical/Fire Damage to Attacks +# increased Attack Speed +# to Level of all Melee Skills +#% increased Critical Damage Bonus % increased Rarity of Items found +# to maximum Life +#% total Elemental and Chaos Resistance +# to Attributes |
|
 (Boots) Rare Boots - the Boots should always improve your Movement Speed by at least 30%. Other than that, look for the basic defensive modifiers. (Boots) Rare Boots - the Boots should always improve your Movement Speed by at least 30%. Other than that, look for the basic defensive modifiers. |
|
| Min. requirements: 30% increased Movement Speed +100 to maximum Life +300 to Armour +100 to Energy Shield +40% total Elemental and Chaos Resistance +40% of Armour also applies to Elemental Damage Optional affixes: % increased Rarity of Items found % reduced Slowing Potency of Debuffs on You % reduced Movement Speed Penalty from using Skills while moving +# to Attributes |
|
 (Jewel) Heart of the Well - this Jewel can grant you plenty of Extra Damage, which can be very useful to apply Chill and Shock better. You can mix it with other useful modifiers as well, but it can be expensive. (Jewel) Heart of the Well - this Jewel can grant you plenty of Extra Damage, which can be very useful to apply Chill and Shock better. You can mix it with other useful modifiers as well, but it can be expensive. |
|
| Recommended modifiers: Gain (9–15)% of Damage as Extra Cold/Fire/Lightning Damage 10% of Leech is Instant |
|
 (Jewel) Rare Jewel - on your Jewels, look for modifiers to improve your maximum Energy Shield. They can also improve your Damage and Speed while in Shapeshift form. (Jewel) Rare Jewel - on your Jewels, look for modifiers to improve your maximum Energy Shield. They can also improve your Damage and Speed while in Shapeshift form. |
|
| Min. requirements: 15% increased maximum Energy Shield Optional affixes: % increased Critical Hit Chance % increased Critical Damage Bonus % increased Area of Effect % increased Damage while Shapeshifted % increased Skill Speed while Shapeshifted |
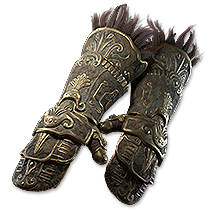 (Gloves) Rare Gloves - the Gloves are a flexible choice. They can provide a lot of Attack Speed or Gem Levels for Rend. You could also skip the Armour and opt for high amounts of flat Damage for your Attacks. Resistances are always important.
 |
|
If you have any other build requests please leave that in the comments below. We are always open to suggestions and constructive feedback.
Pictures used in this article are the intellectual property of Grinding Gear Games.