Buy/Sell
 Log in


Ward-stacker Infernalist POE 2 Build
Extremely strong Setup for Infernalist that utilises Ward to bypass Mana usage and trigger thousands of Spells per second.Ward Stacker Cast on Elemental Ailment
Infernalist Build
Updated for Path of Exile 2 Early Access
The Best Crafty Guides by Odealo
| Guide notes |
| October 14 2026 - Created the Build |
| Build Overview | |||
| Tags: [SPELL] [TRIGGER] [WARD] | |||
|
Budget: Defenses: |
|
Boss DPS: AoE: |
|


The Infernalist Ascendancy offers a unique way to solve the Mana Cost sustain problem by converting your Mana into Infernal Flame. Instead of costing Mana, your Spells now generate Flame. It decays rapidly if you stop generating it for 2 seconds, but if you reach the maximum amount, it will reset back to 0, and you will take 100% of your maximum Life and Energy Shield as Fire Damage. By picking Chaos Innoculation and Eldritch Battery Keystones, you will have only 1 maximum Life and no Energy Shield, so the self-inflicted Damage will be non-existent. You can't use Mind over Matter, since the Infernal Flame is not Mana either. To protect you from dying, you will use the new Defense resource, the Ward. It absorbs incoming Damage just like regular maximum Life, with the main caveat being limited recovery, mostly limited to base regeneration and Remnants of Kalguur Skill.
The sources of Ward are quite limited. You can Runeforge every gear piece to get some base Ward, or socket Warding Runes, but the majority of it comes from specific Uniques: the Brass Dome and Svalinn, which nets you roughly 2500-3000 Ward in total. The Svalinn also makes your Block Chance lucky, so you can quite easily avoid almost 75% of incoming Hits. During mapping, you will pick up Remnants of Kalguur to restore and overflow your Ward, but during Boss fights you are reliant on the Ward base regeneration, which is 5% per second.
Another important aspect of Infernalist is the Bringer of Flame Notable, which allows all Damage types to inflict Ignite. This is not a DoT Build; you simply want the Energy to feed the Cast on Elemental Ailment Meta Skill very efficiently. The Energy is based mostly on the Damage you deal, modified by enemy Power and Ailment Magnitude. The more powerful Ignites you inflict, the more Energy you gain, which triggers your Spells faster. Although Enemies can take damage from only 1 instance of Ignite at the same time, you can apply multiple Ignites simultaneously, each generating a bit of Energy. With the unlimited Mana sustain, you can focus entirely on triggering tons of high-level Spells. The Ignite Magnitude is still useful to boost the Energy generation, but your main scaling vectors are the usual Critical Hit and Spell Damage bonuses. The Infernalist also boosts your Crit Damage bonus by 50%, making it an even more prominent method of improving your DPS.
This Setup can be used with any Spell combination, but currently the strongest options are Grim Pillars as an Energy generator and Comet as your main spender. At a higher budget, you can consider weaker Spells that cover greater areas or are faster to use, but during the early progression they can be quite inconsistent and uncomfortable to use. Grim Pillars is a Kalguuran Skill that costs Ward to use. It summons 20 Ice crystals that explode upon contact with an enemy, or can be detonated instantly by any other Spell supported by Biting Frost. The Enangle is the best option for this purpose, as it covers an entire area and hits very often. It will also be used to apply the Critical Weakness Debuff via the secondary Weapon set. The Comet simply deals tons of Damage in a targeted area, which is supposedly balanced by its very long Cast Time. Consequently, it requires more Energy to trigger, but it is still by far the best option here. It consumes Fire Infusion to double its damage, which you can generate with yet another Cast on Elemental Ailment Setup, which triggers Living Bomb and another Entangle. You can also use Spellslinger and Cast on Block to trigger even more Spells. To boost your Damage against Bosses, you can use Elemental Weakness and Frost Bomb to heavily lower their Elemental Resistances. If you want to keep it simple, use Rakiata's Flow to reverse their Resistances.
You can also check our other Path of Exile 2 builds right over here Odealo's Crafty Guides - Full List
1. Gameplay
Use Grim Pillars to summon Ice Crystals underneath monsters. Against Bosses, prepare Entangle to detonate Pillars faster, and cast Elemental Weakness and Frost Bomb to drastically lower their Resistance.
|
|
|
|


2. Build's PROS & CONS
| PROS |
|
| CONS |
|
3. Leveling tips
This Setup requires certain Endgame Unique items to stay alive, so you will need to level up with a regular Spell-casting Setup. We recommend using our Essence Drain Lich Build to progress through the campaign easily, and respec once you reach Maps and acquire the core Unique Items.
4. Final Skill Tree, Ascendancy Points, and Pantheon
Final Skill Tree:
 |
|
Click on the image to open the Passive Tree preview in a new window, or use the Path of Building (PoB) tool, |
Ascendancy points:
Preferably in this order:
- Pyromantic Pact
- Bringer of Flame
- Grinning Immolation
- Altered Flesh
5. Final Gems links
| [DPS] Grim Pillars setup Weapon Set 1 |
|
 |
Grim Pillars - creates Ice Crystals around you that detonate upon contact with an Enemy, dealing Cold Damage in an area. It costs Ward to use. |
 |
Spell Echo |
 |
Considered Casting |
 |
Vorana's Siege |
 |
Ignite III |
 |
Pinpoint Critical |
| [UTILITY] Entangle setup Weapon Set 2 |
|
 |
Entangle - creates Vines that rapidly Hit nearby Enemies, making it an ideal pick to apply the Critical Weakness Debuff and detonate your Pillars. |
 |
Biting Frost I - consumes Freeze on Hit, which causes Ice Crystals to detonate instantly. |
|
Pinpoint Critical |
 |
Prolonged Duration II |
 |
Magnified Area II |
 |
Branching Fissures II |
| [DPS] Cast on Elemental Ailment setup Weapon Set 1 |
|
 |
Cast on Elemental Ailment - applying Elemental Ailments generates Energy used to trigger linked Spells. The Energy gained depends on Ailment Magnitude and Enemy Power. |
 |
Comet - the strongest Spell in the game. It consumes Fire Infusion to deal even more Damage. |
 |
Spell Cascade |
 |
Uhtred's Omen |
 |
Boundless Energy II |
 |
Energy Retention |
| [Utility] Cast on Elemental Ailment setup Granted by Absent Amulet |
|
|
Cast on Elemental Ailment - you will need a secondary COEA Setup, ideally granted by Absent Amulet. |
 |
Living Bomb - plants a Bomb that explodes and generates Fire Infusion to boost the Comets. |
|
Entangle - another Entangle Setup helps during clearing Maps, but it is not necessary. |
 |
Overabundance II |
|
Biting Frost I |
|
Boundless Energy II |
| [UTILITY] Elemental Weakness setup Weapon Set 2 |
|
 |
Elemental Weakness - a powerful Curse that lowers Enemy Resistances. |
 |
Ritualistic Curse |
|
Magnified Area II |
 |
Cursed Ground |
 |
Prolonged Duration II |
 |
Heightened Curse |
| [UTILITY] Frost Bomb setup Weapon Set 2 |
|
 |
Frost Bomb - inflicts Elemental Exposure, lowering enemy Resistances further. |
 |
Potent Exposure |
|
Magnified Area II |
 |
Cooldown Recovery II |
|
Prolonged Duration II |
 |
Mobility |
| [UTILITY] Remnants of Kalguur setup | |
 |
Remnants of Kalguur - slaying or stunning monsters creates Remnants that restore and overflow your Ward. |
 |
Remnant Potency I |
 |
Harmonic Remnants II |
| [UTILITY] Overwhelming Presence setup | |
 |
Overwhelming Presence - lowers Enemy Ailment Threshold, improving the Energy you gain by Igniting them. |
| [UTILITY] Charge Regulation setup | |
 |
Charge Regulation - consumes Power Charges periodically to grant you lots of Crit Chance. You will generate Charges by consuming Infusions. |
|
|
6. Gear Setup
You will want all your armour pieces Runeforged in the Verisium Anvil in your hideout to get Ward. The Brass Dome and Svalinn gets particualy large amount of Ward in the process, enabling the entire setup. To boost your Damage you will need the usual Skill Levels, Spell Damage, Cast Speed, and Critical Hit modifiers. Ailment or Ignite Magnitude is also useful to generate more Energy. You can safely ignore maximum Life, basic defense, and Chaos Resistance modifiers on gear, making it much cheaper to assemble. You will also need a bit of Attributes and Item Rarity.
|
Stat priorities on items:
|
 (Weapon) Rare Wand - you should prioritise bonus Skill Levels, Spell Damage, and Extra Damage. Critical Hit Chance and Cast Speed are also useful, but not mandatory. You can use Dueling Wand for yet another triggering Meta Skill, but it is only useful if you remember to activate it at all times. |
|
| Min. requirements: +4 to Level of All/Cold Spell Skills Gain 25% of Damage as Extra Fire/Cold/Lightning Damage 70% increased Spell Damage Optional affixes: Gain #% of Damage as Extra Fire/Cold/Lightning Damage #% increased Critical Hit Chance for Spells +1 to Level of all Spell Skills (Celestial Alloy) #% increased Cast Speed Grants level # Spellslinger |
|
 (Shield) Svalinn - grants a massive amount of Ward and makes your Block Chance Lucky. Try to get a version with the least amount of bypassed damage from Blocked Hits. |
|
| Grants Skill: Level 14 Cast on Block +(50—100) to maximum Runic Ward (200—300)% increased Armour Chance to Block Damage is Lucky You take (0—20)% of damage from Blocked Hits |
|
 (Weapon) Effigy of Cruelty - use this Focus in your second Weapon Set to apply Critical Weakness with Entangle. |
|
| +(20-30) to maximum Energy Shield (40-50)% increased Spell Damage +10 to Intelligence +(7-13)% to Chaos Resistance Critical Hits with Spells apply (1-3) Stacks of Critical Weakness |
|
 (Amulet) Rare Absent Amulet - the Absent Amulet can grant you Cast on Elemental Ailment Skill for free, saving 100 Spirit. Try to get Spell Skill Levels here. |
|
| Min. requirements: Grants Skill: Level (1-20) Cast on Elemental Ailment Optional affixes: +# to Level of all Spell Skills Resistances Attributes Cast Speed Rarity |
|
| Distilled Emotions/Raven-touched/Megalomaniac: Cooked Endless Blizzard Vigilance Immolation |
|
 (Ring) Rare Ring - here you should prioritise Cast Speed and capping your lacking Resistances. Once that is complete, get Spell Damage, Crit, or Extra Elemental Damage for Spells, obtained via Breach Tree crafting. |
|
| Min. requirements: 20% increased Cast Speed 40% total Elemental Resistances Optional affixes: #% increased Spell Damage Gain (8—12)% of Damage as Extra Elemental Damage with Spells % increased Critical Hit Chance for Spells #% increased Critical Spell Damage Bonus +# to Attributes #% increased Rarity of Items found |
|
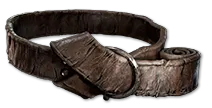 (Belt) Rare Belt - at first, your Belt should provide basic Resistances and Strength. Later on, you should include special Caster modifiers that grant Spell Damage and Cast Speed during Flask Effect. |
|
| Min. requirements: +2 Charm slots +40% to Elemental Resistance Optional affixes: +# to Strength #% increased Spell Damage during any Flask Effect #% increased Cast Speed during any Flask Effect +# to Stun Threshold |
|
 (Helmet) Alpha's Howl - grants a large amount of Spirit. It requires a lot of Dex to wear. The Raven-Touched Shard allows you to instill an additional Notable, but at first you can opt for a second Socket via Corruption instead. |
|
| (80-100)% increased Evasion Rating +100 to Spirit +(50-75)% to Cold Resistance Presence Radius is doubled |
|
 (Body Armour) The Brass Dome - the Runeforging process removes all Armour and provides a large amount of Ward. With the additional Socket acquired via Corruption, it can reach over 2000 Ward. |
|
| (500-600)% increased Armour -(5-1)% to all Maximum Elemental Resistances +(200-300) to Stun Threshold Take no Extra Damage from Critical Hits |
|
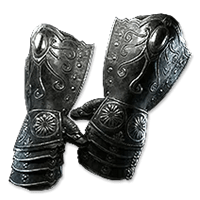 (Gloves) Rare Gloves - the Katla's Gloom enables Decay modifiers, which can improve your Ignite or Ailment Magnitude to greatly boost energy generation. |
|
| Min. requirements: Can roll Decay modifiers +40% to Elemental Resistance Optional affixes: % increased Magnitude of Ailments you inflict #% increased Ignite Magnitude #% increased Rarity of Items found #% increased Critical Damage Bonus +# to Attributes |
|
 (Boots) Rare Boots - your Boots should grant lots of Movement and fill remaining Resistances. You can also get a bit of Stun Threshold or some Ward, but it is not very impactful. |
|
| Min. requirements: +30% increased Movement Speed +40% to Elemental Resistance Optional affixes: +# to Ward #% increased Rarity of Items found #% increased effect of Socketed Augment Items +# to Attributes |
|
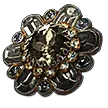 (Jewel) Against the Darkness - a very strong Jewel that can grant you a large amount of Extra Damage. Lightning is the most useful for applying Shock, but any type is good. |
|
| Notable Passive Skills in Radius also grant: Gain (2-4)% of Damage as Extra Lightning/Cold/Fire/Chaos Damage |
|
 (Jewel) Heart of the Well - another potent source of Extra Damage. |
|
| Recommended modifiers: Gain #% of Damage as Extra Lightning/Cold/Fire/Chaos Damage |
|
 (Jewel) Rare Jewel - your Rare Jewels should improve your Critical Hits and Ailments. Try to enhance the Suffix modifiers with Potent Liquid Ferocity. |
|
| Recommended modifiers: #% increased Critical Damage Bonus #% increased Critical Spell Damage Bonus #% increased Critical Hit Chance #% increased Critical Hit Chance for Spells #% increased Magnitude of Damaging Ailments you inflict with Critical Hits 40-60)% increased Effect of Suffixes |
|
 (Flask) Lavianga's Spirits - you don't need Mana, but this Flask is always active, which can enable certain modifiers on your Belt. |
|
| This Flask cannot be Used but applies its Effect constantly (80-70)% reduced Amount Recovered |
|
|
If you have any other build requests please leave that in the comments below. We are always open to suggestions and constructive feedback.
Pictures used in this article are the intellectual property of Grinding Gear Games.